
The Aeezo Dream Plus is a WiFi digital photo frame that seems to offer pretty much all the features that the users wanted to get from such a device for years. There’s the aforementioned support for WiFi, so users all over the world can send photos to the frame (and not be limited by some local connection support), there’s the promised easy-to-use app (we’ll put it to the test immediately) and the good-looking display that’s 9.7-inches, so fairly large.
The display is also touch-screen, so it’s essentially a ‘bare-bones’ tablet, while also directly competing with the smart displays that seem to be popping up everywhere from some major brands. Of course, the people that want a digital frame will avoid dealing with any smart assistant, so this niche will remain intact for a long time (I doubt your grandma wants to argue with Alexa or Siri).
The digital frame can only be powered using a power cable and yes, I would have liked a rechargeable battery, but you can’t have them all at this price point. That being said, most people will appreciate vivid colors and overall, for their photos to look good (or better), especially considering that the device will most likely be a gift, so, let’s put the Aeezo Dream Plus WiFi digital photo frame to the test and see the manufacturer has managed to create an excellent device at a better cost than its main competitors.
The Design and Build Quality
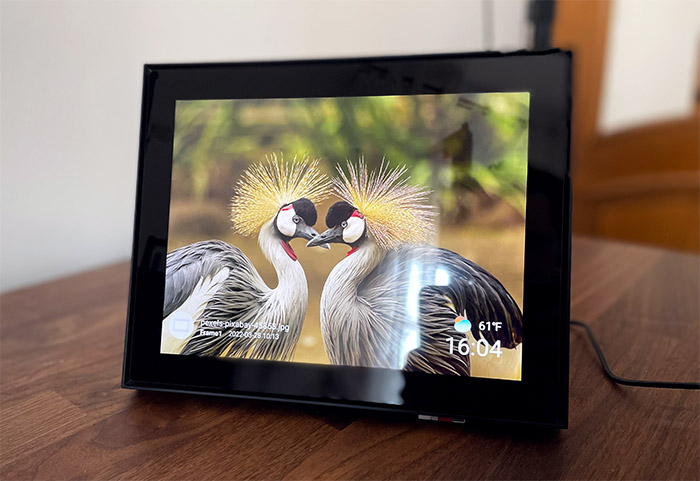
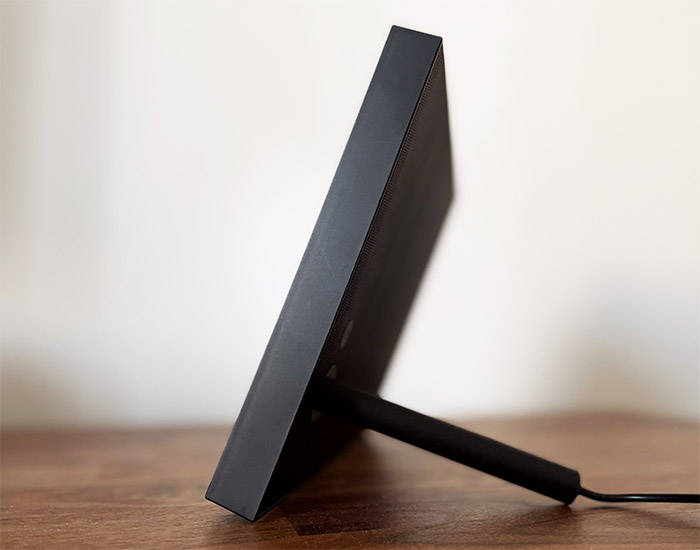
All Aeezo has to do is to reproduce with as much fidelity as possible the traditional-looking picture frames that we usually cover our homes with and I do think they pulled it off. The display itself sits in the middle being surrounded by a recessed area and finally, there’s the rectangular plastic frame which is not thicker than the traditional picture frames. Indeed, at 9.44 x 7.56 x 0.78 inches (24.0 x 19.2 x 2.0 cm), it has a fairly large frame, while still keeping a decently slim profile (in comparison to the usual picture frames) and, for the support, Aeezo used a plastic cylinder. The support is used to cover up the cable connection which, unfortunately is proprietary.
Yes, you can only use the provided cable type and, in case it gets broken, you will have to rely on the manufacturer to get a new one. That being said, the display has a substantial bezel which once again can be used in the advantage of the Aeezo Mobile Plus because it’s going to closely resemble the traditional frame. So, yes, not much else is happening on the front of the Aeezo Dream Plus, but I do need to mention that the model that I got is covered by a black matte finish, while there is a white version available as well.
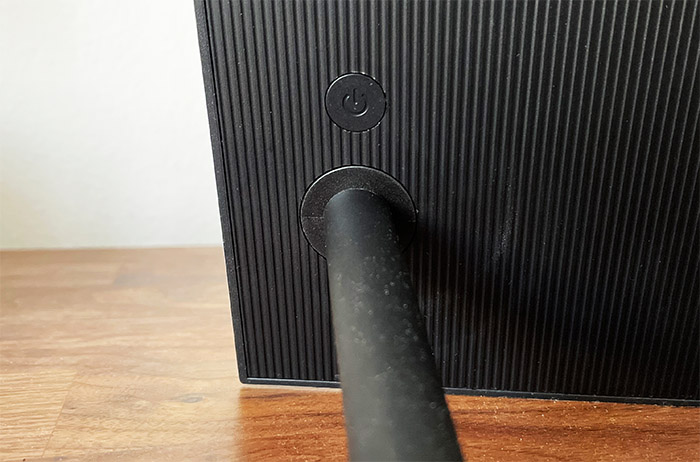
The manufacturer went with an SD card slot (no microSD, you will need to rely on the adapter that usually comes in the same package as the card) and it’s hidden at the bottom of the frame. If we turn the device around, it’s possible to see that the rear panel is covered by a ribbed pattern and there is a Power button, as well as the connector for the power cable. I admit I didn’t notice the Power button immediately and just realized it’s there when checking the device more thorough, so again, they really wanted to keep the look of the traditional picture frames as much as possible. The cable is fairly long, reaching about 6 feet (1.8 meters), so you do have some degree of freedom to where you can position the frame, but then again, you’re still going to have to remain next to a power outlet.
And the cable will be visible, unless you can mask it really well next to the furniture. Which is why a rechargeable battery could have been a solution, but then again, the frame would most likely be far bulkier and you would have to recharge the Dream Plus almost as often as a tablet.
The Installation
Before anything else, you do need to power on the Dream Plus digital photo frame and to do so, you need to first attach the cable. And the cable installation was weirdly difficult. I say that because I thought you need to rotate it, but you actually need to simply push it in and it’s not going to enter at every angle. It’s a bit strange, but I got the hang of it quickly. After that, the display powered up immediately (which is why I missed the Power button in the first place) and I was asked to choose the preferred language.
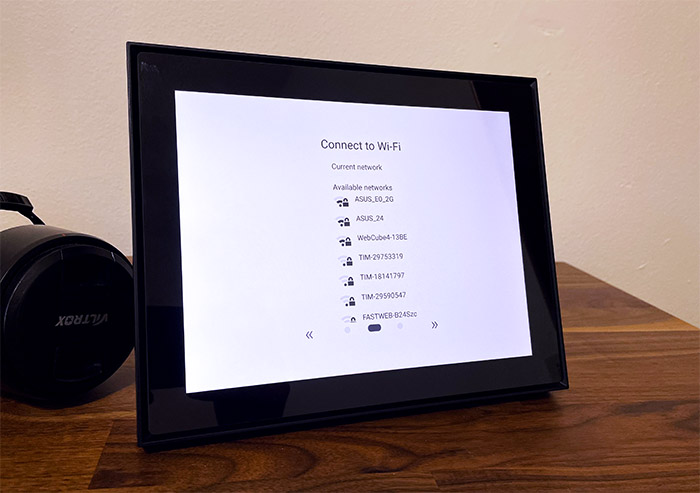
After that, I needed to choose the WiFi network that the Dream Plus will be connected to. The spec list says that the digital photo frame does support both 2.4GHz and 5GHz networks (802.11n), which is a somewhat uncommon occurrence in the IoT department. Then, I was asked to give the frame a name and I also had to use a source for the photos that are going to be displayed. The display will show a guide on what you need to do: install an app and then receive a code which will allow you to then push photos towards the frame. And it can be done remotely, so you don’t have to be in the local network to do so.
Furthermore, Aeezo clearly stated that the photos that you send aren’t stored on their server, but only in your local device which is the frame itself. The technology that they use is P2P (peer to peer), so it essentially opens a port towards the app in your network (router) to allow you to send data. It’s obviously more secure than to just trust the Cloud servers, but you should still make sure that the Dream Plus digital frame is connected to a separate WiFi network. All that’s left now is to install the app and pair it to the frame.
The App
The application is called Aimor and it’s available on both iOS and Android devices, so go ahead and install it on one of your mobile phones. The app will require your location (either set it to not be precise or turn it off completely), then you will need to create a new account (only needs an email).
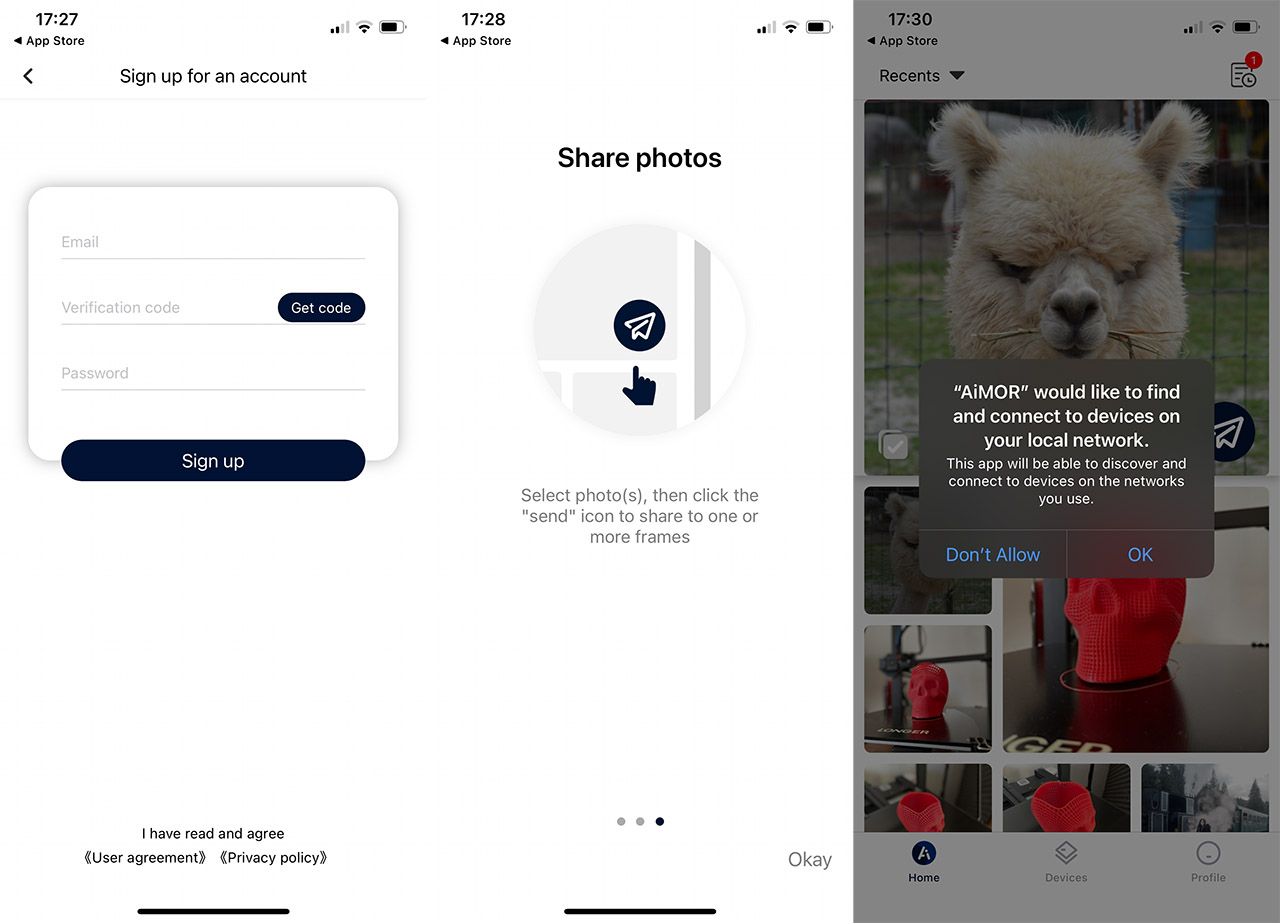
The app will then ask for permission to your Photos (which I did allow) and it also wanted to connect to devices from the local network (not necessary). Then, you’ll gain access to the app GUI which will immediately load the photos from your Gallery. At this point, you will have to connect to the Dream Plus digital frame and to do so, tap on Devices and click on ‘Add a new device’. Enter the code that is displayed on the frame and that’s about it, you can now send photos to the Dream Plus.
In order to send a photo or video to the frame, press on the paper plane icon, select the recipient (if you have multiple frames connected to the app), add a caption and select Send. In case you send a video, you will be asked to select the preferred portion (only a few seconds can be played). If you go to History, you will be able to see in real-time the status of your photos and videos. When the Dream Plus received it, it will make a sound and a notifications will appear to let you know that you received a new file.
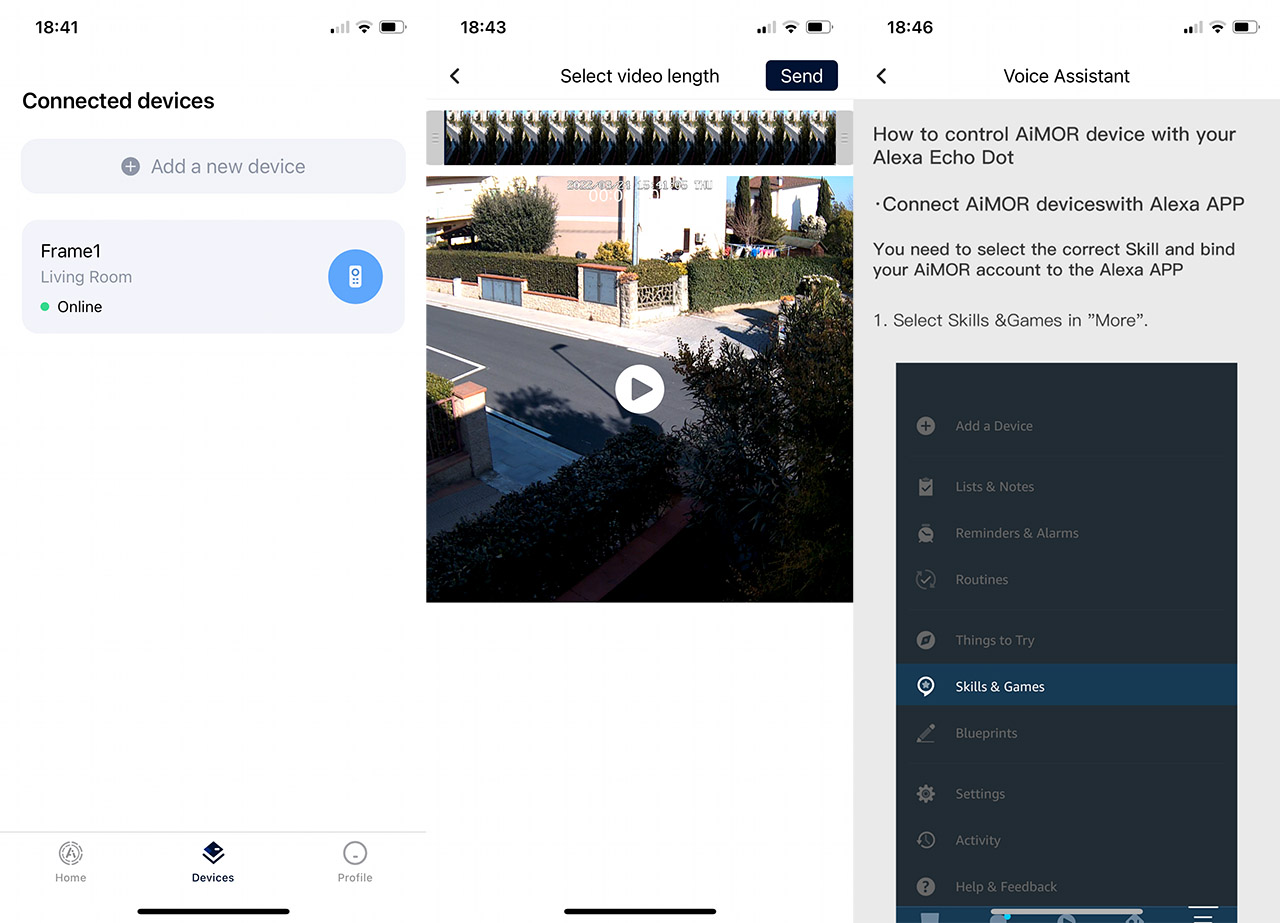
The app will allow you to add more Devices and, under Profile, it’s possible to pair the app with the Alexa smart assistant – there are detailed instructions on how to do it in the app.
The Display of Dream Plus
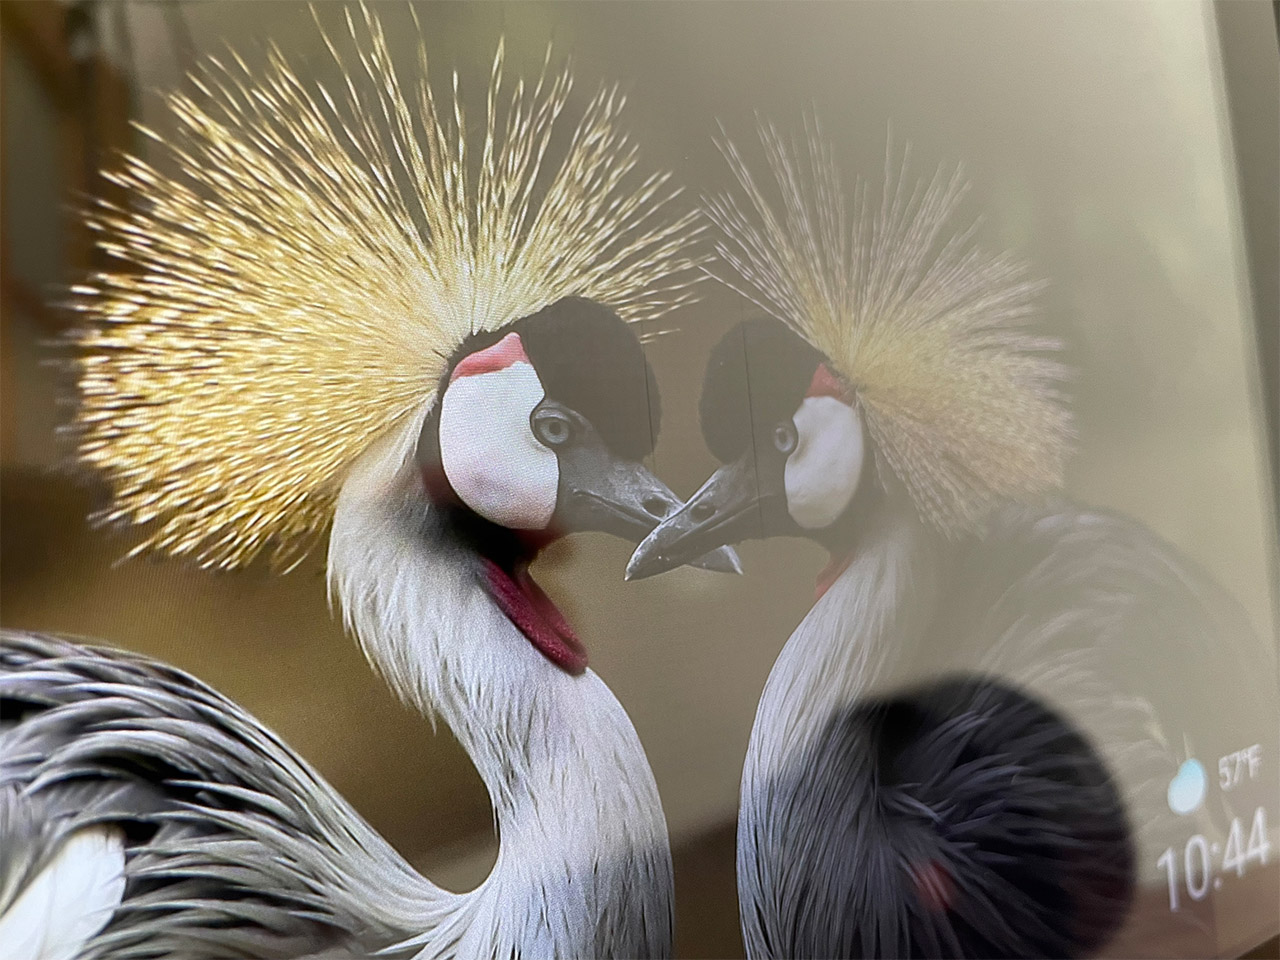
Aeezo Dream Plus digital frame uses a 9.7-inch IPS display which has a resolution of 2,048 x 1,536 pixels and it’s a reflective panel, so make sure that the sun won’t point directly at it or you won’t be able to properly see the photos. And yes, this remains an issue even if you up the brightness all the way up. I noticed that the color fidelity doesn’t change along with the brightness adjustment and, being an IPS panel, it does have good viewing angles.
But, the reflections will again have a say into how well you can view the photos at an angle. The panel seems to be quite uniform and I couldn’t see any light bleeding during the night, so that’s good news. At the same time, it’s going to be obvious that this is a backlit screen during the night and not a photo frame, while you can almost be fooled by it during the day. The colors are fairly well reproduced and a bit on the warm side. The black levels don’t really go that deep, so, depending on the photo, one may feel like it’s a bit under-saturated; the white levels are alright and they don’t become yellowish despite the warmer tone. I did notice that there are several vertical lines in the middle of the screen, especially visible when darker tones are displayed and, while barely visible, they’re still there.
There is also an auto-rotation feature built-in and it’s very reactive, even better implemented than on some expensive tablets or phones. And let’s not forget that we are dealing with a touch-screen display which allows for a fairly smooth navigation between photos and videos, as well as for setting up and manage the device.
The Software
The Dream Plus does have a built-in software which allows you to change various aspects about the frame and it’s worth mentioning that you don’t even have to use the app at all. You can simply rely on an SD card to transfer photos, even though going this route would negate one of the reason of existence of the Dream Plus. After pushing some photos or videos towards the WiFi digital frame, they’re going to start moving in a slideshow and, if you tap on the screen, a small menu will appear in the middle.
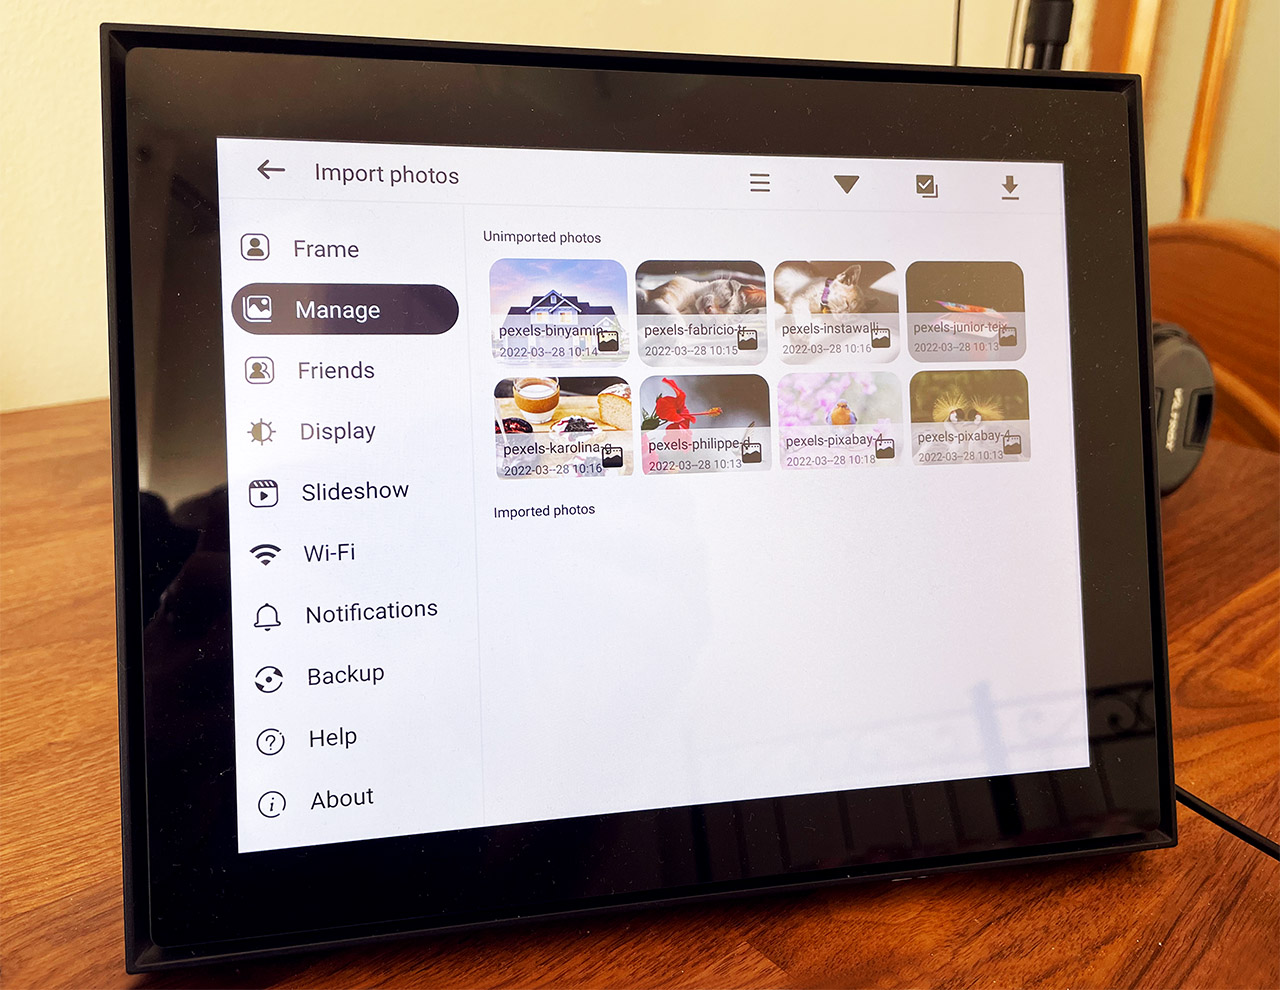
Here, you can visit the Settings, Favorite the photo (like it), Power off the device, Add a new friend (device), Pause the slideshow, check the Gallery (with all the photos and videos), Hide a photo, fit to frame and crop any photo (this is actually really useful). If you want to delete a photo or video, simply tap and hold on the display. The Settings section is worth exploring more in-depth because here, you can adjust some general settings about the frame, Add or Delete Friends and adjust the brightness of the display. Under Manage, you can Import and Export photos on an SD card. And be aware that I haven’t mentioned “and videos” because you can only move photos with an SD card, which is a bit of a shame and got me confused at first.
The Slideshow settings will allow you to change the Timer for when the photos/videos change (10 seconds is way too short because it distracted me from anything I was doing), then you can show captions, change the order, as well as manage how the videos will be displayed and played. You can also opt to see various Notifications, enable Backup (can be on the SD card) and change the WiFi network to which you’re connected.
The Performance
The Dream Plus is equipped with a quad-core Cortex-A53 CPU that’s clocked at 1.8GHz, along with a Mali-T760 GPU (clocked at 732MHz), 1GB of DDR3 RAM and 16GB of internal storage. So it’s essentially an entry-level tablet that runs a lightweight software.
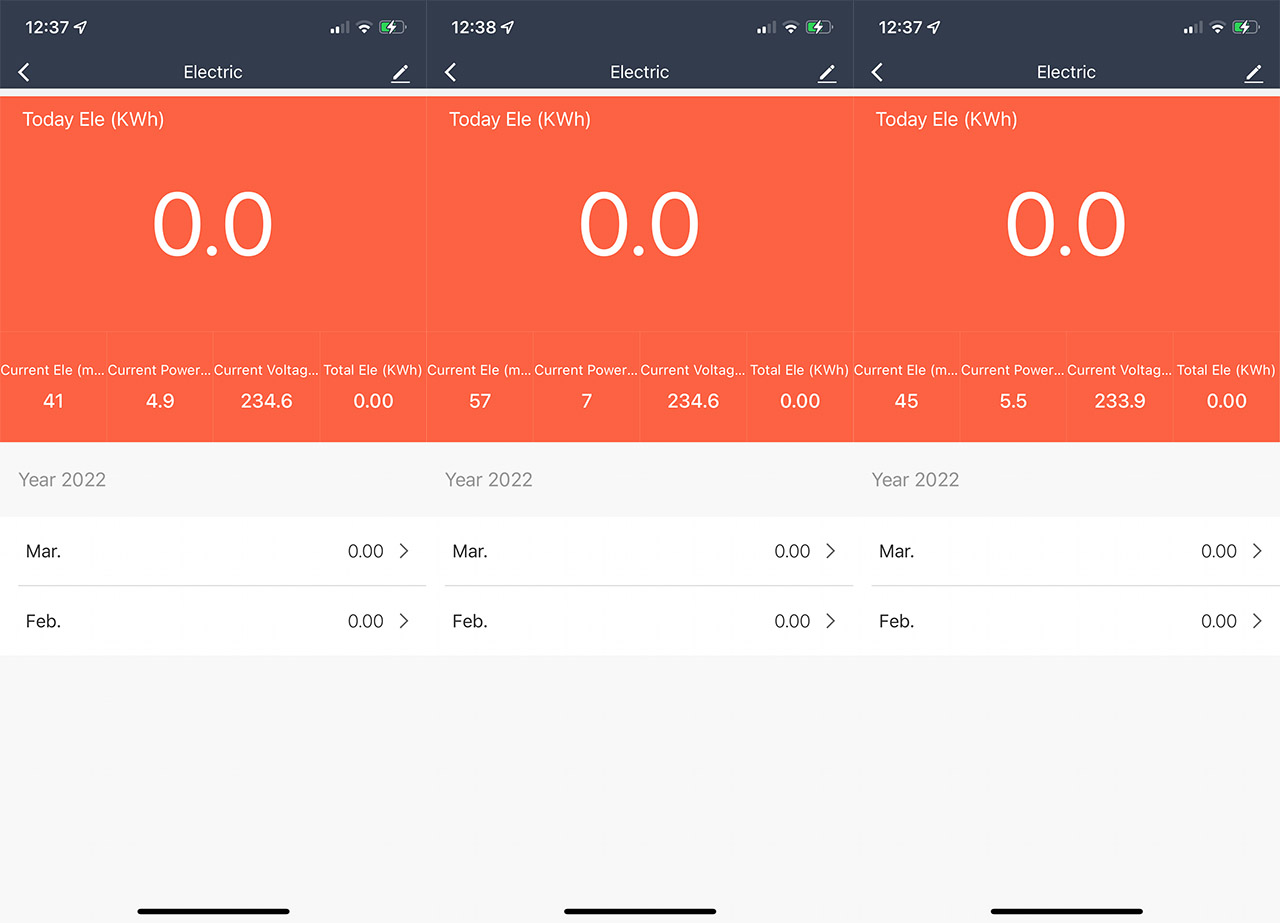
And it shows because navigating the Software menu has been smooth and responsive. I have noticed that there is a slight delay when manually moving through the photos and videos, but I have a feeling that they added that intentionally for creating a cool effect, which didn’t really achieve its intended purpose. The reason why I say that is because I noticed no change when I moved from a photo to a video, so it’s not a processing power + RAM issue, nor is the GPU under powered. The videos can play sound since there is a built-in speaker and you can adjust the volume from the menu. What about the power consumption? It varies depending on what happens on the screen. When a single photo is shown, the average power consumption is close to 5W and, when you move to another photo or video, it jumps up to 7W for a couple of seconds. Playing a video will also rise up the power consumption to about 5.5W, so it’s not that high above the still photo.
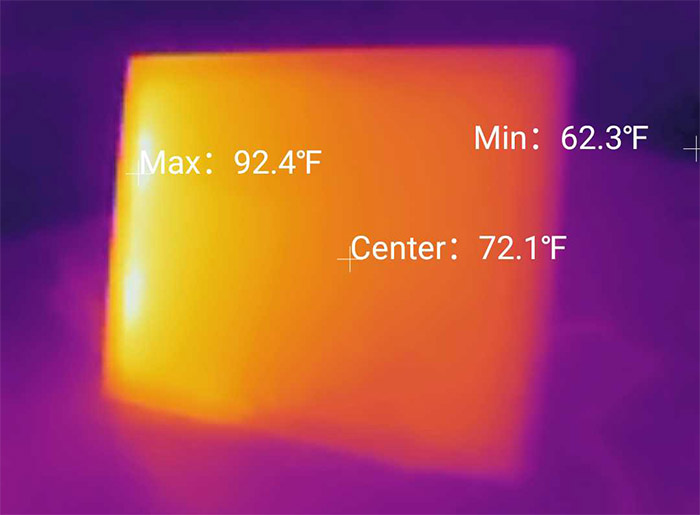
I also wanted to see the frame’s temperature, so I took the thermal camera (AGM Glory Pro) and, as you can see, the left part is noticeably more warm than the right side which is almost as cold as the furniture it sits on. This is because that’s the place where the components for the power connector are located.
The Conclusion
I really liked the concept behind the Aeezo Dream Plus because it’s a way to connect generations of people without having to go through some social media platform which most likely cares little about your privacy. This way, you can share your experience with the people that actually matter to you. And I do appreciate that Aeezo has made the app data transfer free (I do hope that it stays this way in the future as well). The display looks good, the auto-rotation is responsive, it’s easy to push photos and videos to the device and, considering the price tag, there is little to complain about. I know that these devices are advertised to be great as gifts and they are, but I see them to be a bit more for interconnecting people bypassing the social media platforms altogether.
Aeezo Dream Plus
-
Pros
- Great way to bypass social media
- Good image quality
- The software is responsive and easy to navigate
- The app can transfer videos and images free of cost
Cons
- There some strange lines on the display (can be better seen with a black background)
- Can't move videos from the SD card