
The Longer RAY5 is a compact laser engraver designed to cater to the hobbyists and the home enthusiast audience. And it seems that the Longer RAY5 is also the first laser engraver that comes with a built-in touch screen. As expected, it’s not really suitable for production purposes and that’s mostly due to the because of the used hardware which is not really built to survive industrial strain and conditions (it also comes disassembled and it needs to operate in the open due to fumes and potential fire hazard).
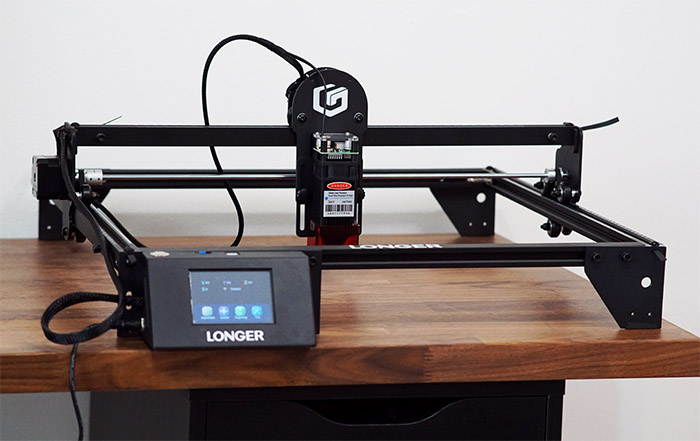
That being said, the Longer Ray5 does have a few design elements that are usually found on more expensive DIY laser engravers. There’s the aforementioned built-in touch screen which allows you to easily control the engraving process without relying on a separate device (you also get to adjust the values after slicing the model).
Then, there’s the 32-bit motherboard (which operates at 240MHz), the safety protections (yes, the laser can be very harmful if not handled properly) and Longer says that the device is quite fast, reaching up to 6,000mm/min, which is surprisingly good for the price tag.
| Longer RAY5 | |
| Check Price | Longer3d.com |
| Coupon Code | RAY5$10OFF (10% off) |
| Promotion | Promotion time: 3.21.2022 – 4.10.2022 |
Besides the eye protection (eyeglasses), the safety precautions include offline protection, movement and thermal protection, and there’s also an emergency stop button. Longer has been designing budget-friendly 3D printers for a while now and I have actually tested the LK5 Pro some time ago which offered good value for the money, so let’s put the Longer Ray5 laser engraver to the test as well and see how well it performs.
The Design and Build Quality
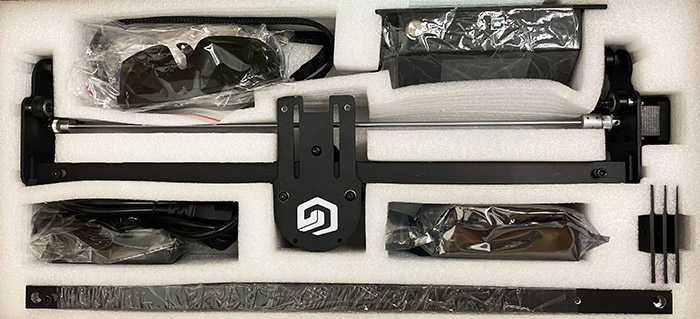
Despite being called RAY5, this is actually the first laser engraver developed by Longer, but these devices are not new, so the blueprint was already there waiting to be improved. And there is a strange, but kind of natural relationship between 3D printers and these compact laser engravers because at the core, they do have quite a few common elements. Sure, there is no plate in the case of laser engravers, but the laser does travel along two axis (instead of three for the 3D printers) to do the engraving, similarly to how the extruder moves with the printers. That being said, the Longer RAY5 is almost entirely disassembled out of the box, but I doubt that will scare off the DIY enthusiasts, especially since it’s not that hard to put everything together.
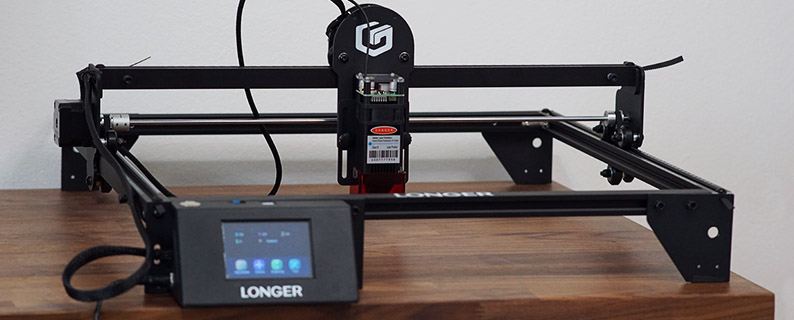
I know I called the RAY5 compact, but the frame is actually fairly large, measuring 24.0 x 26.4 x 0.8 inches (61.0 x 67.0 X 20.0cm) and the working area is 15.75 x 15.75 inches (40.0 X 40.0 cm). So you should be able to engrave some larger pieces. The frame is made of metal, just like pretty much all the other pieces, including the display case and I noticed that the there are measurements printed on the two main frame pieces to make it easier to accurately engrave various surfaces.
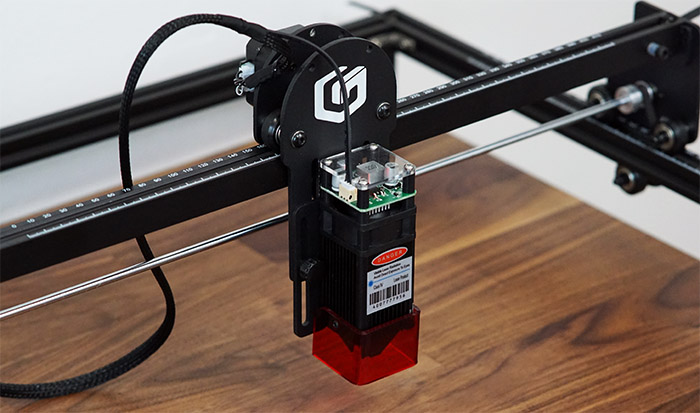
The laser module gets attached to the X-Axis frame and it moves in two directions (X and Y axis) with the help of a couple of motors. The frame holds together nicely and is sturdy enough to limit the amount of vibrations caused by the movement – it’s actually surprisingly smooth.
One of the most interesting aspects of the Longer RAY5 is the control box which has a touch-screen display embedded and it allows the user to control the engraving process without having to take the SD card out and make any changes. Furthermore, the Longer RAY5 can connect wirelessly to your computer, so you don’t really need to rely on a wired connection. And indeed, the manufacturer has added a USB cable inside the package in case you do want to go the wired route. So, there are plenty of options in terms of connectivity. The laser itself uses the diode technology with the wavelength between 450 to 460Nm and it’s a fixed focus type, having a 30mm focal range. The power input is 12V, 3A, while the optical output ranges between 5W to 5.5W. If that’s not enough, you do get the option to upgrade it to a more powerful 8W or 10W model (and yes, Longer will have a better 10W module available soon).
Be aware that the laser can be harmful on contact and to your eyes, so use the suitable equipment when handling it (FDA Class IV). I also need to mention that the power brick has a maximum output of 12V – 5A, but that doesn’t really have any impact on the laser output itself. The output is lower for efficiency sake and it’s good news that the internal circuitry is built to keep the power consumption as low as possible.
Note: I noticed that the laser module uses a HL BAF T43 HD50N06 60V N-Channel MOSFET.
Putting Everything Together
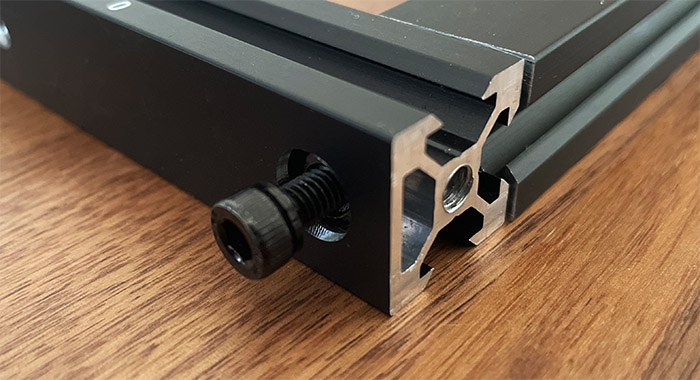
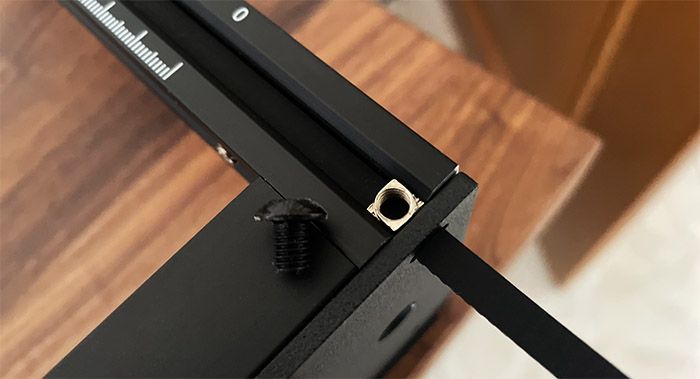
Like I already said, the installation process is made as painless as possible by Longer and you should be fine as long as you follow the instructions. The first thing that you need to do is take the four frames out of the box and align them properly on a large flat surface. By properly, I mean putting the frame with the Longer logo closer to you, the frame with the small knob already attached to the left, the other marked frame to the right and the last frame at the ‘top’ (farther from you). Then, take the small plastic pouch that has the corner grooves inside, along with the screws and insert the corner grooves into the frames to form a perfect 90 degrees angle.
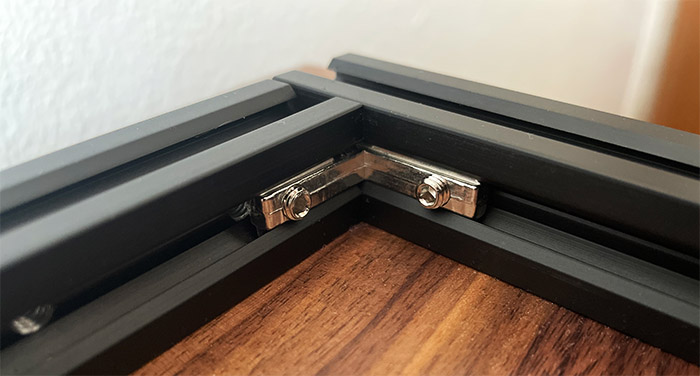
The corner grooves are specifically designed to allow movement on the longer frames, but limit it on the smaller ones. Afterwards, take the M5x25 screws that were in the same pouch as the corner grooves and insert them into the frames using the circular hole (use the Allen keys provided in the package).
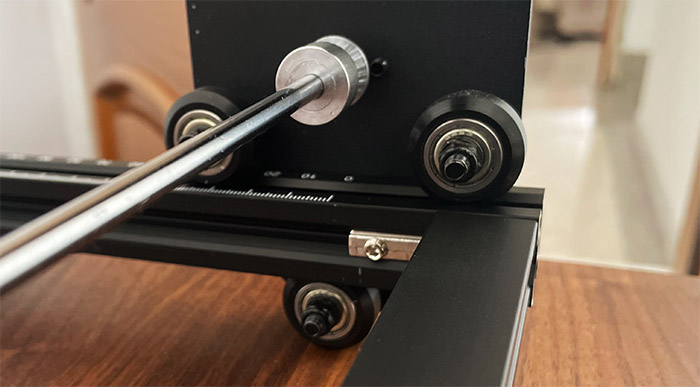
After that’s done, take the X-Axis frame from the package and, I noticed that the instructions get a bit confusing here, but the idea is simple. Slide the X-Axis assembly into place, putting the frame in-between the three wheels. You will notice that the X-Axis will be stopped by the nut that’s already installed on the left frame.
On the next step, identify the Step 3 pouch that contains the M7 washers and also take out the three metallic feet, as well as the display (which will act as the fourth foot) from the box. Use two M5x16 screws for each foot and simply tighten them into the dedicated holes (it’s hard to miss them) – one screw should enter the previously added corner grooves. As for the display assembly, use one M5x8 screw (the only one) and one M5x16 screw and tighten it to the front frame, from the left.
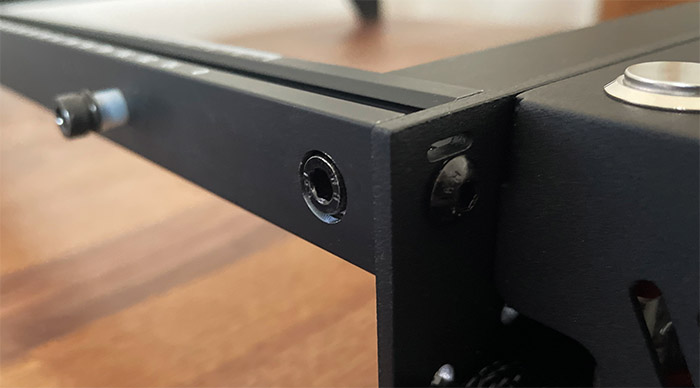
Lastly, use the remaining screw and the nylon isolation column to limit the X-Axis movement towards the display. At the step 4, it’s time to install the Timing belt, so make sure to take the corresponding plastic bag from the package. It’s going to contain four M5x6 screws and four trapezoidal screws. Put the timing belt with the tooth downwards inside the frame canal from the right side and make sure that it goes underneath the two wheels, but above the cogwheel.
You will notice that there are two narrow holes carved into the feet that you previously installed: push the belt out on both sides. Take the screws and fix one part of the belt into position (make sure to rotate the trapezoidal screw to sit perpendicularly) and, after tightening the belt, put another pair of screws on the other side of the belt. Do the same for the left frame.
On the next step, you need to install the laser head, so take the step 5 plastic pouch from the package and the idea here, is to use the two thumb screws to fix the laser module into place. And then to take the two M3x6 and the nylon isolation column to adjust the height of the module from the rear side. Longer says that the laser should not be placed too high, but they don’t really give any additional indications. And that’s because it’s up to you to adjust it depending on the thickness of the material that needs to be engrave or even cut. After that, you need to take the cord that’s attached to the display and insert the middle-placed connector to the motor on the left side and the two connectors at the end of the cable, one into the top placed motor and the other into the laser module. It’s pretty straight-forward since the connectors aren’t identical.
The Calibration of the Longer RAY5
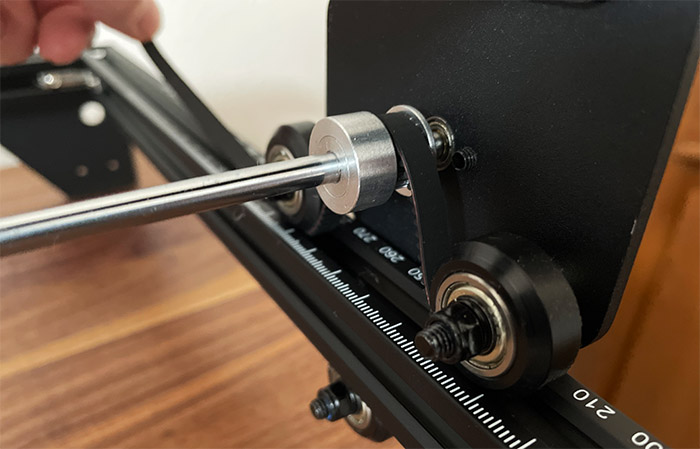
The last step before starting the engraving process is the calibration. To do it properly, you need to take the board that’s going to be engraved and position it underneath the laser head. Then, take the focusing column (the metallic cylinder) and place it in between the board and the dedicated area within the laser module assembly.
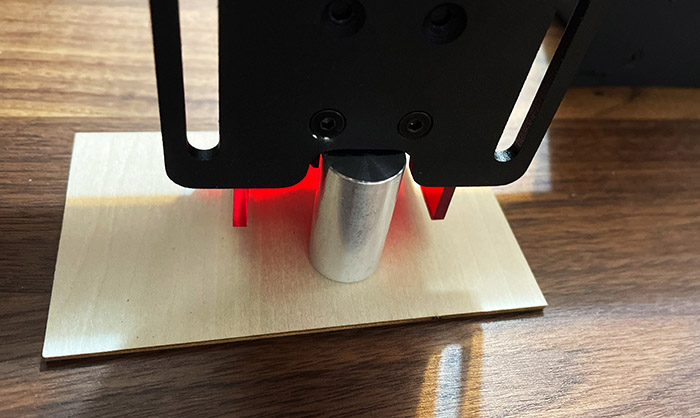
Adjust the screws to match the correct height and then tighten them back. That’s about it, now it’s time to prepare the model that’s going to be engraved. I do have to mention that I am not a fan of this calibration approach because, in time, the screws will be less effective and, if you need to constantly move through various board sizes, the mechanism will eventually fail.
The Display
After having connected the power cable and pressed the metallic button from the top of the controls section, The fans should start running (the laser should not turn on) and the display will show the position of the laser module (X, Y and Z axis), the laser intensity (the S – should be 0 when in stand-by mode) and the status of the WiFi connection. Far lower, there are four tabs, the first is called Adjustments and it will allow you to increase or decrease the laser intensity. The second tab is called the Control and here, you can adjust the position of the laser head, set the zero position (where the laser will default) and you can also set the Moving distance (can be 0.1, 1.0 or 10mm), as well as the Moving Speed (can be High, Mid or Low).
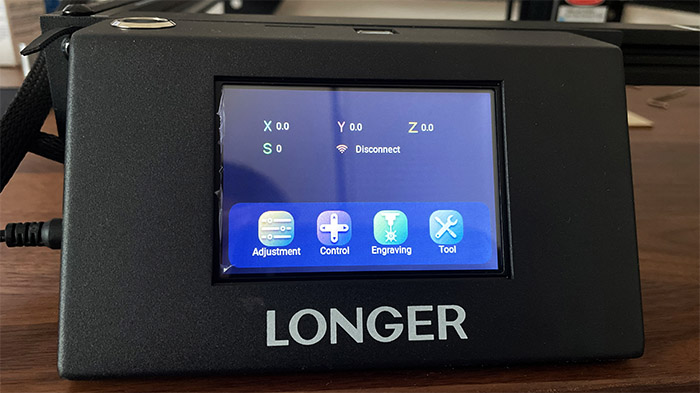
Under Engraving, you get to see the contents of an SD card and start engraving a model. Under Tool, you can see the type of board that’s installed, the Firmware version, as well as the CPU frequency. There’s also the option to set up the WiFi and there is only support for the 2.4GHz bands (of course). I couldn’t really call the process of inserting the password as being overly annoying, but it wasn’t pleasant either, because not all of my touches were registered by the screen. This happened because I was so used to the over sensitive screens on the smartphones, that I forgot that a firm push on the screen can make a difference. So, to easily and accurately type on the small display of the Longer RAY5, properly push on the tab, icon or letter and it will register every time.
Longer RAY5
-
Pros
- Good performance on both wood and metal (considering the price tag)
- Easy to install
- There is a display
- The laser module is upgradeable
- Some safety precautions in place
Cons
- The calibration mechanism will fail fairly quickly if you need to do constant adjustments
- It needs a heavily ventilated room with little to no reflective materials
- It needs continuous supervision while it's operating