
When it was first launched, the Nest Protect smart smoke and CO detector was received with lots of skepticism due to what was deemed an unnecessary amount of features and a very high price tag, but after the improved second generation was released, the people seemed to be more welcoming towards the idea of adding the vital smoke detector within a smart home environment. This happened because Nest has made significant steps towards limiting the number of false alarms (something that severely plagued the first gen Nest Protect), it added thorough self-tests and it improved the Nest app integration (although it’s worth noting that the shutdown of Works with Nest and its replacement with Works With Google Assistant has left things in a bit of a mess).
Because of this, despite the best efforts from First Alert (with its OneLink) or other manufacturers (such as Roost) to top what Nest has to offer, the Second Generation Nest Protect remains the most popular smart smoke and CO detector on the market.
But the more features it has, the more things could go wrong, so, why should you need to connect your smoke detector to the wireless network? A higher-end basic smoke detector from Kidde or First Alert should be cheaper and would do just fine detecting most types of fire, but the Nest Protect can notify you in case it detect fire even when you’re away from home.
The problem is that in case of false alarms, you could easily ruin your family vacation and drive back home for nothing – at the same time, you can intervene in a timely manner in case of real danger. Of course, beside the notifications, there are also some other feature to explore, so let’s have a closer look at the Next Protect Second Generation and see if it’s worth equipping your home with a smart smoke and CO detector.
Design
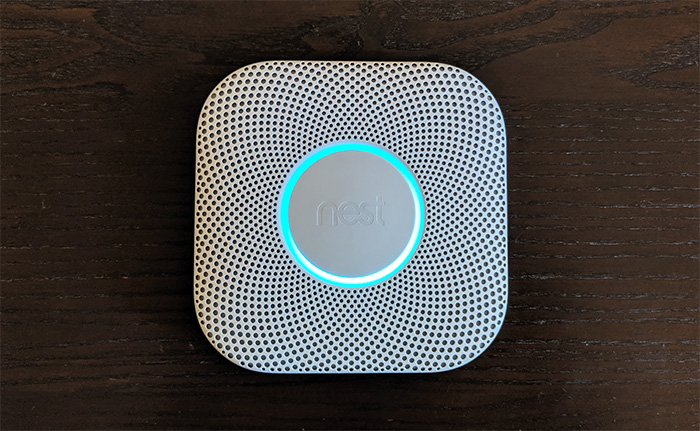
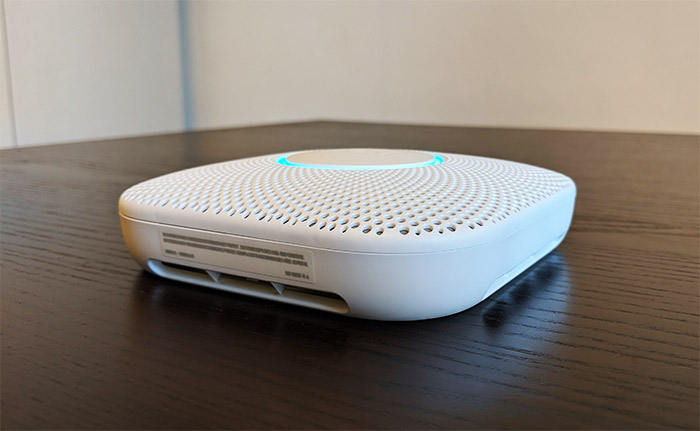
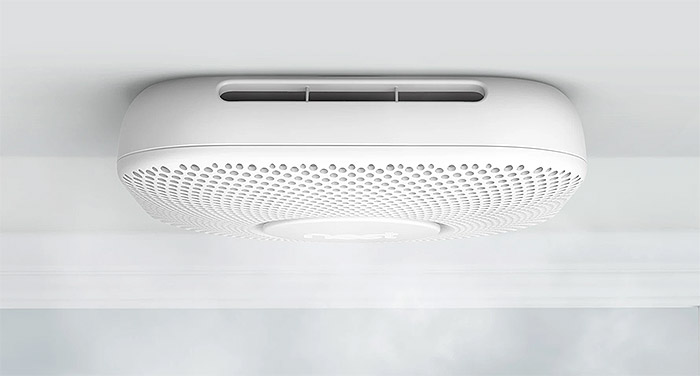
There isn’t much variety in the smoke detectors market, the palm-sized cylinder being the most preferred shape adopted by most manufacturers. But, as expected, Nest wanted to show you that you’re not looking at just another smoke detector, so the second gen Nest protect has a rectangular case with soft rounded corners and lots of cut-out round holes which form a pattern around a circular central button. The device is also almost entirely covered by a white matte finish which doesn’t retain fingerprints (with the exception of the front glossy Nest logo) and on the edge of all four sides, it has some openings to allow the smoke particles to reach the sensors’ chamber.
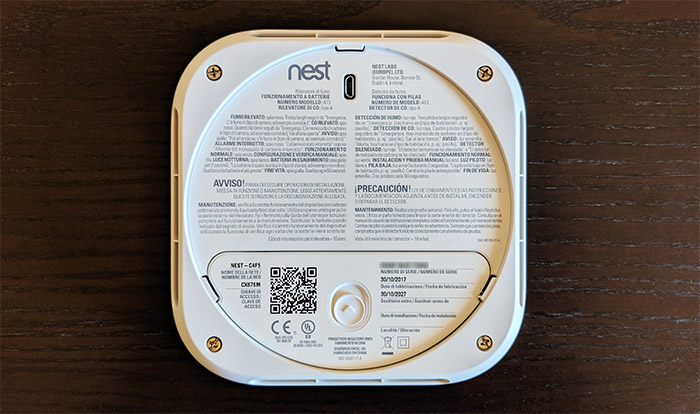
If you turn the device upside-down, you will notice that the entire case is held together by four screws and in the middle, inside the depressed circle, Nest has added printed info about the device (including the certifications, the Serial Number and fabrication date), as well as a micro-USB port. This port was added solely for the support team to gain technical info and you cannot use it for charging the batteries or anything else. Depending on the type of smoke detector that you chose, battery-only or wired, you will be able to see a small connector on the back panel (where you have to connect the electrical wires) and a compartment for the batteries – in my case, I got the battery-only Nest Protect, so it lacked the connector for the wires.
Note: If you’re unsure whether you’re holding the first generation or second gen Nest protect, the main design differences are the rounded corners (the first gen has straight edges), the battery compartment (it will be missing on the first gen) and the back plate, which will be circular on the second gen and rectangular on the first gen Nest Protect.
In terms of size, the Nest Protect Second Gen doesn’t stray off too far from the standard blueprint, measuring 5.3 x 5.3 x 1.5 inches (LxHxW), so it’s just a little bit larger than the regular, non-smart smoke and CO detector (we can take as an example the Kidde Smoke and CO detector, which measures 5.6 (diameter) x 1.8 (depth) inches).

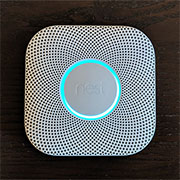
The design centerpiece of the Nest Protect is, of course, the front LED ring which shines from underneath the canal that surrounds the circular button and, similarly to the LED indicator on the WiFi mesh systems, it changes its color to indicate various conditions. It’s worth adding that besides the LED color, the Nest Protect also makes use of a 2W speaker to vocally let you know that its sensors have detected smoke in the room. That being said, in case the Nest Protect detects that the smoke or CO levels are rising, then the LED will start flashing yellow and the speaker will tell you to ‘please be aware, there is smoke Carbon Monoxide in the [room], the alarm may sound’.
At this point, you should ensure that the smoke source is removed and that you open a window to let in some fresh air to dissipate the CO. In case the Nest Protect detects that the smoke and/or CO quantity in the room have reached a dangerous level, then the LED will start flashing red, the horn will activate (it’s 82db loud, so it will easily wake you up during the night) and the speaker will let you know that there in an emergency and that there is either smoke or CO in the room where the device is installed. Pressing the circular button will temporarily silence the alarm (the LED will cycle through yellow and red) and after the alarm is over (the device no longer detects smoke or CO), the Nest Protect will return to its default state with the LED slowly flashing green.
Installation and App
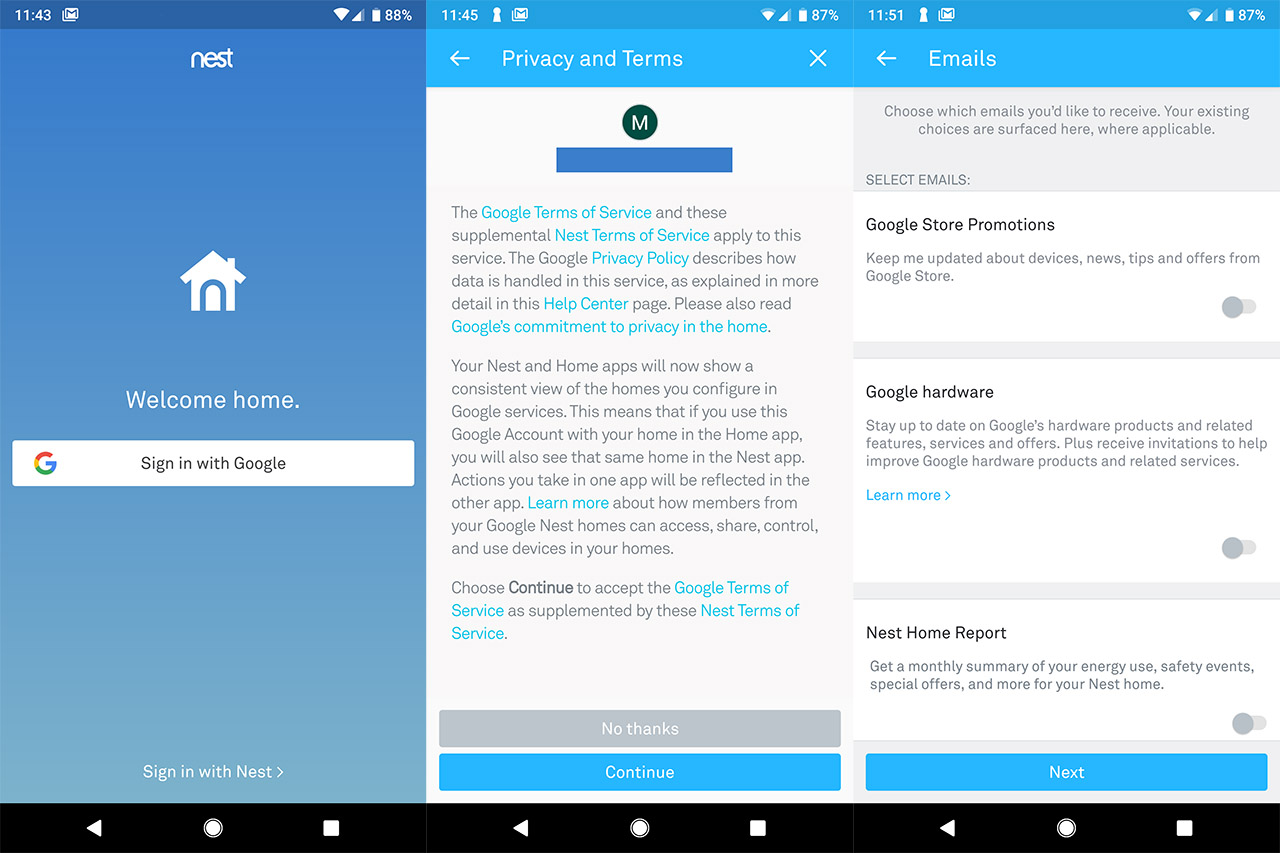
Unlike the traditional smoke detector, the Nest Protect does require a bit more steps until it’s going to be fully functional, so, before performing the hardware installation, you need to first download and install the Nest app on your mobile device (compatible with iOS and Android OS), create an account (either use your Google account or sign in with your Nest account – you can’t create a new one) and then let the Nest app guide you through the initial configuration process: after logging in using your account (I used a Google account), you will have to set up a new Home (or use an existing one) and it will ask for your home address which I did find invasive (you can be as vague as you want in this step if you don’t want Google to know your exact home address).
Afterwards, you will be able to set which types of email you want to receive: can be Google Store Promotions, Google hardware (apparently it’s to send you any new available service and offers) and lastly, the more important one, the Nest Home Report which will show you a summary of your home energy use, any safety events and more. Afterwards, you will be asked if you want to use the current mobile device’s location to determine whether you’re home or away for the Home/Away Assist feature and finally, you will gain access to the app’s user interface. Here, you will notice two main tabs, one displaying Home (with the outside temperature) and underneath it, there’s the Add button: press it to add the smoke detector and use the phone’s camera to quickly detect your Nest Protect (via the QR code).
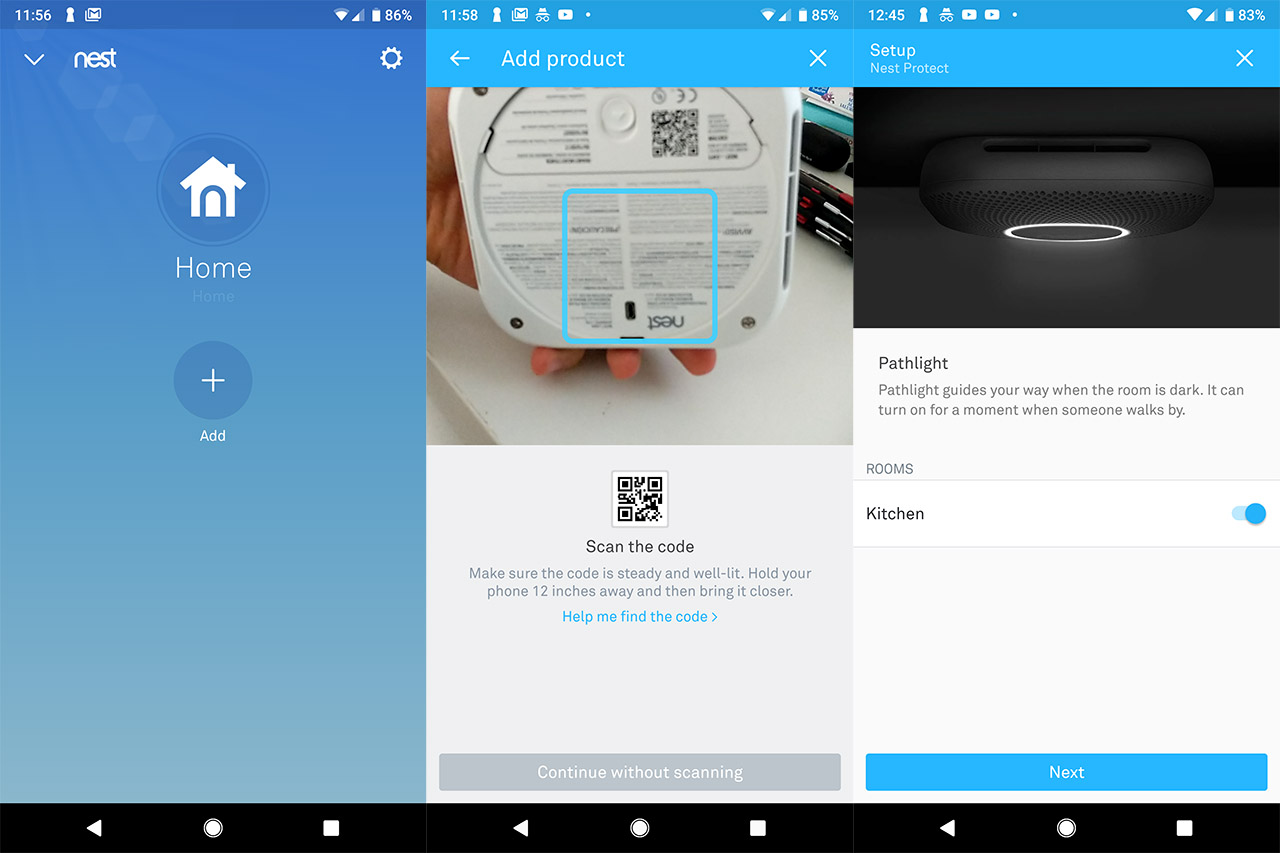
For the next step, select the location of your detector, pull the blue tab to connect the batteries to the device and wait until the LED ring turns blue. At this point, the Nest Protect will ask to select the preferred language (in case you got an International model) and will run a self test, letting you know the status of the smoke and the CO detection sensors. After the test is concluded, the LED will turn off and you will be asked if you wish to enable the Pathlight and the monthly Sound Check (select the preferred time). Now, you can perform the hardware installation: inside the package, you will notice that the manufacturer has included a circular plate and four screws to help you mount the Nest Protect on the ceiling. The location is very important and to get the best results, make sure that there are at least 12 inches from any corner – although it is ideal to keep at least 20 inches from the nearest wall.
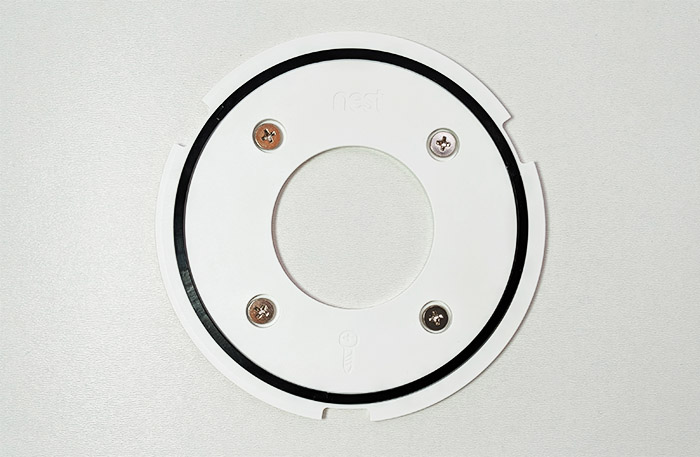
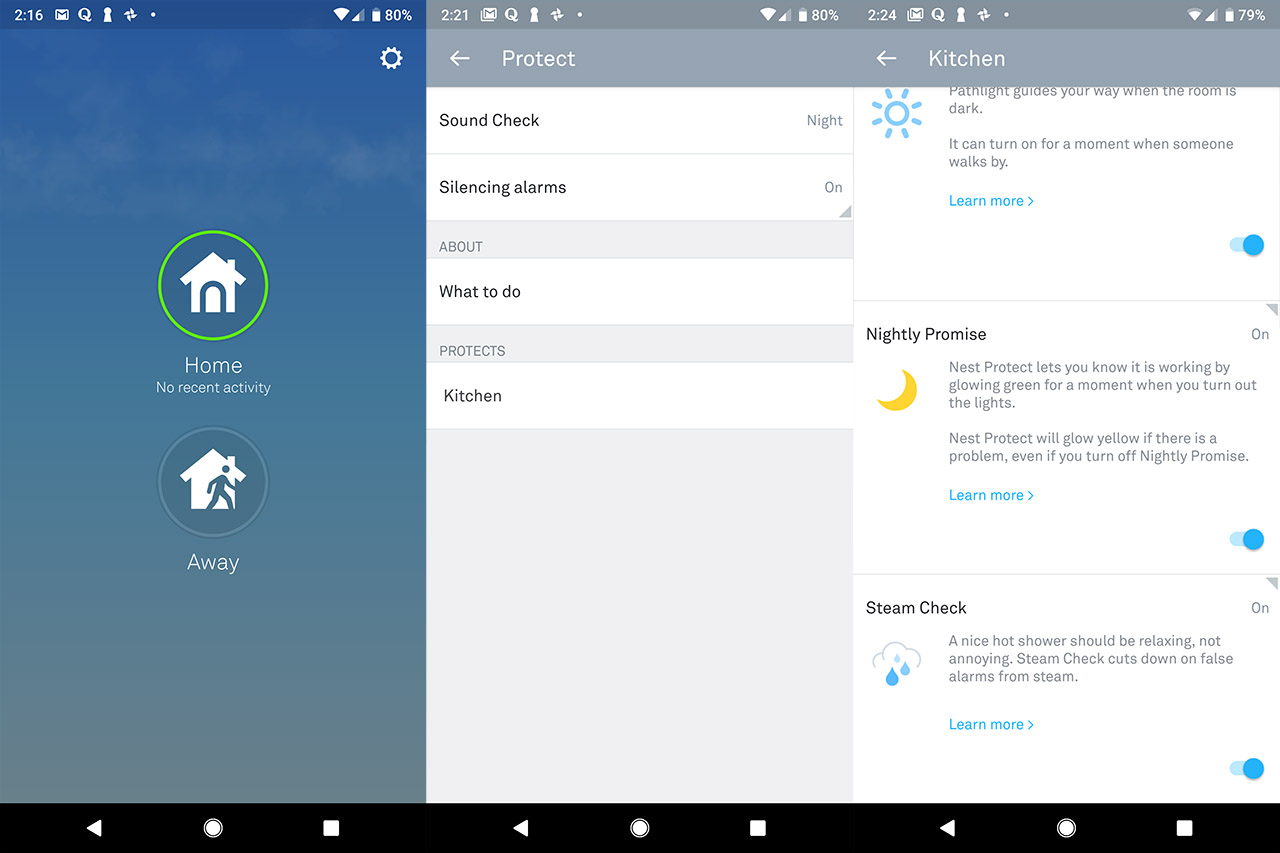
After you have attached the mounting plate to the wall or ceiling, if you have the battery-only Nest Protect, then gently push the device against the plate and rotate it clockwise until the detector is square with the wall or ceiling – if you have the wired Nest Protect, then you need to first attach the wires from the wall to the dedicated connector in the device. You can now press again on the button to see if everything works fine. The application itself isn’t very complicated, allowing you to easily switch between Home and Away modes by pressing the Home icon and, if you tap on the Protect icon, it will take you to a new window where you can run a Safety Checkup (tests the system, including the sensors) and you can also view the History logs.
On the top right corner, there’s a small cogwheel icon which, when tapped, it will take you to the Nest Protect settings, allowing you to set the Sound Check, to enable the ability to Silence the alarms using the app and, if you click on the chosen location (mine was Kitchen), it will display a new set of options: under Nest Sense, you can enable/disable the Pathlight (turns on when the room is dark and someone is walking past the detector), the Nightly Promise (shows you that everything is in order by glowing a green light immediately after you turn off the lights), the Steam Check (when enabled, it has the role of detecting steam, therefore reducing the number of false alarms from steam) and Heads-Up (when the CO and smoke levels are rising, it will sound a less loud alarm). Under the Device Options, you can set the Brightness of the LED, the Spoken language, the WiFi connection and you can also view various stats under the About section.
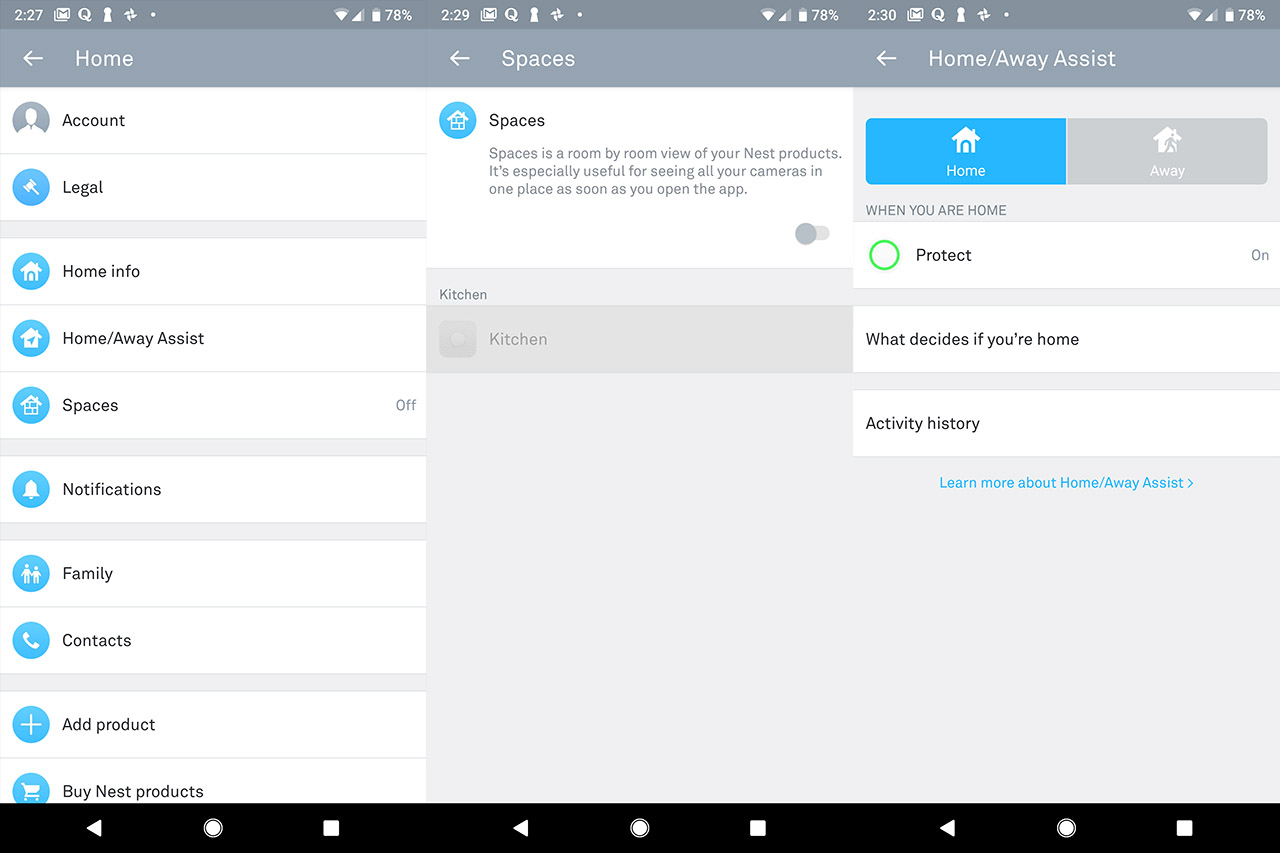
If you return on the main page and again click the cogwheel icon, it will display a different set of options, allowing you to configure your Account, view the Legal terms, modify your Home info (address), toggle between the Home and Away modes, divide your rooms that have installed Nest Protect devices in Spaces, choose the type of Notifications, add more Family members to the app, add emergency Contacts, Add a new product or Buy other Nest products.
Very recently, Google made the move to replace the Works with Nest with Works with Google Assistant in order to keep all its devices under a single ecosystem and since the end of August 2019, you won’t be able to add new devices to the Works with Nest system, but Google does state that the devices that are already connected to the Works with Nest will continue to work normally, for now. Unfortunately, Works with Google Assistant doesn’t have the same appeal as the Works with Nest because it lacks some of the best features of the latter, such as the IFTTT integration, so the devices won’t communicate between each other, triggering various functions and instead, you will have to give vocal commands to the Google Home assistant to accomplish similar tasks.
Besides this, there is a bit of a mess with third-party devices compatibility, since some manufacturers haven’t yet finished migrating towards the new platform (such as Lutron devices). So, if you were excited to connect various devices to the Nest Protect and create IFTTT applets, you may be a bit disappointed by what Google has to offer right now.
Features and Performance
In order to detect most types of smoke, the detectors make use of two types of sensors, one is the ionization sensor and the other is the photoelectric sensor. The ionization sensor is great for detecting small particles (which usually come from fast flaming fires) and it relies on a very small amount of radioactive material (Americium 241 – the amount is small enough to be harmless to human beings) and, using two plates, it creates an electric field which ionizes the air inside a small chamber and, when the small particles disrupt the air flow, it triggers the alarm. The photoelectric sensor is best used for detecting larger particles (which are usually created by slow smoldering fires) and the way it works is by pointing a light beam away from the sensor (usually positioned at a 90 degrees angle) and, when the larger particle enters the chamber, it will scatter the light beam, therefore hitting the sensor and triggering the alarm.
The Nest Protect Second Generation relies on a photoelectric sensor to detect large particles, but it doesn’t use an ionization sensor to detect the small particles, instead, it has added a blue LED light (450nm wavelength) which is able to scatter more light off smaller particles, therefore triggering the alarm even when particles underneath 10 micron enter the chamber. This combination of sensors is named Split-Spectrum sensor and it does a really good job at detecting a large variety of particles, but, unfortunately, on the first gen, it had some trouble with steam which would easily trigger false alarms.
To fix this, the second gen Nest Protect was designed to only allow smoke within the chamber and, by relying on the humidity sensor, it tries to do better at telling the difference between steam and smoke. Besides the Split-Spectrum sensors, the Nest Protect 2 is also equipped with an Electrochemical Carbon Monoxide sensor (apparently, it’s a Figaro TGS-5342 CO Sensor) and the way it works is that it produces a signal current proportional to the amount of gas there is in the area using fuel cells which oxidize the CO to CO2 at one electrode and Oxygen is consumed at the other electrode (therefore producing the current which will trigger the alarm).
The CO sensor is rated at 10 years, while most other CO detector will usually work for no more than 6-7 years, but it doesn’t seem that Nest is that confident in the rest of the device since it has a warranty \
of only 2 years. That being said, the Nest Protect is also equipped with a heat sensor to detect sudden rises in temperature, an occupancy sensor to help with the Pathlight feature and an ambient light.
It is important to know that you need to periodically test your smoke detector (at least once per month as recommended by the USFA) using the Test button and this includes the Nest Protect but, besides the manual test, the device also runs self tests every 200 seconds and it’s not only superficially, it actually tests to see if the smoke and CO sensors work and, using the built-in microphone, it also listens to the horn and speaker to confirm that you will be alerted in case of an emergency (there have been reports that the device can randomly go offline, so it’s paramount to regularly test it).
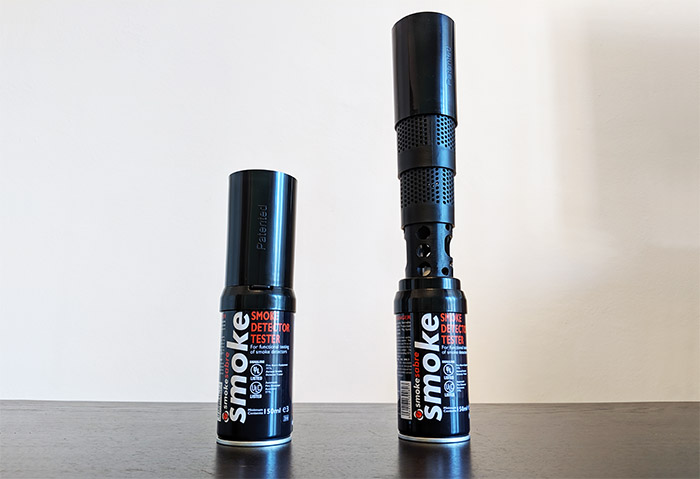
But, as seen in the “How to test a smoke detector” article, some users will not find the Test button and self-tests enough to ensure that everything is working properly and may need to actually expose the device to smoke. Of course, I advise against testing the device with real fire, but I do find the aerosol method pretty efficient, so I decided to also test my Nest Protect unit using a can of Smoke Sabre Aerosol. This particular aerosol has an extended plastic piece which ensures that you don’t spray the sensor directly, therefore better simulating the real-life smoke conditions.

Initially, I decided to spray the aerosol smoke at no more than 1 foot and, after I released the synthetic smoke for one second, the Nest Protect’s LED turned yellow in 2 seconds and it triggered the alarm in 3 seconds (along with a Notification on the phone which took an additional of 3 seconds). Next, after the room once again had fresh air, I sprayed the smoke from 2 feet, again for only one second and, after 4 seconds, the LED went yellow which a second later become red and the alarm was triggered. To continue this test, I decided to spray the smoke from 3 feet, but pushing the button for one second didn’t give enough smoke (it cleared way too quickly), so I released a higher quantity of smoke, this time for 2 seconds. In this case, the LED on the Nest Protect took 9 seconds to become yellow and 10 seconds to turn red and to trigger the audible alarm.
Conclusion
The debate whether the smart smoke detector is better than the traditional device isn’t going to end anytime soon because while the smart device will give more control and features, it also comes at a significantly higher price, but an important aspect is that people don’t yet fully trust IoT devices, especially those in charge with ensuring their safety.
The Nest Protect Second Generation is a very well polished smoke and CO detector (and a significant improvement over the first gen), but it’s not the perfect device, being prone to pretty much the same problems as the regular smoke and CO detector, which includes occasional false alarms and possibly shutting down. At the same time, if you’re willing to spend more for such type of devices (which you will have to replace after 10 years), you do get a decent integration with other Nest devices, as well as third-party products (it will get better after Google manages to fix the Works with Nest transition), more sensors to better detect smoke, thorough self-testing procedure, a very loud horn (as well as a voice and light alarm) and some additional non-really-necessary, but cool features, such as the Pathlight or the Nightly Promise.
Nest Protect Second Gen
Pros
- Nice design
- Split-Spectrum sensors for detecting small and large smoke particles
- Electrochemical Carbon Monoxide sensor
- Proximity and Humidity sensors
- Vocal, light-based and horn-based alarms
Cons
- Only two years warranty
- Expensive
- Works With Nest is replaced by Works With Google Assistant