
Originally published: February 04, 2023
Updated: September 5, 2026
The TP-Link EAP615-Wall is a sort of successor to the EAP235-Wall plate WiFi 5 access point, sporting a very similar design and look, but the upgrade to the WiFi 6 standard has brought a few significant improvements. OFDMA is the cornerstone for any WiFi 6 access point, and it’s being used with the TP-Link EAP615-Wall as well, plus the hardware is also a bit more potent to be able to handle a slightly denser network.
| TP-Link EAP615-Wall | |
|---|---|
| TP-Link.com | Check Product |
| Amazon.com | Check Offer |
And that’s pretty much the point of upgrading to WiFi 6 because you will see a proper difference when you have lots of compatible client devices connected to the AP. Besides OFDMA, the TP-Link EAP615-Wall supports 80MHz channel bandwidth and, considering that it’s an AX1800-class device, it does seem similar to the EAP610.
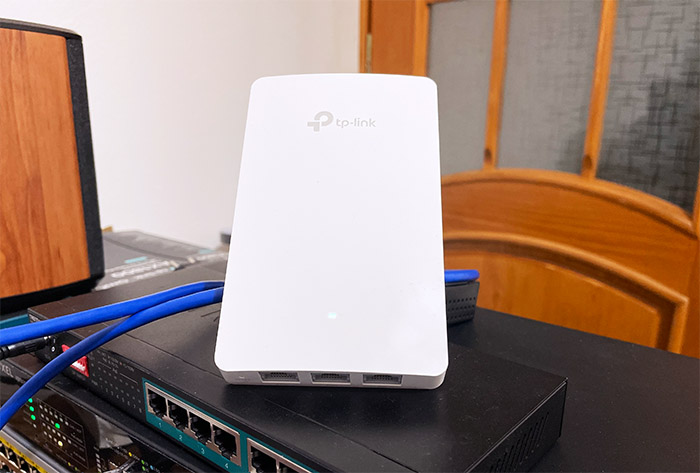
The access point has a PoE pass-through port to allow powering up another PoE device without having to add another cable and there are also two additional Ethernet ports for those older client devices. So, it’s a bit different than the ceiling-mount Omada APs, but how well does it actually perform, and should you go a bit higher to the EAP610 v2? Let’s find out.
Design and Build Quality
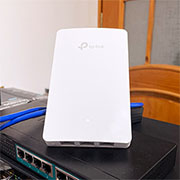
I did mention the similarities to the WiFi 5 EAP235-Wall plate access point, but it goes a bit farther than that because the TP-Link EAP615-Wall also has the same dimensions. So, the slim case will easily blend in with the wall and if it wasn’t for the single LED at the bottom, you would hardly notice its presence.
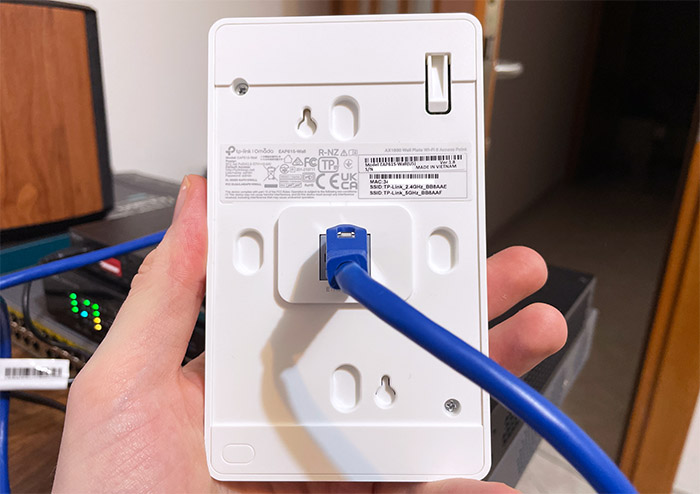
Also, you need to be aware that similarly to most other wall plate access points, there is a section with an Ethernet port that protrudes a little bit. This means that the Ethernet cable needs to come from junction box and into the access point, so you have a bit less freedom to where you can install the device than you would with other types of access points. That being said, is it possible to mount the TP-Link EAP615-Wall outdoors? The device has no IP rating and, even if there are no ventilation cut-outs, it was not built for outdoor conditions.
All the Ethernet ports are Gigabit, the rear-placed one being the PoE In port which powers up the TP-Link EAP615-Wall. At the bottom, there are two Ethernet ports (ETH1 and ETH2) for any cabled device, while the third is PoE Out, so it can be used for powering up another PoE device.
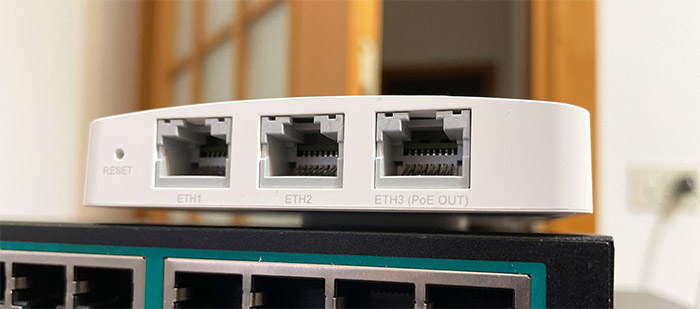
Be aware that the PoE In port needs a PoE+ device (switch or adapter) in order top power up a PoE 802.3af device since the output can only go up to 12W (or 13W for the EU version). Next to the ports, TP-Link has also added a recessed Reset button. But enough about that, let’s see this device in action in the Test Lab.
Wireless Performance and Test Lab
TP-Link EAP615-Wall
Test details
Test year: 2023. Firmware: V1_1.1.4 Build 20221213.
Charts use measurements stored in the MBReviews benchmark database. Stability charts are downsampled for display; the full one-second series remains in the database.
Read the full MBReviews Wi-Fi testing methodology.
Explorer version: 0.15.0.
To test the TP-Link EAP615-Wall, I decided to connect the access point to a PoE switch and, since I am lazy and had the unmanaged switch TRENDnet TPE-LG80 on the desk after I finished writing the analysis on how many Watts does a PoE switch use, I used this switch for the single-client tests. Besides the access point, I connected a cable from the router to the switch and also the server device (which has a 2.5GbE port, but it’s irrelevant in our case since the TP-Link EAP615-Wall is a Gigabit AP). Then, I connected three client devices, the first being a WiFi 6 computer (equipped with an Intel AX200 adapter), the second is a WiFi 5 laptop (equipped with an Intel 8265 card) and the third is the good ol’ Pixel 2 XL (also WiFi 5).
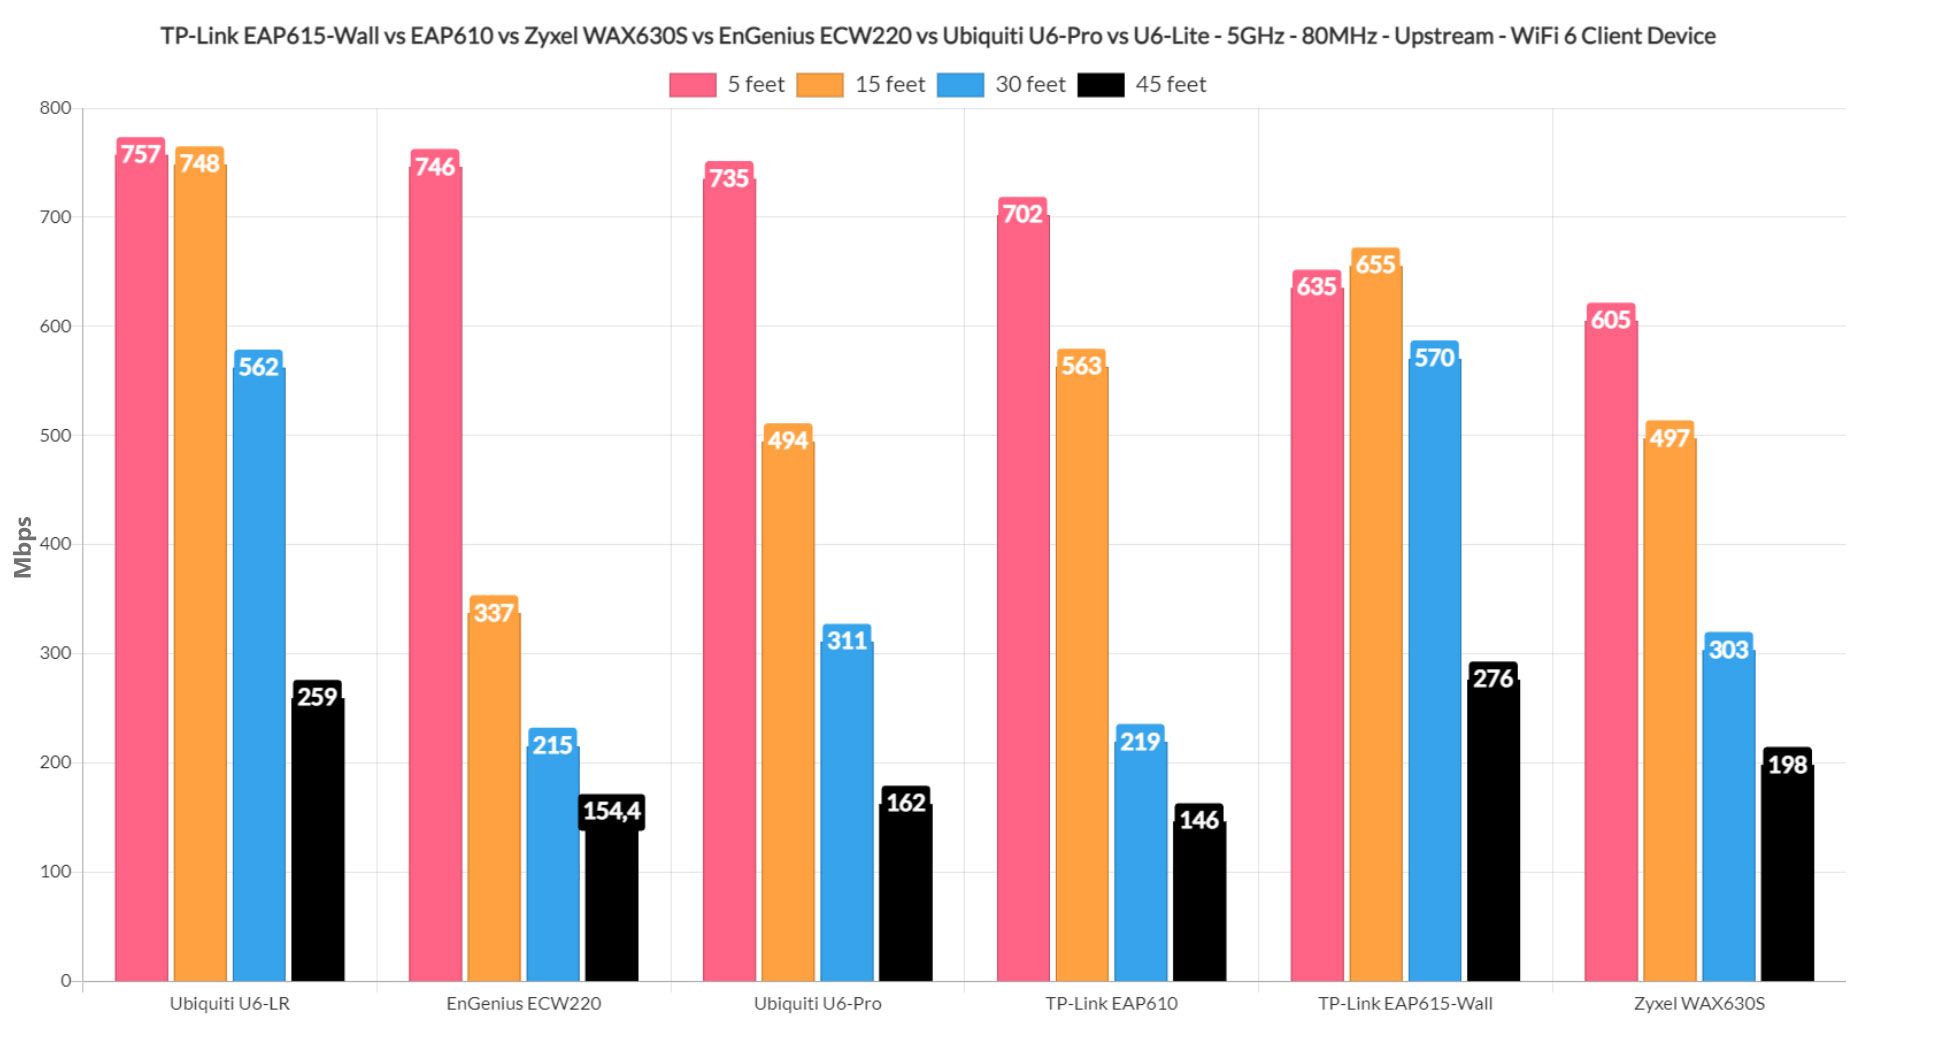
This way, while the WiFi 6 AX200 client device was connected to the 5GHz network (80MHz), I saw an average of 653Mbps upstream and 338Mbps downstream at 5 feet. At 70 feet, the signal strength dropped quite a bit (-87dB), but I could still browse the web and watch videos since upstream, it was 50.8Mbps and down, it was 14.2Mbps. Surprisingly, this WiFi 5 client device managed to reach 70 feet even if the attenuation was -87dB and I could see an average of 7.1Mbps upstream and an average of 3.9Mbps downstream. I got to say that on a single client test, Mediatek does phenomenally well, pushing the TP-Link EAP615-Wall farther than the other APs at certain points.
The wireless performance on the 2.4GHz was also surprisingly good using all three client devices, so check out the Test Lab to see the results.
PoE Pass-through Performance
I was curious about the efficiency of the PoE Out port, so I decided to connect the TP-Link EAP615-Wall to a more powerful Ethernet switch (just because I could) – the Zyxel XS1930. And I wanted to see if the wall plate AP could power up the TP-Link EAP610. It could not, so neither could it power up the EAP660 HD or the EAP670. Next, I tried powering up a Reolink RLC-510A camera which supports 802.3af (15.5W maximum) and it still didn’t work.
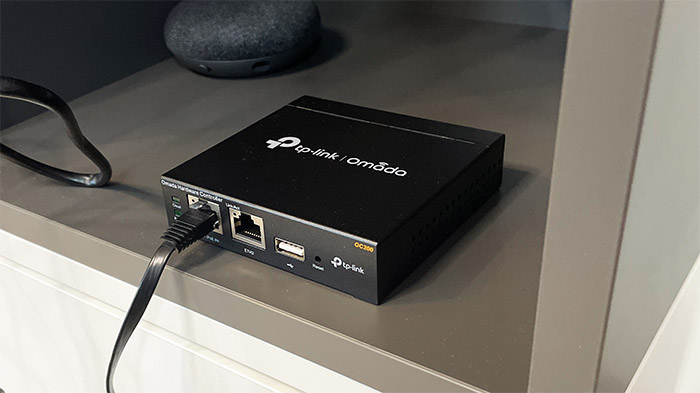
I also tried the OC200 and the EnGenius SkyKey I with no success, so these are pretty much all the low power PoE devices that I have available right now. I couldn’t really test the actual output. Still, keep in mind that there is very little electricity actually running through, so a lot of devices can’t really be powered by the TP-Link EAP615-Wall.
UPDATE 02.04.2023: As I said in the intro, Emiel Wieldraaijer (from EMRO) reached out to me recently to point out that I have missed some Advanced settings which have the role of enabling the PoE port. This setting can be found in the Omada controller interface > EAP615-Wall > Config > Advanced, and then scrolling down until reaching the ‘ETH Port Settings’. Here, I was able to enable the ETH3 PoE Out, but make sure that the EAP615-Wall is not powered by another access point. Use a PoE switch or PoE adapter.
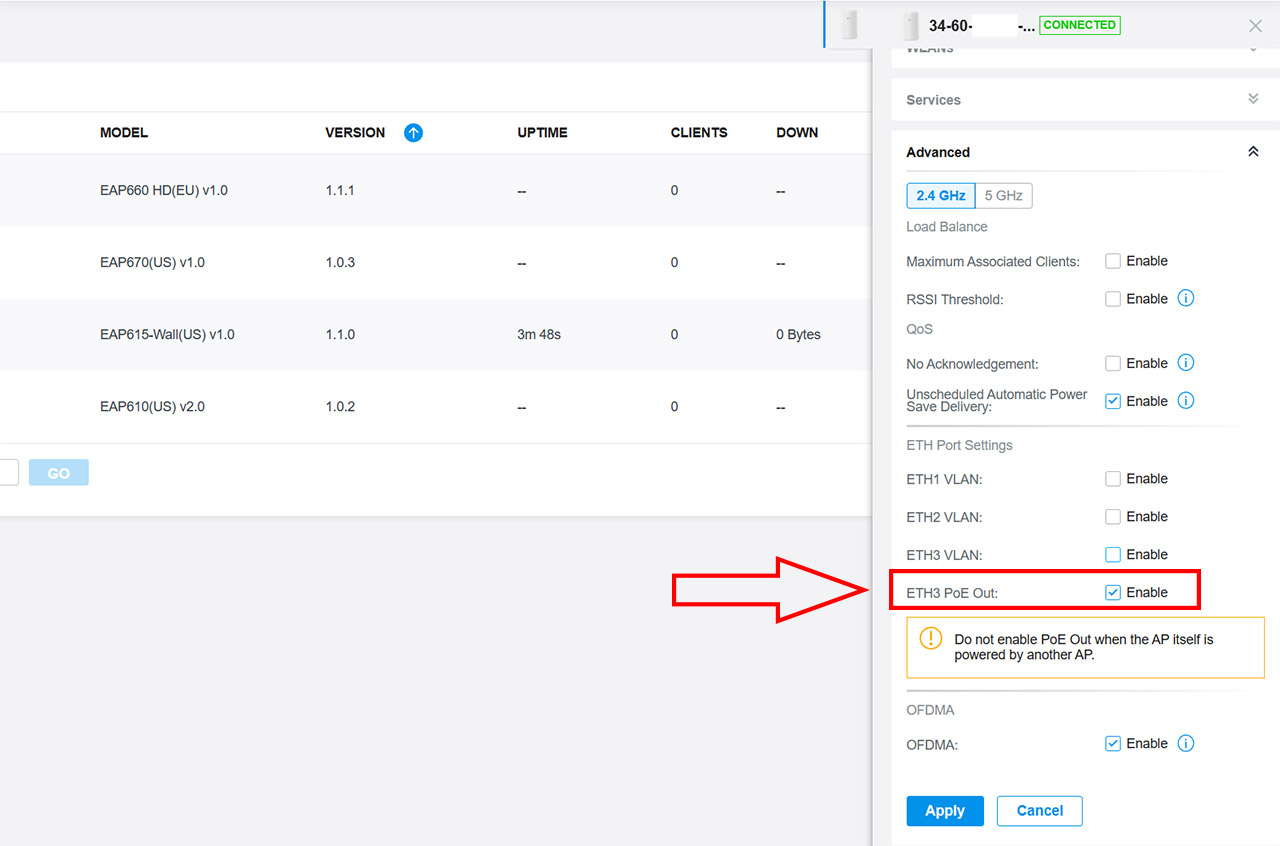
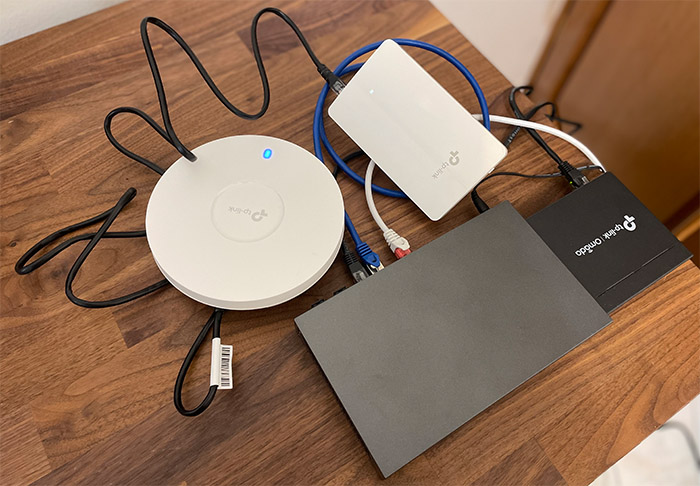
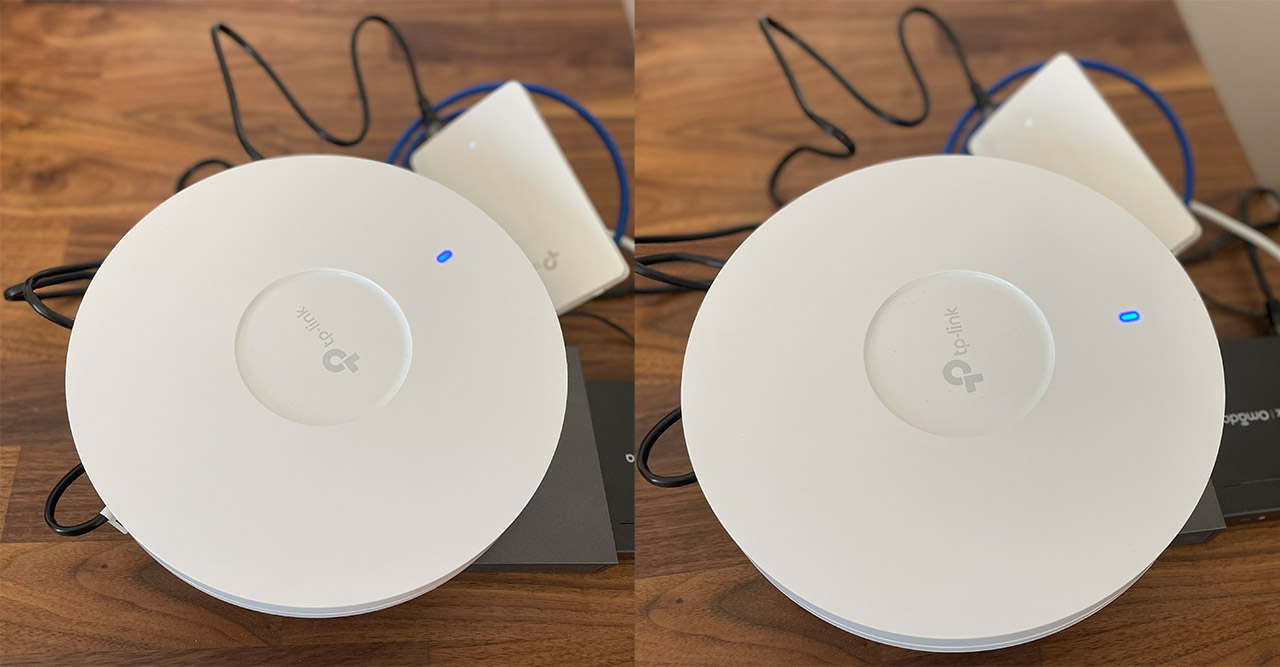
Now let’s check out just how well EAP615-Wall performed, I went up gradually, from an AX100 AP to an AX5400 one. It had no trouble powering up the EAP610 as you can see from the photo and it handled the EAP660 HD and the EAP670 as well. Bear in mind that the EAP610 can draw up to 12.8W via PoE, so it is possible to max out while being powered to the EAP615-Wall. The EAP660 HD and the EAP670 can go up to 21.5W and 19.8W respectively, which means that while the TP-Link EAP615-Wall will be able to power up these two access points, you can’t really push them to the limit.
The Thermal Management
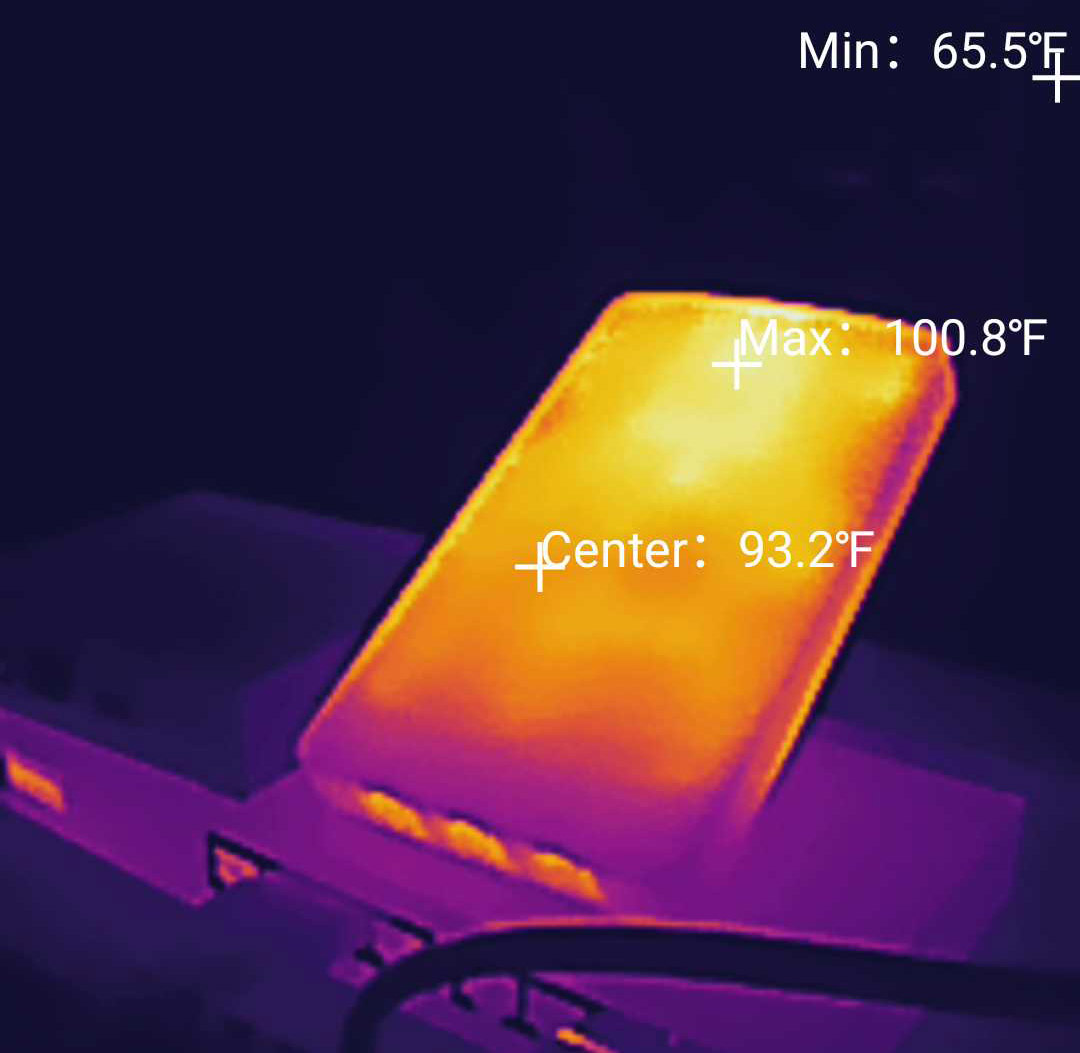
Since there are no ventilation holes, does the TP-Link EAP615-Wall get hot? Due to its compactness, it will get a bit more warm than other access points, but I suppose it’s in line with the likes of ECW220S.
Internal Hardware (TP-Link EAP615-Wall Teardown)
TP-Link has made the teardown process of the EAP615-Wall very simple since all I had to do is remove the two screws from the bottom and then carefully detach the top cover using a prying tool. It’s a win for the right to repair movement but be aware that you need to know what you’re doing otherwise you can still lose the warranty. That being said, the first thing that you’re going to see is the bottom side of the PCB and not much is going on here.
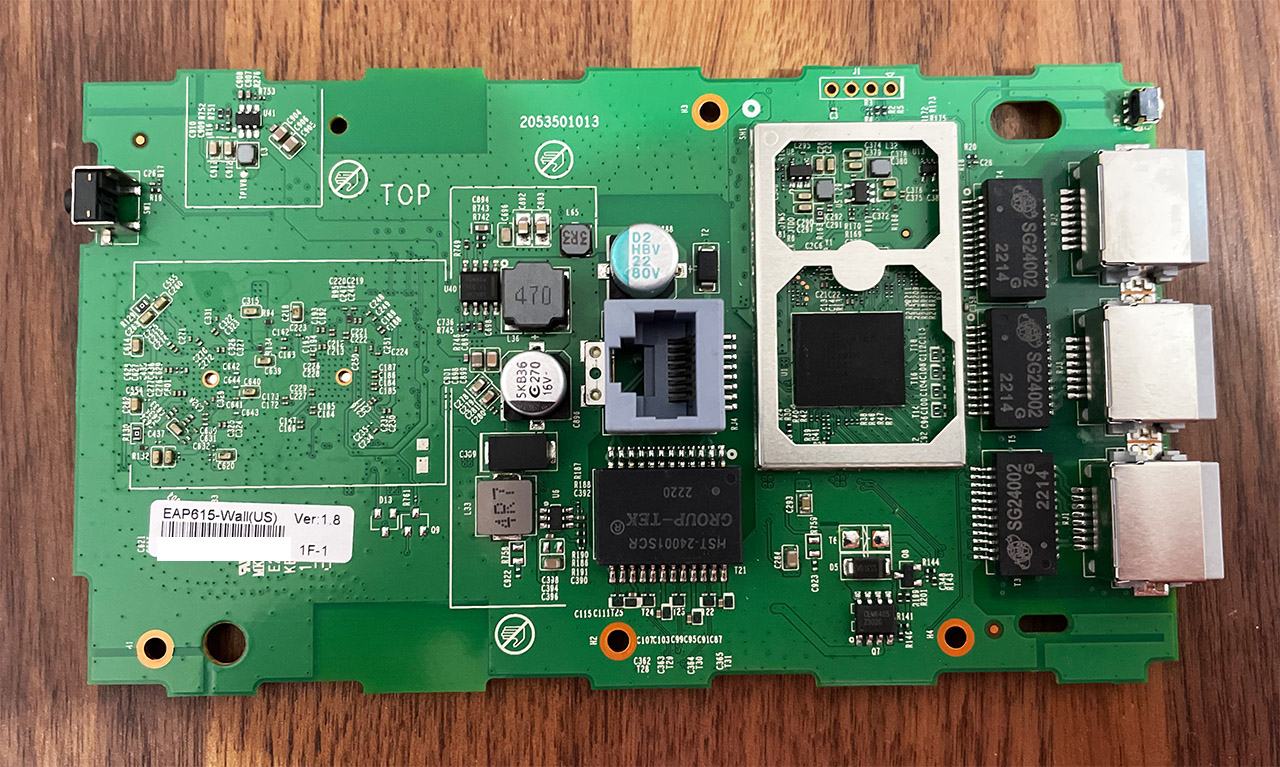
I was able to identify the 16MB NOR flash memory from (XMC QH128AHIG) and, underneath the aluminum cover, I could see the two chipsets for the WiFi radios (which are the same as on the Asus RT-AX53U). The TP-Link EAP615-Wall uses the Mediatek MT7975DN 802.11b/g/n/ax 2×2:2 for the 2.4GHz radio and the Mediatek MT7905DAN 802.11a/n/ac/ax 2×2:2 for the 5GHz radio band (I could not see any obviously placed front-end module, so there seem to be no signal amplifiers).
Next, I removed the four screws that held the PCB in place and, after taking out the large metallic heatsink and the aluminum cover, I could identify the dual-core 880MHz Mediatek MT7621DAT chipset and it seems that the device uses the integrated 128MB of RAM (Mediatek MT7621DAT).
TP-Link EAP610 vs TP-Link EAP610-Outdoor vs Zyxel WAX630S vs TP-Link EAP660HD
| TP-Link EAP615-Wall | TP-Link EAP610 | TP-Link EAP610-Outdoor | TP-Link EAP660 HD | |
| CPU | dual-core 880MHz Mediatek MT7621DAT | quad-core 1.2GHz Qualcomm IPQ6000 | quad-core 1.2GHz Qualcomm Atheros IPQ6000 | quad-core 2GHz Qualcomm IPQ8072A |
| RAM | 128MB Mediatek MT7621DAT | 256MB ESMT (M15T4G16256A) | 256MB ESMT (M15T4G16256A) | 512MB ESMT (2x M15T4G16256A) |
| Storage | 16MB NOR XMC QH128AH16 | 128MB ESMT (F59D1G81MB) | 128MB ESMT F59D1G8MB-ASM1P1AWL | 128MB ESMT F59D1G81MB-AZM1P0H9N |
| Switch | Mediatek MT7621DAT | Realtek RTL8211F | Atheros AR8033-AL1A | Not identified |
| 5GHz Radio | Mediatek MT7905DAN 802.11a/b/g/n/ac/ax 2×2:2 | Qualcomm QCN5052 802.11a/b/g/n/ac/ax 2×2:2 | Qualcomm QCN5052 802.11a/b/g/n/ac/ax 2×2:2 | Qualcomm Atheros IPQ8072A (QCN5054) 802.11a/n/ac/ax 4×4:4 |
| 2.4GHz Radio | Mediatek MT7975DN 802.11b/g/n/ax 2×2:2 | Qualcomm QCN5052 802.11a/b/g/n/ac/ax 2×2:2 | Qualcomm QCN5052 802.11a/b/g/n/ac/ax 2×2:2 | Qualcomm Atheros IPQ8072A (QCN5024) 802.11b/g/n/ax 4×4:4 |
This means that the TP-Link EAP615-Wall is almost identical to the Rock Space AX1800 WiFi 6 extender. And yes, it doesn’t have that much in common with the EAP610 or the EAP610-Outdoor.
Setup and Software
Standalone Mode
Although you would miss out on some cool and useful features, you don’t need to actually adopt the TP-Link EAP615-Wall into the Omada SDN to be able to use the access point to its near full potential. And that’s because the standalone mode is very comprehensive in terms of options. To access it, you need to know the IP address given by the router and, after inserting it into a browser’s URL, insert admin/admin as the default credentials.
Then, the TP-Link EAP615-Wall will ask that you change the username and password, as well as set the SSIDs (optional). Then, you gain access to the GUI which is identical to what I saw with the EAP610, the EAP660 HD and the EAP670 (well, at least you are not forced to use an app, like Ubiquiti does – got to love that data collection). So, at the top, there’s the four main sections, the first being the Status where you get to see some info about the Device, the Wireless networks and the Client devices that are connected to the AP.
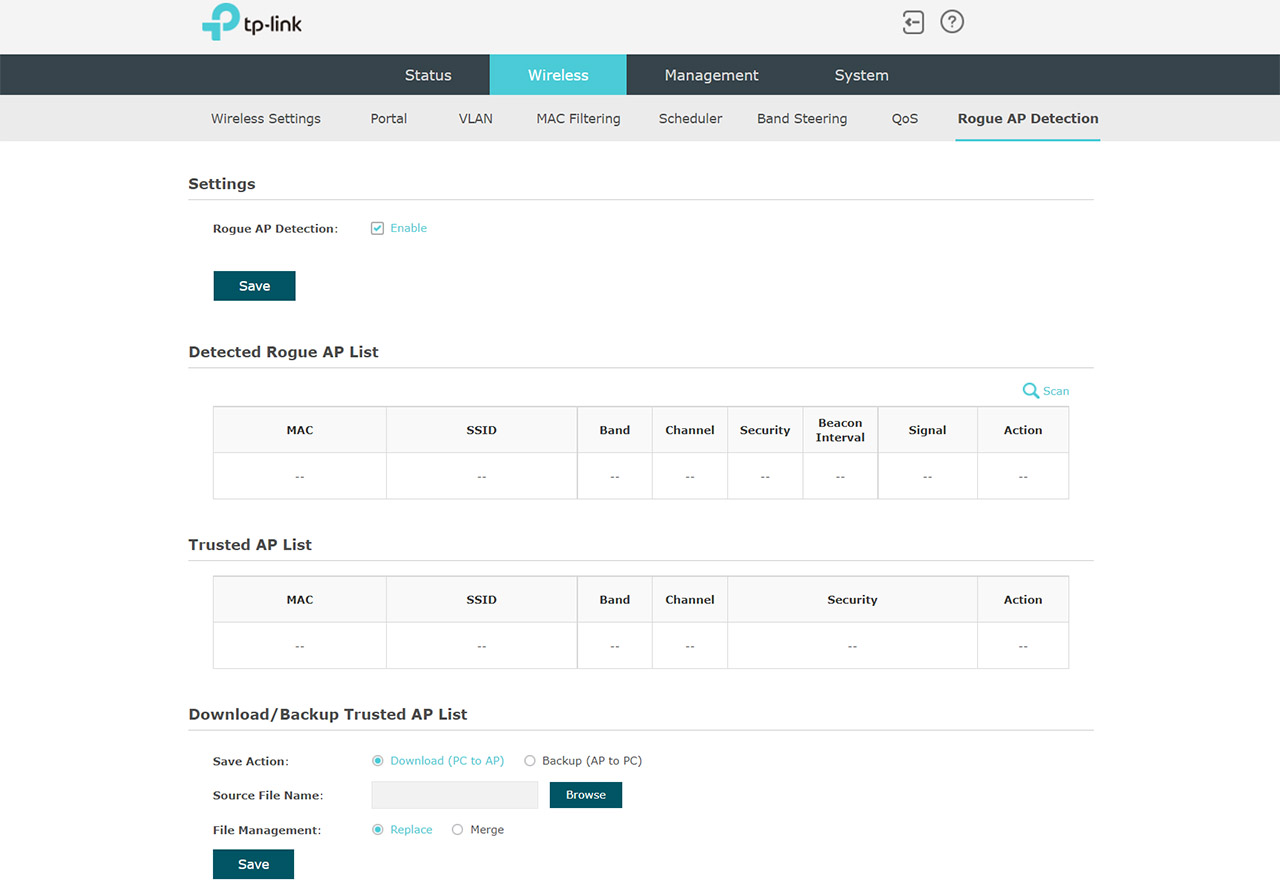
Then, under Wireless, you get to change a few settings for each radio band, the SSID configuration (supports WPA3-Personal only) and there are a few advanced settings as well. There’s the Load Balance, the Beacon Interval, OFDMA and more. Besides the Wireless Settings, it’s possible to configure the Portal (for guest access – useful for hotels, airports, hospitals and so on), enable VLAN, MAC Filtering, Band Steering, QoS and Rogue AP Detection (on the Omada controller, it offers far more data).
Under Management, you can set a Dynamic or Static IP, check the Logs, use SSH, control the LED or more. And under System, you can set up the admin account, update the firmware, as well as reboot/reset or back-up and restore a previous configuration.
The Omada SDN
TP-Link does provide access to the Omada Cloud-based controller, so you don’t need to rely on any type of hardware, just be aware that it does come with a subscription fee. But the experience doesn’t differ if you’re using the OC300 or the OC200, you’re just going to be limited to a certain number of devices. I still have the OC200, so I connected the SDN controller to the Ethernet switch that was powering the TP-Link EAP615-Wall and, after accessing the interface (the IP from the router in the URL), I went immediately to the Access Points and adopted the device (it was already detected and in Pending state).
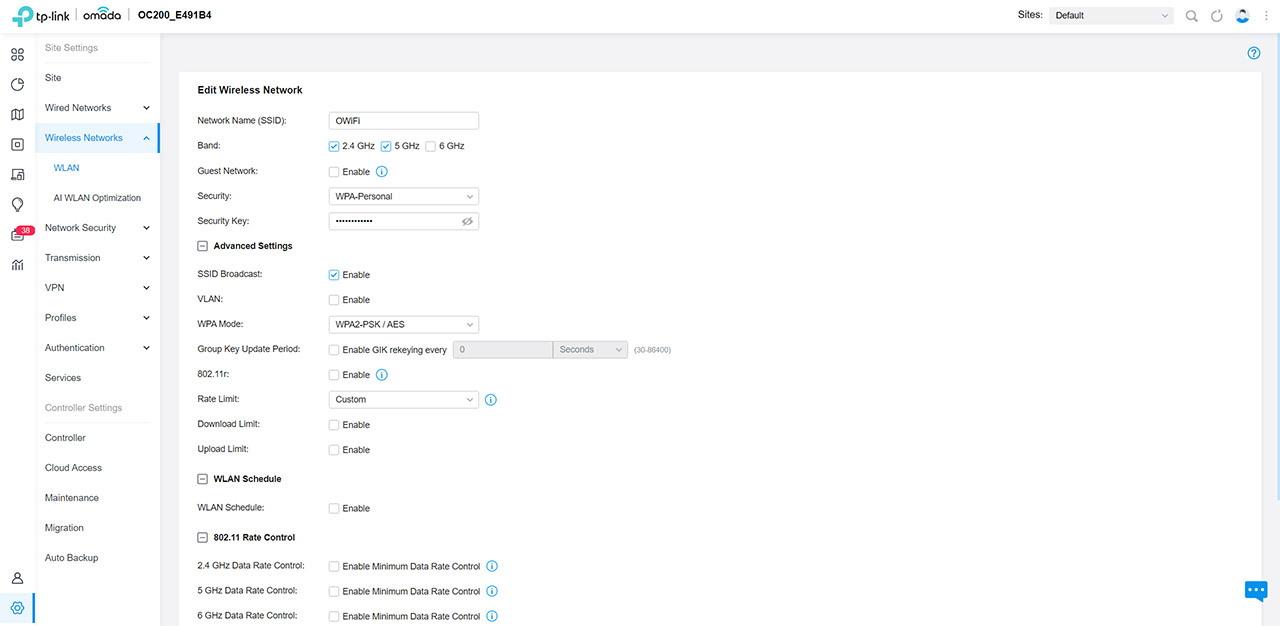
Then, the vertical window on the right got populated with lots of info (after the provisioning was done) and I was able to change the general settings received from the controller. Overall, it’s a very similar set of options as you get from the standalone mode, which means that there’s a healthy set of info under Details, you can see the Client devices and even configure the radios, VLAN or enable OFDMA. Besides these dedicated settings, you can also adjust the way all access points behave under this network.
This can be done by going to the Settings section (bottom-placed cogwheel) and under Wireless Networks > WLAN, you can modify the SSIDs, as well as adjust some advanced settings which include the 802.11r, the rate limit and control, as well as the MAC filtering. Also, just like Ubiquiti, TP-Link has included an AI WLAN Optimization option which, as the name suggests, it automatically changes the radio settings so that all access points work in harmony with as little interference as possible.
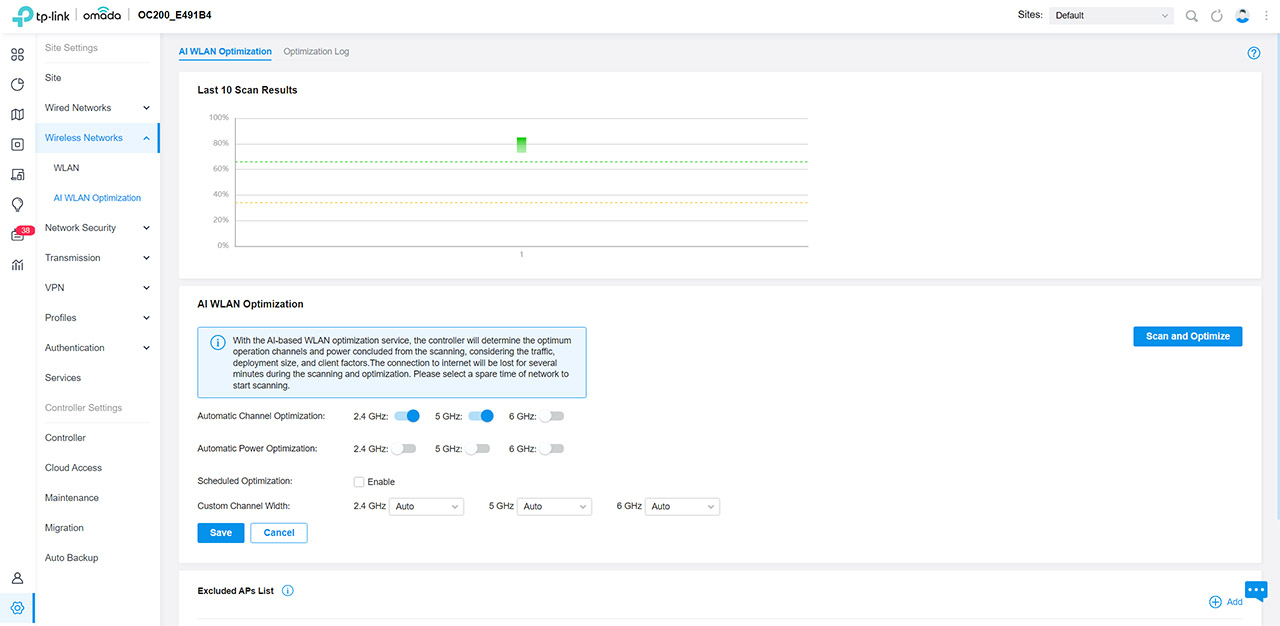
And the most important aspect is the scheduled optimizations because neighboring networks rarely remain static, so the settings need to be adjusted constantly.
Conclusion
Wall plate access points are always awesome due to the small case and multiple ports. And the TP-Link EAP615-Wall also offers a surprisingly good wireless performance not only on the 5GHz, but especially on the 2.4GHz radio band. Plus the standalone mode and the support for Omada do make for a complete package. The only gripe that I have about the access point is the actual PoE pass-through because I just couldn’t power anything with it. Yes, it doesn’t go up to 15W, but then again there are very few PoE devices that can be powered with such a low amount of power. I have updated the article to point out that you can actually power up access points and other PoE devices using the EAP615-Wall.
TP-Link EAP615-Wall
-
Pros
- WiFi 6 features, such as OFDMA
- Has multiple Ethernet ports
- Good WiFi performance
- Comprehensive standalone mode + support for Omada SDN and controller
- Very compact
Cons
- No BSS Coloring although it is vaguely advertised as being supported
- The PoE budget for the secondary device can be a bit limited