
The ANNKE Crater Pro comes as an improvement to the original ANNKE Crater, an indoor camera that was ridiculously inexpensive, while still offering some interesting features such as 1080p footage, two-way audio and human motion detection. So, why release a Pro version? For the same reason the SwitchBot Pan/Tilt Cam very recently got upgraded, it’s to make the entire series more competitive.
| ANNKE Crater Pro | |
|---|---|
| ANNKE.com | Check Product |
| Amazon.com | Check Offer |
And yes, the ANNKE Crater Pro does use a better lens with a higher resolution (1440p), there is now support for not only 2.4GHz, but also for 5GHz (needed at a higher bitrate) and the developers also included motion tracking. Obviously, most of the features of its predecessor are still here, so human detection algorithms are included, as well as the option to add 128GB of local storage (via microSD cards).
The panning and tilting actions are present and ANNKE decided to make some slight changes to the design of the camera. It’s just a change in look, the motors work pretty much in the same manner.
What’s interesting is that ANNKE claims instant notifications which suggests that the detection and the alarms are processed locally, without the need to go over the manufacturer’s servers.
There is also support for Alexa (voice control) which may be seen as a welcomed bonus, although I am a bit wary about the privacy implications of using such a system. That being said, let’s put the ANNKE Crater Pro to the test and see if it’s worth adding as an extra security layer to your home.
Camera Design and Build Quality
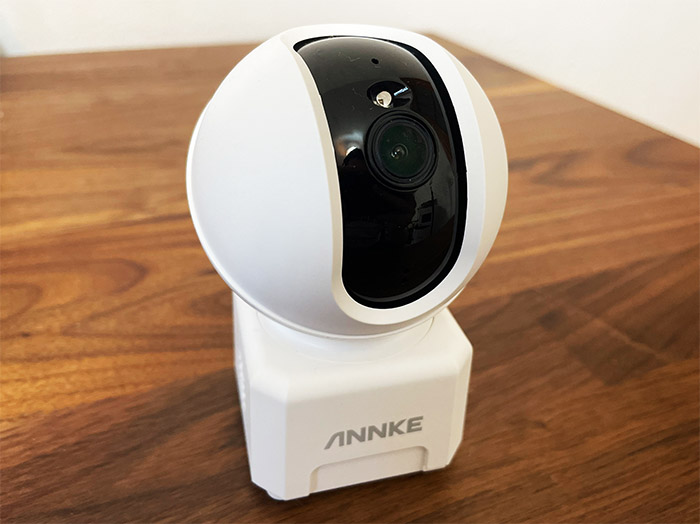
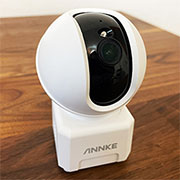
ANNKE Crater Pro has a similar design to most other indoor cameras which means that there’s a base and a top that can be panned automatically using a dedicated motor. And the top side contains a sphere that tilts so the user can adjust the view both horizontally and vertically. The guiding canal allows for a tilting angle of up to 60 degrees, while the horizontal movement goes almost all the way around, reaching 350 degrees.
The case is covered by a white matte finish, while the inner sphere is glossy black and the rectangular base is a bit taller than on other cameras. But the ANNKE Crater Pro is still fairly compact, measuring 4.3 x 2.7 x 2.7 inches (11.0 x 7.0 x 7.0cm) and, while the base is slightly narrower than the spherical top, it still seems to be heavy enough to keep the camera stable. There are also four silicone feet to keep the ANNKE Crater Pro into position even when connecting the charging cable. And this takes us to the main gripe I have with the camera.
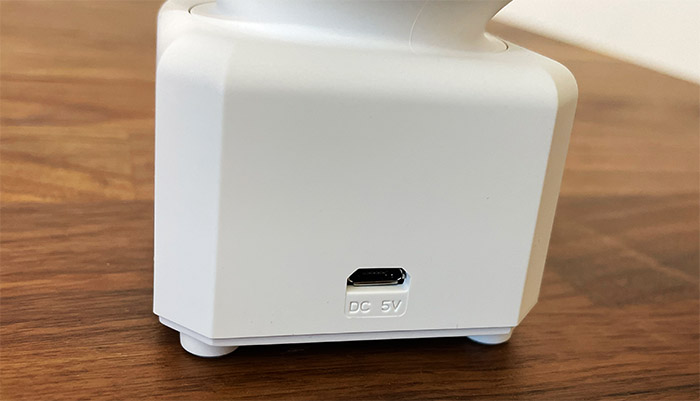
For very weird reasons, ANNKE decided to add a microUSB charging port and a compatible cable+charger into the package, and I understood that the transition to a newer USB standard period was long and painful for some manufacturers. But we’re done, USB-C is now the standard and frankly, we should never see another device with a microUSB port ever again.
Another minor complaint would be that there is a light wobble between the top and the base of the device. On the left side of the camera, ANNKE has added a punctured pattern to allow the speaker to push sounds through and, when paired with the microphone that sits on the black sphere, it allows the user to hold conversations with anyone near the camera. It can be a child, a pet or even a confused trespasser. So, can the ANNKE Crater Pro be positioned outdoors? I kept on mentioning that the camera is suitable for indoors conditions, but is there a chance to sneak it onto a porch and still be somewhat protected from the elements?
Well, it does not have built-in protection against dust or water ingress, but then again, the camera does remain operational when the temperature ranges between 14°F and 122°F (-10°C – 50°C). I have mentioned in the intro that the ANNKE Crater Pro does offer the option to insert a microSD card that goes up to 128GB, so I suppose we do get a fairly decent amount of local storage available. This slot can be found on the black sphere – you will have to manually point the lens up in order to access the microSD slot.
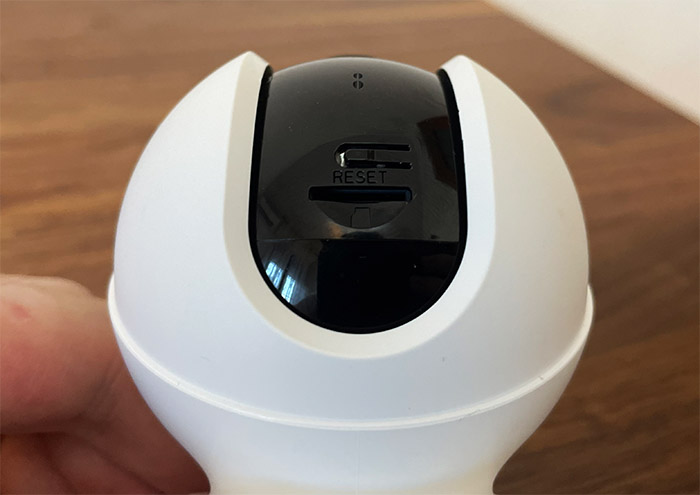
Next to it, there’s the Reset button (if you need to restore the factory default settings) and I suppose I should also mention the single IR LED. In my experience this can mean that the night vision may be a bit lacking, but let’s just see it in the testing section.
ANNKE Crater Pro Teardown
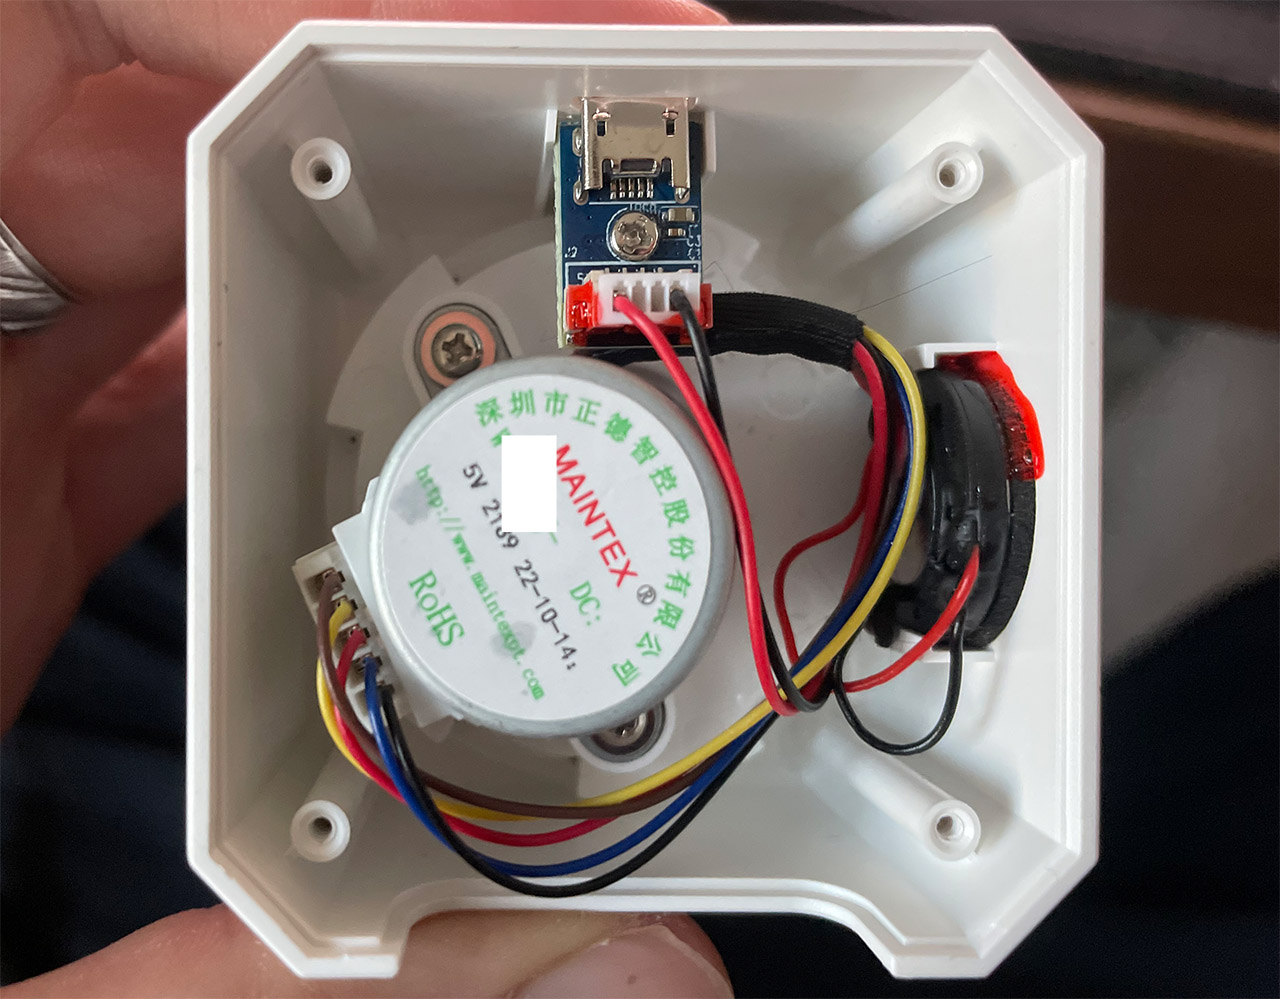
I did check the FCC ID website to see if the manufacturer has provided some internal photos, but it seems that none were provided. For this reason, I had to open up the ANNKE Crater Pro myself but I didn’t really get that far. I could detach the bottom panel quite easily by removing the four screws hidden underneath the silicone pads and then I could see the panning motor and the speaker.
I removed the motor, but there didn’t seem to be an easy way to move forward – I don’t mean it’s impossible, it’s just that I think they included some glue and things can get messy. So yeah, it’s possible to break it by trying to detach the top part. For this reason, I think that it isn’t really repair-friendly.
The Installation
The hardware installation is simple and straight-forward – connect the provided cable along with the brick (yes, there’s one in the package as well) to the camera to power it up. Then, wait a few seconds until the ANNKE Crater Pro starts making weird noises – it’s something like ‘steph’ in a sonar manner. Seriously, a simple flashing LED is enough, we don’t need these voice prompts. Now it’s time to install the MyANNKE app and create a new account (requires an email). Then, the Permissions starting popping up – it wants access to the Storage and the Media (which make sense), but nothing about location or privacy.
I did install the app on an Android device, so I also installed it on iOS to see if there was any difference. It asked for additional permission for seeing and accessing other devices in the network and I could check the Privacy section which shows that there is some data collection happening. This includes some log data and Cookies info which can then be used for ‘behavioral remarketing’. Moving forward, I had to populate the Device List, so I tapped on the Plus sign and I had to allow the app to use Bluetooth to detect and connect to the ANNKE Crater Pro.
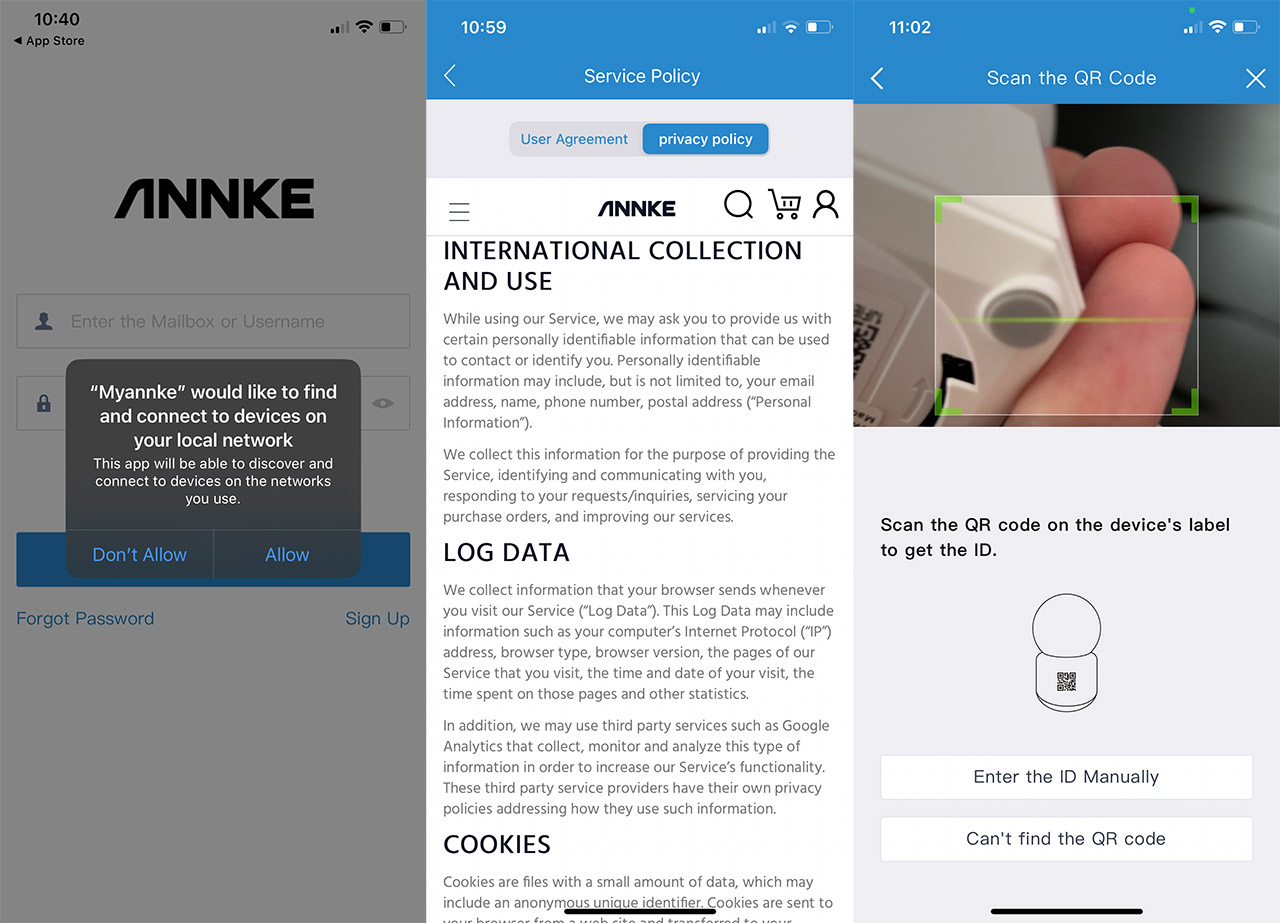
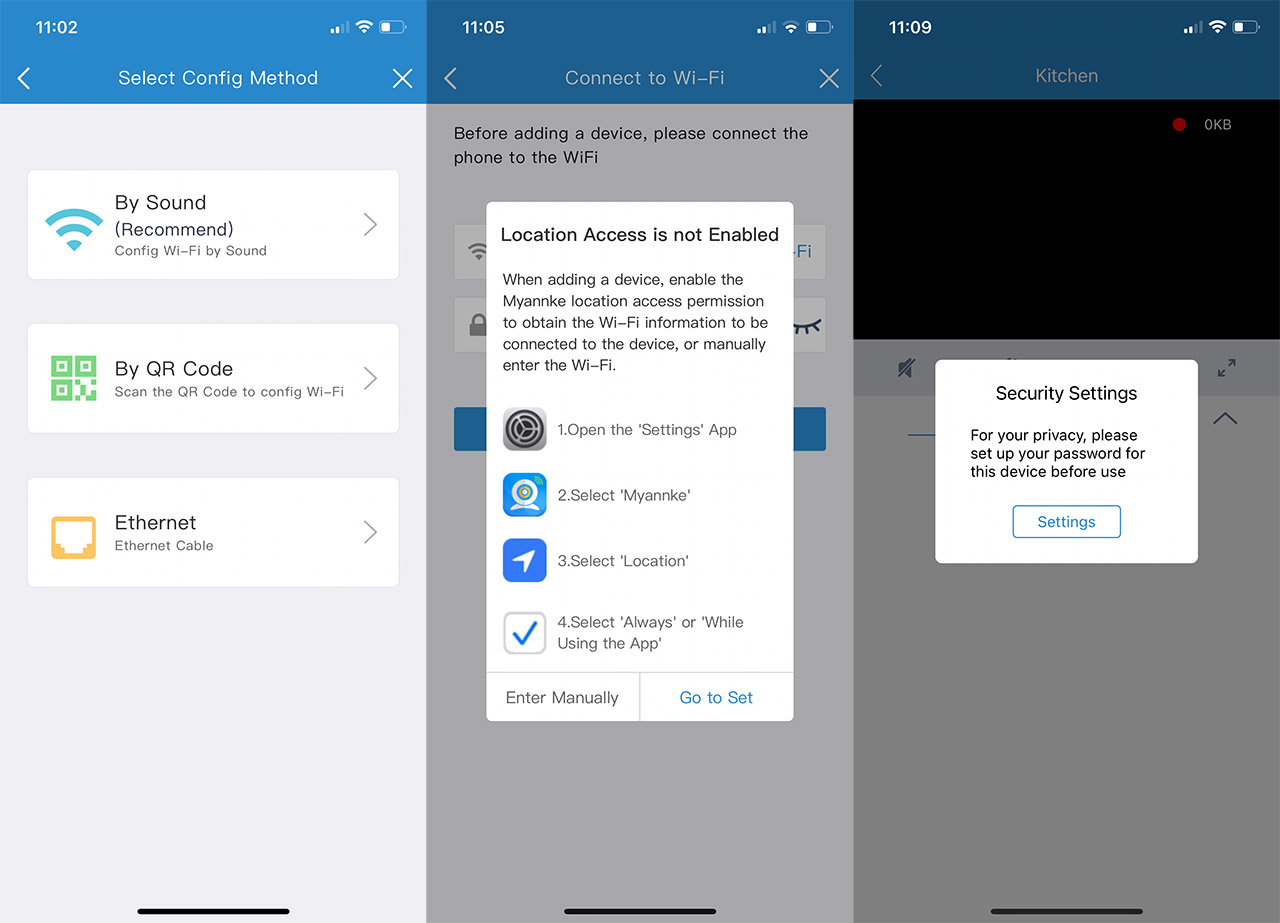
Then it also asked to access the camera to scan the QR code from the camera label. After that, I could choose between three methods of pairing, one using the sound, the other using a QR code and the last via Ethernet cable. The last one is obviously not supported since there is no such port on the ANNKE Crater Pro, so, since it was the recommended one, I went with the sound method. And there it was, the needed permission to access the location which I politely declined.
The great news is that I was given the option to enter the WiFi credentials manually which is not something other manufacturers offer as an alternative and what happened next was very unexpected. Apparently, I had to keep the phone close to the microphone on the camera and then a sound would play which would contain the data for the pairing. This had to be the coolest way I have ever seen a devices pair to an app. The last steps are to set up a password for the access to the camera and to check for an available firmware update.
The Mobile Application
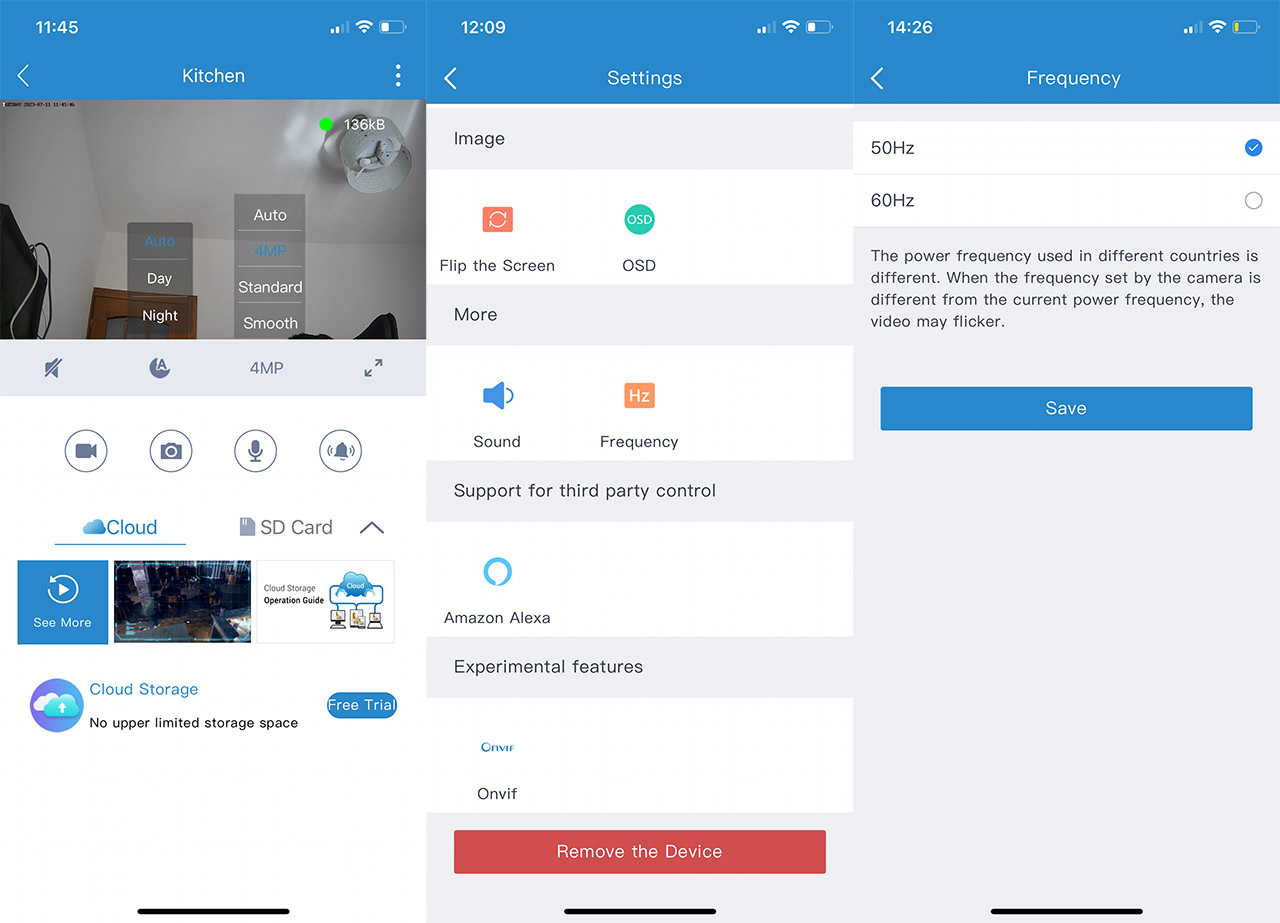
The top half of the screen is covered by the live footage captured by the ANNKE Crater Pro and you can adjust the image quality to the full 4-megapixel, to Standard, Smooth or Auto. It’s also possible to switch between Night and Day time view and enable the microphone. A bit lower, ANNKE has added four icons which allow you to capture a photo, record a video, enable the microphone for two-way conversation or trigger the alarm.
The bottom half of the window will show the videos and photos stored on the SD card or on the Cloud servers. I thought that NVRs weren’t an option, but scrolling through the Settings, I realized that the ANNKE Crater Pro actually has ONVIF support, although in experimental (beta) form at the moment.
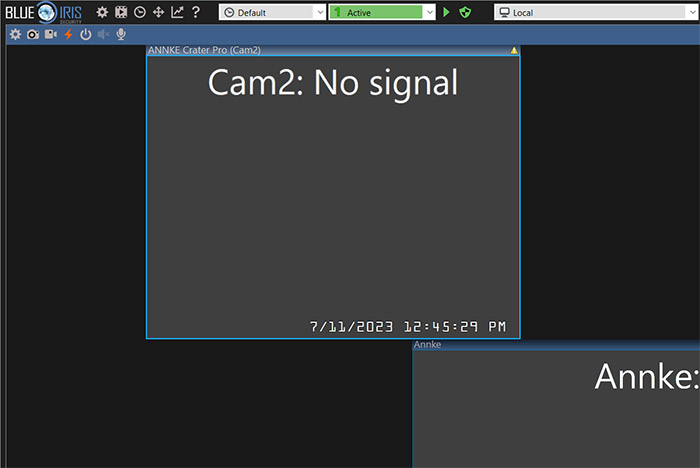
This means that it should work with a system like Blue Iris, right? Yes and not quite yet. After enabling the ONVIF feature, Blue Iris was able to detect it and I could also enter the username and password. So, in a sense, the connection has been successful, but even so, I got the ‘no signal’ message, which means that most likely, the ANNKE Crater Pro works only with ANNKE NVRs.
Some other interesting settings that are worth mentioning are the option to change the frame rate of the footage (50 or 60Hz), to enable Amazon Alexa, Flip the screen, Share the device and more.
What about the Pan/Tilt movements? To remotely adjust the camera angle, it’s necessary to simply swipe on the live footage window. Depending on the WiFi connection, the action can be registered quickly, leaving a delay of about a second before the camera moves.
The Image Quality
The ANNKE Crater Pro relies on a 4-megapixel lens that has a 1/3″ progressive scan CMOS, a viewing angle of 70 degrees and the resolution can go up to 2,560 x 1,440p. To check how well the camera is able to reproduce a good image quality, I decided to put the camera in the kitchen, where the light intensity wasn’t very high. Since we’re dealing with an indoor camera, the less-than-ideal lightning conditions are to be expected, but the ANNKE Crater Pro behaved relatively well.
My monitor is 1440p, so I checked the video that’s uploaded on YouTube in full screen. I can tell that there is a very noticeable amount of noise, especially the farther I would go from the camera (the colors are also a bit undersaturated). The footage is obviously not crystal clear, but then again we are dealing with a surveillance camera, so the idea is to focus mainly on identification and motion detection. Returning to the footage, we can see that there is some slight distortion at the edges, but it’s barely visible unless you actively search for it. Now let’s talk about the night vision.
In the video that I attached, there was very little light reaching the lens, with the exception of the temperature LED from the AC, so the performance is more than decent. We can see lots of details and the focus happens quickly even when moving the camera around at a faster pace. Yes, there is some noise, but if you need this camera to check a certain room in your home, it should be able to ‘see’ every corner almost as clear as during the day. Let’s talk a bit about signal strength.
Considering that the ANNKE Crater Pro can connect to the 5GHz, it definitely is better than the 2.4GHz radio, right? Well, yes, but the camera is still limited to the 802.11n standard, so it does not make use of the 802.11ac. This means that despite the resolution bump, the bitrate is still not that high (the videos seem to be very compressed). The good news is that when the camera was positioned 30 feet away from the router, on a different floor and with two thick walls dividing them, I still got a very quick reaction from the ANNKE Crater Pro when swiping on the screen.
Motion Tracking and Motion Detection
ANNKE does not offer a dedicated section for the motion detection and tracking, and instead, to enable any of these features, it’s necessary to go to the myANNKE app > Settings > Notifications.
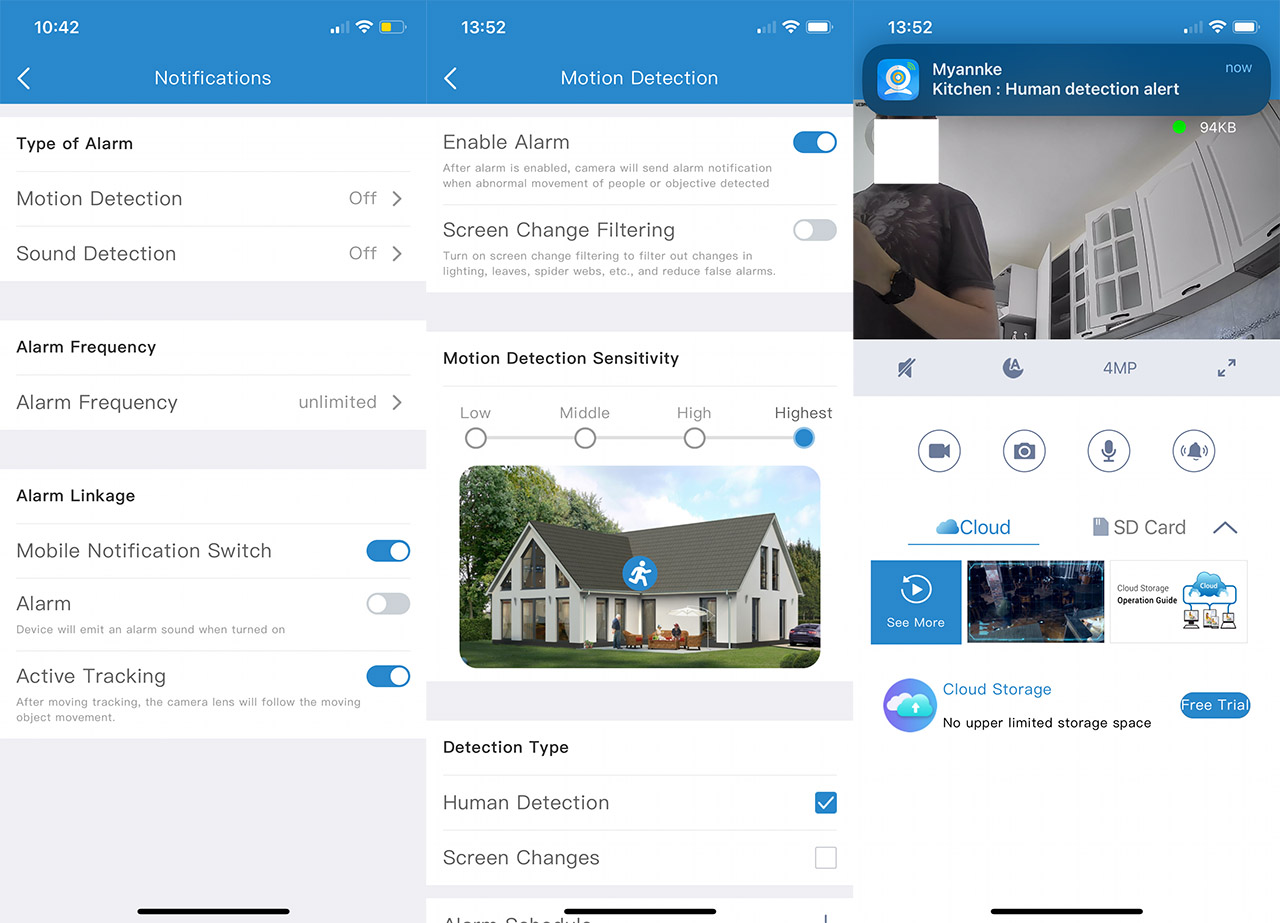
Here, it is possible to enable the Motion Detection and then there’s a suite of options to fine tune the entire process. You can set the sensitivity which should be high if the area of interest is far away (more than 20 feet) and to low if it’s near the lens. There is also the option to enable the Human Detection and/or the Screen Changes. The latter is obvious, so let’s talk a bit more about the former. It’s very reactive and does detect a person that enters the area.
Additionally, I noticed that even if I would cross my hand in front of the camera, it could still tell that it was a human – this happens with objects as well, with the exception of ampler movements, such as those from curtains. How quick was the notification? I didn’t see any delay, so the moment the camera detects any changes, it will almost immediately send a notification towards your phone. Obviously, it is mandatory to have a reliable WiFi connection for everything to work flawlessly, but it goes to show that the processing is done at the device level, lowering the latency significantly (to see what happens when you don’t do things in this manner, check the Reolink cameras and their 4-5 seconds delay).
The Motion tracking can also be enabled from under the Notifications and you don’t really get additional settings, just the switch-on button. How well does it work? It depends on how close the subject is to the camera and how fast the movement is. About 5 feet in front of the lens, the ANNKE Crater Pro will try and keep up with the movement, but you’re most likely be faster than the motors can react. You can see it in the video. But, if the person is about 10-15 feet in front of the camera, then the tracking is actually quite persistent and, as you can see from the attached video, the motors would react quickly and keep the lens on the moving subject.
The Conclusion
I am excited to see so many bigger brands trying their hands at delivering budget-friendly indoor cameras. And, while the first ANNKE Crater had the role of capturing our attention, the Crater Pro is definitely a better, more mature device. The resolution is higher, there is now motion tracking and, hopefully in the future, the ONVIF will become a full fledged feature, allowing the camera to work with third-party NVRs. I am not really a fan on the microUSB port, but other than that, the ANNKE Crater Pro is a fairly capable inexpensive indoor-suitable camera.
ANNKE Crater Pro
-
Pros
- 1440p resolution.
- Decent night vision.
- Motion tracking + fairly accurate human detection.
- Support for up 128GB local storage via microSD.
- Charging brick provided in the package.
Cons
- The decision to use a microUSB port for powering up the camera.
- Some wobble between the top side and the base.
Mark is a graduate in Computer Science, having gathered valuable experience over the years working in IT as a programmer. Mark is also the main tech writer for MBReviews.com, covering not only his passion, the networking devices, but also other cool electronic gadgets that you may find useful for your every day life.