
While not the first to make liberal use of autonomous algorithms, the HOVERAir X1 may actually be the first device to open the door for wide adoption of drones, going beyond the mere scope of a hobby device. And that’s because it’s one of those few ‘AI done right’ devices on the market (trust me, most is just fluff and nonsense).
| HOVERAir X1 | |
|---|---|
| TheHover.com | Check Offer |
| Amazon.com | Check Product |
I admit that my first reaction was why would anyone want to be limited by what they can do with their drone. But then it hit me. I don’t have to learn how to do those cool shots, the HOVERAir X1 does everything for me and there is no learning curve at all. So what was I concerned about again? This is awesome.
Indeed, the HOVERAir X1 is able to follow you around, it can zoom out, orbit around you and there is even a bird’s eye view included. More than enough for video creators and the great thing is that the drone is both smaller and lighter than expected, while also maintaining a very stable flight path. By small and light I mean actual pocket size because the HOVERAir X1 can be folded and carried around in a pocket.
The tracking system that the drone uses is camera-based, so no GPS or any other satellite tracking systems, but, as you will see in the following sections, the device can get very close to the subject (you), while also managing to steer clear of obstacles. Obviously, the main disadvantage is the lack of freedom on maneuvering the drone the way you want, but, to be honest, most people don’t have the skill or the time to learn the manual controls to get worthwhile footage with a regular drone. Without further ado, let’s put the HOVERAir X1 to the test and see how it performs.
Design and Build Quality
Due to constant heavy regulations, the majority of the drones have shrunk significantly and have gotten more lightweight, but the HOVERAir X1 has taken it a step farther. The device weighs just 4.4oz (or 125g) and that taking into account the battery as well, so it’s very, very lightweight – we will see how it handles wind.
The small self flying camera (or drone) will come folded in the package and you do need to spread its wings to let it fly. But the good news is that it’s very easy to carry around and, considering that it measures 5.0 x 3.4 x 1.2 inches (12.7 x 8.6 x 3.1cm) when folded, it can even fit some generously-size pockets. Of course, since we’re dealing with such a lightweight device, the entire case is made of plastic and it’s not the hard, heavy type, it’s the soft, more flexible one.
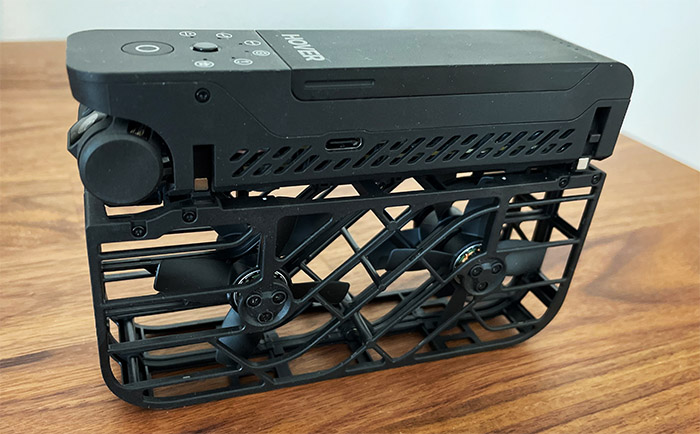
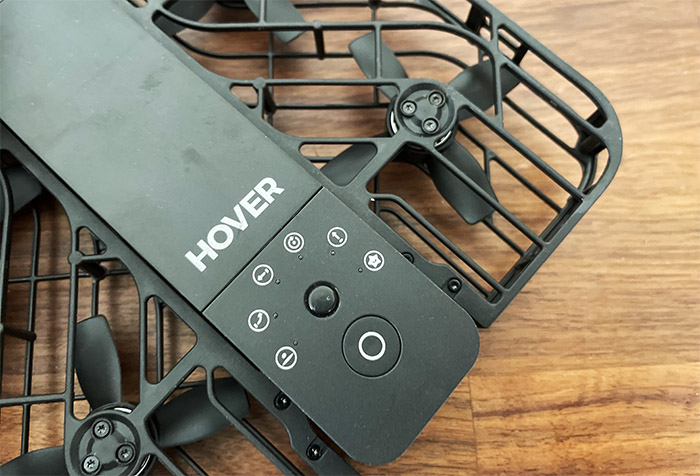
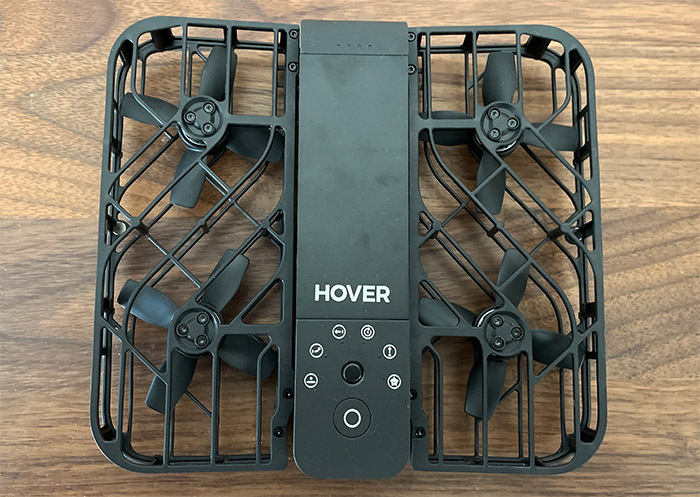
I also saw a small magnet that keeps the two wings together, so there is no risk of them opening up in the bag and get damaged. Each wing contains a couple of rotor fans, but is it possible to replace them? Well, I could see some small screws with a star pattern head, so I guess you should be able to take the plastic out and replace the fans in case they get damaged. When fully opened, the wings will stay at an angle and you can see the four small magnets that keep them into place. And now let’s focus a bit on the main part of the device, the narrow plastic piece from in between the wings.
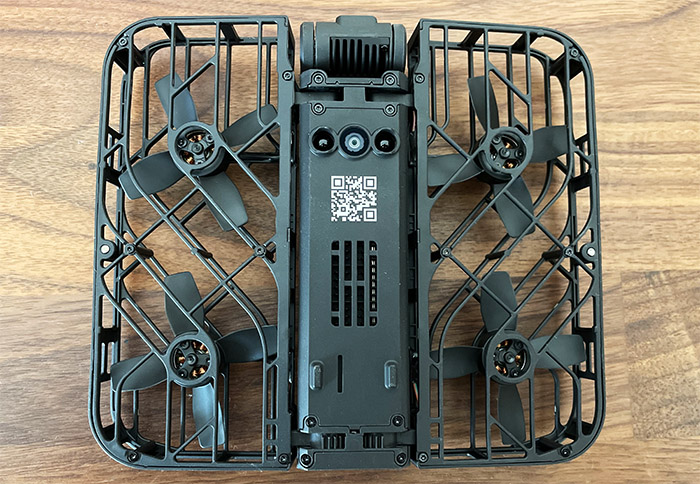
If we look from the bottom, we can see some heat ventilation openings and perhaps the most important section is where the downward vision system is embedded into the case. The system consists of a centrally-placed camera which has the role of keeping the subject always into focus even when the drone is high up. On the sides, there are two IR LEDs which work as ToF sensors to get an approximation of the distance between the user and the flying camera.
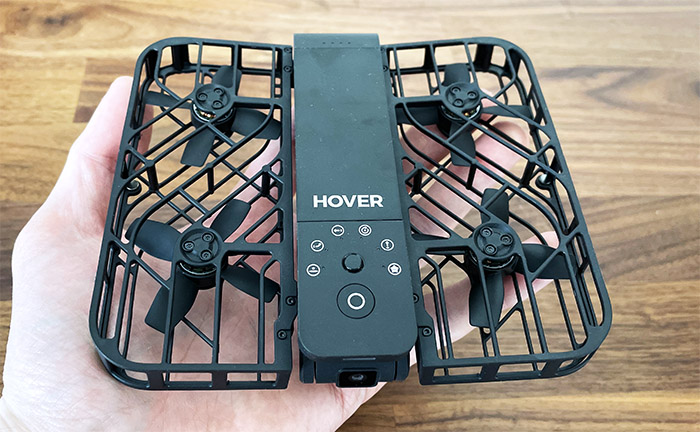
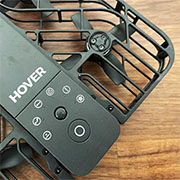
Considering that this device hovers the line between professional flying assistant and cool flying drone toy, I suppose the VIO system is more than enough. This way, you should be able to fly the device in enclosed spaces without needing access to GPS or any similar system. At the top, the HOVERAir X1 has positioned its controls. There are two main buttons and several LEDs surrounding them. The first is the Power button which also has included the Takeoff function and then there’s the Mode button which will toggle between the available modes – the LEDs will light up accordingly.
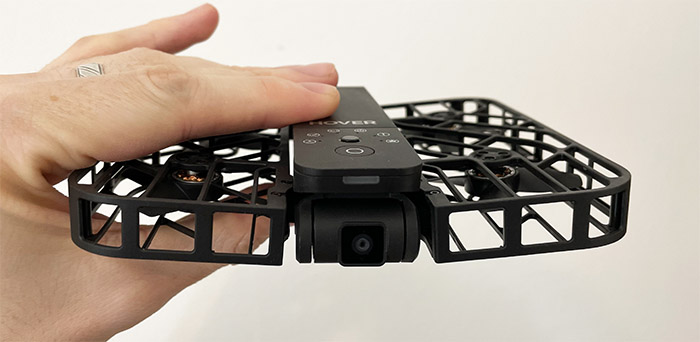
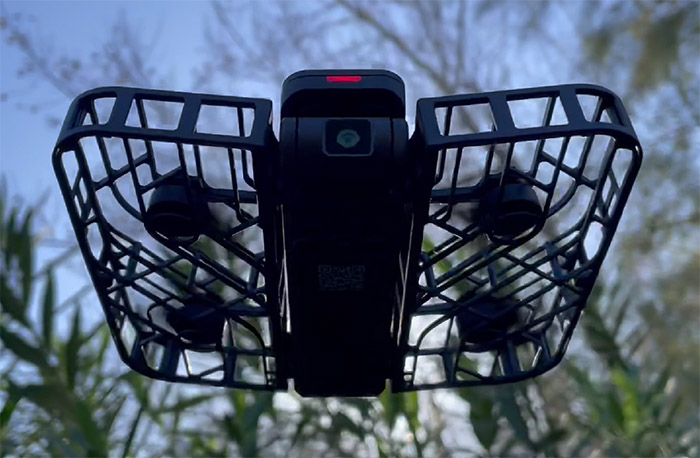
I first missed them, but at a close inspection, there are four other LEDs near the rear of the flying camera and thee have the role of indicating the remaining battery amount (it’s in increments of 25% – one quarter per LED) – I later realized that this is the battery itself. On the front, the developers have added a gimbal camera. This small camera will always look for your face and it will stabilize and adjust the flight path in order to follow you around. There is also an LED above the gimbal camera which will flash green until the HOVERAir X1 is paired to the phone, at which point, the LED will turn solid green.
The Controls
I am going to talk about the physical controls, the buttons that are positioned at the top and to be more specific, the Mode button which, while seemingly limited in scope, it does allow the user to enable various functions without having to rely on the app. The default mode is the Custom Snapshot which will either capture a photo of you or a group of people – similar to how the selfie stick would work.
The first icon + LED from the circular suite of icons indicates that the drone is in Hover mode (the HOVERAir X1 simply stays in the air awaiting a command), the second is the Zoom Out mode where the drone simply goes farther from you while maintaining a steady flight path. Then, there’s the Follow me mode where the HOVERAir X1 simply follows you keeping a distance of a few feet (it cannot go father than 12.5 miles per hour or 20km/h) and the Orbit mode where the drone goes around you to create a panoramic-like video shot.
Lastly, we have the Bird’s eye mode which rises the drone very high above you. It’s nice to see that we get so much control without having to take out the phone, but let’s get also get a look at the app to see what it has to offer.
The Mobile App
The HOVERAir X1 doesn’t really add that much in terms of control and it makes sense since the device is very close to autonomous, but it does offer a way to help the user to better understand how to use the self flying camera. Before that, let’s talk a bit about the pairing process.
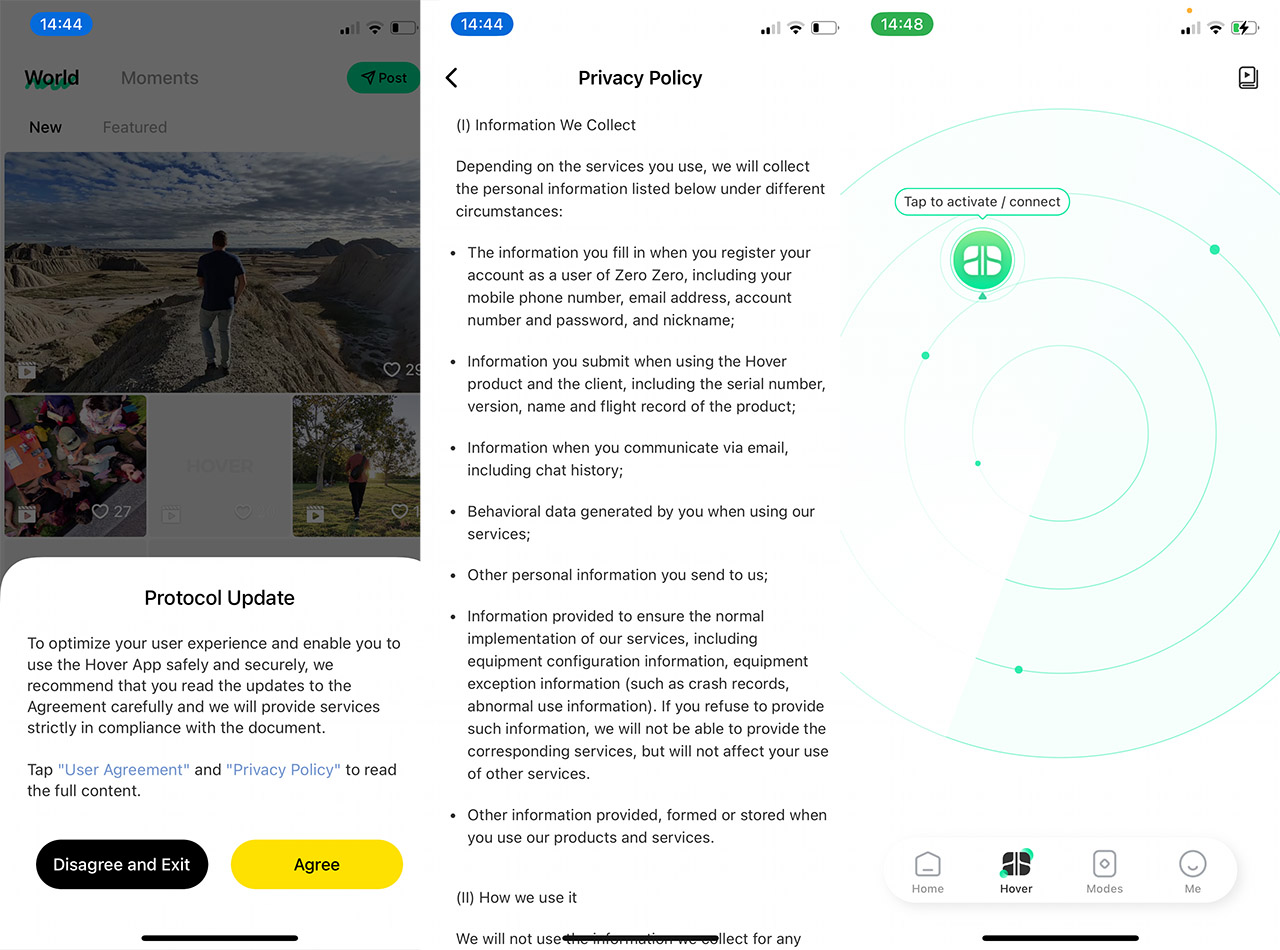
After taking the HOVERAir X1 from the package, you need to first make sure that the battery is fully charged and then press and hold the Power button until the LED turns green and you hear a voice prompt. Then, open the app and accept all the terms and conditions since there is no way around it. And yes, there is some data collection + there is the option that the data can be disclosed with their affiliated third-parties (which can also include mergers, acquisitions and so on). Everything that doesn’t happen on your own server is a bit of a privacy nightmare right now, but I digress.
Moving on, after all that, I was taken to the Home page of the app which is going to be populated by videos taken by other users (your own Featured Works will appear here as well), but what we’re interested in is the Hover section (second option at the bottom). As long as the Bluetooth is enabled on the phone, the HOVERAir X1 should automatically be detected here and to pair it, just follow the steps that guide you. That’s about it, you can now move to the Modes window which includes the Basic ones which are the same that are offered using the physical Mode button.
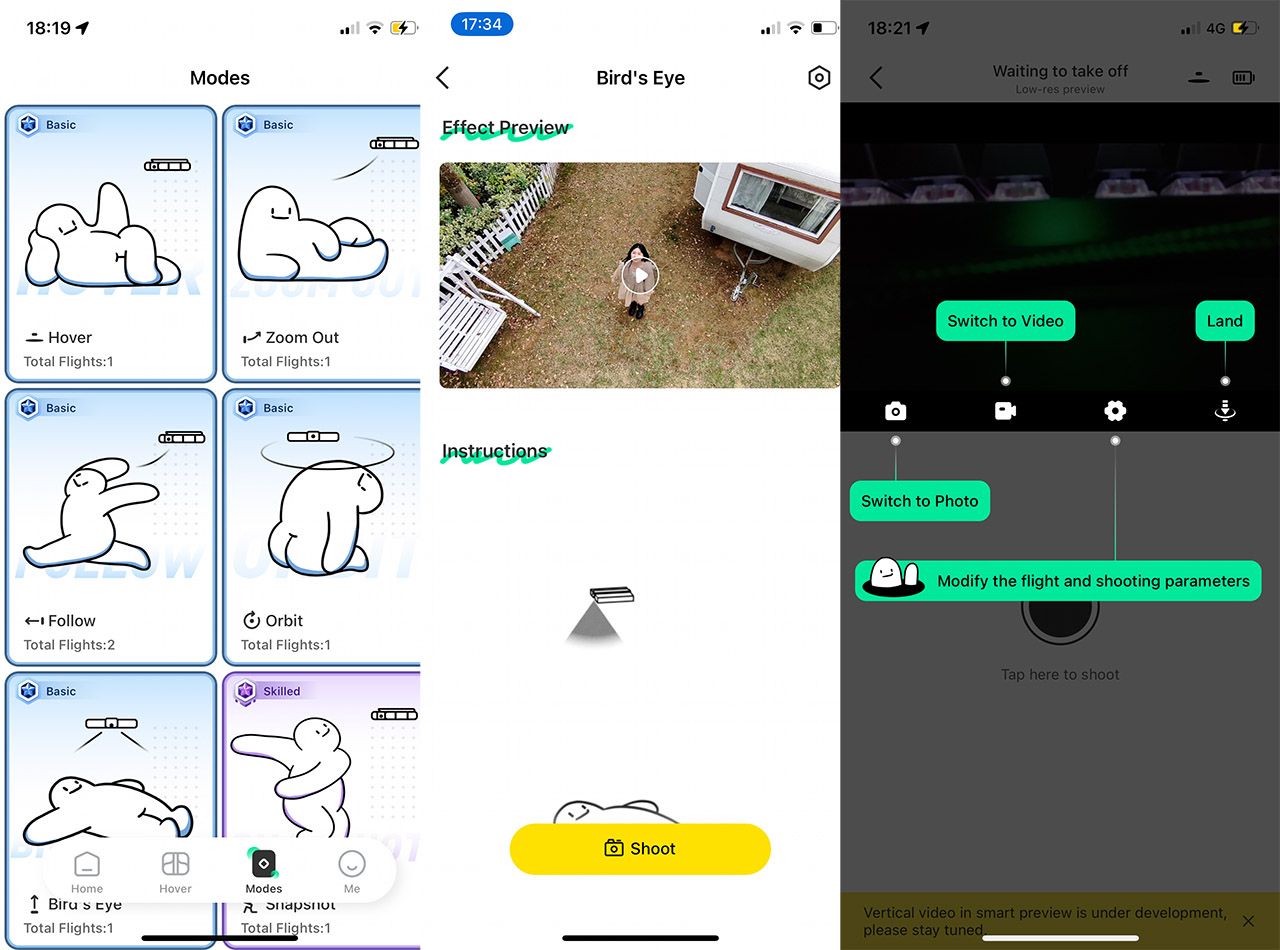
There are a few more, such as the Dolly Track and the Manual Control (these are considered Skilled-level modes). The cool thing is that each effect has a Preview video and an animation so you know exactly what the drone will do. Additionally, there is a Me section and here, what we’re interested in is the Academy because it has video guides and tutorials for Beginners, a better view of the Flight Modes, as well as more insight about the Functions of the HOVERAir X1. Here, it’s also possible to update the firmware, but the app will quickly let you know if a software upgrade is available.
The Accessories
The one accessory that I got in the package is a charging station which can charge up to two batteries at the same time, and, as expected, I also got an extra battery. This station relies on USB-C for power input which is excellent and there are status LEDs on each of the two batteries. As I mentioned before, we’re dealing with four LEDs, each one lighting up for every 25% of battery that’s charged. And there is also a button which will light up the LEDs when you want to check their status because they will turn off at some point to preserve the battery life.
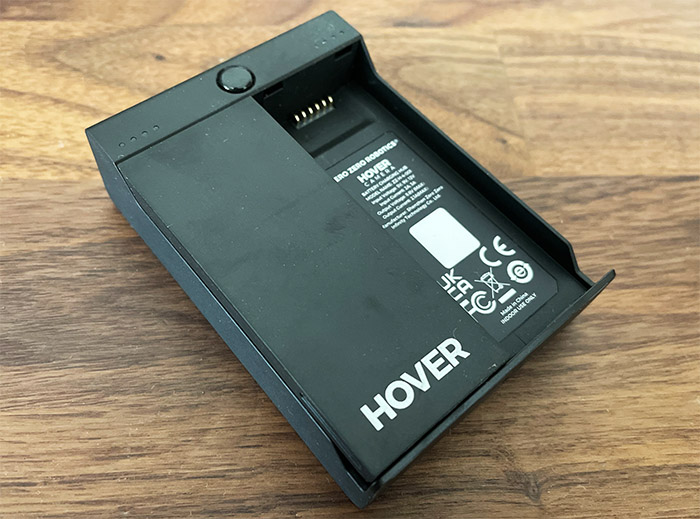
From what I can tell, the batteries are proprietary and you will have to get them from the manufacturer, although, I am fairly sure a couple of them will last a long time. Additionally, I noticed that there are a myriad of aftermarket accessories available and you can check the current list.
The HOVERAir X1 in action
The idea behind the HOVERAir X1 is to require as little user input as possible, so all you need to do is power on the small drone, choose the mode using either the physical button or using the app and then press the Start button (Power button). There are a few particularities, of course. First is that the HOVERAir X1 launches and lands in the palm of your hand. And, if you follow the instructions, then you know that the hand needs to be extended in a manner as to ensure that the small self flying camera can see your face.
That’s the second important particularity – the face tracking algorithm is crucial to the correct function of the small drone. And I do have to emphasize that the HOVERAir X1 follows you around and is not designed as some weird spying tool. When it can’t ‘see’ you, the HOVERAir X1 will simply hang in the air awaiting for you to get back in its field of view. Now, let’s talk about how well designed is this tracking mechanism.
There are a few modes which highlight this aspect very well, such as the Follow me mode and the Orbiting mode. The area where I flew the drone was a camping site which, unfortunately was closed to the sea because the mighty Ciaran storm had just swooped in. But it is important to know that the winds were still stronger than usual, so we got to see just how well the HOVERAir X1 can handle stronger winds. The video shows that the HOVERAir X1 handles wind well and yes, it does have to correct its path several times, but despite its small size and its light weight, it does surprisingly well.
Now, about the face tracking aspect, I tested it with and without sunglasses, and in both cases, the drone had no issue identifying me. I have mentioned before that the small drone can follow a subject as fast as 12.5 miles per hour but considering the wind, I am not sure it would have been able to properly follow me. Instead, I walked in a more alert manner and it had no trouble following me around, even if I did some sharp turns. I also tried out the orbiting mode and it worked well every time except for one situation when I did not estimate the distance properly and the poor drone ended up in a small tree.
It survived, so don’t worry, the device remained unscathed. I also tried the zoom-out mode and it was fun to see the drone up high (about 16 feet or 5 meters). Again, it handled the wind fine, so the stabilizer works really well even in more difficult conditions. I should also mention the manual mode which offers you a way to control the drone using the mobile app – up, down, rotate, left and right. It’s obviously good to have a way to manually control a drone, but know that it doesn’t really compare to the dedicated remote controls that come with other specialized drones.
Is that a bad thing? Not really, because the manufacturer has made it very clear what the purpose of the device is and even were very careful on calling the HOVERAir X1 a self-flying camera. And that’s exactly what it is. But there is a potential shortcoming about this device and it’s the video quality. The camera is able to capture decent photos and the video output can be 2,704 x 1,520 (30fps), 1,920 x 1,080 (60fps) or 1,920 x 1,080 (30fps) for the HDR mode. It sounds good on paper, but, as you saw in the video, the quality is about the same as on an entry-level smartphone.
Don’t get me wrong, it’s a great camera considering how small the drone is and its price tag, but it could have been a bit better. Especially since the target audience will most likely want to use the drone footage for their social media accounts.
The Battery Life
Since the ever changing laws pretty much forced the manufacturers to make the drones smaller, the direct consequence was that the batteries had to be smaller as well. And it’s normal to get about between 10 to 20 minutes, depending on the size of the device. The HOVERAir X1 falls in the very small category and the manufacturer claims that a single battery charge should give you about 11 minutes of flight time. It’s actually a legit claim, even if in my test, the battery went to 0 after about 8 minutes.
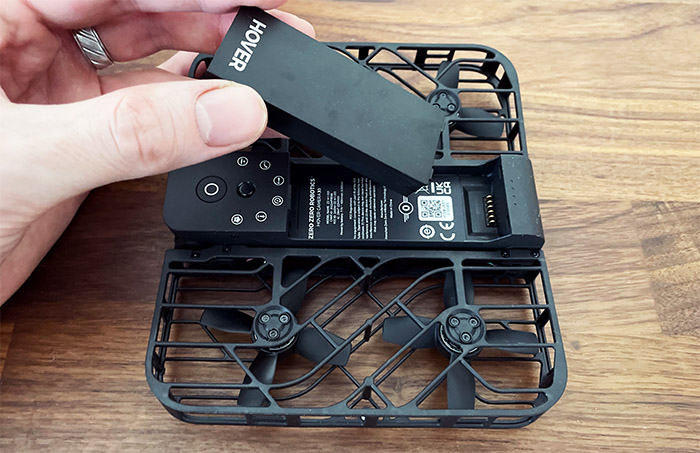
I say that because you need to take the strong wind into account since the drone had to use more energy to keep itself on the path. I did not mention it before, but you can swap the batteries on the HOVERAir X1 with relative ease. That is if you have very strong nails because you will have to detach it from the top part of the device – putting a new battery is a way simpler process.
The Conclusion
You may have noticed that the manufacturer refers to the HOVERAir X1 as a self flying camera and not as a drone. That’s a better term because the device was designed to work autonomously as a camera assistant more than anything else. And after testing it, I think that the developers definitely nailed it. The tracking works very well, the camera is properly stabilized and there is very little input required from the user. And, while one may see these presets as limiting, there is a healthy amount of cool effects available (plus, there’s the option for more to come with future updates).
I also really liked that you’re not tied to using the app all the time and it’s possible to get the video effect you want with the push of a couple of buttons. So, overall, it’s a very well thought-out device with a clear purpose which it achieves with ease and that’s a rare thing nowadays especially when ‘AI’ is involved.
Hover Air X1
-
Pros
- Portable - can fit some generously-sized pockets
- The preset modes are very useful
- The image stabilization is excellent
- Very easy to operate - it's very close to autonomous
- The battery can be easily replaced
Cons
- No MicroSD card slot
- You need to be careful about your environment since the small drone will collide into tree branches
Mark is a graduate in Computer Science, having gathered valuable experience over the years working in IT as a programmer. Mark is also the main tech writer for MBReviews.com, covering not only his passion, the networking devices, but also other cool electronic gadgets that you may find useful for your every day life.