
From the series of curious, yet seemingly simple questions, a user recently asked me how to find the running DNS servers on the network and this one is a bit strange because I immediately assumed that the DNS queries were the actual focus. There are some fine methods of doing so, even though the IPv6 has made things a bit more difficult than before (with the IPv4).
At the same time, it was entirely possible that the person was curious about whether the devices from that particular network were connected to a local DNS server or whether they were using public DNS servers. It isn’t that difficult to find out, regardless of the used OS, so let’s explore some of these options and hopefully, cover other questions about DNS as well.
Local or public DNS servers?
If you don’t know what DNS is, I will keep it short and simple. The DNS (Domain Name System) has the role of translating the hostname that you want to access to the IP address associated with that hostname. This way, you don’t have to type weird numbers. Obviously IPv4 has simpler numbers, while IPv6 made it a bit more complicated, but the idea is that the DNS keeps us sane.
Now, most people don’t bother changing the default settings from their router or client device (be it a Desktop PC, a laptop, a smartphone or a smart fridge), so the DNS server that they use is most likely a public one. Most rely on the Google Public DNS, using one of the following IP addresses: 8.8.8.8 or 8.8.4.4. And there’s nothing wrong with that, especially if the devices connected to the network simply require Internet access. But the interesting thing is that the routers provided by the ISPs can have their own DNS which seems to be used for tracking purposes.
Not that Google is a saint in this regards, but at least it’s fast, very fast. One other reason to get your own router is that it sometimes comes with its own DNS from the manufacturers themselves. For example, the Asus routers use the ASUS servers and it can been seen (and changed) under DDNS. It even has the possibility to encrypt the DNS queries using HRRPS/SSL Certificate.
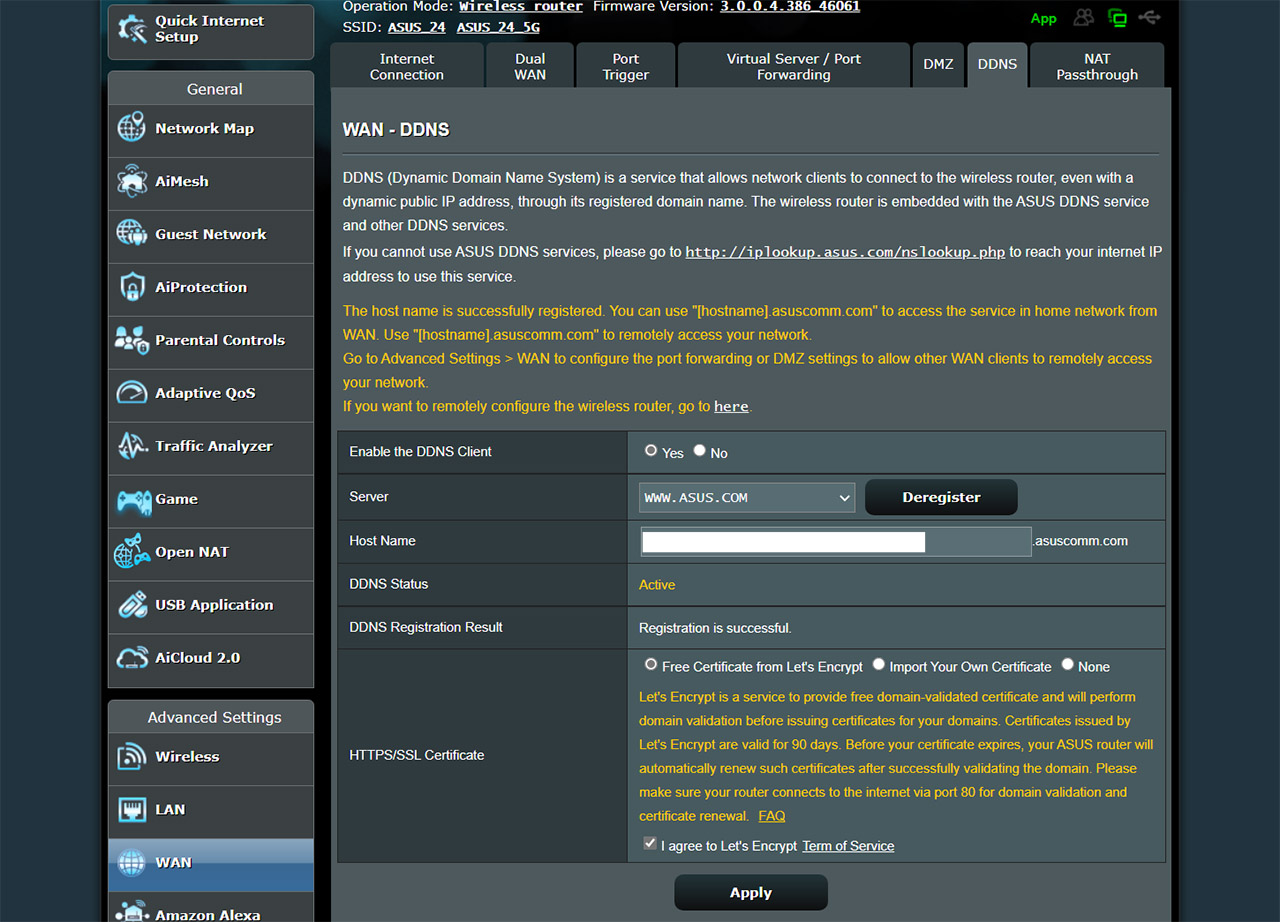
Funny thing is that this option is not on by default, you need to do it yourself (Heh, want privacy? Then enable it yourself. Right, Asus? Right?). What about the private DNS servers? Why would you need those? They’re mostly used in businesses and corporations, where there are lots of local IP addresses and you can’t really expect everyone to remember them. So, a private DNS not only solves this issue, but it will also be faster to quickly access local resources. The best practice that lots of seasoned admins suggest is to use local DNS that forwards to an external DNS.
How to check which DNS servers are used by a specific device?
In a home, the router should push the DNS server towards the client devices and not each device to use its own. In some cases, it makes sense (for specific applications), but in most situation, it’s just going to cause issues in the long run. To check the DNS server used by your router, you will need to access the GUI and, since I had an Asus router installed, I decided to use it for this presentation.
- 1. Access the GUI: Go to the IP address or enter router.asus.com in the URL (for a concrete presentation on how DNS works). The IP address of the newer Asus router is 192.168.50.1.
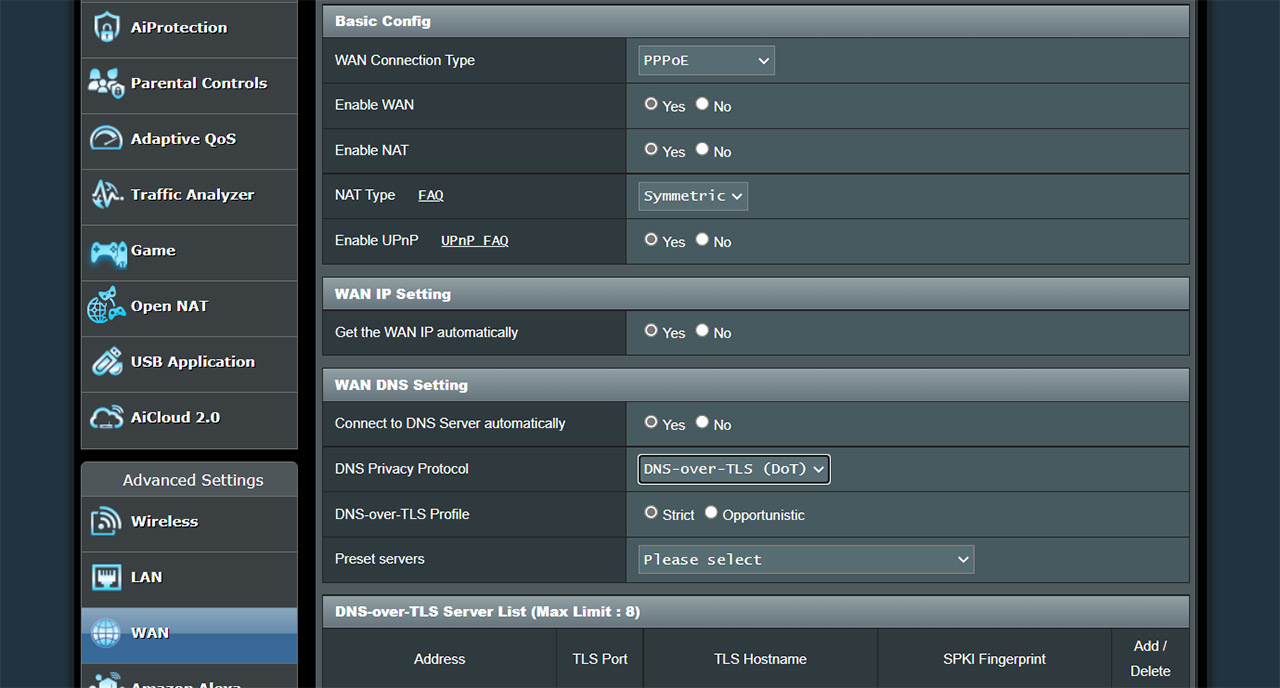
- 2. Go to Internet Connection: This section can be accessed by clicking on WAN (under Advanced Settings and then Internet Connection from the top).
- 3. WAN DNS Settings: By default, they should be Yes for connecting automatically to the DNS Server and None for the Privacy Protocol – for privacy reasons, you can change it to DNS over TLS.
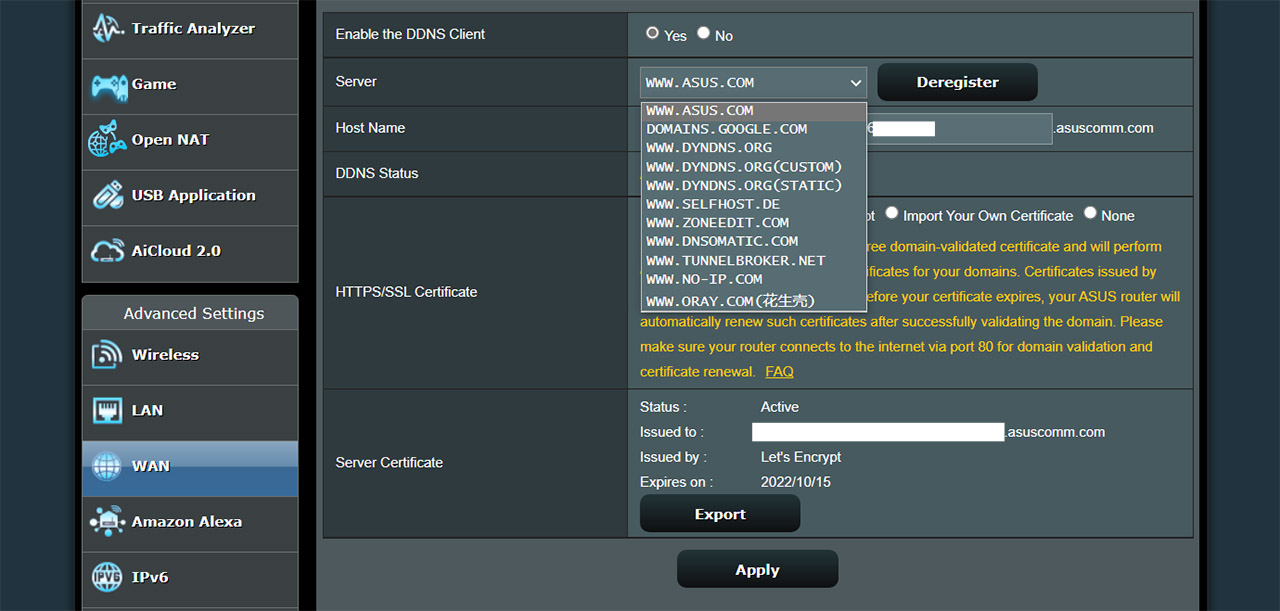
- 4. Go to DDNS: From the top menu select DDNS and here, you’ll be able to see that the router is registered to use the ASUS.com DNS server. You can change it to whatever you like, but regardless of your choice, then please consider adding a HTTP/SSL certificate for a bit of privacy.
If your client devices do not use the same DNS as the router, then you can check it in the following ways:
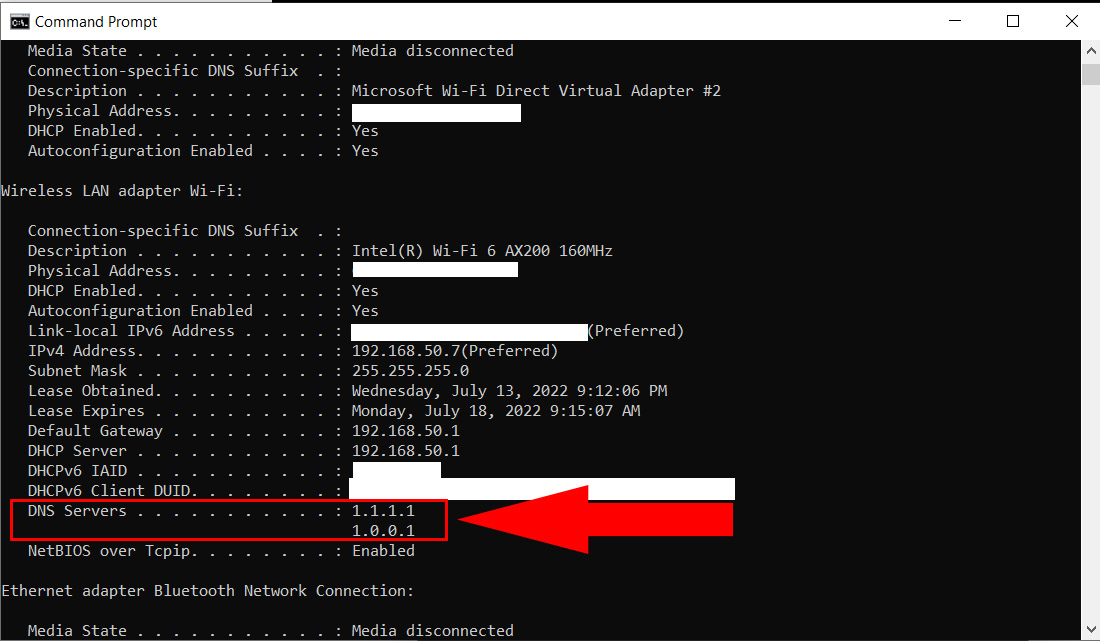
- Windows OS: Open the command prompt (search for cmd and press enter) and then type ipconfig/all. Scroll down until you can find the two DNS addresses.
- Linux OS: You will have to check the content of the /etc/resolv.conf, so type cat /etc/resolv.conf.
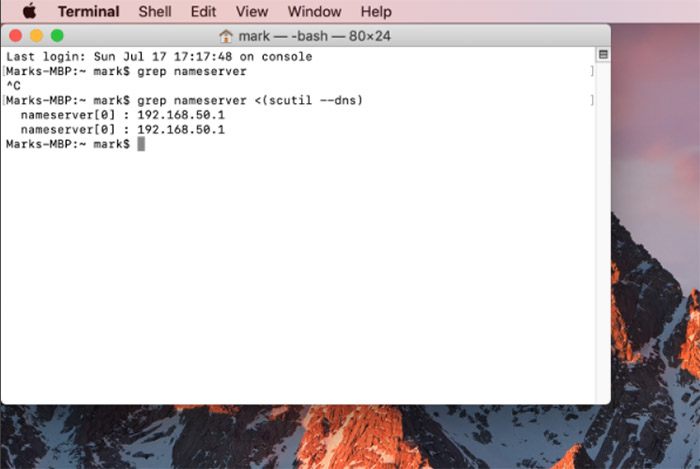
- MacOS: Open the Terminal and type grep nameserver <(scutil –dns). As you can see the MacBook actually uses the Asus nameservers, while the Windows PC does not (that’s how I set them up).
How to check the DNS queries in your network?
Wireshark
You knew I was going to mention Wireshark and you were right. This tool is phenomenal for packet capture since it has a built-in DNS filter (port 53 – DNS for TCP and UDP protocols). As you will see, Wireshark will provide you with all the data you will need to identify the devices that are making requests on your network. Furthermore, if you use the Promiscuous mode, you should be able to see everything – be aware that not all interfaces will give you want you want even in this mode.
The problem with Wireshark is that you can only see the device itself and not the app that makes the requests from that device, but you should still get some idea about what’s going on on your network. Be aware that Wireshark is great for short-terms data capture and will consume a lot of resources if you want to use it continuously for longer periods of time.
PiHole

PiHole is awesome and can do a great deal of things, including ad blocking and yes, you can even check out the DNS queries on your network. But, it works in a similar manner to Wireshark disclosing only the client devices and not really the apps that do the requests themselves. Still plenty useful though.
TCPDump
Just like the Wireshark, TCPDump sees the traffic on port 53 (which makes sense since we’re interested in the DNS queries) and, as its name suggests, you get to see all the TCP data ‘dumped’ on your screen. That’s why some users prefer to forward the packets captured by TCPDump towards Wireshark since it makes the data far more legible (unless you need to run complex data analysis).
Mark is a graduate in Computer Science, having gathered valuable experience over the years working in IT as a programmer. Mark is also the main tech writer for MBReviews.com, covering not only his passion, the networking devices, but also other cool electronic gadgets that you may find useful for your every day life.