
Lately, we’ve witnessed an increased interest into releasing easy-to use routers, with a really user-friendly setup and configuration (although lacking in terms of ports and some software features). Following this pattern, last year, two interesting mesh WiFi systems have been released (Luma Home Wi-Fi System and Eero Home WiFi System), also featuring the simple setup and configuration but, unfortunately, at an even higher price.
Now, these systems do their job really well, you get a single unit to connect by wire to the Internet and the next two or three units will further send the signal throughout the house, thus eliminating any remaining blank spot. We have seen the Eero system in action and we were pleased by the result.
If you have WiFi-dead spots in your home and can’t afford such systems, fortunately there are alternatives.
We’re pretty sure most of you have an old router tossed in a drawer after you upgraded to a newer, more capable one, but, which unfortunately can’t really cover all of the rooms (especially if you have thick concrete walls). So, if you’re wondering how to extend your WiFi network, that old router can be the solution.
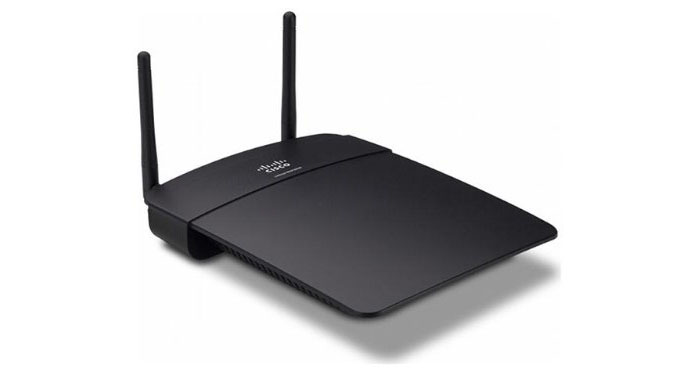
Note: If you don’t own an old, unused router, you can buy a cheap router and use it to expand your WiFi network. A good example is the TP-LINK TL-WR841N, which is a capable and inexpensive router (especially with an open source firmware, like DD-WRT). You can also have a look at the famous Linksys WRT54G.
From here on you have several options, you can either use the router as a wireless repeater, a wireless access point or to create a wireless bridge.
What is a wireless access point?
A wireless access point is a piece of technology that allows you to convert a wired LAN connection to a wireless network. Basically, this means that you give wireless capable devices a way to connect to your wired Internet network.
Access Points are used quite often in a large office, where a good Internet connection will make a big difference in productivity; you can also find this technology implemented in coffee shops or airports using the name of hotspots, but it’s most commonly used in homes, in the form of wireless routers.
If you didn’t know already, the wireless routers have – obviously – router functionalities merged together with wireless access points capabilities.
While you could purchase a dedicated Access Point, it doesn’t really make sense, because (as seen before) wireless routers can operate as Access Points and, surprisingly, a router will be cheaper, since the market demand is better and the competition more fierce (therefore lower prices).
So, striping away some of your old router’s features will convert it to an wireless access point which you will then use to expand your network and we will next show you how to do it.
How to use a router as an Access Point?
As we stated before, a wireless router without the routing capabilities and the DHCP server would just be an access point. Also, a wireless router without an access point would just be a wired router.
Another thing you should know is that if you have a really old router that only supports the 802.11g technology and lacks the newer N or AC standard, you should expect that N-clients who connect to the G-access point will receive 11g performance and speed.
The other way around, if 11g-clients connect to an N-router (in mixed mode), generally won’t have an impact to other 11n-clients connected to the same router. But, if you have 11b clients, you should not mix them together with 11n or 11g as it will slow down your speeds and affect the network performance, so its best to keep them separated.
Keeping this in mind let’s get going with converting your old router into an access point.
Note: If you mess up or miss a step don’t worry, you can start from beginning after you hard-reset your router.
BEST WIRELESS ROUTERS UNDER 200 DOLLARS
STEP 1: Obtain the IP address and the DHCP range of your existing router.
If you’re using Windows, you need to access the command prompt by clicking Start, Run and then type CMD. When the command prompt appears (the black small window) type in ipconfig and press Enter.

Here, the IP address is 192.168.1.7 and the Default Gateway, given by the ISP is set to 192.168.1.1.
Next, we need to find out the DHCP range. This can be done by simply typing the new-found Default Gateway IP address into a browser. Login into your router (by using the username and password provided written on the bottom of your router, if you didn’t make any changes) and check out the DHCP range.
Now, depending on which router model you have you will find a start IP and an end IP address. For example, if you use a TP-LINK router, you can find the DHCP range on the Advanced Settings – DHCP – DHCP Settings, NETGEAR Genie has these settings under Advanced – Setup – LAN Setup; using the NETGEAR Smart Wizard, you can find it under Advanced – LAN IP Setup.
If you’re using a Asus router, the DHCP range can be found in Advanced Settings – LAN and if you’re using a Linksys, the DHCP range is under Status – Local Network.
STEP 2: Connect your old router to a PC and log into its interface.
After you plugged in the old router (using a LAN port!) you should open a browser and type in the router IP in order to access the interface. Usually, the default IP is 192.168.0.1 or 192.168.1.1. If you’re not sure which is the IP, you can check the label, which is usually found on the bottom of the router, because most manufacturers write down the default IP, username and password there.
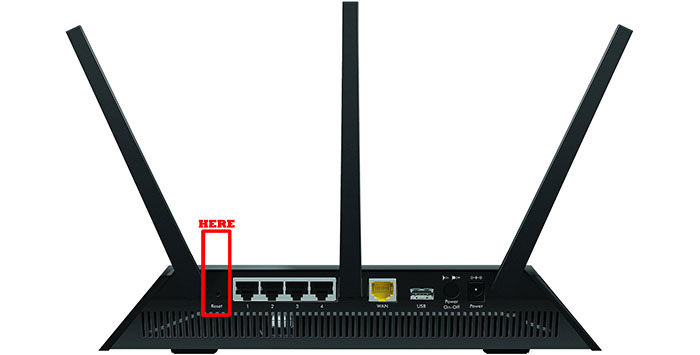
Note: It is wise to reset your router to factory settings, because you may encounter problems when trying to access the router interface, such as not wanting to connect and not recognizing the IP address. If there is no external button for resetting, you can use a thin object and insert it into the hole on the back of the router in order to push the reset switch.
STEP 3: Disable the DHCP on the soon-to-be Access Point (AP).
This is a very important step, because you don’t want to interfere with the first router’s DHCP, which, as you know, assigns IP addresses to all clients, just let your main router do its thing. If you fail to disable the DHCP, the AP won’t work.
Disabling the DHCP should be easy enough because usually, all you have to do is uncheck a check box.
STEP 4: Change the IP address of the AP.
After disabling the DHCP, you have to change the LAN IP address to an unused address, outside the DHCP range, but in the same subnet as any other connected devices.
For example, if your main router has the IP address 192.168.1.7 you can use 192.168.1.2 or, to avoid any IP conflicts in the future, use something more bold, like 192.168.1.178, just be sure to be outside the DHCP range. Now, save the settings.
STEP 5: Use the same WLAN settings as on your main router.
You want your Access Point to use the same SSID (network name), encryption type and passkey as the main router. But, if you have a 11g access point and want only 11g clients to connect to it, you can use a different SSID, along with a different passkey and a different encryption (if applicable).
It is ideal if you can use the WPA2 encryption, as it is the best right now. Really old routers may not use WPA or WPA2, but keep in mind that the WEP encryption is very unreliable and easily hackable. Also, make sure your passkey is strong enough (use different character types).
STEP 6: Use a different channel.
In order to not confuse your connected clients and maintain a stable network, it is ideal if you use different channels for every Access Point. For example, if your main router is on channel 6, your AP can be set to channel 11. In order to find which is the less crowded channel you can use tools like InSSider.
STEP 7: Connect the AP to the network.
Now, we have to use an Ethernet cable to connect the AP to the main router and test the connection. You have to be careful not to put the cable into the WAP port (it happens more often than you may think), because it will give you headaches wondering why is it not working when you did everything properly.
Next, you may need to reboot the computer, but using the command prompt and ipconfig /renew should also do the trick.
STEP 8: Test your new Access Point.
Since we have the AP connected to the network, you can now check if your AP is reachable using the new assigned IP. Next, try to connect a new wireless client and see if it receives an IP automatically.
And that’s it, you now have successfully converted an old router into an access point and managed to expand your network without any expenses.
PREVIOUS: How to use an old router in order to create a wireless bridge
NEXT: How to use an old router as a Wireless Repeater
Mark is a graduate in Computer Science, having gathered valuable experience over the years working in IT as a programmer. Mark is also the main tech writer for MBReviews.com, covering not only his passion, the networking devices, but also other cool electronic gadgets that you may find useful for your every day life.