
In an ideal world, every device would be wireless, would easily connect to a network and maintain a stable connection. In reality things aren’t that smooth, in most cases it is ideal to have a wired network. But a large majority of people don’t have the means or find visually pleasing covering all your home with wires. But, although the wireless networks have evolved a lot there still are some shortcomings.
A modest router may not cover all of your rooms, so you could need an additional repeater, which will cut the speed by a half. At the same time, a capable router may prove to be too expensive. New mesh systems, like Eero and Luma could prove to be the future of wireless networks and a preferred option for the usual customer because of its simplicity, but right now they are way too expensive.

So, you are left with a few solutions, either buy dedicated equipment and extend your already existing wireless network or you could convert an unused router (usually, a cheap one) into an access point, a wireless extender or create a wireless bridge.
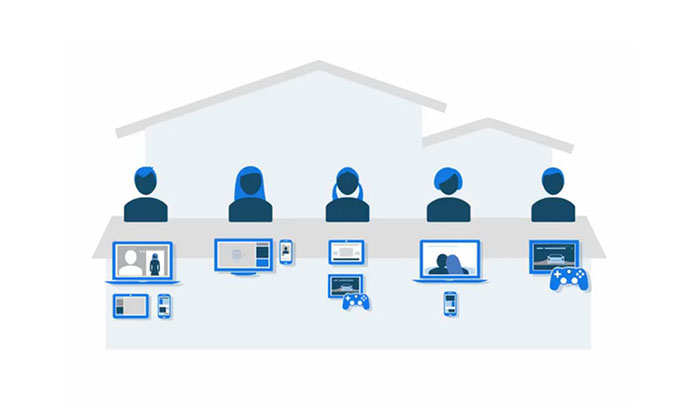
We went through the first two options and they prove reliable for wireless clients, but what if your devices don’t have a wireless network card. What if you want to connect a Desktop computer, a wireless-ready TV or a console?
In this case you may need a wireless bridge.
Note: Inside offices, where there are a large number of computers connected, you can also use two capable routers and connect them in bridge mode, therefore creating a powerful network that will ensure productivity (people are happier when the Internet performance is great).
What is the bridge mode?
A wireless bridge (client bridge mode), usually, connects two wired networks using a wireless connection, allowing two or more routers (or access points) to communicate between each other. The two network sections will be in the same subnet, so any client connected to any part of the network will be able to see each other and share a DHCP server (a client gets assigned an IP address configured for the shared network).
Comparing this system to wireless repeaters, you get a better transmission and less collisions.
Wirelessly bridging two routers together is something commonly found within business offices, where you have a large amount of computers and less found inside homes, especially because it isn’t easy to pull off and maintain a complex system. Most of the users will be in favour of using the simpler wireless repeater mode, instead of bridging two networks together.
How to create a wireless bridge using an old router?
Setting up a router in bridge mode can be done if the router’s firmware supports this option, but even if it doesn’t, installing a custom firmware, like DD-WRT or OpenWRT will allow you to accomplish this task.
Since there are a lot of router models and each manufacturer has its own way of creating the interface, there may be some differences when setting up a wireless bridge (meaning some settings could be found under a different section or name). We are going to write some general steps, not for a specific router, but these steps can be adapted for every model.
STEP 1: Reset your old router to factory settings.
While this isn’t a mandatory action, it is recommended simply because there can be settings that you may have forgotten about and can be a cause of future problems, even if you follow the steps correctly. To return the router to factory settings you have to push the reset button for 30 seconds.
The reset button can come in two ways, the first being a normal button and the last, a hole in which you have to insert a paperclip to access the switch.
STEP 2: Take note of the wireless settings, the IP and the Subnet Mask of your primary router.
For wireless settings, you need to know the SSID (network name), wireless security encryption type, the frequency band (can be 2.4GHz or 5GHz) and the passphrase. Also, depending on the model you may need to manually input an IP address, so its best to take note of all the needed information.
STEP 3: Access the old router’s interface.
Now, you need to connect the old router to a computer using a LAN port (don’t use the WAN port!) and afterwards, open a browser window and type the IP address of the router. Usually it’s going to be 192.168.0.1 or 192.168.1.1. If none of these are working, you can check the label from the bottom of the router, as most manufacturers will write the standard info there.
Next, log into the interface using the username and password which are also written on the label.

STEP 4: Get to the proper section and choose the Bridge Mode.
This step can be a little tricky because of the UI differences between router models. For example, using the Netgear Genie (R7500) you will find the Bridge Mode under Advanced Setup and Wireless Bridge, while on Asus N66U you have to go to Advances settings, Administration, Operation mode and select Media bridge.
STEP 5: Choose the IP address of the old router.
Depending on the router, you can either choose to get the IP address settings dynamically from the main router or use a fixed IP address.
Obviously the first option is the better one, but if you don’t have a choice, when prompted to enter the IP settings choose an IP address in the same range as the main router (if the IP address of the main router is 192.168.1.1, choose 192.168.1.24), the same Subnet Mask and insert the primary router’s IP as the Default Gateway.
STEP 6: Setup the Wireless Settings.
If your router is dual-band, you can choose between 2.4Ghz or 5GHz (we recommend using the latter), afterwards insert the same SSID as your main router, the same security encryption (WPA2 is the best right now) and insert the same passkey. Click Apply.
And that’s it, you have now successfully created a wireless bridge between two routers.
BEST WIRELESS ROUTERS UNDER 200 DOLLARS
What if your router doesn’t have the Bridge Mode supported? It’s simple, you install a custom firmware. But, be aware that setting up a router in bridge mode using DD-WRT or OpenWRT can present some risks.
That is why it is very important to download the proper version of the firmware and install it accordingly. If not you can brick your router (meaning it will become unusable, permanently). It may sound dangerous but it’s actually quite easy to install the proper custom firmware. And that is because the community of both DD-WRT and OpenWRT are very friendly and you can find countless information on their forums about almost every model of router existing on the market.
So let’s get going.
STEP 1: Write down the IP, the Subnet Mask and the wireless settings of your primary router.
For wireless settings, you need to know the SSID (network name), wireless security encryption type, the frequency band (can be 2.4GHz or 5GHz) and the passphrase.
STEP 2: Research, download and install the compatible firmware version for your router.
As we said, it is very important to download the proper firmware version. Just follow the directions carefully and you will successfully install the DD-WRT firmware (or OpenWRT) on your router.
STEP 3: Hard reset your router.
After installing the custom firmware hold the reset button for 30 seconds to return the router to its default settings.
STEP 4: Access the custom firmware interface.
To access the new interface you have to open a browser and insert the IP address of the router, which could be 192.168.1.1 or 192.168.0.1. Afterwards set a new password.
STEP 5: Select the Client Bridge Mode and insert the SSID.
After you gain access to the interface head over to Wireless, basic Setup and choose the Client Bridge at the Wireless Mode. Afterwards insert the SSID of your primary router at the Wireless Network Name(SSID). Click Apply.

STEP 6: Configure the Wireless Security.
While still being in the Wireless section access the Wireless Security tab. The Security Mode should have the same encryption as the main router, as well as the WPA Algorithm and the WPA Shared Key must be the same as the passkey from your primary router. Click Apply Settings.
It’s very important to not use the WPA2 Personal Mixed because it may kill the communication between router, select WPA2 Personal instead.
STEP 7: Configure the IP address of the old router.
Next, you should go to Setup, Basic Setup and Router IP. For the Local IP choose an address in the same subnet as your main router. For example, if the IP address of the primary router is 192.168.1.1, you can choose 192.168.1.2.
The Subnet Mask should remain the same (usually, it’s 225.225.225.0) and in the Gateway field insert the IP address of the main router. As for Local DNS, insert again the main router’s IP address (ex. 192.168.1.1).
Optionally, you can enable Assign WAN Port to Switch so you get to use the WAN port as a LAN port (versatile option if you need to connect one more wired client). Click Save.
STEP 8: Configure Security.
Now, you must log back into the interface using the 192.168.1.2 IP address and go to Security and Firewall. Here, in the Block WAN Requests, make sure everything is unchecked except the Filter Multicast. Also, make sure the SPI Firewall is disabled.
STEP 9: Set the Operating Mode of the Router.
Lastly, go to Setup, Advanced Routing and select Router as the Operating Mode. Click Save and Apply Settings.
And that was the last step, if everything works fine you have successfully managed to create a wireless bridge between two routers. This is extremely useful as you can now connect your Desktop computer, your TVs, consoles and any other devices through the second router and gain access to the Internet.
PREVIOUS: How to use an old router as a Wireless Repeater
NEXT: How to use an old router as an Access Point
Mark is a graduate in Computer Science, having gathered valuable experience over the years working in IT as a programmer. Mark is also the main tech writer for MBReviews.com, covering not only his passion, the networking devices, but also other cool electronic gadgets that you may find useful for your every day life.