
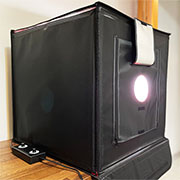
The Ombar photo studio light box is a 24 by 24 inches container that was designed to help photographers to quickly get a shot of smaller to medium-sized products. There is a larger variant as well which measures 32 by 32 inches, if you need to capture larger products.
And I know that some companies need to rely on a proper shooting setup with lots of lights that offer a high degree of adjustment, but these light boxes target a slightly different audience. I am talking about business owners that have just started a new online shop and don’t want to deal with expensive equipment, yet.

So, the Ombar photo studio light box promises to make shooting product photos quick and painless. And one of the main selling points is just how easy it is to install and to carry the entire box folded from one place to another.
This is something that we’ll check in a minute and we will also put to the test the studio box’s ability to help create an uniform lighting on the product. I am aware that a lot of people may want to go the DIY route which is usually cheaper, but then again the Ombar Photo Studio Light Box is quite inexpensive and it does promise to offer the ability to adjust the brightness, as well as the color temperature. There are also multiple color backdrop sheets available, so without further ado, let’s check it out.
The Assembly
The Ombar Photo Studio Light Box came in a fairly large, yet thin cardboard package and, after taking it out, I could see that there are five backdrop sheets of PVC. Which seem to be waterproof, so spilling water will not do any damage at all; and they’re also easy to clean.
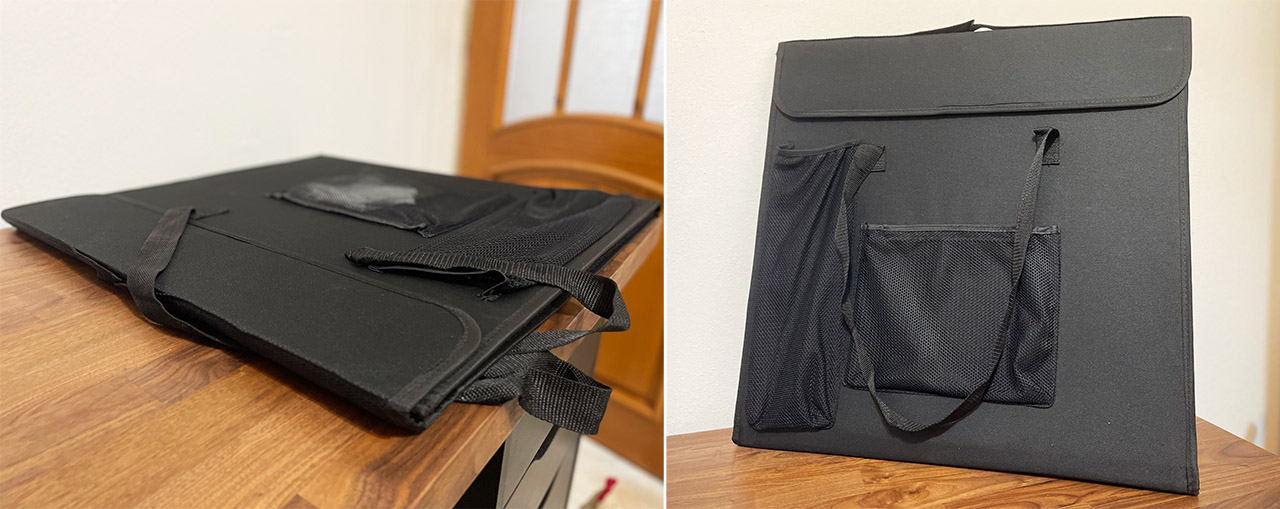
The colors are black, white, orange red and vermilion. And I have seen that each sheet has a couple of Velcro strips attached to one end – that’s for attaching the suitable backdrop sheet to the box. As for the Ombar photo studio light box itself, it arrives already folded and I did see that the manufacturer put the user manual, as well as the light diffuser in the middle pocket. There is a secondary pocket which is useful to store one of the preferred backdrops, but overall, the entire box looks like a giant thin bag when folded.
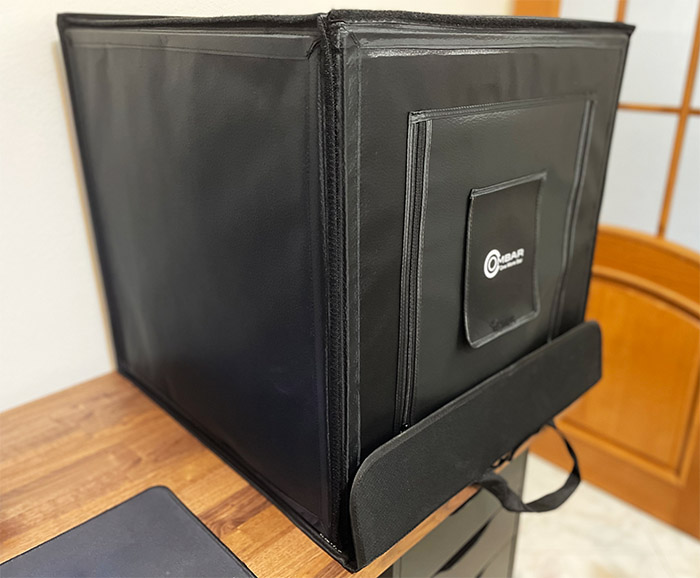
So let’s open it up. The idea is to unfold the tent into a cross-like pattern and then use the Velcro strips to form a cube. Make sure that the Velcro strips are properly attached and the entire process shouldn’t take more than a few minutes – it took me about two minutes to put everything the way I wanted. Then, find the part that has the logo and put in on the front, while the section with the cables should be upwards. Inside the package, you will also find a controller that has two cables which need to be connected to the two cables inside the Ombar photo studio light box.
Red goes to red and black to black – connect the controller to a power socket and the red LED should now shine on the controller box. You can power on the LEDs to get an idea on how the box works: the LED should shine from the top and you should be able to control the light intensity, as well as the color temperature. We’re not done though because we need to also attach one of the five color backdrop sheets.

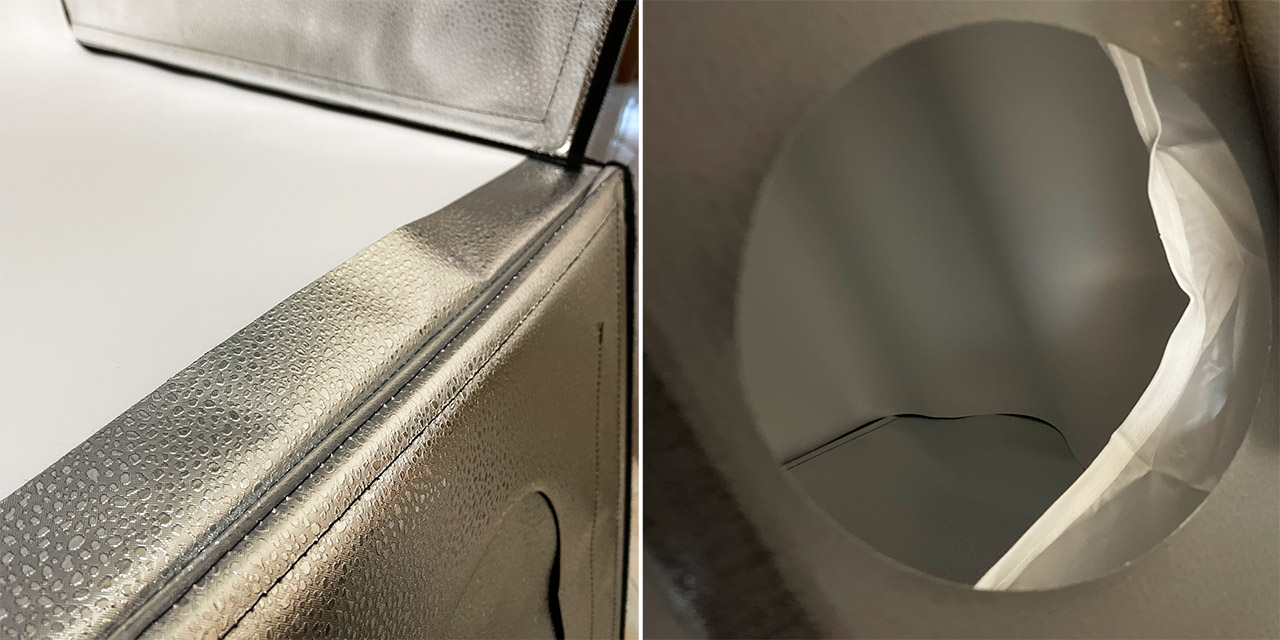
The way the manufacturer says that you can do it is by opening up the top and attach the backdrop to the two Velcro strips. Don’t bother with this approach because the best way to do it is via the front cover. That’s because the backdrop will start warping around and push against the front section, so you need to insert a part of the backdrop underneath the dedicated area at the bottom of the box.
Even so, the backdrop would still be a bit wavy which is why I would have preferred a few more Velcro strips to properly keep it in place (we’ll see if it affects the photos). Since we got the box open, now it’s also a good time to add the light diffuser. To do so, it needs to be put before attaching the top cover – this way, I noticed that it looked a bit saggy from the top. Again, it would have been great if Ombar added more Velcro strips to keep everything nice and tidy.
The Build Quality
There are a few things that I do like and a few that I don’t. I did like that the Ombar Photo Studio Light Box is fairly lightweight (weighs about 11 pounds), so it’s easy to move around and it doesn’t feel like it will break apart while doing so. That’s because the Velcro strips are quite strong and will keep all sections tightly together.
The two available openings are also a very nice touch since it’s easier to get a top shot and to capture a photo of the product from the front. But I do know a few people that complained about some light boxes having a small front opening, so Ombar has added a secondary front opening to get a better shot of a larger object. Another thing that I liked was the controller which would easily attach to the two cables and just stay completely out of the way until needed.
And the two dials work great, giving that retro electronics devices vibe. Lastly, what I also liked was that it was easy to put together and then just as easy to take apart, so it’s very much possible to rely on a device such as the Ombar photo studio light box to do remote client work.
Now on the things that I think need improvement. And it’s mostly related to the Velcro strips. There are just too few for some important parts. Sure, the box is held tightly shut, but the provided backdrops do get wavy, which could have easily been prevented. The light diffuser would also have used a few additional Velcro strips since the hole in the middle just drops uneven.
It won’t really affect the shot, but it can be annoying to work around it. Other than that, the 240pcs LEDs seem to be more than enough and there is enough space for small and medium-sized products to be photographed which is nice.
The Controller
Ombar went with what looks like a power brick, but it has added two dials that do dramatically change the look of the controller. Sure, everything is made of plastic, but I am a fan of the retro look, so I liked the design immediately. The good news is that the dials are easy to operate (smooth rotations), but yes, considering the price tag of the entire device, it doesn’t really have a premium feel to it.
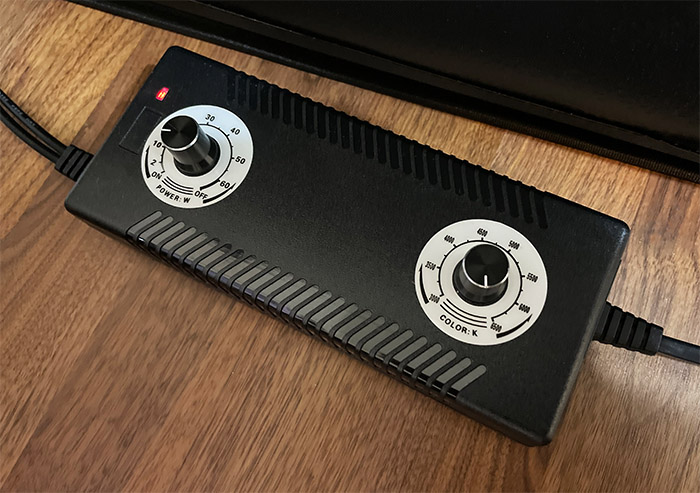
Around each dial, there are guides to let you know the current brightness level or the color temperature and the adjustment is done gradually, not in sudden steps, which is a nice touch.
Can the Ombar Photo Studio Light Box actually improve photos?
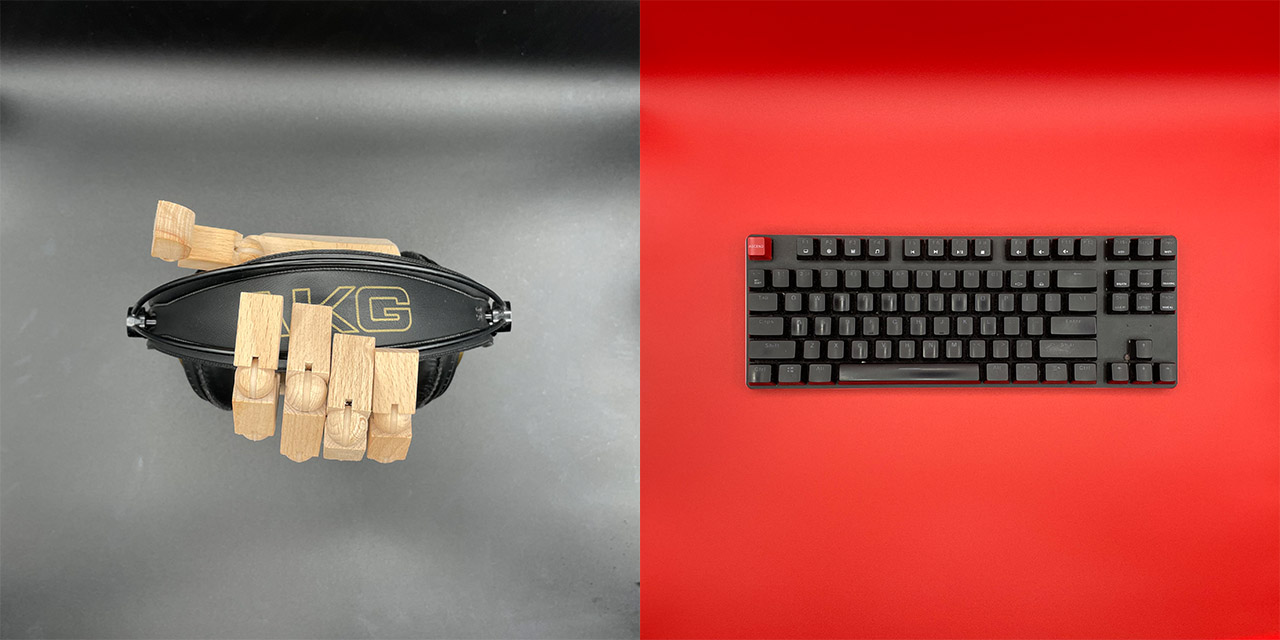
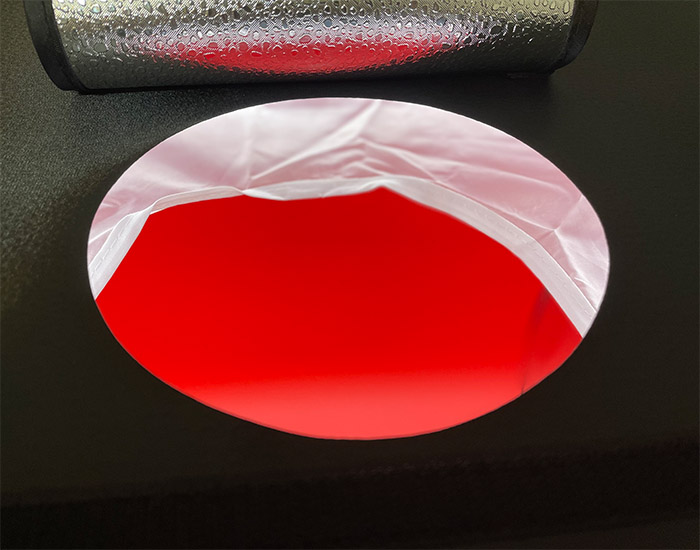
It obviously can. The idea is to create a closed environment where the light can shine uniformly on the object and the backdrop should also help a lot by offering a simple background (ideally, with an intense color). But, not everything is perfect. I really am not fond of these backdrops because I had to fight the waves non-stop, with every shot.
I really wasn’t able to make a single backdrop to stay properly unless I put my hand inside and kept it down. And there are consequences to this. The light was no longer that uniform and you can see in my photos that you don’t get a constant background color, there are some visible waves. For this reason, I suggest you get some more malleable backdrops, ideally not made of PVC to get a more controllable background.

Even the default ones are not bad if you are actually looking for the effect that they can create. The larger front opening can be enough for some shots, but to get close and personal to the objects I was trying to photograph, I preferred to fully open up the front cover. This will allow the light to bleed out a bit, but, as I said, it’s very much possible to capture good photos through the provided ‘windows’ as well.
The top opening is what I liked the most because the shots were really great and I felt like the light shone just right on the object. One criticism that’s true for any device such as the Ombar photo studio light box is that there is very little room for customization. Besides adjusting the brightness and the color temperature, you can’t do much else. You can’t play with shadows, adjust the intensity of the light on certain parts only or any other stuff that you could with a different lighting setup.
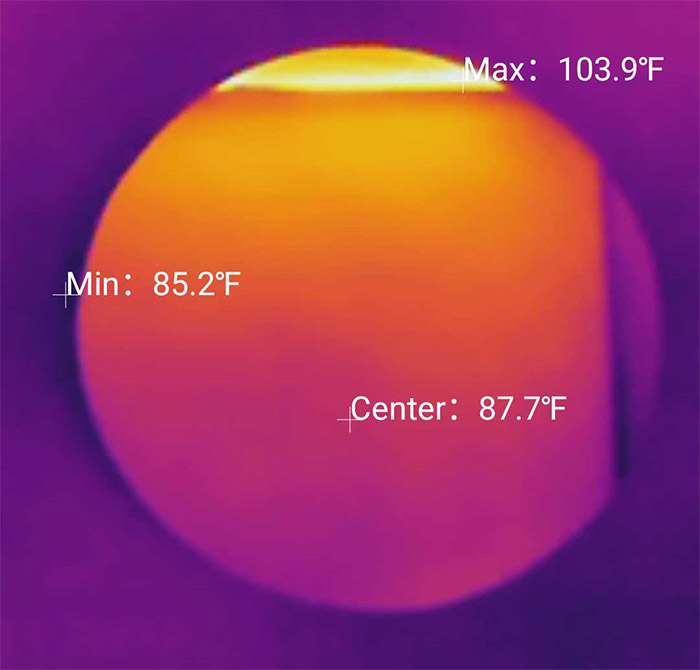
But, as I already mentioned before, the idea is to make shooting product photos easy and as close to professional as possible. Which is doable with a light box, just be careful with the backdrop sheets. Even if it’s summer here for more than a month already, I was able to notice that the light box emanated some heat when I opened one of its sides.
So, how hot does it actually get? It’s noticeable after some time because the heat doesn’t have anywhere to go, so it’s very much possible for the temperature to reach up to 100 F at some point. And this made me wonder about how much power does the Ombar photo studio light box actually use at maximum brightness. The meter that I was using showed that it’s only a bit less than 10 Watts, which is decently good.
Conclusion
The Ombar photo studio light box was designed to offer an easy way to quickly get good product photos and it does the job quite well. I am not very fond of the provided backdrops (which you can replace), but other than that, it did work as intended. The brightness levels were good and it was easy to adjust them, as well as the color temperature. Obviously, some of the most important factors is the portability and how easy it is to assemble the box, as well as disassemble it. So, considering the price is right, then you could give the Ombar photo studio light box a chance, just be aware of its aforementioned quirks.
Ombar photo studio light box
-
Pros
- Easy to install and uninstall
- Very portable
- Can adjust the brightness and color temperature
- Multiple openings
Cons
- There aren't enough Velcro strips to properly attach the backdrops
- The light diffuser simply hangs from the top
Mark is a graduate in Computer Science, having gathered valuable experience over the years working in IT as a programmer. Mark is also the main tech writer for MBReviews.com, covering not only his passion, the networking devices, but also other cool electronic gadgets that you may find useful for your every day life.