
The ANNKE FCD600 is a 6-megapixel dual-lens camera and it’s an entry-level model that follows a very similar approach to the Reolink Duo cameras. There are two separate lens, each with a fairly wide viewing angle and the footage from both cameras is combined to offer a seamless 180 degrees angle.
| ANNKE FCD600 | |
|---|---|
| ANNKE.com | Check Product |
| Amazon.com | Check Offer |
And that’s without any distortions at the corners, a common effect on the single lens wide angle cameras. It seems that the Annke FCD600 is the only dual-lens model outside the NightChroma series so far, which is a bit of a shame (I’ve seen it in action on the NC400 and it was amazing), but we still get color night vision due to the dual LED lights. The camera also uses BSI sensors to enhance the night view, so it should surpass its competitors in the same price range (we’ll put it to the test to confirm it).
I also saw that the FCD600 has human and vehicle detection, a feature which I have seen working really well on the Reolink cameras, so I am curious if ANNKE is just as good at detecting people and moving objects. Also, just like Reolink cameras, the detection seems to be done locally, at the device level, not on the server. Due to it being under Hikvision umbrella, the ANNKE FCD600 does have a few elements that I suppose could seem complicated, such as the optional wiring methods or the software itself, but far from being considered deal breakers. That being said, let’s put the Annke FCD600 to the test and see how it performs.
Design and Build Quality
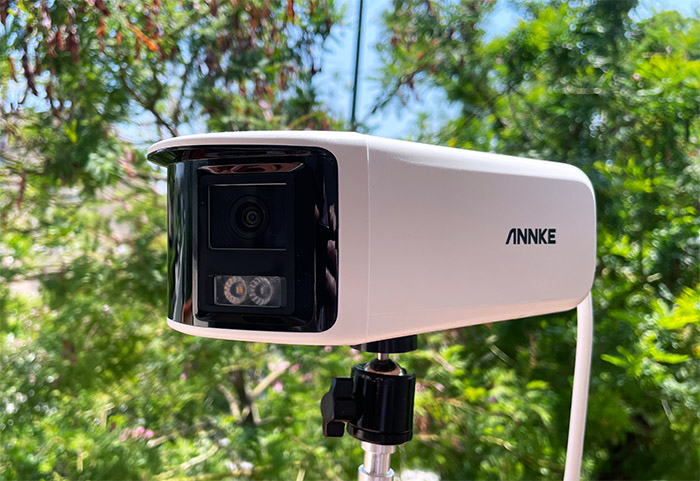
ANNKE has been experimenting quite a bit with the design of its dual-lens cameras and, when put next to the regular camera, the ANNKE FCD600 does have a peculiar design. It kind of looks like the Reolink Duo, although it is a tiny bit taller due to the additional LED spotlights.
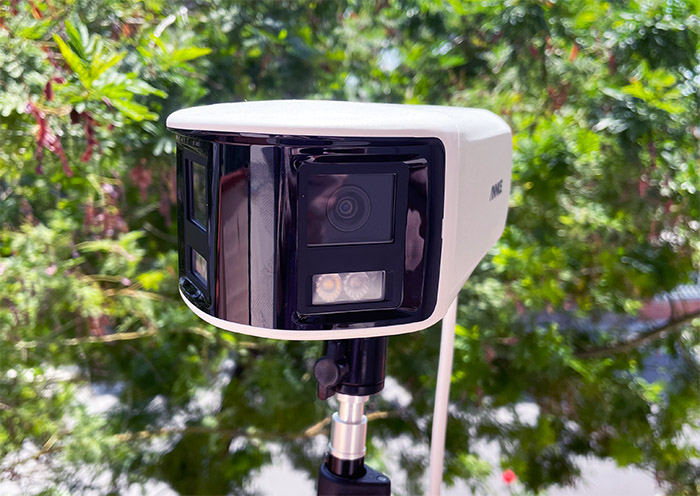
The FCD600 measures 5.4 x 4.7 x 4.0 inches (13.8 x 12.0 x 10.1cm) without taking the support arm into account, so it does have a fairly big case, not that it matters that much since security cameras are meant to be seen. The case is entirely made of plastic and I did noticed some minor misalignments where the plastic parts come in contact with each other. The camera is covered by a white matte finish which is common for both indoors and outdoor security cameras, while the front part, where the manufacturer has positioned the lens is covered by a slight glossy black finish. Again, a common color palette choice.
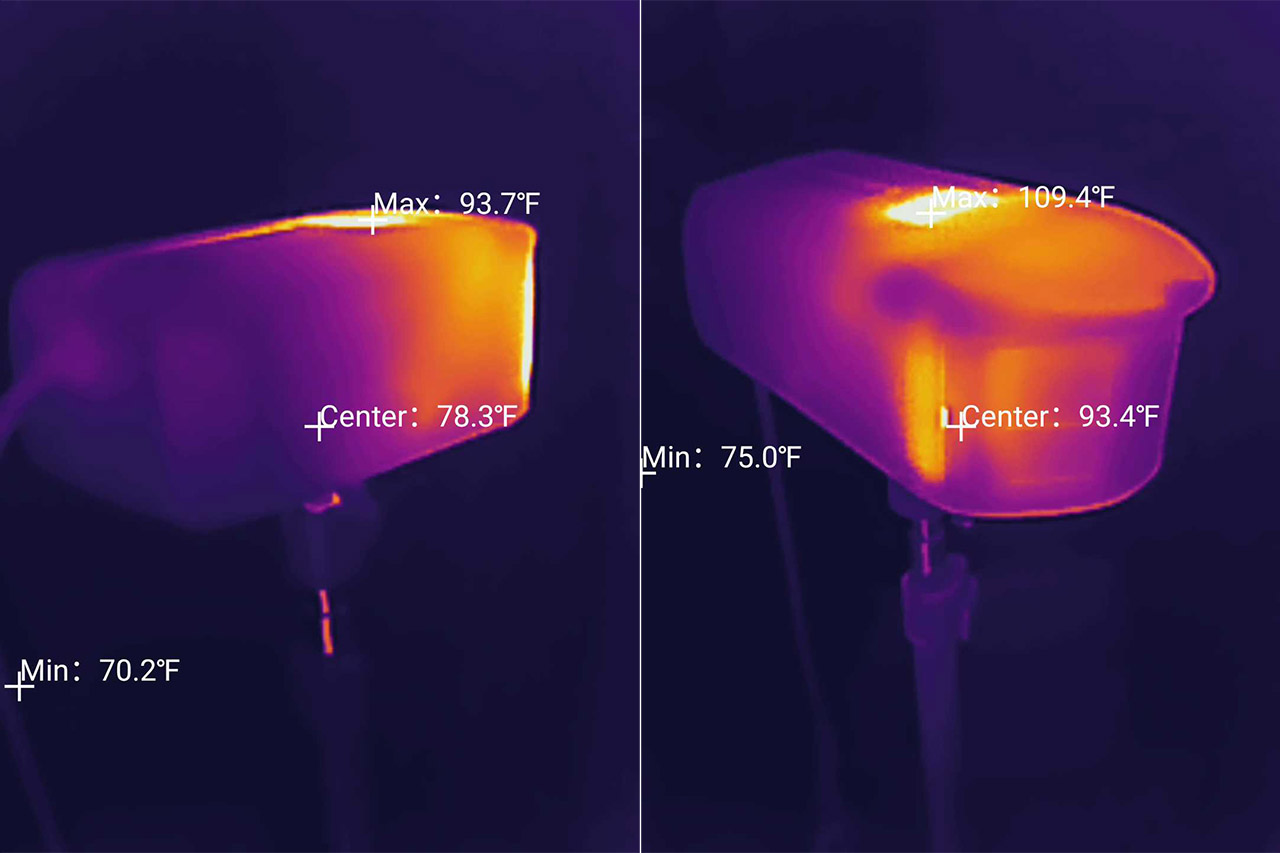
The ANNKE FCD600 is IP66-rated, so there are no ventilation holes anywhere around the case and the developers had to rely on the efficiency of the chipset and on the plastic case itself to dissipate the heat. I did use a thermal camera to better understand how hot the device can get and, as you can see from the photos, the heat management is done properly.
Although there are no ventilation holes, there is a speaker located at the bottom of the FCD600 and it’s a fairly loud one, reaching up to 95dB. Paired with the front-facing microphone (from in between the lenses), you can have a two-way conversation with a courier or just scare off a trespasser (and then listen to their faint distant cries).
Also on the bottom, you will be able to see that there is a plastic cover that’s held by a couple of screws (with the label Setting) and, after removing it, I could see the Reset button (press and hold it to return the Annke FCD600 to its factory settings), the microSD card slot and what seems to be a Console port (perhaps for diagnostic purposes). The microSD is not necessarily a standard on the FCD600 because there is a model available without it and two models with 128GB storage, while the better equipped version offers 256GB of storage.
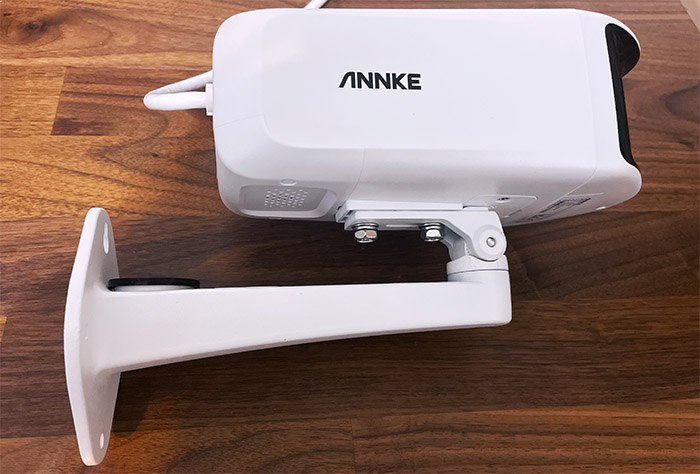
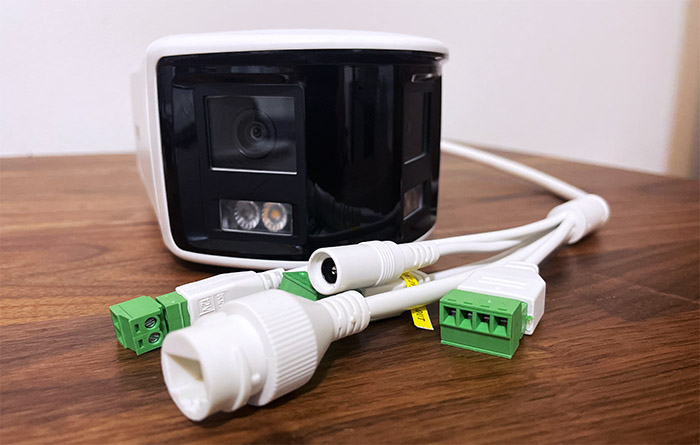
Now let’s talk a bit about the stand. It’s metallic and it can be attached either above or below the device since there are dedicated holes on both sides (same as the Reolink Duo). The area where it gets in contact with the camera is padded to avoid any scratches and I really liked that the manufacturer has added a hole for the cable to pass through, allowing to keep things a bit more tidy. Then again, the bouquet of cables doesn’t really help that much.
The thick cables that exits the Annke FCD600 does divide into five separate cables, the main one being PoE, followed by the regular Power cable (DC 12V). The other three cables are a DC 12V Power interface, an Audio in/out interface and lastly, there’s an Alarm connector, so the camera can communicate with a separate alarm system and trigger the horn.
ANNKE FCD600 Teardown
ANNKE does not have any warranty void seal (as should be the standard in any industry), so all you have to do is to detach the black plastic piece from the front. There are two holes on the sides where you can insert the head of a screwdriver, so the piece just pops off. And then, you will have to remove the four screws after which it’s possible to detach the front portion of the camera completely.
Take note of the red silicone seal – this needs to go back exactly as it was before in order for the camera to maintain water and dust resistance. That being said, I could see the layered PCBs and I could identify the HK-2020-A16 TGYY7100 2213-AJ Bluetooth 5.0 chipset, the GigaDevice AP2147 5F1G05UEYIG which seems to be the flash memory, but could find much about it on the web.
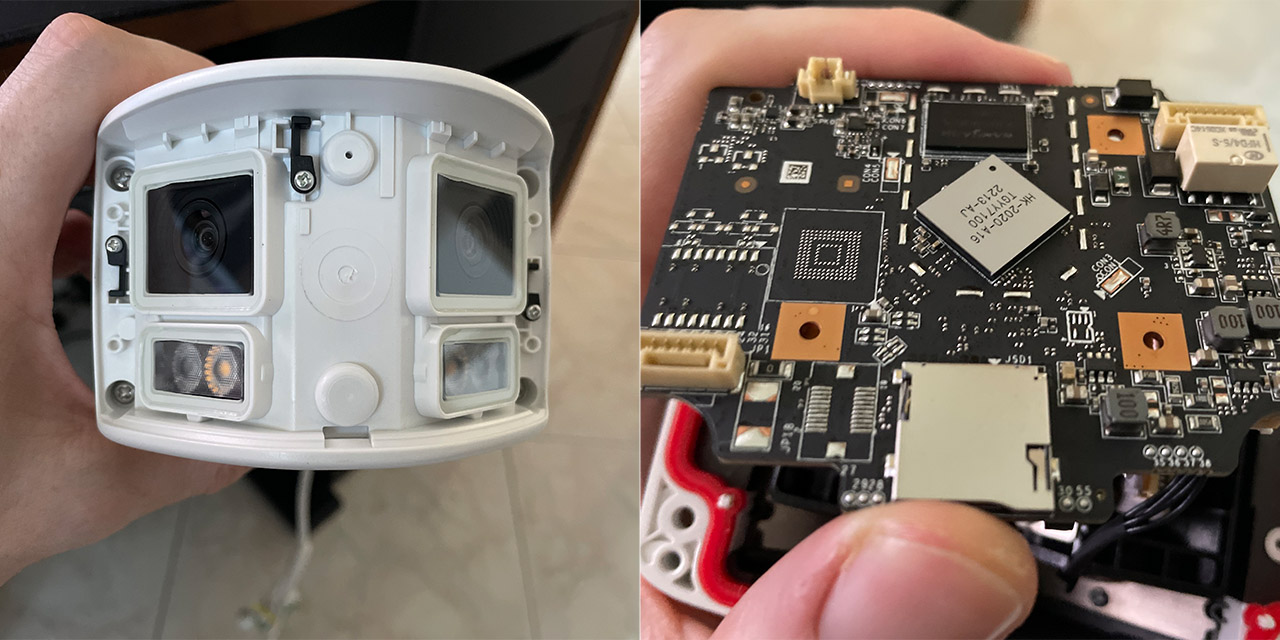
Then, there’s the two RAM chips: 512MB of RAM from Nanya (NT5CB256M16ER-FL) and an additional 512MB of RAM also from Nanya (NT5CB256M16ER-FL). I also saw that there is enough space for a good thermal management inside the case since about a third is used just for the cable to pass through.
Installation and App
The ANNKE FCD600 is a fixed camera, so don’t expect any remote position adjustments. All you can do is mount the stand on the wall, attach the camera and position it at the suitable angle. Overall, it’s a fairly simple process and the manufacturer has provided everything that you would need in the package (including a drill guide sticker). Obviously before anything else, you will have to decide how the camera will be powered up and to be honest I always prefer PoE over other options because this way, I can only use a single cable for both data transfer and power.
And I don’t necessarily mean to use a PoE adapter or Ethernet switch, since there are PoE NVRs available as well. Just make sure that they’re compatible with the Annke FCD600 – check for RTSP and ONVIF support, since the camera does support both protocols.
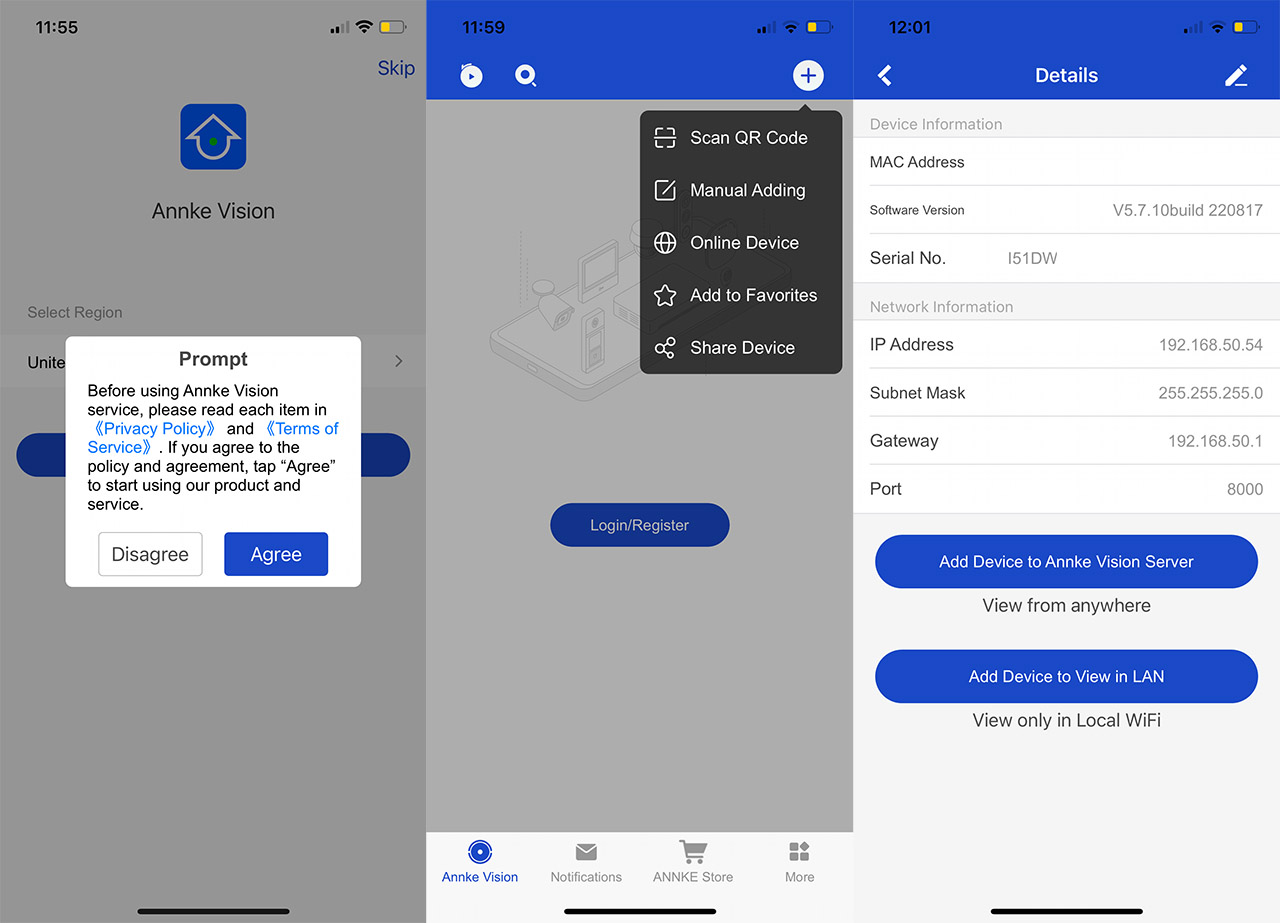
After powering up the unit, I saw that the LEDs will briefly flash and I could now access its web-based interface or rely on the app for live view and extra control. I think a lot of people will prefer the latter, so we’ll start with that. The mobile app is called Annke Vision and it’s available on both iOS and Android. The app will ask for your location (select no), then permission to send you notifications (which makes sense) and there’s also a Privacy Policy which includes a curious type of collected info: “video content files that may content personal visual identity information”, so yeah, be aware that the video feed will go through their servers and perhaps it may be better to just use the local network or an NVR.
There are ways to check the live feed remotely without using the app (create a tunnel to your router – Asus makes it very simple). The app will also ask if you want to create an account and you can skip it. Then, you can add the camera. I wanted to use the QR code mode, but that wasn’t an option, so I just let it detect the Annke FCD600 in the network (it was connected to my router). Then, the app asked to activate the camera and I could add a password (it was written in Chinese, but I think I got it right).
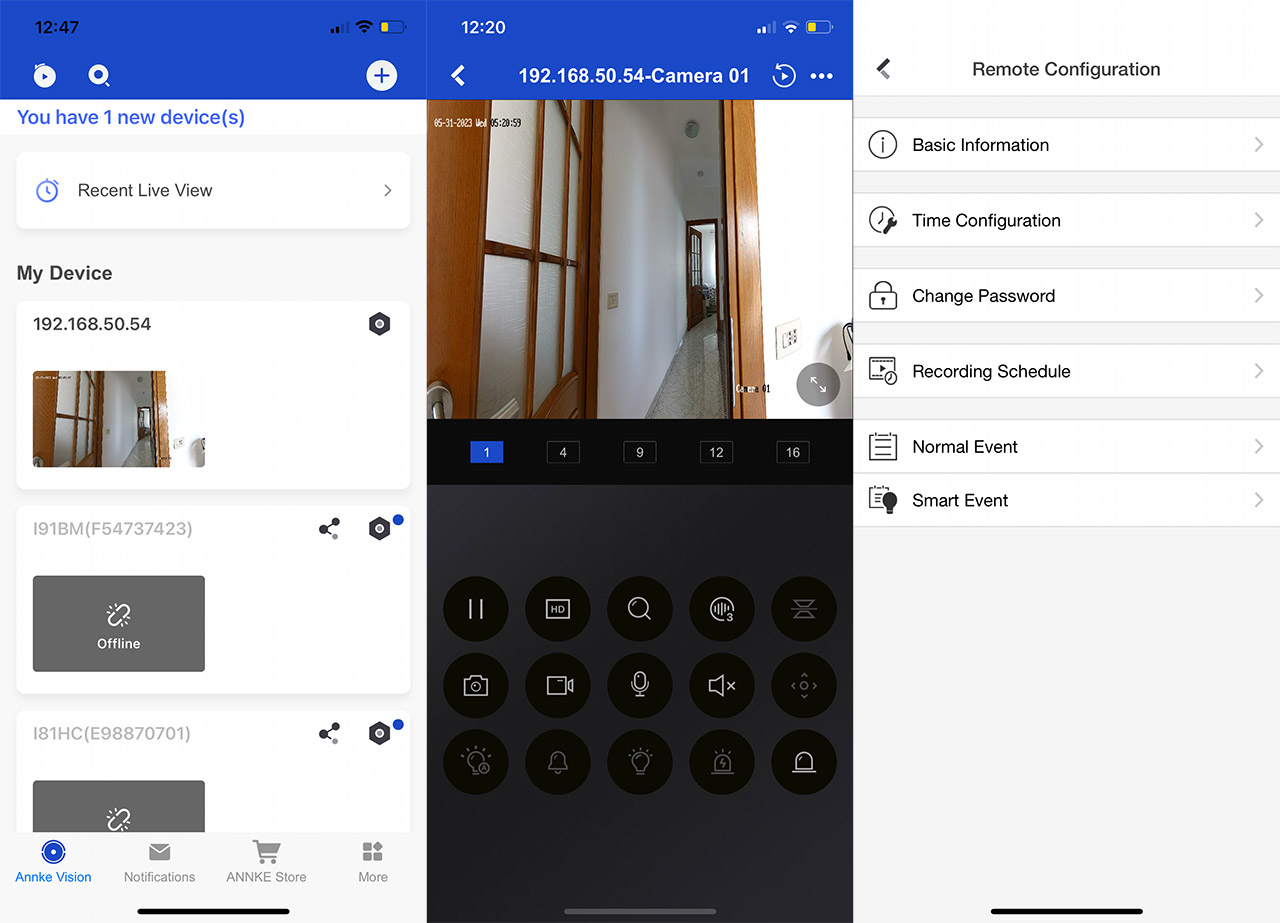
The app will also ask if you want to view in live feed in LAN or on the server, something that I greatly appreciated. Then, you can finally see the live footage and there are also a bunch of options underneath with about half being grayed out. You can switch between SD and HD image quality, digitally zoom onto a specific portion, select the noise reduction level, capture a photo, record a video, enable the two-way communication and there is also the possibility to enable the Alarm Output 01.
To see Notifications, you will have to create an account (can’t skip it this time) and while you can use a phone number, it’s also possible to just rely on an email address. There are a few other settings which are not quickly available, but are incredibly important. You can access them by returning to main window, clicking on the configuration icon which will lead to the Device Information and then press the three dots to go to the Remote Configuration.
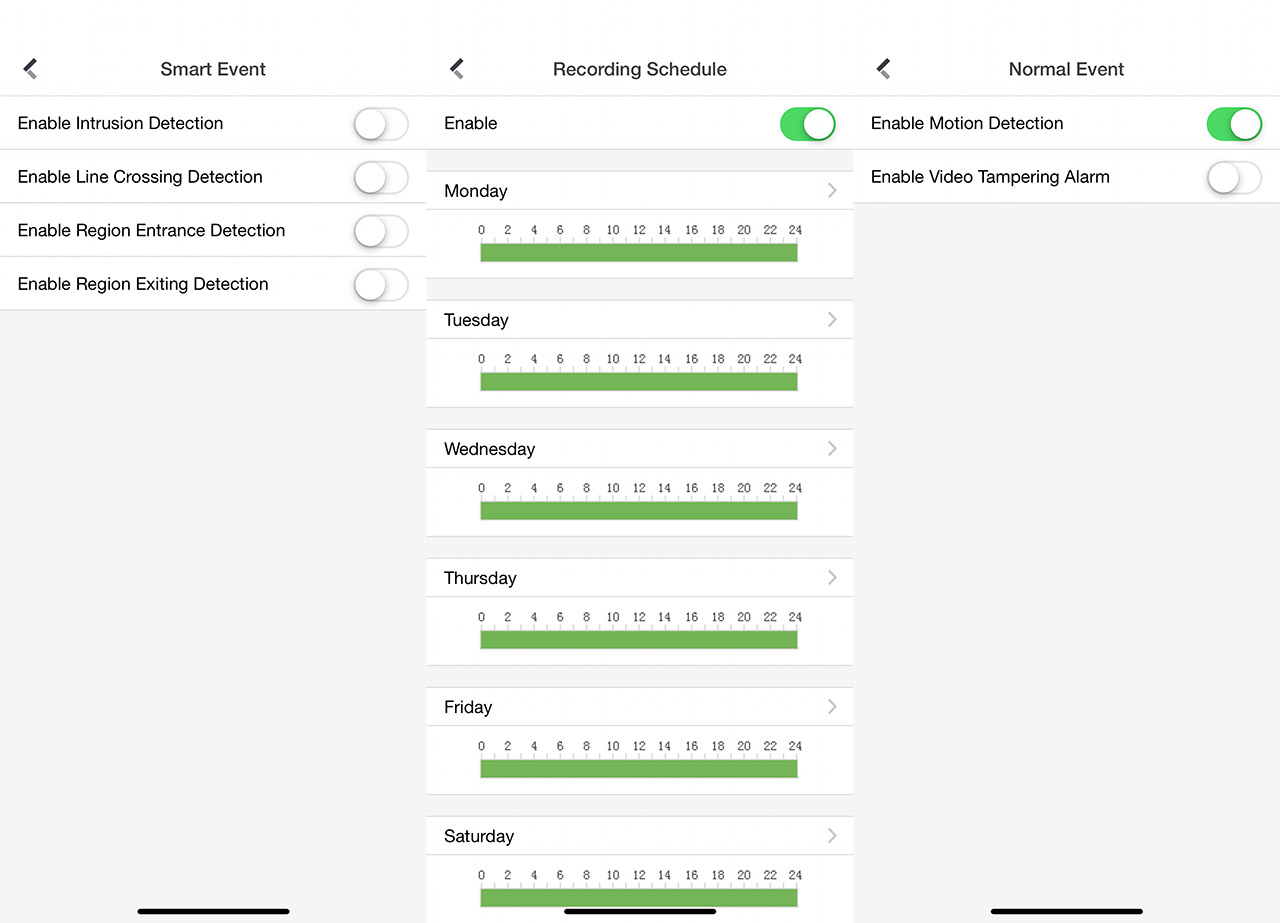
Here, you can set up Schedules, enable anti-tampering under Normal Event and most importantly, under Smart Event, you can enable Intrusion, Line Crossing, Region Entrance and Exiting Detection – all are turned off by default. Now let’s see how the web-based interface functions.
The Web-based interface
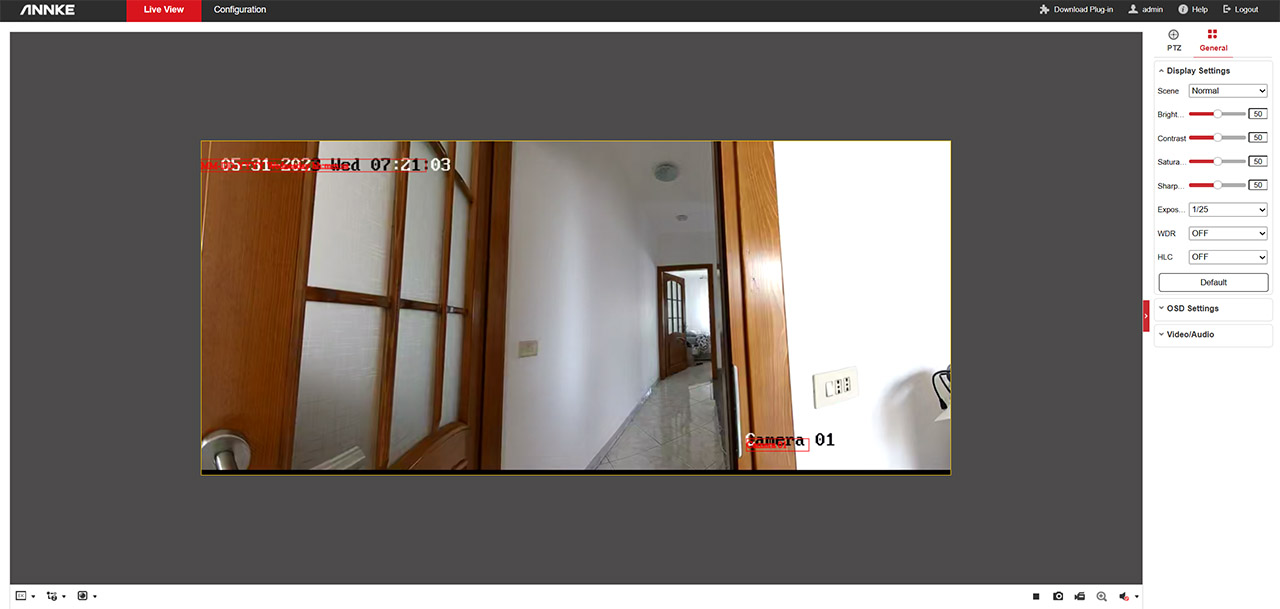
The way to access the web GUI is to enter the IP address that was given by the router into the URL. Then, there should be two main sections, one is Live View and the other is Configuration. And yes, you do get much more freedom to control even the smallest aspects of the Annke FCD600, and I suppose, there is a bit more structure than on the app. The Live View will cover most of the screen, while on the right, you can control the image quality and the resolution (from under the General section) – the PTZ is not available on this camera. It’s also possible to change the aspect ratio and the stream type using the small icons from the bottom left of the live footage.
The Configuration section is divided into multiple areas, the first being the System and here, I saw that there is the possibility to choose the optimal distance for the Image Stitching, the option to set the RS-232 serial connection parameters, some Security options and there’s also User Management. The next section is the Network and especially under Advanced Settings, it’s going to be intimidating: there’s SNMP, QoS, Integration Protocol, the Alarm Server and a lot more options to allow you to set up how the Annke SDC600 connects and interacts with other devices in the network.
Pros
- Dual-lens = seamless 180 degrees view
- The night vision is excellent
- You can customize pretty much everything in terms of software and camera behavior
- Multiple types of connectors available, including integration with an alarm system
- Good thermal management
Cons
- The app can sometimes feel like a maze
- The smart events need to be set up manually from the ground up (it's nice to only make adjustments to a pre-existing model)
Mark is a graduate in Computer Science, having gathered valuable experience over the years working in IT as a programmer. Mark is also the main tech writer for MBReviews.com, covering not only his passion, the networking devices, but also other cool electronic gadgets that you may find useful for your every day life.