The best radon detector should be able to accurately detect elevated radon levels in your home in the shortest period of time possible and it should also provide clear results that can be understood without the need of a professional. Of course, the price tag is also an important factor to take into account, considering that the focus will be on the active radon testing devices that are a bit more expensive than the passive detectors that don’t require any power to work and are simply sent to a lab for the results.
That being said, do you actually need to invest in such a device? Simply put, radon is a colorless, odorless and tasteless radioactive chemical element (there’s no way to tell it’s there without specialized equipment) which forms when radioactive metals (such as uranium) break down in rocks, water wells or soil and, after a certain period of time, the gas can come through the cracks of a building and accumulate to become hazardous for the people’s health.
EPA says that almost 20,000 annual deaths are caused by radon exposure (leading to lung cancer), so it is important to know if you may be at a risk in your own home. You can hire professionals to check the radon levels in your home (especially if your state is in the risk zone as shown by this dedicated map), but, if you decide to do the test yourself, I found that the best radon detectors (non-professional) can be considered (for now), the AirThings Corentium Home 233 radon gas detector, the Radex MR107 and the RadonEye RD200P second gen. I have also added the Safety Siren Pro Series4 which is a revamped version of the older Series3.
The reason why some of these devices made it to the top three is because they’re very popular, have proven to be decently accurate especially on the long term testing and the FTLab RadonEye RD200P is NRPP-approved (having an app could prove to be an advantage only if it makes it easier to see and interpret the results, otherwise the app or any other smart features will add no weight to which radon detector will be considered the best one).
Note: The Environmental Protection Agency (EPA) kind of acts as the authority to oversee the accuracy of the radon testing devices and, while AARST / NRPP do ensure the accuracy of professional-grade gear, the consumer market is left on its own, so unless you go for those $2000+ products, you’re not going to find affordable EPA-approved radon testing devices. Apparently, that’s left up to each individual state, and unfortunately, not many approve radon testing devices in the first place. You may also think that relying on passive devices and see the lab results would be the best way to get the most accurate results, but, unfortunately, some of these labs are not checked by anyone, so it’s very easy to get false results as well.
I will now try to cover some of the basics of what you should take into consideration for both testing and possibly mitigating the levels of radon in a house, but, for a far more comprehensive guide, please check out the Home Buyer’s and Seller’s Guide to Radon which was specially created by EPA.
| 1. AirThings Corentium Home | 2. Radex MR107 | 3. RadonEye RD200P |
 |
 |
 |
| Read Review | Read Review | Read Review |
 |
 |
| 4. Safety Siren Pro Series4 | 5. CradTec PRM-02H |
 |
 |
| Read Review | Read Review |
 |
 |
ALSO CHECK OUT: THE BEST SMOKE DETECTORS OF 2023 (YEAH, I ACTUALLY TESTED THEM)
Passive vs active radon detector testing
Nearly one in 15 US homes are estimated to have an elevated radon level and you can’t really tell if your house is radon free based on the levels dictated by your state or neighborhood measurements – one house can have a low radon level, while its neighbor can show dangerous levels of radon, since there are many factors that can ensure an easier gas accumulation, especially in the basement and first floor.
So, you need to test your home (since this is pretty much the only way to find out) by using passive means, the most common being the use of charcoal canisters or charcoal liquid scintillation devices (radon is being absorbed into the charcoal), alpha-track detectors (radon will leave strikes on a plastic film) and electret ion chamber detectors (that use a statically charged Teflon disc which has its charge reduced by the radon decay) that you need to keep in your home for a certain period of time (it can even go over 90 days), in order to get exposed to the radon in the house and then these devices get sent to a laboratory for analysis.
You can also rely on active measuring devices (such as those explored in this article) which do require a power connection and will continuously check the radon levels in your house. The way these devices work is by either pumping the air or diffuse it into a special chamber where the quality is measured at regular intervals (can happen every few minutes). As expected, the active testing devices are more suitable for short-term tests, where the client or the owner wants to quickly see if there are elevated radon levels in the house and, it’s true that these devices ca prove to be more accurate and can even provide evidence for tampering, but some are sensitive to humidity and do require regular calibration.
How to test your house for radon
If you decide to test a house for radon, you can do a short-term test or a long-term test. The former is usually conducted for at least two full days even if you choose to use passive or active testing devices and the long-terms testing is usually conducted for more than 90 days, showing every variation (if you’re using active continuous devices) and it can give you a year-round average for the radon levels present in the house.
The best practices when running such a test, whether it’s long or short-term is to place the devices in the lowest level of your home and it’s also advisable to check the more trafficked rooms (such as the living room or bedrooms – EPA says that you shouldn’t test radon in the kitchen, the bathroom, the hallways or the laundry room). Furthermore, make sure that the radon detector is at least 20 inches above the floor and away from exterior walls, drains, windows or doors and you should also start the test after at least 12 hours have passed since you closed the windows and the doors to that room.
You should also try your best to prevent any test interference. As EPA says, this can be achieved by using devices that frequently records radon for any swings (the active continuous devices can prove to be ideal for this situation), to have a motion sensor employed in the vicinity to make sure the device hasn’t been moved or tampered with (it can happen when a house owner wants to sell it quickly and is afraid of the possible results) and a proximity sensor (to show whether the radon levels variations can be correlated to the presence of people in the room). You can also use both temperature and barometric pressure sensors to see if the weather conditions and/or the doors/windows being close or opened can have an effect on the radon levels variations.
Why continuously test your house for radon?
Some people may wonder why not just use a simple short-terms kit (which is usually very inexpensive) and check the radon levels once and, if they’re low, everything is fine. You either have it or you don’t, right? Not necessarily, since depending on the time of the year, the temperature and so on, the radon values can fluctuate significantly, and a continuous testing device can show the average value over a long-time-period. You can also easily identify what causes the radon levels to increase and can take the appropriate measures to make sure they’re kept low. And that takes us to the next section: what can you do to keep the radon levels low.
What can you do to keep the radon levels low
EPA says that the recommended radon levels are lower than 4 pCi/L (the industry standard, not the health standard, so the lower the better) and the good news is that you can keep the radon level down. The first thing that you can do is to seal any cracks in the foundation of your house, which can have a positive impact on lowering radon levels, but EPA says that a vent pipes and fans system is the best solution to this problem. This way, the radon gas is guided outside your home. Other solutions include the active depressurization systems or the active pressurization system (when the former can’t be installed).
Best radon detector in 2020
1. AirThings Corentium Home 223 Radon Gas Detector
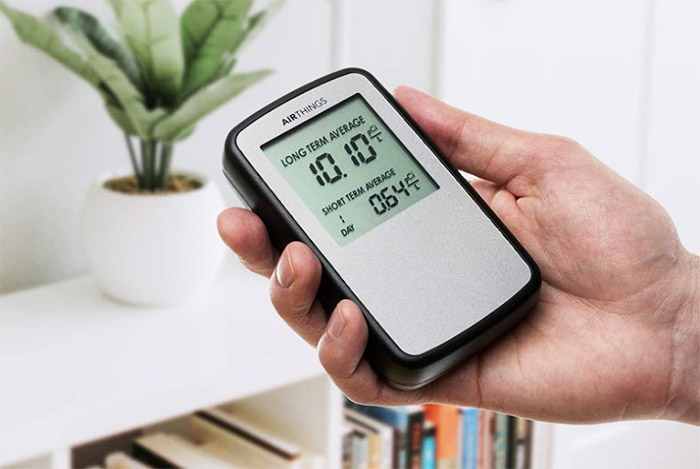
One of the most popular (active testing) radon detector is the AirThings Corentium Home, a small digital device which is the first to be battery-operated, allowing you to easily move it around the house. This is a big deal considering that the radon detectors are usually large, and most do require a connection to a power socket. It’s important to know from the get-go that the Corentium Home is not certified by EPA and it also does not carry an AARST/NRPP certification – if this is of utmost importance, you should have a look at the AirThings Corentium Pro, a significantly more expensive professional radon detector that can be connected to an app.
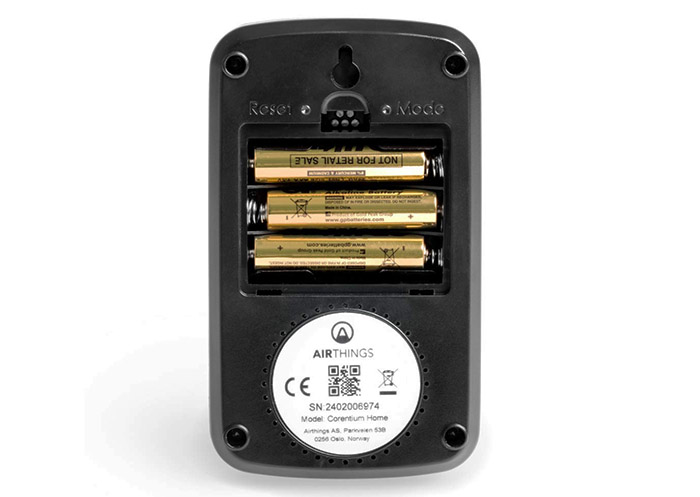
The manufacturer has also made available the Wave smart radon detector which, similarly to the Corentium Pro, can be connected to an app for a far easier data display, but the Corentium Home should still be more than enough to get some environmental readings. That being said, we’re dealing with a fairly compact plastic device which measures 4.72 x 2.71 x 1.0 inches and weighs 4.58 ounces (including the 3 AAA alkaline batteries). The entire case looks very industrial, but it’s still quite simple, so, on the rear side, you’ll find the battery cover and two buttons, Reset and Mode, the former having the role of deleting all the stored data from the previous measurement, while the latter will display the number of days that the device was active since the last reset (there’s also a mounting hole).
You won’t find any Power On/Off button (the device will start measuring the radon levels immediately after the batteries are correctly inserted), but there is a microUSB port that can only be used by the manufacturer (most likely, for diagnostics purposes) and, about half of the front side is occupied by the display (black and white). On the screen, you will be able to see the Long Terms Average radon levels and the Short Time Average which ranges between 1 and 7 days – the measurements are made in pCi/L (Picocurie per liter air). At the top there’s also the battery indicator (the manufacturer says that the batteries should last for about 2 years before needing to be replaced). It’s worth noting that the manufacturer says that the digital radon monitor doesn’t need to be recalibrated within its lifetime.
It’s true that the charcoal passive testing devices are a lot cheaper and most of the time, very accurate, but only short term and it will work only once in a single location, without showing any variations that may occur due to some occasional conditions (weather, door closed and so on). AirThings Corentium Home 223 radon gas detector can be a good reference device to help you get an idea whether you may deal with high radon levels. But, if it shows a high concentration of radon gas, I would still run a parallel test with a cheaper passive device and confront it with the results gotten from AirThings Corentium on the same period (both tests should be done in the same conditions). The reason for that is because there is a chance that it may not be perfectly accurate, showing a deviation of about 20% in the first couple of days which should reduce after being used for a longer period of time (more than two months).
2. RADEX MR107 Radon Detector
The Radex MR107 is perhaps the second most popular radon detector from the non-professional market, after the AirThings Corentium, and both devices are pretty much in the same price bracket, so I do see that the cost does dissuade people from going to the more expensive options, even the lower-end NRPP-approved RadonEye RD200P. As expected, the RADEX MR107 is not EPA certified and neither are any of the other devices from this list, but this does not mean that they’re not able to detect the radon levels to a certain amount of accuracy. Furthermore, while it doesn’t have a fancy app to go along with it, the radon detector does allow you to export the data and check it on a Windows OS machine.
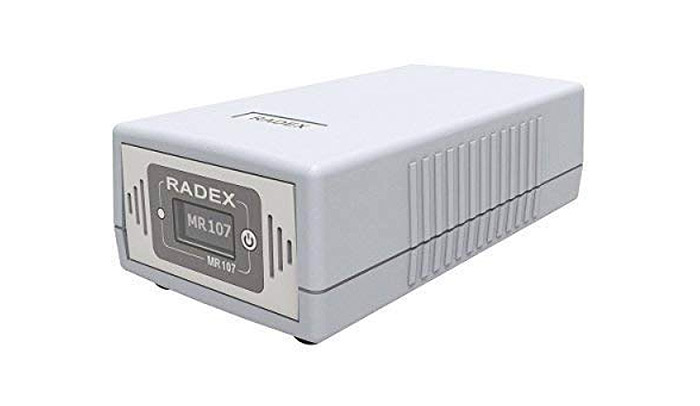
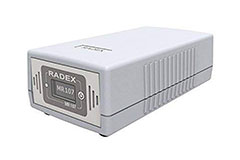
Similarly to the other active testing devices from this article, the Radex MR107 is quite compact, allowing you to easily move it from one location to the other (it measures 7.87 x 4.72 x 3.93 inches and weighs 17.6 ounces) and, to power it on, you can either rely on the internal rechargeable battery or on a 5V external power source (so, in a sense, it’s similar to the Corentium Home approach, which uses three replaceable batteries). The device looks even more industrial than the AirThings Corentium Home, sporting a rectangular case covered by a light gray matte finish and on the bottom, there are four tall feet to keep the device into place. On the rear side of the radon detector, you can find a single USB port that you can use to either charge the internal battery or for connecting the device to a computer and, underneath it, there’s a Power On/Off switch.
You don’t see this switch that often since neither the AirThings Corentium Home, nor the RadonEye RD200P have it – it’s a nice addition, although not a vital one. Moving on to the front side, the Radex MR107 has a very small black and white display and on its left, there’s a ‘Work in Progress’ LED light, while on its right, there’s an ‘On/Off/Switch Info on the screen’ button. After some time has passed after being powered on, the display will turn off to save power, but the radon detection process will still run in the background, shown by the flashing ‘Work in progress’ LED – to turn the display back on, press the button on the right. On the screen, you will be able to see the level of the radon EEVA in the air, but you can also change it to show the temperature, the humidity in the air, the max/medium/min level detected and, towards the top, it will also show if the sound alarm is turned on (if the radon levels go over a set limit, the alarm will turn on), how much battery is left and other type of information.
All this info can be sent to a local computer (you need to install the Radex One software which is compatible only with Windows OS) and you can see the radon levels variation over a certain period of time in a graph that will also contain the temperature and humidity measurements, allowing you to pinpoint any possible causes for the radon level spikes – you can also adjust the info that you see on the small LCD display and configure the Audio settings.
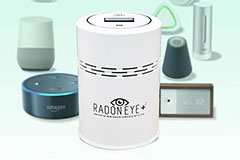
3. FTLab RadonEye RD200P Radon Detector (Second Gen)
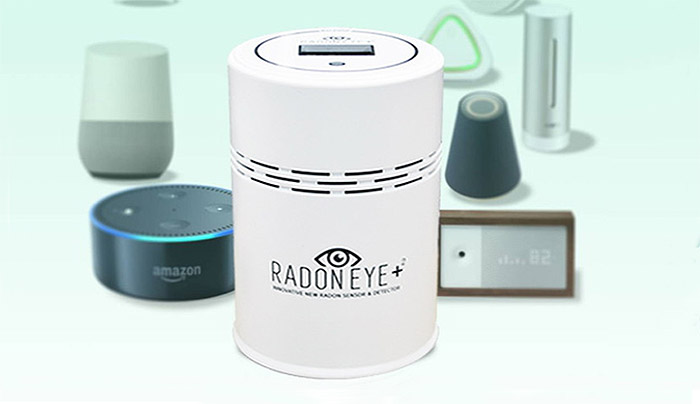
The FTLab RadonEye RD200P is one of the cheapest continuous radon detectors to be NRPP-approved, claiming to be 20 times more sensitive than the other active testing radon detectors with the help of a dual-structured pulsed-ionization chamber system and the manufacturer also boldly says that you can get accurate readings in less than an hour. The data can be seen on a small display on the top of the device or can be transferred to a mobile phone or computer for more thorough analysis. It’s worth noting that the RadonEye RD200P can be powered using a DC 12V adapter or powerbank, so, unlike the AirThings Corentium, it does not use batteries.
This is the second generation device, but, there is no true difference in the way the radon detector looks or detects the radon gas accumulation when put next to the previous generations and instead, the manufacturer has simply added more smart features, such as the WiFi connection (besides the preexisting Bluetooth) and the support for Amazon Alexa. While it may not seem important, it is a required addition considering that a lot of users experienced some issues with the Bluetooth connection. That being said, the RadonEye RD200P2 is a relatively small cylindrical device, measuring just 3.14 x 4.72 inches (just like the RD200P and the original RD200) and pretty much the entire case is covered by a white matte finish. Towards the bottom, the case does protrude a bit to make way for the fourth silicone pad (that helps keeping the detector in place) and for the DC-In connector.
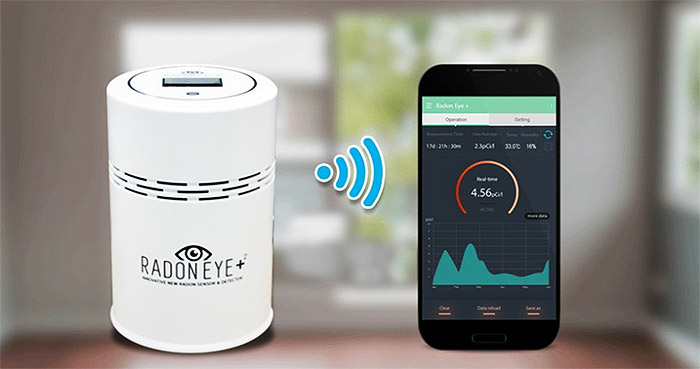
Besides the four feet, there are also some openings on the bottom of the device, as well as cutting through the cylindrical body about one third from the top to allow the air to enter the ionization chamber; on the top section, there’s a small 0.96-inch LED color display which shows the Radon concentration value in the middle (can either be measured in pCi/l or Bq/m2 – it can be changed from the app), while on the top right corner, there’s the connection status and the Vibration sign (there’s a built-in vibration sensor to prevent any detection error). Besides the LCD display, there’s also a LED which flashes when the device is connected to a mobile device and when the radon concentration is high. You can access the radon Eye+ application via either Bluetooth or direct WiFi connection and the app itself is quite simple to use and you can add multiple devices (by rooms).
The first window is going to be Operation, where you can see the Real-time radon level readings (as well as the temperature in the room, the humidity, the peak value and the measurement time), while the second window is dedicated to the Settings, where you can change the Unit, set an Alarm when a specific value is detected and change the Temperature Unit. Just like the AirThings Corentium Home, there is no On/Off button, the device will start immediately after being powered on and, as I said in the introduction, FTLab relies on a dual-structured pulsed-ionization chamber to detect the radon concentration, unlike the AirThings Corentium, which uses the lower-cost photodiode technology. In terms of accuracy, the manufacturer says that it should be about ±10% (minimum error <±0.5pCi/l), but, since the RadonEye Plus 2 is still not a professional radon detector device (despite being in the same list as the likes of the Sun Nuclear 1028), I would suggest running a passive test as well to check to see if the two results are close to each other (while trying to maintain the same conditions for both tests) before investing in any type of renovations.
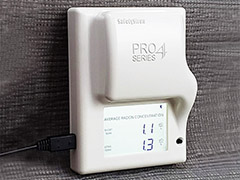
4. Safety Siren Pro Series4 Radon Detector
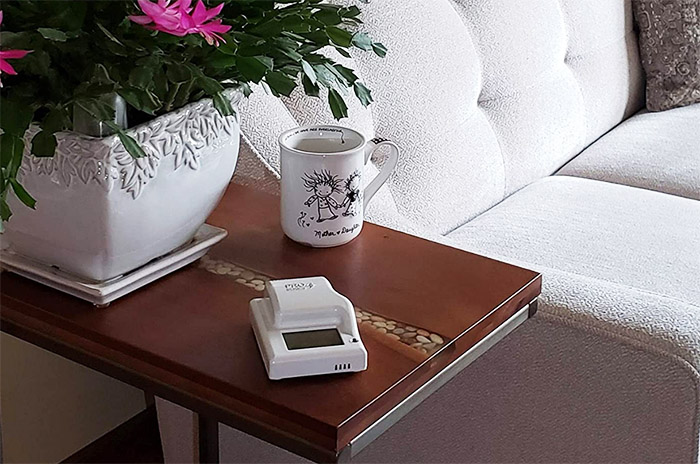
The Safety Siren Pro Series4 is a revamped version of the Series3 radon detector, so it does come with a few improvements such as the more comprehensive LCD display and the slightly more modern design. So yes, the core elements remain pretty much the same which is to be expected, it’s more of a looks upgrade. And to be honest, I think it does help the device better compete with the other players on the market, some of which went as far as to make these devices a part of a smart home.
Should you care for these features, it’s up to you, but the idea is to offer an accurate reading of the radon levels and hopefully, the Safety Siren Pro Series4 is up to the task. While the Series3 had a very industrial look, the Series4 is a bit more stylish, kind of. There’s a white plastic case with lots of curved corners and it measures 4.6 x 3.4 x 2.0 inches which is just about as large as the Pro Series3. But there is one thing that I didn’t like with this new series: there are no mounting holes.
The previous gen had it, so why the Safety Siren Pro Series4 lack this option is beyond my understanding. Also, the power cord is really not that long – there is also no support for batteries, so the radon detector needs to stay close to a power socket, which is not always ideal. In any case, the bigger display is actually really useful since it clearly shows both the short term and the long terms radon levels in the area, and there is a backlight mode to see the screen during the night as well.
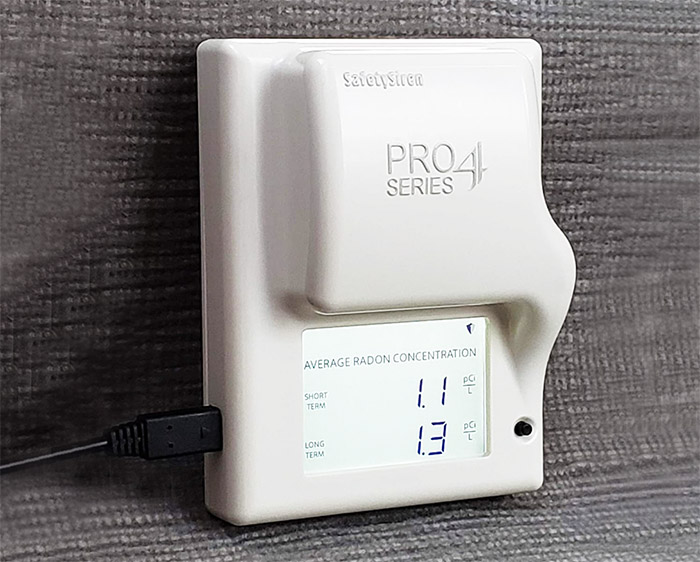
One of the features that was ported from the previous generation was the audible alarm and, in the case of the Safety Siren Pro Series4 radon detector, it’s possible to better set it up to your convenience. For example, you can silence the alarm for 30 or 90 days (with a visible countdown on the screen), but keep in mind that the alarm for elevated radon levels is preset by the manufacturer and it’s 4 pCi/L or higher (the display shows updates values each hour).
This means that when the radon detector detects values above that, the buzzer will sound 4 short chirps once every hour until either the radon levels go down or the user silence it. The cool addition to this series is the visual alarm function which is very useful for people that have hearing impairments – this way, it’s easy to know when the radon detector alarm has been activated. It’s also worth noting that the alarm can reach up to 85dB at about 4 inches away from the radon detector.
Additionally, the Safety Siren Pro Series4 runs a self-test every 24 hours to check for any electrical faults (in a similar fashion to how a lot of smoke detectors do). As I mentioned with the other models from the list, these are no professional radon detectors, so to ensure their accuracy, it’s wise that from time to time to use passive tests (where you get the results from the lab) to check if the values continue to match. This is enforced by the fact that there is no means for calibration (although you do get the possibility to receive factory evaluation).
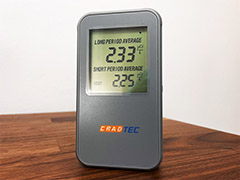
5. CradTec PRM-02H Smart Radon Detector
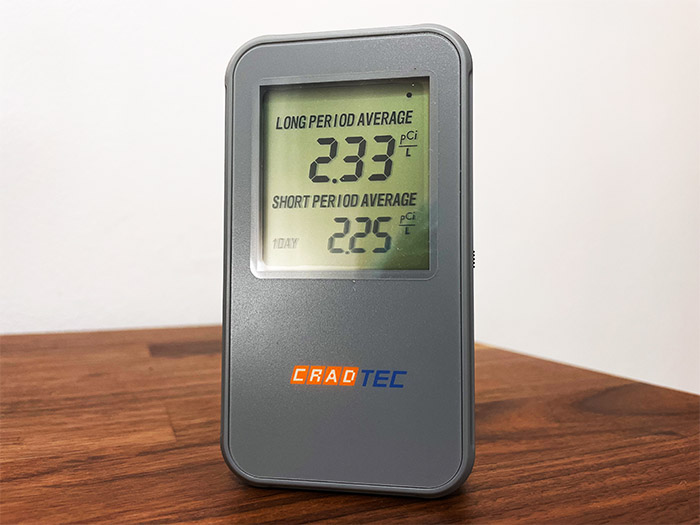
The CradTec PRM-02H is a compact, battery powered radon detector and, if you’re familiar with the AirThings Corentium Home 223, you’ll notice that the former has been heavily inspired by the latter in terms of design and functionality. But before talking more about that, I saw that the manufacturer calls the device smart, so does it connect to an app or to the local network for some browser-based client? Not really. The device is called smart because it offers a display with status data, something that’s above the passive tests, but it does not really add anything more above the other active radon detectors from this list.
I have already mentioned the similarities with the AirThings Corentium Home 223 radon detector, so expect a rectangular case made of plastic which measures 4.7 x 2.5 x 1.0 inches and I noticed that the front was gray, while the rear side was matte black. The similarities go a bit farther than that though because the rear panel is pretty much identical between the CradTec PRM-02H and the AirThings Corentium Home 223. There’s the three-battery slot covered by a plastic piece which can be held in place by a screw.
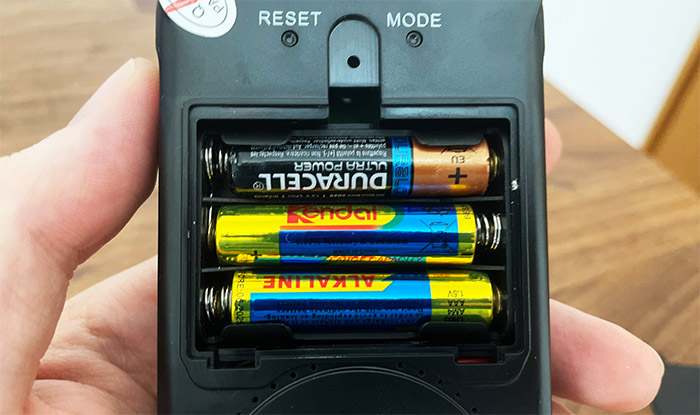
Above it, there’s the two buttons, one is Reset and the other is Mode, both requiring a narrow tool in order to be pressed – I get it for the former, but it’s highly annoying for the latter. And yes, you will press the Mode button quite often. Underneath the battery slot, there’s a circular area surrounded by small punctured holes that allow the air to reach the sensing chamber. And again, we see the same approach on the AirThings Corentium detector, so, at least design-wise, the CradTec PRM-02H radon detector feels like a clone device.
The display shows a short term (24 hours) and a long-term reading, and the measurements are done in pCi/L, but, if you press on the Mode button, it will switch to Bq/m3. Know that in case of high radon levels, the measurement will appear sooner than a day (about 4 hours) in order to let the user know that it needs to take urgent measures to lower the value (there will also be a fan icon). I did leave the device at the lower level of the house, about 3 feet off the ground and, after a day, I already got a reading which showed 2.4pCi/L.
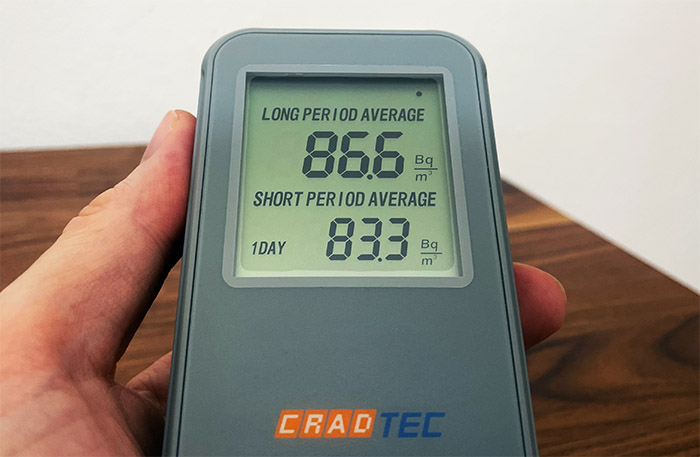
Four days later, the value gradually lowered, getting closer to 2pCi/L. It’s still a high value, so why did it decrease over time? I didn’t take any measures to lower the radon level, I just lowered the humidity in the house. Going from 70 to 55% showed a short-term radon value of 1.88pCi/L (later days, it went even lower, to 1.7pCi/L). This is more in line to the average values that have been registered in my area.
Lastly, know that just like the AirThings Corentium Home 223 (which I have referenced several times already), the CradTec PRM-02H radon detector is not EPA approved and it does not have the AARST / NRPP certifications.

Mark is a graduate in Computer Science, having gathered valuable experience over the years working in IT as a programmer. Mark is also the main tech writer for MBReviews.com, covering not only his passion, the networking devices, but also other cool electronic gadgets that you may find useful for your every day life.

