
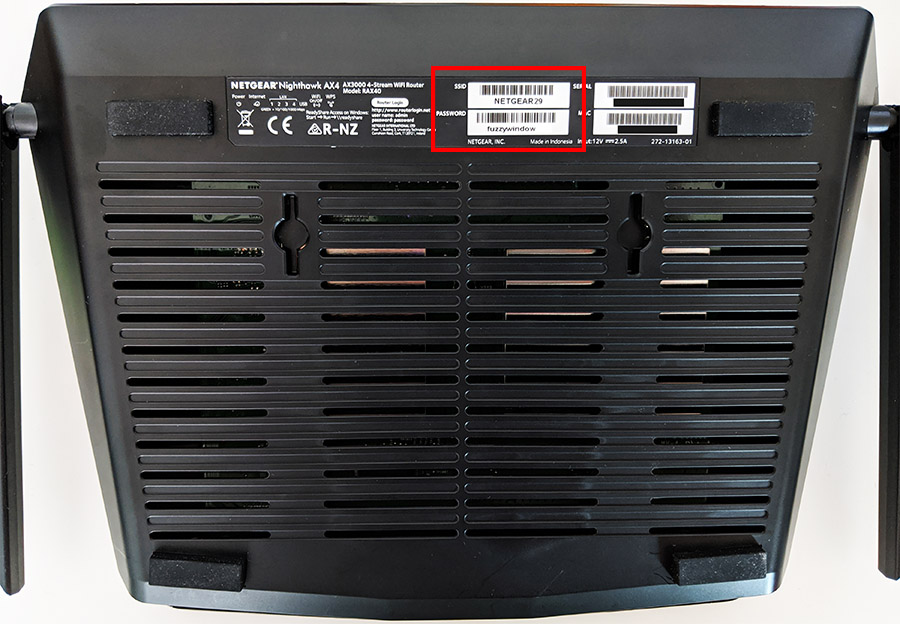
Whether you reset your wireless router to its default factory settings or you simply got a new router and want to connect your devices to the WiFi network, but don’t have the wireless security key, know that there are a few simple ways to quickly recover it. The most obvious one is to check for a sticker which has printed all the relevant information (it should also contain the default IP address, the username and password – unlike the administrator user/password, the WiFi key is unique for each device) – some routers from Asus have it on the rear side, due to their peculiar construction (such as the RT-AC86U), but on most other routers or WiFi systems, the sticker is going to be on the bottom of the device.
There is a chance that after entering the wireless security key from the sticker won’t work and this can happen when the router is already configured, so the user changed it from its default state. To fix it, simply reset the router to the factory default settings: check for the Reset button, which should be next to the ports (make sure you press it long enough to perform a proper reset, since there are routers that simply restart if the button is pressed for only 2-3 seconds).
As expected, there are some cases where the sticker is missing, but even so, depending on whether you are already connected to the wireless network or not, there are some steps that you can take in order to retrieve the wireless security key. If you’re curious about what the security key is and how many types there are, check this article on Wikipedia.
1. If you are already connected to the WiFi network – Windows 10 instructions:
-
- Click on the Windows key and then on the Settings icon (on the left, there’s a cogwheel icon).
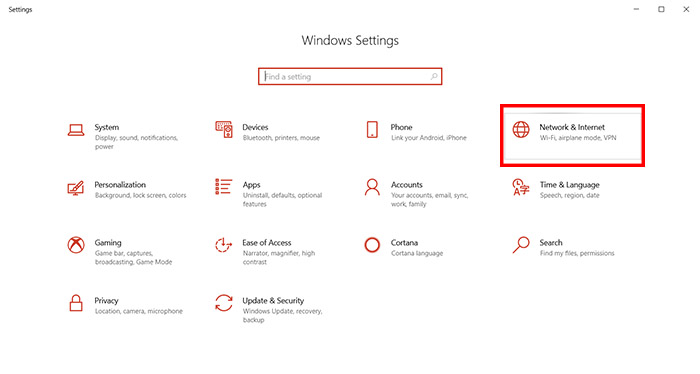
- After the Windows Settings section has appeared, identify and click on the Network & Internet.
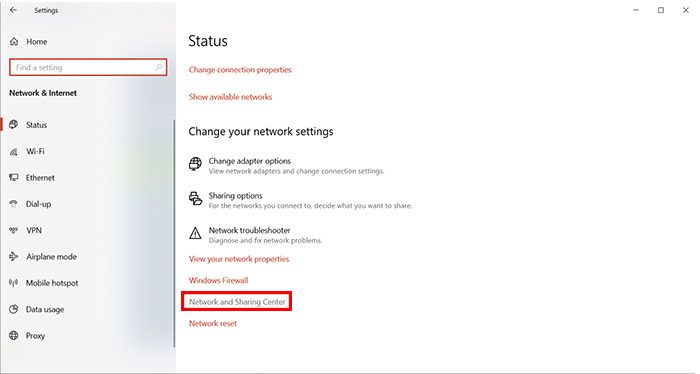
- You should now be able to see the Network status – scroll down and click on the Network and Sharing Center (can also be found under the Related settings from the WiFi tab).
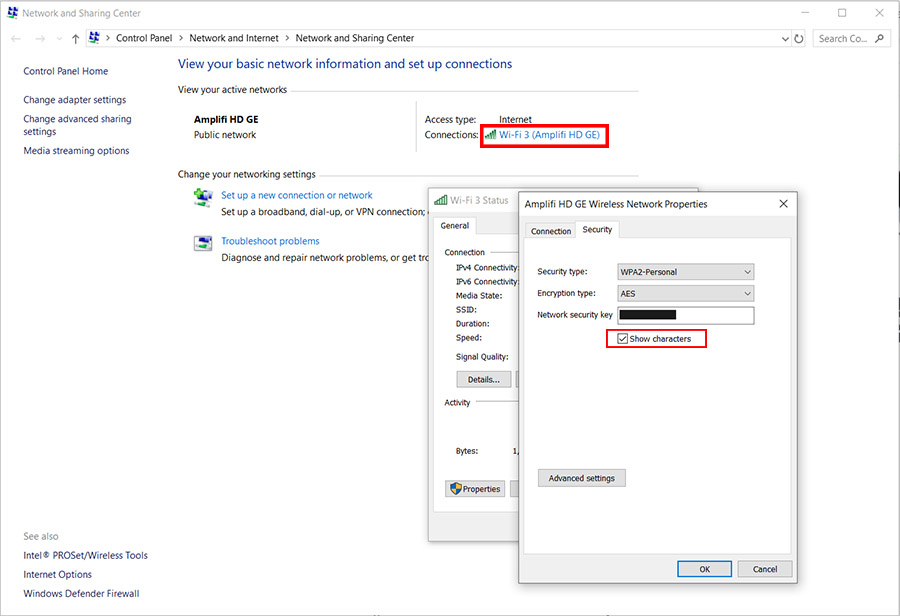
- Under ‘View your active networks’, you should see the SSID (name) of the WiFi network and on the right, there should be the Access type and the Connections: click on the WiFi network next to the Connections to summon the WiFi Status window.
- Here, click on the Wireless Properties to open a new window – select Security and then under the Network security type, click to Show the characters of the wireless key.
2. When you are connected to the WiFi network – MacOS instructions:
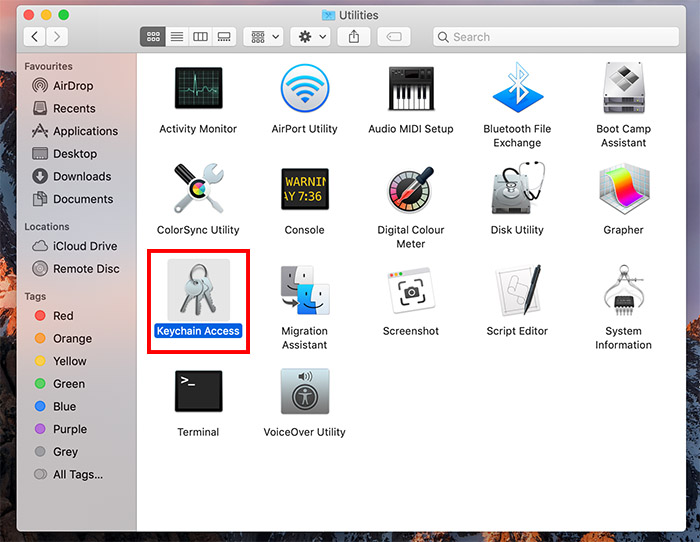
- On MacOS, the wireless key will be stored in the Keychain Access section and, to enter it, you need to click on Go > Applications and identify Utilities.
- Open it and you should be able to click on the Keychain Access.
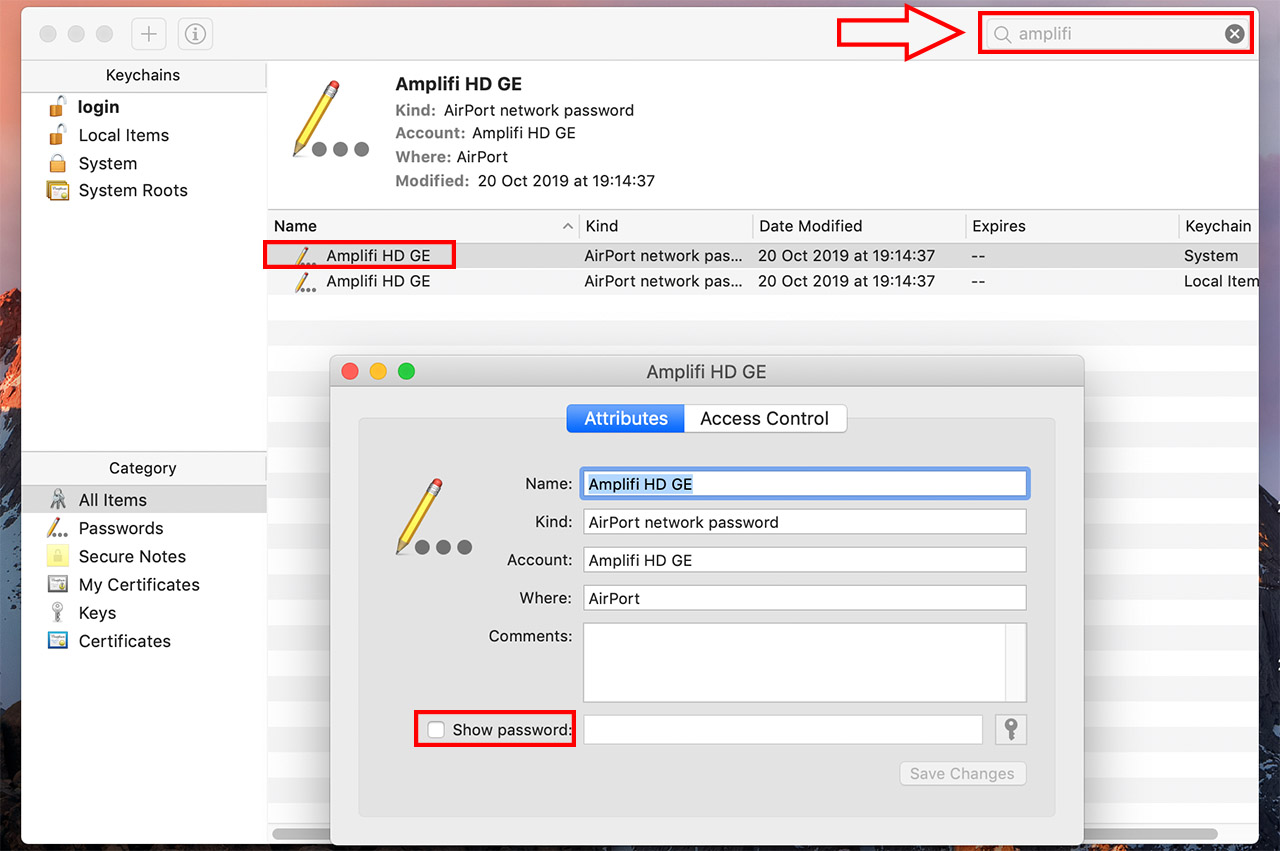
- At this point, it will not immediately become obvious which is the password that you’re looking for and, to simplify things, simply enter the name of the SSID you are connected in the search box on the top right corner (as seen on the pic).
- Double click the network and at the bottom, click the box next to the Show Password: you will be asked for the password of the active User account – enter it and you should be able to see the wireless security key.
3. When you are not connected to the WiFi network:
Note: In this section will also show how to change the wireless security key of your router.
Since it will be impossible to connect to the SSID without a passkey (unless it’s set to open), you’re going to have to plug an Ethernet cable from your computer to the router, open a browser and in the URL, enter the IP address of the router. If you’re lucky, you could find it on the info sticker from the bottom of the wireless router, but, if it’s missing or doesn’t work, then you can find it by opening a terminal (from Windows, search for cmd) and entering ipconfig.
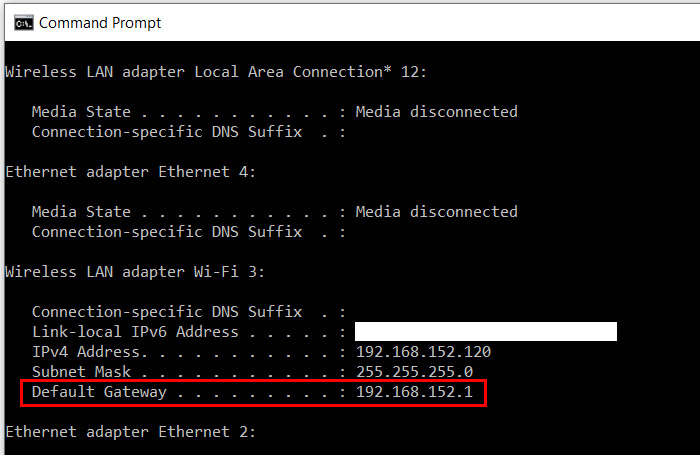
Here, you should be able to identify the Default Gateway (should be something like 192.168.x.1). If you’re using a MacBook, you need to go to the Network window (click on the Apple icon > System Preferences > Network), then click on Advanced and the TCP/IP tab to see the gateway of the router. Enter this IP in the URL and pretty much all routers will ask for the username and password – depending on the router model, you should be able to find the default ones on the Internet (should be some combination of admin/password), but, if it was changed already due to a prior configuration, you have no choice but to reset the router to its factory settings and start again.
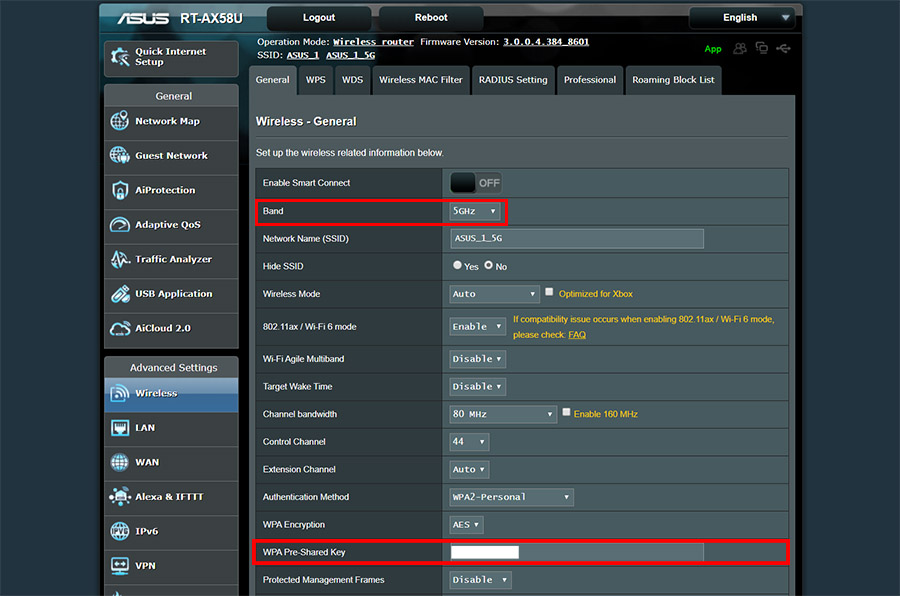
After gaining access to the user interface, you should search for the Wireless section – every router brand is going to be a bit different so, for example, an Asus router will have the Wireless section under the Advanced Settings and to see the wireless passkey, simply scroll down until you can identify the ‘WPA Pre-Shared Key’; since you’re here, you can also change the password.
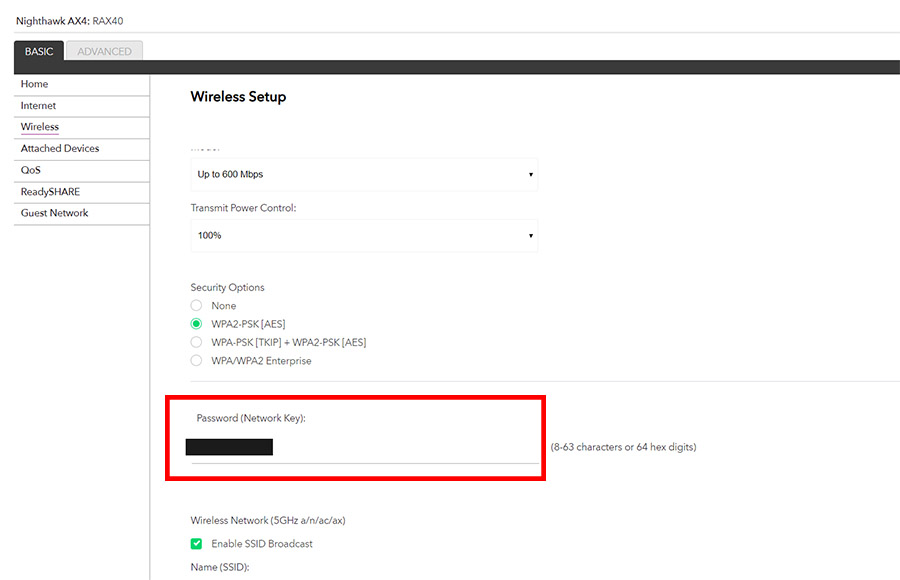
If you use a Netgear router, the Wireless section is going to be under Basic and again, simply scroll down to see the wireless passkey – you can also change it now from its default state.
Some WiFi systems, such as the Google WiFi or AmpliFi HD GE have made it pretty much impossible to go this route since they lack a web-based UI, so, unless you have access to the dedicated application, you will not be able to recover (or change) the wireless security key.
Mark is a graduate in Computer Science, having gathered valuable experience over the years working in IT as a programmer. Mark is also the main tech writer for MBReviews.com, covering not only his passion, the networking devices, but also other cool electronic gadgets that you may find useful for your every day life.