
The gimbals can hardly be considered the most exciting devices, but the PowerVision S1 tries to change that not by challenging the core concept, but by improving it and adding a few new elements. PowerVision has always been a bit more quirky, something that’s very obvious with its drone series and it’s interesting to see that this unconventional approach has helped make the S1 one of the most compact gimbals out there.
| PowerVision S1 | |
|---|---|
| Powervision.me | Check Product |
All that in an effortless manner by folding all the moving parts. It could raise the question of longevity, so we will check just how well everything is actually put together. The PowerVision S1 can also charge your phone and I have seen this concept before even with the charging cases of TWS earbuds. But there’s a twist, you can charge your phone wirelessly.
Indeed, there is a 4,120mAh power bank inside the compact case of the S1 that will charge up your phone and any other compatible device (10W). Furthermore, the PowerVision S1 does come with a comprehensive proprietary software which supports gesture control and it has a smart tracking algorithm (AI). Additionally, there’s also in-app editing, ensuring that you can create suitable videos for most social media platforms (short-video format). That being said, let’s check out the PowerVision S1 and see if it needs to be in your bucket list.
Design and Build Quality
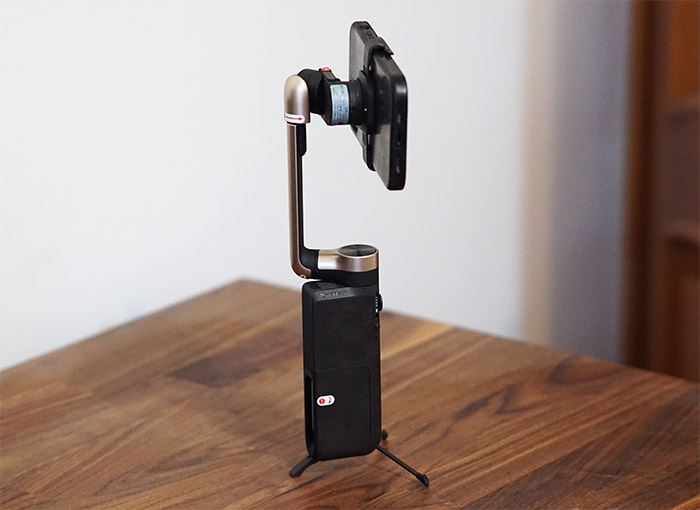
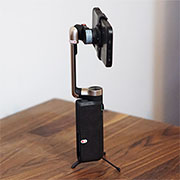
Out of the package, the PowerVision S1 is already folded and it won’t resemble in any way a gimbal. It’s a rectangular case with a black plastic handle and on one side, you should see a metallic border – it looks like an oversized lighter. I was accustomed to the cylindrical handles of the other gimbals, so I was skeptical of the large rectangular case, but PowerVision has added a soft leather-like finish to make it comfortable to hold and ensure that it doesn’t slip out of hand.
The gimbal does measure 5.5 x 2.3 x 1.1 inches (14.1 x 5.9 x 2.8cm) when folded, so it’s more compact than the Hohem iSteady X and it’s not even that much about the size, the shape matters even more. The rectangular design of the S1 will make it easier to insert it into the pocket of your jeans, let alone a backpack.
And what’s interesting is that despite the inner powerbank, the device still weighs 10 ounces (298g), so it’s not heavier than your regular compact gimbal. The manufacturer has made the unfolding process fairly easy for the user, especially for the first time, by adding numbered labels with arrows, showing the correct order and the direction towards what a specific piece needs to move.
That’s how I understood that before anything else, I need to open a side panel to expose the secondary stabilization motors. And, following the instructions, I straightened the arm and adjusted the position of the tilting motor as to ensure that I can attach a smartphone.
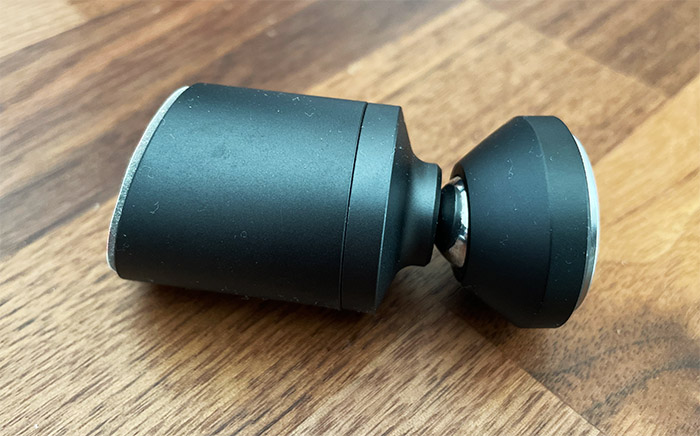
The arm and the joints are mostly made of plastic, but there is a partial metallic shell which, in my case, it was matte rose gold. At this point, I realized that something seems to be missing. Where is the clamp? The PowerVision S1 has included a separate metallic clamp which attaches magnetically (I assume it’s a part of the device even if I got it in a separate box). The concept is simple, you need to use a strong battery (there are two pill-shaped in the box) that get attached to the rotating motor section and then attach the clamp to the other end.
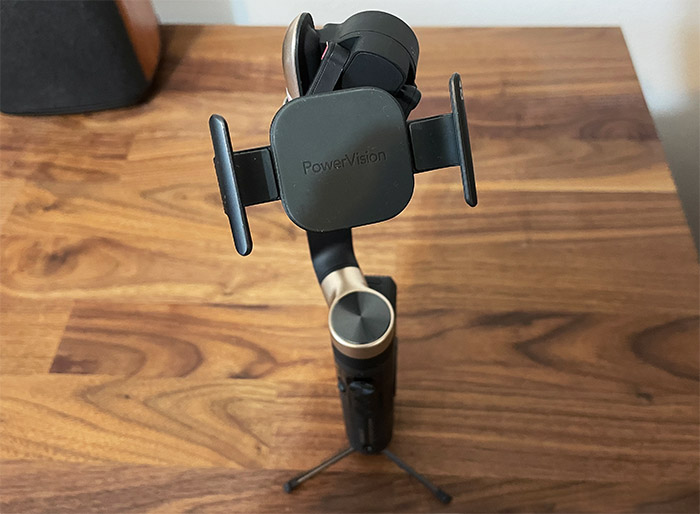
The clamp seems to be metallic (for the most part) and, while it can get fairly wide (the opening is 3.5 inches-wide or 9cm), it doesn’t fare that well with phone cases. For example, an iPhone 12 with a case would sit inside the clamp, but it’s going to have the tendency to move when using a silicone case. Also, I do appreciate the silicone pads which are supposed to protect the phone from scratches caused by the clamp, but you need to be careful especially when removing the clamp because it’s very tight and it’s easy to scratch the phone.
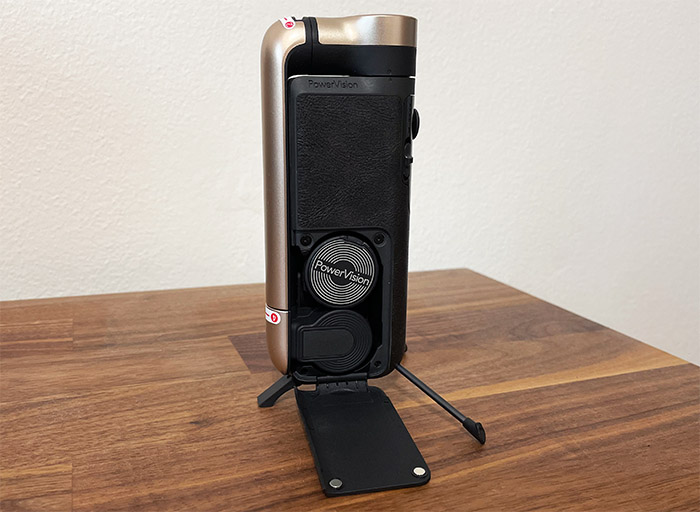
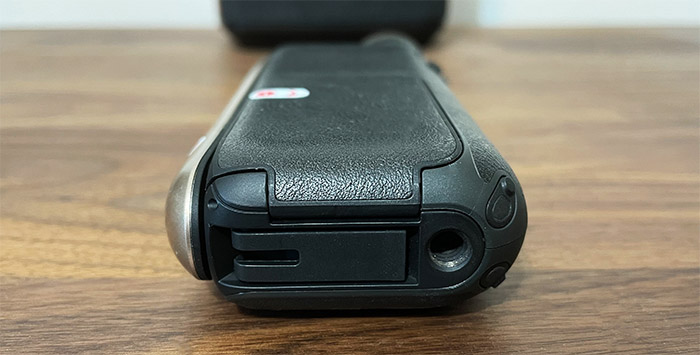
I haven’t yet mentioned it, but yes, the PowerVision S1 is a 3-axis gimbal and the manufacturer used a USB-C for charging up the inner battery. If you look at the bottom of the handle, you’ll see that there is a mounting hole, so you can add whichever tripod you prefer. But, the gimbal has a built-in tripod. If you look closely, you can see the that there is a plastic piece that can be detached and put into position (has a small silicone foot) and next to it, there are two circular areas from where you can unfold two telescopic arms which can also be put at an angle.
This way, the gimbal will stay vertically – it’s not the most stable system, but it should work if you forgot your dedicated tripod at home.
The Controls
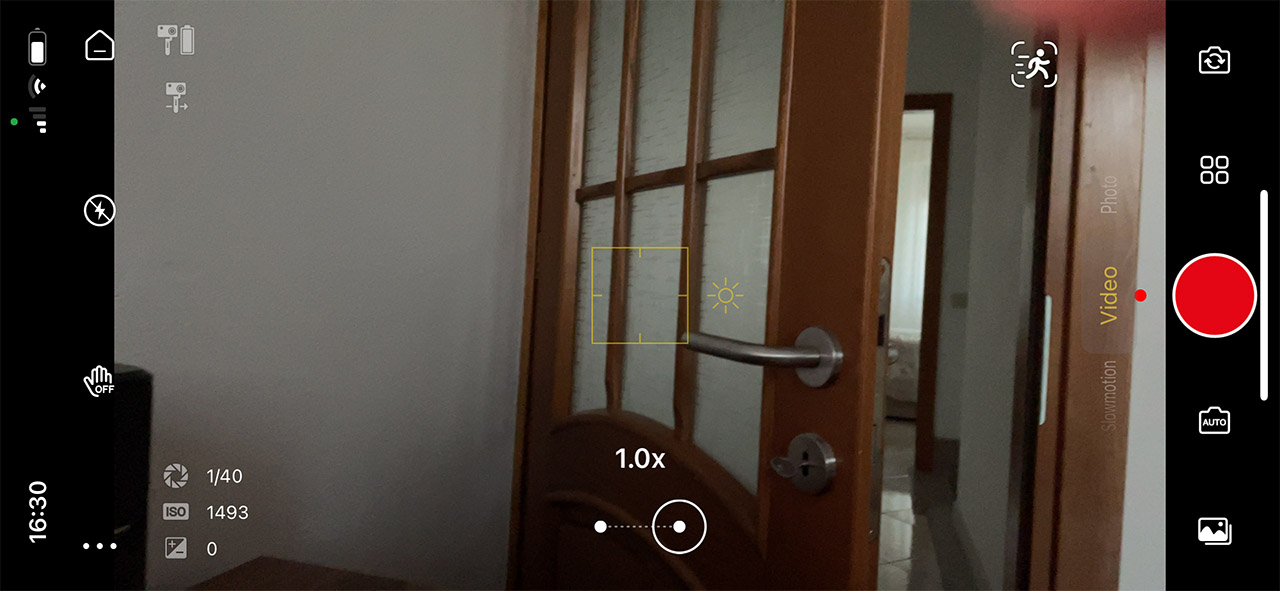
PowerVision has added all the buttons on one side, just a bit above the USB-C port and the way to easily differentiate them is by checking the pattern at the top. Well, it’s not like you’re going to miss the joystick that has the role of moving the gimbal in four directions (up, down, left and right) and it’s an alright implementation. It’s fairly accurate and you can get accustomed to the fact that it’s a bit small, but when compared to other gimbals, I suppose a slight depression in the middle to help the finger rest better could have done wonders.
The pattern works decently well, but it can be better. Know that the joystick can also be pressed and its function is to start the Tracking mode (one quick press), to re-center the gimbal (two presses) and to switch between front and rear (press three times).
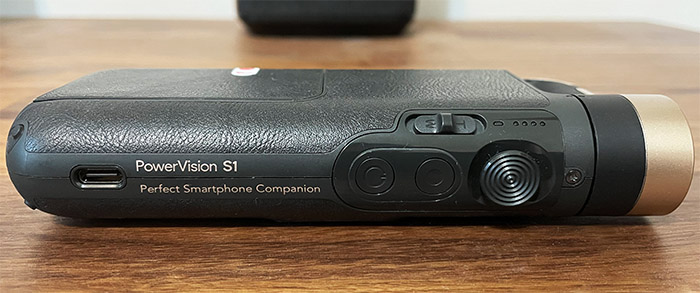
Underneath the Joystick, there are two buttons, the bottom one is the Power key – press and hold it to see the battery level, and, once the gimbal is turned on, you can use it to switch between portrait and landscape mode (press it two times). Above it, there is the Camera button which, as its name suggests, it will take a photo or start a video recording when you press it once and if you hold the button, it will start the Burst shooting mode. On the side, there’s the Zoom slider and the battery level LEDs – one LED is the equivalent of 25% percent of battery. Overall, it does seem that the PowerVision S1 does have all the default controls expected from a gimbal.
Other Accessories
Besides the clamp, I got another accessory in the package and it seems to be a phone holder which can be installed on the windshield. It’s well done and made of metal, although I initially failed to understand its relation to the gimbal. But after checking the official page, there is another accessory available, a phone case for iPhones.
And it makes sense since I mentioned that the phone can slide out of the clamp with its default case. So, the phone holder, being magnetic, is a way to complement the use of the iPhone case.
The Setup Process
Since it’s quite obvious that the targeted audience consists of the iPhone users, I am going to install the app on an iPhone 12, but it will also work with Android as well. The app is called Vision+ S1 and, after installing it, the first thing that needs to be done is to accept the User Agreement and the Privacy Policy. Unlike other manufacturer (cough Eufy cough), PowerVision made it very clear what data is being collected (includes location, mobile device data, data shared on social media networks and more) and what they’re going to do with it.
Before anything else, it’s used for their product promotions, but they may also share the collected data with third parties. And there is a table which shows the third-party SDKs and the purpose of the data collection and use. After that, you’ll be asked to allow the app to use your location (I decided to set it to Precise:Off), to use Bluetooth (necessary to connect to the gimbal), to receive Notifications (didn’t really find them useful) and then, the actual wizard started.
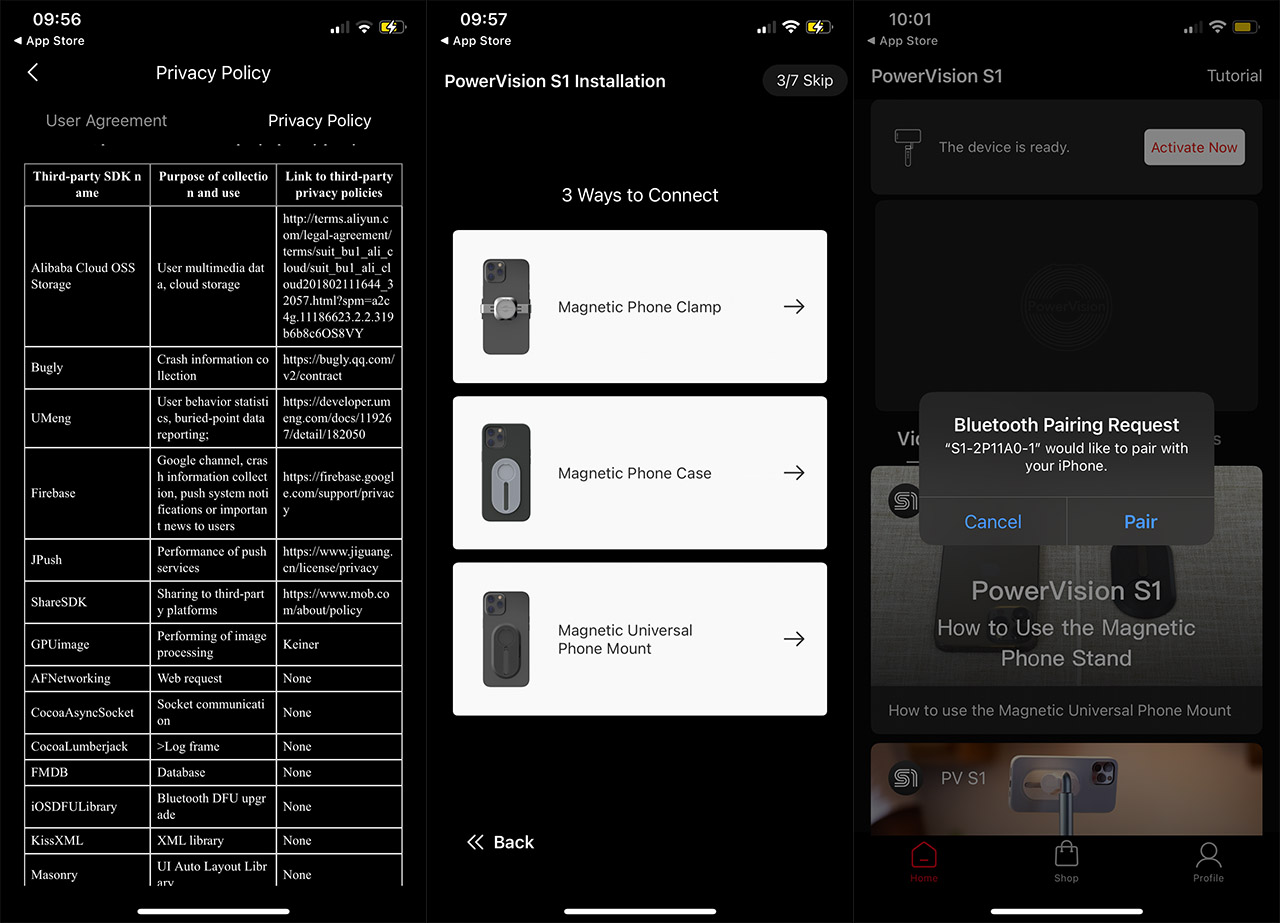
There is a guide on how to unfold the gimbal (skippable) and how to attach the phone to it (although the labels are already clear enough). Afterwards, the app will ask for access to the microphone, to the photos and to the camera, which makes sense. I guess you could use the mounting hole on the bottom to attach a deadcat, but there is none around the case – you’ll have to be creative with a mic addon.
Returning to the app, at this point, you’ll be asked to create an account and you can either choose email or phone number (go with the former) and that’s about it, you can now use the new camera app. Also, know that each section will have its tutorial, so you don’t get lost and easily understand how everything works, despite its complexity.
How the PowerVision S1 Works
I won’t deny that Apple did a good job when developing the Camera app, but the Vision+ S1 is miles ahead in certain aspects, mostly in regards to cinematography. There are both Video tutorials and Shot Guides to help you try out various techniques, and, after the phone is connected via Bluetooth, you will be able to see how much battery is left, start the live view or the PowerFollow.
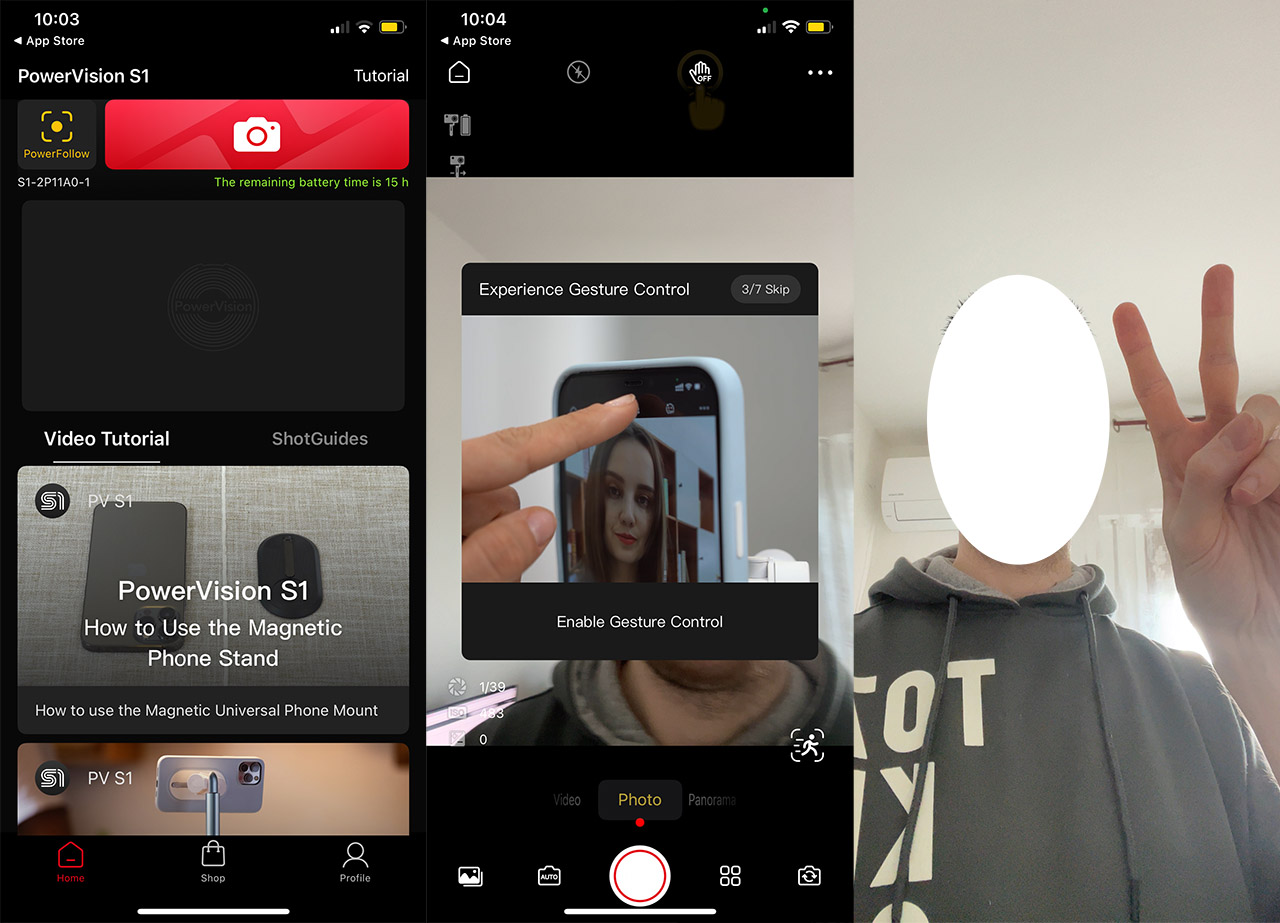
The idea behind the PowerFollow is to make the gimbal follow you around while you’re live streaming and, as expected, it works really well even if you do sudden moves. After you move to the actual camera view (the red button), by default, you get the options suitable for Video and you will see a small icon with a running man. That’s going to enable the AI tracking which attaches to the area in the middle of the screen and move the arms of the gimbal to keep that section in the center. It’s also possible to track faces and specific people, which is incredibly useful while vlogging.
Another important aspect is the ability to change various settings, including the ratio, the brightness and the flash (I also liked the status info on the bottom left screen – aperture, ISO). The app will provide the possibility to take a panoramic shot and you get to choose between various available modes (including 240 degrees, clone, 3×3).
And there is also the possibility to capture a Timelapse (very useful for me when shooting 3D printing videos) and I saw that PowerVision has included a Slowmotion mode as well. But, while these functions are incredibly useful for a wide array of applications, the point of the gimbal is to keep the phone as steady as possible and allow for fluid and ample movements.
Obviously the up and down movements (when walking) aren’t going to be negated, not with a 3-axis gimbal, but the PowerVision S1 should still help up to a certain degree. So, to see how well the gimbal keeps the phone steady, I went to a nearby small town and first, I filmed using an iPhone 12, then, I took a longer video on what you can expect using the PowerVision S1.
The iPhone 12 already does a phenomenal job at stabilizing the footage, but the gimbal adds that extra stabilization when checking corners – I did use the joystick a few times to get an idea of how it moves in video.
The Battery Life
The battery should easily allow you to film an entire day from dusk to dawn, so it’s a bit more than 12 hours. In my case, filming for about half an hour had pretty much no impact on the battery. Obviously, if you decide to charge your phone using the powerbank, then you will shorten the potential battery life by quite a bit.
The PowerVision S1 as a wireless charger
I saw that the manufacturer has advertised that the PowerVision S1 can wirelessly charge a compatible phone so I decided to check out how well it works. I didn’t really check any guide and, while the device was turned off and folded, I put an iPhone above it. Nothing happened.
That’s because I needed to put the gimbal in charging mode. So, I pressed the Power button once, so that the LED will become orange and, after putting the smartphone above the PowerVision S1, it started charging.
The Conclusion
In a market dominated by Moza and DJI, is there a place for a new player? Oh yes. The PowerVision S1 is one of (if not) the most portable gimbals out there and, while the 3-axis approach and the controls aren’t anything new, the tracking of either object or human is really well made and properly polished. So it’s clear that PowerVision understood its audience considering that it’s far easier to quickly create good videos for social media with an iPhone and this gimbal. There is, of course the additional powerbank and wireless charging which weren’t mandatory, but perhaps enough to persuade you to avoid the competition. It’s not the perfect device (I am not a fan of the clamp), but it does come close to what could be the complete package for a gimbal.
PowerVision S1
-
Pros
- Compact and easy to carry
- Supports AI tracking
- Various video mode available (including slow-motion and panorama)
- Wireless charging (powerbank)
- Built-in tripod
Cons
- The clamp is a bit tight and may not work that well with some phone cases
Mark is a graduate in Computer Science, having gathered valuable experience over the years working in IT as a programmer. Mark is also the main tech writer for MBReviews.com, covering not only his passion, the networking devices, but also other cool electronic gadgets that you may find useful for your every day life.