
The Technaxx TX-168 is a universal car alarm which was designed to fit pretty much any type of automobile since all it requires is the access to the battery and a lighter slot to function. It’s a simple, yet effective approach and the idea is to sound the alarm both under the hood and inside the car if the sensor detects movement.
| Technaxx TX-168 | |
|---|---|
| Amazon.com | Check Offer |
And no, you don’t have to worry about losing a lightning outlet because the module does offer two USB ports, one type-C and the other Type-A (limited at 2.4A). But how common are cars without a built-in alarm? Is the Technaxx TX-168 actually needed? A lot of older cars do not have an alarm, so an inexpensive device which won’t make any unnecessary clutter can be a godsend. But even a lot of the newer cars lack an alarm.
For example, I drive a 5-year old Fiesta that doesn’t have a car alarm and my sister drives a one-year old Tucson without a car alarm, so it’s just an optional that a lot of people don’t deem important, even if it actually is. And, if we were to compare the price of the Technaxx TX-168 to the one requested by the dealers for the built-in alarm, well, it’s usually a lot less. But the question is just how effective this universal alarm actually is. Let’s put the Technaxx TX-168 to the test and find out.
The Design and Build Quality
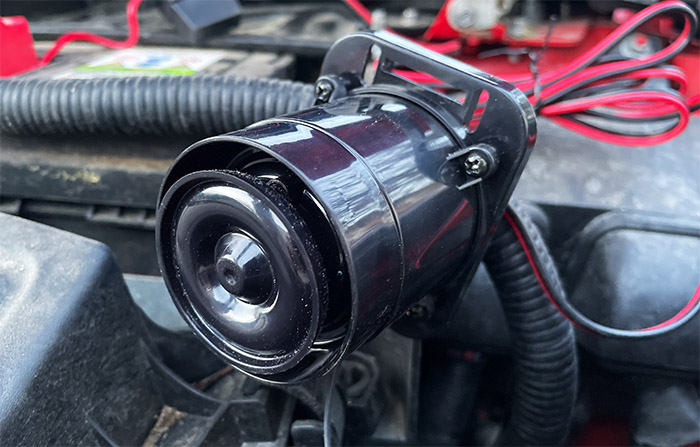
Inside the package, there are three parts, one is the external siren that gets to be installed under the hood of the car, the other is the car alarm that needs to be installed into the car’s lighter outlet and lastly, there’s the remote control. The external siren consists of the main module and a couple of cables. The module is made of plastic and it’s very lightweight since inside it there is a buzzer (or speaker) attached to a board and you can also see the small transmitter board that’s used to communicate with the car alarm.
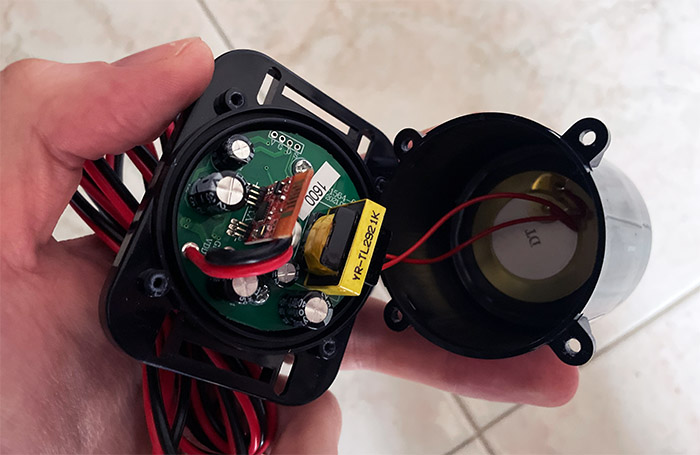
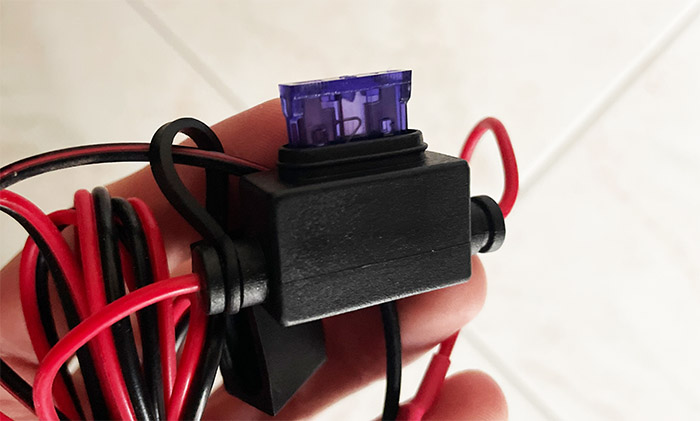
The two wires (red and black) are fairly long, so you have some freedom to where you can attach the module (there are two zip ties in the box to help you with that). And, as you may have anticipated, the red is for positive and black for negative, so you know which to connect to what battery terminal, and I have noticed that on the red wire, there is a fuse. It’s a 3A fuse which does serve as a surge protector and even for over-current – know that all car alarms have a fuse (at least I hope so).
This fuse can be replaced if necessary and it’s not a complicated process since the manufacturer has added a protective cap that needs to be removed.
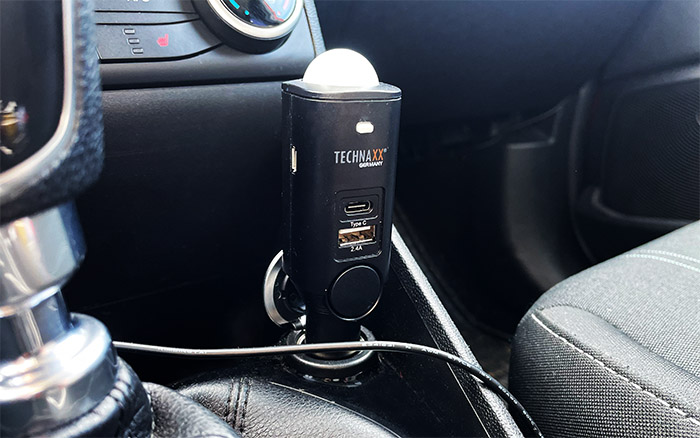
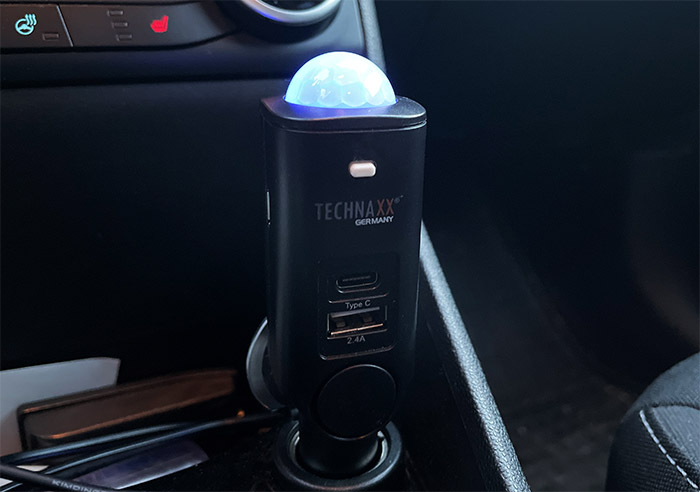
The car alarm module is designed to be powered up by a lighter outlet from your dashboard. It’s also lightweight and entirely made of plastic but do be aware that it protrudes quite a bit.
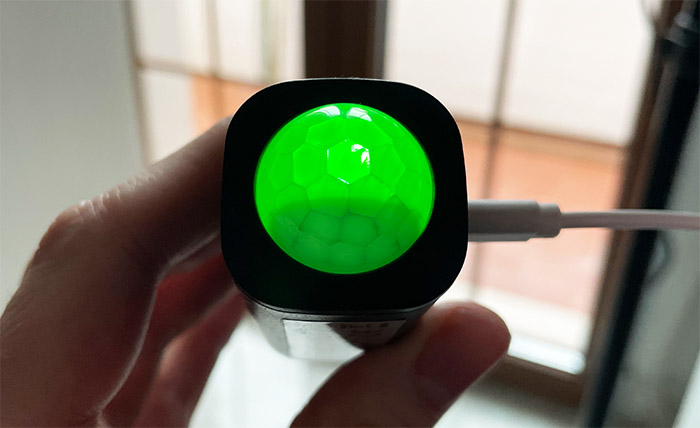
The module measures 5.5 x 1.2 inches (14.0 x 3.0cm) and at its end, there is a dome-like protrusion that allows the LED to shine through (although only partially). This LED will be solid blue while the car alarm is charging and as soon as it’s fully charged, it will switch to green.
When the battery is low, then the LED will flash blue – in case the alarm is triggered, the LED will flash red. There are some other functions which rely on a combination between the LED and the speaker – yes, there is one on the side of the module as well as on the external device. When the device is armed, the LED will flash red every 5 seconds and, when you activate it, the LED will flash red once with a beep.
I have mentioned that there are two additional USB ports since you ‘got robbed’ by one of the lighter outlets, but there is an additional port, a microUSB which is positioned on the side of the module. There is a reason why it’s on the side of the alarm – the microUSB port can be used to charge the car alarm only, not for charging up a phone or a camera.
Be aware that you need to charge the car alarm before it will be activated, and you don’t necessarily need to use the microUSB port since the lighter socket will do just fine as well. Another important element is the Panic button which is small and white, and its role is to enable the siren manually in case you feel like you’re in danger. It’s a useful and nice feature to have.
The Remote Control
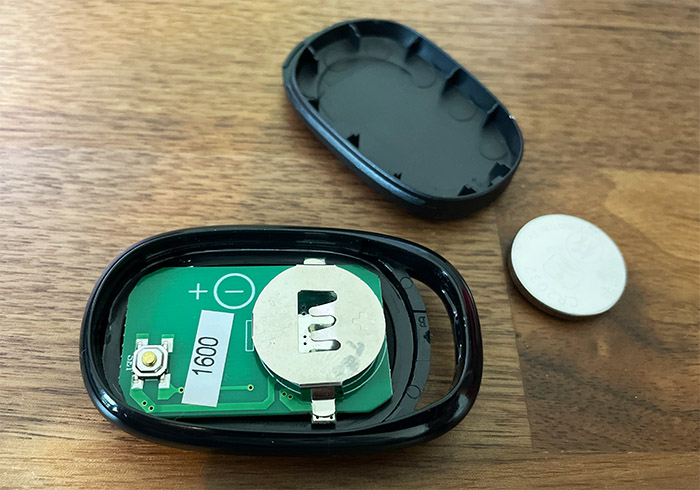
You do get a single unit in the package, and it does not have a battery installed.
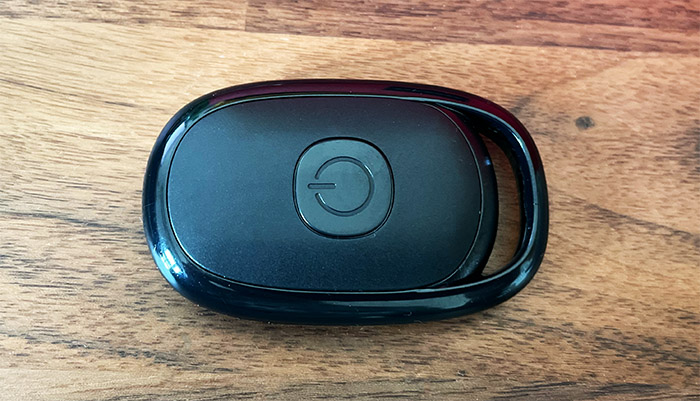
The good news is that you do get a battery alongside the remote control and to insert it, you need to use a sharp object to detach the top section (check for the ridges on the frame of the plastic case). The pairing process is not as simple as I thought since you do need to have the board open (best done after installing the battery). You need to press and hold on the Panic button from the car alarm module and, as soon as the LED starts flashing in colors, press the small button from the battery side on the small PCB.
Wait a few seconds until the mixed color lights turn off and the remote control should now be paired to the Technaxx TX-168. If you thought detaching the lid was awkward, just try putting everything back together. Technaxx really needs to make this process a bit more simple – just add a sliding door or something.
The Installation
Before attempting to install the Technaxx TX-168, you need to make sure you know what you’re doing, otherwise you can actually get electrocuted. If you’re familiar with the car battery and have jump started one before, then you should be fine. The idea is to connect the red wire to the positive end of the battery and the black one to the negative, so unscrew the bolts a bit, insert the connectors and tighten them back. Be aware that when you connect the second wire, the alarm will let out a quick beep.
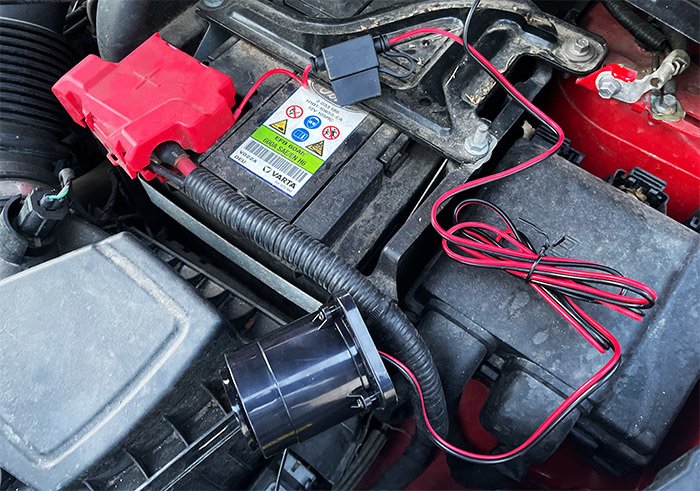
Then, you do need to put the module somewhere under the hood using the zip ties, but you also need to make sure that it’s not going to end up somewhere near the engine since the heat can damage it. The Fiesta is a small car, but I think I found a good spot for the module as you can see in the photo. The next step involves inserting the car alarm into the lighter outlet and as soon as you do, you should see the LED turning solid blue.
Now it’s time to pair the remote control (the instructions are in the previous section), and you should also be able to arm and disarm the alarm at a push of a button. Be aware that not all cars will continue to give power to the outlet when the car is turned off, so make sure that you check if that’s the case before purchasing the Technaxx TX-168.
The Technaxx TX-168 in Action
Before discussing anything else, you need to know that the beeps are very loud, so if you were worried that the sound may be muffled or anything like that, know that it’s just as loud as any other car alarm (above 100dB). Now, for the test itself, I armed the alarm pressing the button on the remote once and then I moved around the car, touching it and trying to get some reaction through the window.
Nothing happened, which is great – we don’t want to deal with false alarms. As soon as I opened the door and put a leg inside all hell broke loose. So, this is what I saw so far: I haven’t yet experienced a false alarm, which means that a cat will not trigger it, but nor will a burglar that attempts to hijack the door. The alarm will only trigger when someone enters the car. But there is an issue that I discovered a bit later. The alarm will not get triggered if someone opens the trunk. So, while your car won’t be stolen, your groceries are at risk.
The Conclusion
As I said before, I didn’t have a car alarm at all, so Technaxx TX-168 was actually a very welcomed addition. But is it as good as a built-in (optional) device that comes with your car? In some respects, it’s actually better. I have not experienced any false alarms and the price tag is very attractive. Still, I am not sure if many people will like the long internal module even if it does offer some USB ports, especially in a tiny car. Also, the lack of reaction in regard to the trunk is something to take into account. Even so, overall, I do think the Technaxx TX-168 is a nicely designed car alarm and you should definitely give it a try if you don’t have an alarm in your car already.
Technaxx TX-168
-
Pros
- Inexpensive, yet fairly reliable car alarm
- Somewhat easy to install
- You lose a lighter outlet, but gain two USB ports
- Have not experienced any false alarms
Cons
- The internal car alarm module is a bit big
- The alarm does not trigger if you open the trunk
- Putting together the remote is a bit difficult to put together
Mark is a graduate in Computer Science, having gathered valuable experience over the years working in IT as a programmer. Mark is also the main tech writer for MBReviews.com, covering not only his passion, the networking devices, but also other cool electronic gadgets that you may find useful for your every day life.