
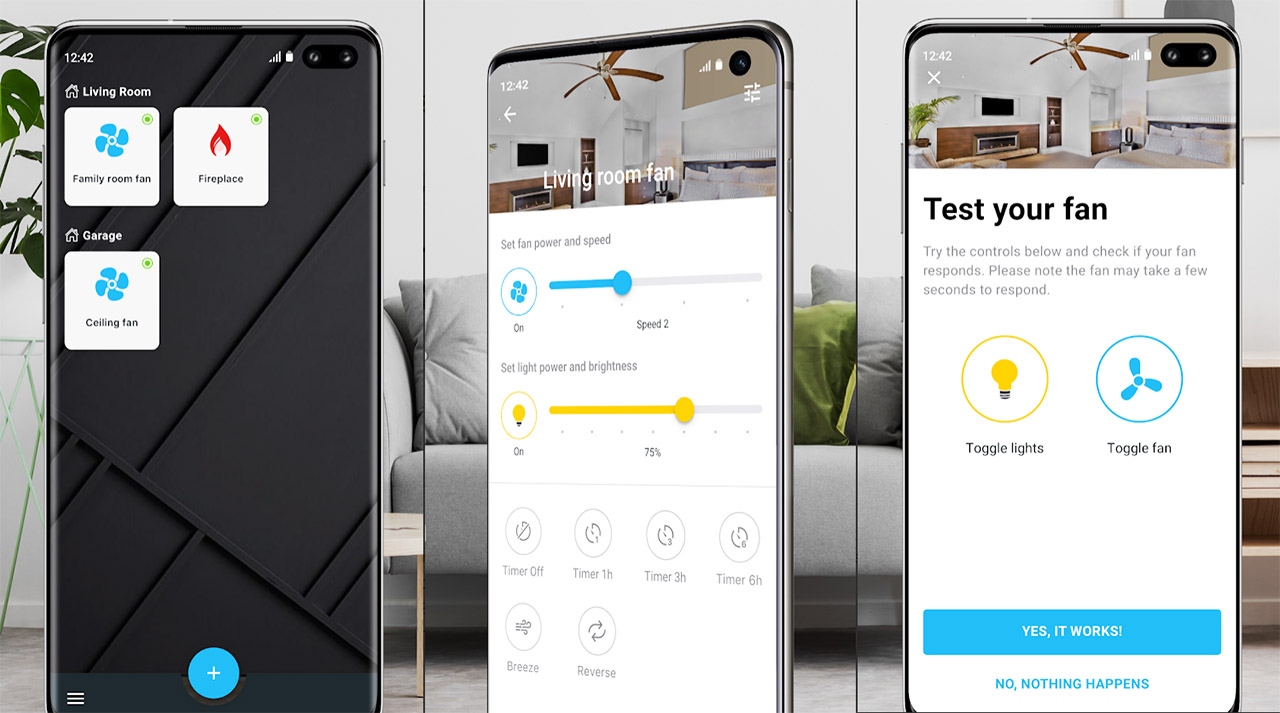
What is a smart ceiling fan?
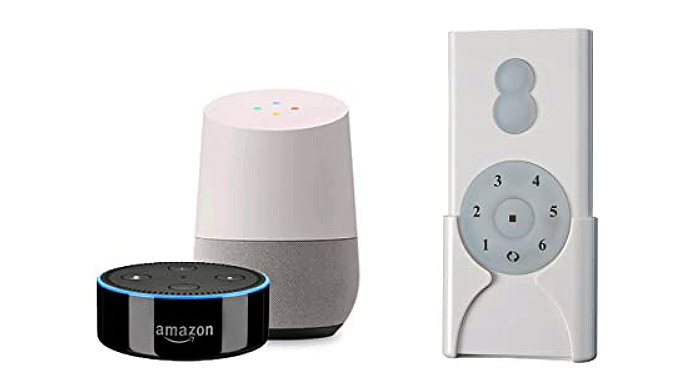
At its most basic form, the smart ceiling fan connects to your WiFi network and it replaces your remote with either a mobile app interface or with vocal commands using your favorite virtual assistant (Alexa, Google Assistant or Siri), but, since the IoT conversion is still ongoing in this specific department, there is a fairly small number of manufacturers to have developed a full-fledged smart ceiling fan. So far, the most prominent names are Haiku and Hunter and the reason for that is the very high price tag. A reliable workaround can be the use of non-smart ceiling fans along with a third-party wireless controller or relay module which will convert the older device to a smart appliance and will allow the user to add it to a smart home hub.
Regardless if we talk about a converted ceiling fan or a full-fledged smart ceiling fan, there aren’t any design differences between them and the traditional fan since the initial concept will remain unchanged (it still needs blades and a mounting part), while in the case of the wireless controller, it usually is an external device that needs to be positioned relatively close to the fan, but there are some controllers that can replace your wall switch or need to be installed inside the fan itself.
Do you need a smart fan?
There are smart devices which have become a necessity while others are simply guilty pleasures. For example, we have become dependent to our smart phones, the smart thermostats have solved the ever-increasing complexity of the traditional device, the smart motion sensor light switches do make our lives a lot easier (and so on), so what does the smart fan offer that would make it an indispensable part of our home? It offers all the features of the traditional fan (such as the speed control, the dimmable light or the summer/winter modes), but since it gets integrated in an IoT home network, it can work together with other smart devices (thermostat, air conditioner or other).
This way, the ceiling fan can turn on or off and adjust its speed and direction depending on the room temperature detected by either the air conditioner or by the thermostat in order to rotate the air and keep your room cooler in the summer and warmer in the winter – this helps a lot with the energy bill. You can also create schedules, so the house has the perfect temperature before you get home, it can be paired with sensors that detect when it’s day and when it’s night, so it dims the light accordingly (these are the main advantages, but, depending on your IoT network, there could be other functions available).
UPDATE 10.05.2022: The Carro Icebreaker has been added to the best smart ceiling fan list.
Which are the best smart ceiling fans?
| Bond Smart Home Controller | Hunter Symphony Smart Ceiling Fan | Haiku Home L Series Smart Ceiling Fan |
 |  |  |
| Read More | Read More | Read More |
 | |
| Carro Icebreaker Indoor/Outdoor Smart Ceiling Fan | Minka-Aire Sleek F868L-BN Smart Ceiling Fan | Enerwave ZWN-RSM1-PLUS Z-WAVE |
 |  |  |
| Read More | Read More | Read More |
| |
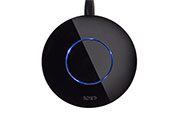
1. Bond Smart Home Automation Controller
The Bond controller is a smart home automation device from the U.S.-based manufacturer, Olibra and it was created to offer an easy way to ‘smarten up’ your already installed ceiling fans, so you can access and control them through your home WiFi network (it supports up to five fans). This device does require for you to have a ceiling fan that uses a remote control (it needs it during the pairing process), but, on the bright side, it does work with almost all existing fans on the market and it is compatible with remote controls that use either (or both) the IR blaster (Infra-red) or the RF tech (radio frequency).
Most smart devices are designed following a minimalist approach, so Olibra had the right idea to use a simple, but elegant case since this is a device which will most likely end up in the centre of the room (especially if it uses the IR tech and it needs to be close to the fan). So, the cylindrical body of the Bond controller (which resembles a hockey puck) is covered by a black glossy finish on the top (it’s the only available colour and it’s a fingerprint magnet), while the bottom is covered by a matte finish and it has a circular silicone ring to ensure that it won’t budge. All around the ring, there are lots of small ventilation holes and on the edge of the Bond controller, you can find a small micro-USB port to which you connect the USB cable for powering on the device.
On the top of the controller, there’s a narrow circular LED light which will be solid white when the device is booting up and will flash green to indicate that it is ready to be installed. To do so, you need to download the Bond app to your mobile device (it is compatible with both Android OS and iOS – but it is not yet compatible with HomeKit), create a new account and connect to your home’s WiFi SSID (at this point, the LED will become solid blue). From here on, you need to have the ceiling fan remote ready, select the type of device you want to add (Ceiling Fan), the location, select a function to program (a button that matches one from the remote control) and hold that button on the remote until the LED becomes green on the Bond controller. And that’s pretty much it, you don’t need your remote control anymore.
Note: With a more recent update, the top LED can now be either dimmed or turned off completely.
Of course, that’s not everything a smart ceiling fan should offer, so you can connect the Bond controller to IFTTT applets, so it works great with Nest or Ecobee smart thermostats, it works with the Wink hub, the SmartThings and, if you have a device that features a virtual assistant, then you can control the ceiling fan using control commands through Amazon Alexa (here, you can find a number of voice commands that you can use: https://olibra.zendesk.com/hc/en-us/articles/360004768231-BOND-Setup#Echo) or Google Assistant.
If you’re still unconvinced about this unique device’s utility, Olibra does have plans to enhance the functionality of the Bond controller, so it will soon support AC units, garage doors, electric/gas fireplaces and motorized shades, but, even in its current form, when compared to the completely integrated smart ceiling fan, it does come at a better price and it does offer a lot more flexibility into choosing the ceiling fan that you like and not be constrained by what a couple of manufacturers have to offer (just be aware that the cheaper IR-only fans do require that you keep the Bond controller within line of sight).
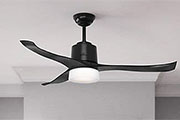
2. Hunter Symphony Smart Ceiling Fan
![]()
While there are some smart ceiling fans and smart controllers compatible with the most popular smart home hubs (such as SmartThings, Wink, Google Home or the Amazon Echo), I noticed that there aren’t as many HomeKit-compatible smart wall switches or ceiling fans. Fortunately, Hunter has thought about the users that prefer to build their smart home around the Apple HomeKit hub and it has created a series of smart ceiling fans that can be used within HomeKit’s environment. One of the most budget friendly solution is the Hunter Symphony ceiling fan which, besides being fully compatible with HomeKit, it also works with Amazon Alexa (so you can control it using vocal commands).
The fan itself doesn’t look any different that the traditional ceiling fan, featuring three plastic blades and a significantly large base in which resides the WhisperWind motor (which supports both clockwise and counter clockwise movements to ensure that the fan remains useful during the winter and during the summer – it also runs surprisingly quiet) and, immediately underneath the blades, the fan keeps its width to make room for the integrated two 9.8 Watt light bulbs. The three blades are available in matte black, white and nickel – they come with a 13 degree blade pitch, so they’re optimized to ensure ideal air movement and it needs less energy to function.
The hardware installation is straight forward (it doesn’t differ that much from the standard ceiling fan) and, after you’re done, you can simply use the provided remote control if you don’t really care about the smart aspect of the device (which allows you to control the lights and the fan – it comes with a remote control cradle) and, since this would pretty much defeat the purpose of purchasing a smart fan, you can use the proprietary Hunter app (which allows the user to create schedules, create groups of fans, adjust the speed of the fan or the dim level of the lights and set timers). The problem is that the SimpleConnect app is not really completely optimised and you may experience freezes or slow loading screens (and even crashes) – Hunter needs to understand that the hardware is great, the fan looks modern and feels premium, but the harmonious integration with the app is what makes the device truly smart (this probably justifies the price difference between Haiku and Hunter fans).
Fortunately we get saved by the HomeKit which has proven to be a lot more reliable controlling the lights and the fan than the SimpleConnect app (you can also use the Apple Watch to adjust the lights/fan). Be aware though that the fan uses just the 2.4GHz radio band and will not pair to the app if the mobile phone can only use the 5GHz radio band (it also is a bit picky when it comes to tablets). So, while having a smart ceiling fan is definitely exciting, Hunter really need to step up its game and fix all these software-related issues which keeps its fan series from achieving its full potential (the manufacturer is constantly releasing new firmware updates, so we may see a more polished software in the near future).
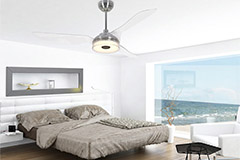
3. Haiku Home L Series Smart Ceiling Fan
![]()
Big Ass Fans (yes, that’s the actual name of this division from Big Ass Solutions) has been developing smart ceiling fans for more than four years, at first focusing towards a niche audience which valued style and the extra smart features more than anything else, but recently, the US-based company decided to expand its reach and it released the L-series, which needed to cut some corners in order to become more affordable. Among the significant changes is the plastic blades (airfoils) instead of the more premium aluminium or wooden blades and the decision to remove the SenseMe technology from within the fan and sell it separately in the form of the Haiku Wall Control unit.
The Haiku Home L series looks similarly to other modern-type ceiling fans, featuring three plastic blades (available in black or white) which were designed in a special, aerodynamic manner to ensure that the fan moves the air in a more efficient way, while consuming a lower amount of energy that its competitors. Furthermore, the Haiku smart ceiling fan uses a very silent motor (which lies within a protective die-cast aluminium motor housing) and the device doesn’t wobble when rotating the blades, so overall, we’re dealing with a silent, elegantly designed fan which is energy-efficient. On the centre-piece, the fan features a circular LED light which has 16 dimmable light levels (it also has a sleep mode): the maximum output is 988 lumens, it supports up to 20 W and the temperature is 2700k.
The Haiku fan from the L series, in its most basic form, comes only with a remote control (turn On/Off the fan or light, set a timer, enable sleep mode or whoosh mode) and it cannot be connected to the WiFi network (therefore, lacking any type of smart functionalities), so, in order to actually get a smart ceiling fan, you need to purchase the optional WiFi module (which gets installed into the fan’s control box) and/or the wall controller to gain the versatility of the SenseME technology. The Haiku controller includes sensors for detecting motion (so, it works similarly to the PIR smart motion sensor light switches), the humidity level or the temperature, so it adjusts the speed and rotation accordingly to ensure the proper internal temperature.
The Haiku wall control integrates with Nest thermostat (so it can easily warm or cool the room) and Haiku Premier Light and I really liked the design of the controller (it’s way better than most other smart light switches), reminding me of GLaDOS from the Portal video game (it has a circular IR lens in the middle).
If you choose to use the WiFi module, then you can connect the fan to the home WiFi network and you can either use the Haiku Home app to control the way the fan functions (the app feels polished and user-friendly) or you can use voice commands if you have an Amazon Alexa device available in your home. When compared to the cheaper Bond controller which can be attached to any remote controlled ceiling fan, there haven’t been made significant steps towards adding diversity to the smart home hubs support and, considering that even the most basic Haiku fan is still considerably expensive, I did expect more than just support for Alexa and Nest thermostat. Then again, most users will need a smart ceiling fan just for that, so, considering that it is a very well built device, it’s worth taking into consideration if the price tag doesn’t bother you.
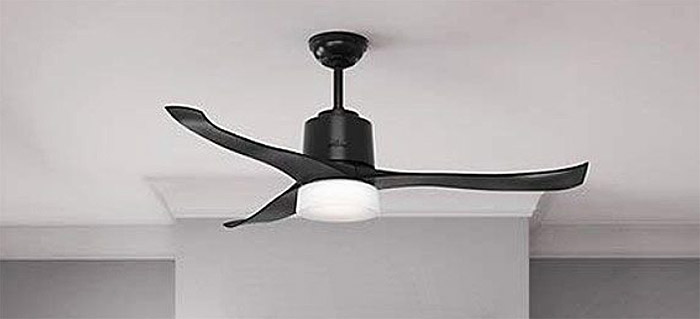
4. Carro Icebreaker Indoor/Outdoor Smart Ceiling Fan
This article is constantly updated, so you can see me complaining that the smart ceiling fan market was under-served. Well, it seems that this has changed and there are far more players competing to put their smart fan on your ceiling. One such brand is Carro from which I chose the Icebreaker Indoor/Outdoor smart ceiling fan and, while I haven’t found any mentions that it may have some protection against dust or water ingress, it is advertised as being suitable for outdoor installation.
It’s obviously going to work under a patio, being somewhat protected by the elements, but I would still be careful with extreme temperatures (I am talking about harsh winters). The smart ceiling fan sports a similar design to other smart fans available on the market (especially the Hunter fans), so there’s a fairly large circular main body in the middle and three blades protruding outwards. The Carro Icebreaker is available in matte black, silver and glossy white, with the bottom piece remaining transparent, and yes, the blades are made of ABS.
This means that they’re lightweight and hopefully, durable as well. The blade sweep of the model I am currently checking is 60 inches, but there is a 52 and 56-inch variant as well for rooms where 60 inches may look ridiculously large.
The lampshade (the transparent circular element that sits downwards) encases the LED lights which are both dimmable and can become surprisingly bright. Indeed, the manufacturer says that the LEDs can go up to 3000 lumen and, considering the actual brightness, these are actual ANSI lumen values – the 30W are also a giveaway about the excellent brightness level of the LEDs. Additionally, I do need to mention that the color temperature spans between 2,700K and 4,000K, which is to be expected for a ceiling fan.
In a simialr manner to the traditional ceiling fan, the Carro Icebreaker features a reversible motor which ensures that during the summer, it enters in the downdraft mode, while during the winter, it goes in updraft mode (set manually, of course). Unlike the Minka-Aire Sleek which had 6 fan speeds, the Carro Icebreaker smart ceiling fan offers 10 speeds. And the motor speed can go as low as 50rpm or as high as 190 rpm which is in line with other smart ceiling fans, ensuring that it can move an average of 4,422 cubic feet per minute.
Since the manufacturer lauds the efficiency of the Icebreaker smart fan, it’s worth noting that it’s rated at 213 cubic feet per minute per watt. The installation process is not really that much different than when you mount a regular ceiling fan, but if you’re unsure about what do to, it’s better to rely on a professional.

That being said, the device itself comes in several pieces, so make sure to attach the blades, the lampshade, as well as the downrod, the canopy and the wiring cover. At this point, please check that the electricity has been turned off so you can install the mounting bracket and then follow the wiring diagram to connect the fan to the power cables. What’s fairly unique about the Carro Icebreaker smart ceiling fan is that it can be installed on ceilings that are at an angle.
If it’s below 25%, then you don’t need any other additional piece, but if the angle goes above that, you need to use an angled mounting kit provided by the same manufacturer. Furthermore, considering the width of the smart ceiling fan, it’s best to take it into consideration if your ceiling is 8 feet or greater. Inside the box, you’ll find a remote control which allows you to switch between modes, to raise or decrease the speed of the fan, as well as to adjust the brightness of the LEDs.
Since we’re dealing with a smart device, it does come with an app as well, called Carro Home (available on both iOS and Android). The app offers every feature that the remote has available, but you also get the possibility to set schedules, as well as to use the smart home assistants to control the way the smart ceiling fan will function (and when).
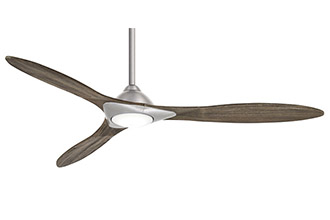
5. Minka-Aire Sleek F868L-BN Smart Ceiling Fan
![]()
The market is currently flooded by new smart devices and in certain departments it can actually get quite overwhelming selecting the more suited product for your smart home, but, while most other segments are well served, the smart ceiling fan market has been unjustly ignored by the major manufacturers, so it’s nice to see that I can add a Minka Aire ceiling fan to the list. Specifically, I will focus on the Sleek (F868L-BN) model which is a part of the smart ceiling fan series that took form after the manufacturer partnered with Olibra, the company that created the Bond smart home controller. Yes, the controller does work with a very large variety of ceiling fans and it seems that Minka Aire wanted this technology to be built into its fans for seamless integrating them within a smart home environment using the mobile application (it will work with the Google Assistant, Amazon Echo and it is compatible with the Nest and the Ecobee thermostat). The device can also be integrated with SmartThings, Control4, Hubitat and more.
Similarly to the Haiku and BigAssFans devices, the Minka-Aire Sleek has kept the design of the traditional ceiling fan, featuring three ABS blades (the blade sweep is approximately 60 inches) which are attached to the central main body. The blades are covered by a faux seasoned wood finish (it also comes as flat white or bronze) while the rest of the device is covered by a brushed nickel finish (can also be graphite or bronze), so the device doesn’t look industrial and instead it will blend in nicely with the rest of the room. Embedded within the triangularly-shaped main body, there’s a relatively large LED light pointing downwards (16 watt Z42 bulb).
The LED is rated at 1,229 Lumens and it seems that it can deliver up to 972 Lumens; furthermore the color temperature is 3,000K and it does seem to have the option to adjust the dimming level. Inside the main body of the smart ceiling fan, there’s a motor that can go clockwise or counter-clockwise, suitable for both the Winter and the Summer modes – it also offers 6 fan speeds (from 50 to 185 rpm).
When the motor goes up to a maximum of 185 rotations per minute, the device will consume up to 31W and the airflow will be at 5655 cubic feet per minute. I hoped that the installation process would be simple, but it is a bit complicated since the ceiling fan does come completely disassembled and you do have to put everything back together: to do so, start with preparing the area where the device will be attached (remove the previous fan and expose the outlet box with the wires) and then secure the hanger bracket to the outlet box.
Afterwards, follow the instructions to connect the cables, attach the downrod, the canopy, the coupling cover and the motor assembly. As a disclaimer, before attaching the fan to the wires, you need to make sure that the electricity is turned off and that you connect the proper wires (there is a guide available, but if you don’t know what needs to be done, it’s better to call a professional). That being said, on the next step, you need to attach the fan blade to the blade arm which will then be tightened to the motor assembly.
The Minka-Aire Sleek F868L-BN smart fan does come with a remote control in case you decide to not connect it to your smart home hub (or router) and you do gain the ability to perform some basic actions without using the mobile application: set the speed level (1-6), change the direction of the fan rotation or adjust the brightness of the LED light.
But, this is a smart ceiling fan after all and its smart abilities are the reason why you paid extra, so, to take advantage of its features, you need to download the Bond Home app (is compatible with both iOS and Android OS) and the installation process is not going to differ than if you were using the app with the dedicated Bond controller: connect your mobile device to the Bond SSID, then connect it to your home WiFi network, choose the device type (in our case, it’s going to be a ceiling fan), select the location and then you get a similar set of functions as you would on the remote control. But that’s not all, because you do get the option to pair the app to the popular voice assistants, so you can send voice commands to Amazon Echo and Google Assistant, but it will also work seamlessly along with the Nest and Ecobee thermostats.
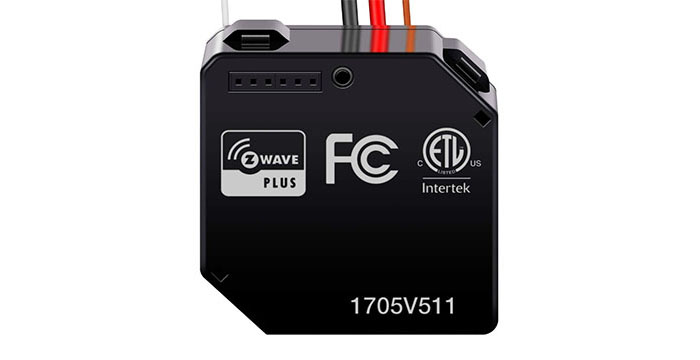
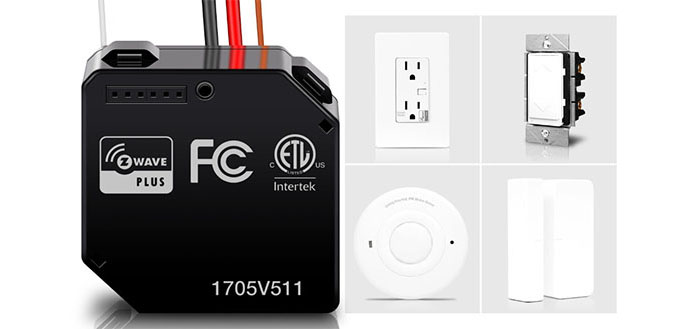
6. Enerwave ZWN-RSM1-PLUS Z-Wave
![]()
The Enerwave ZWN-RSM1-PLUS is a Z-WAVE relay switch module which upgrades the existing switches inside your home to include Z-WAVE connection capabilities, allowing you to control fans, lights or any other type of single appliance through either a mobile application (iOS or Android OS) or using a web browser. Over the last couple of years, we saw an important shift towards the removal of a large portion of Z-WAVE or ZigBee hubs (hubs from Lowe and Iris are now discontinued), which indicates that the manufacturers (and the users, since the consumer market isn’t complaining) prefer a cloud-based connection for their IoT devices (via Bluetooth or WiFi), instead of going for the localized automation – a solution that has proven many times to be superior from the security point of view.
I do partly blame it on the WiFi-only smart assistants, such as Amazon Alexa or Google Home, but, in spite of this, there are still some major players that have faith in the ZigBee and Z-WAVE protocols, such as Samsung SmartThings, Wink or TP-Link Deco M9 Plus. This indicates that the Z-WAVE and ZigBee technologies are here to stay (and they should), so, if you have a regular ceiling fan and don’t want to spend big money on devices from BigAssFans or Hunter and don’t mind tinkering a bit, then the Enerwave ZWN-RSM1-PLUS is an interesting solution to make your ceiling fan smart.
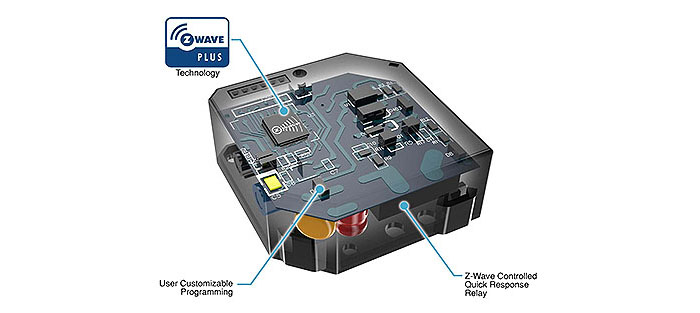
The aesthetics of the relay don’t really matter (since it’s not going to be exposed), but its size does, so measuring 1.77 x 1.65 x 0.72 inches can be a huge bonus, allowing it to be installed next to almost any type of light switch (it does require a neutral wire). The installation process is not really that complicated, but, if you’re not comfortable (or lack the knowledge) to modify anything related to the electricity in your home, then it is better to call an electrician. That being said, the first thing you need to do is to identify the type of wiring circuit that you have (simple or three-way circuit – for one or two switches), turn off the power, remove the wall plate, as well as the mounting screws and, before removing the existing switch, make sure to label the wires.
Next, remove the old switch and connect the Enerwave ZWN-RSM1-PLUS following the correct diagram: the colours may differ, but, by default, the black wire connects to the hot wire, the white wire to the neutral wire, the red wire to the load wire, the orange wire connects on the relay to one of the terminal screws and the hot wire connects to the other terminal screw on the wall switch. Afterwards, rewire the existing switch and insert the Enerwave module in the box; now, you can turn the power back on and test if the existing switch is still working and, using the mobile app related to your Z-WAVE hub, put it in learning mode and, on the Eberwave relay, press the Program button in order to pair it to the hub (if you look at the side where the relay connects to the wires, the Program button is located on the other side).
Lastly, re-attach the wall plate and test the new functions, from which there’s the ability to turn on or off the fan, create schedules and any other type of interaction between multiple Z-WAVE devices (the relay module also works with Alexa for voice control). If you want to control the dim level of the light bulbs, it’s best to purchase Z-Wave bulbs and connect them to the hub. It is important to know that the Enerwave ZWN-RSM1-PLUS features a maximum load of 10A, a voltage between 120-277VAC and the Z-Wave tech allows for a line-of-sight transmission of up to 132 feet.
Note: You don’t necessarily have to install the ZWN-RSM1-PLUS in the same box as the light switch, you can also install it inside the fan top cover.
Mark is a graduate in Computer Science, having gathered valuable experience over the years working in IT as a programmer. Mark is also the main tech writer for MBReviews.com, covering not only his passion, the networking devices, but also other cool electronic gadgets that you may find useful for your every day life.