
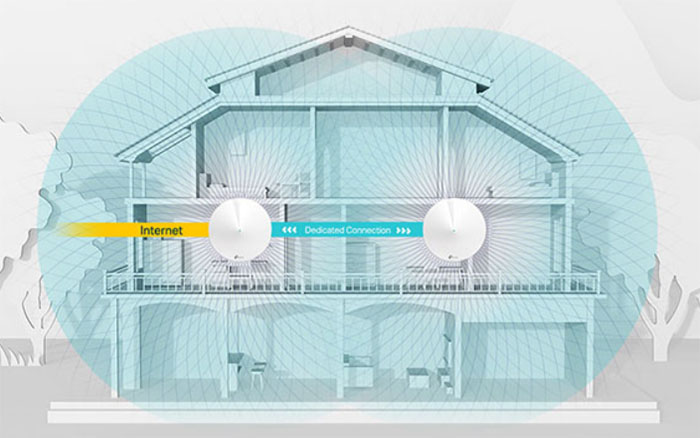
Similarly to the earlier WiFi repeaters, the WiFi mesh systems still suffer from poor traffic backhaul handling and, in order to keep it in check, some manufacturers have relied on adding an extra 5GHz radio dedicated specifically for backhaul (such as he case of the Netgear Orbi), while others allow the system to dynamically choose a backhaul band (Linksys Velop) and some have left all the bands open for both client connection and the backhaul traffic handling (Eero Second Generation). The TP-Link Deco M9 Plus also has the second 5GHz band dedicated for the backhaul traffic, but, if it becomes congested (usually the case with multi-hop systems), the device will ‘borrow’ up to 50% from the bandwidth of the first 5GHz band and, if necessary, up to 50% of the available bandwidth from the 2.4GHz band, adding up to 1.5 Gbps (be aware that the backhaul traffic management is done locally and you mainly need an Internet connection for remote access, as expected). Of course, similarly to the Deco M5, you can still use the Ethernet backhaul feature in case you don’t mind having some Ethernet cables in your home.
Another worth mentioning feature implemented in the Deco M9 Plus is the support for the 802.11r Fast Roaming which makes sure that the handshake with the first node is done before the client begins roaming through the available nodes, so it experiences no disconnection, but this feature is disabled by default because it doesn’t play nice with older devices that do not support it.
In order to test the wireless performance of the Deco M9 Plus, I took two computers, one is a laptop which will connect to the first node via a cable (it will act as the server), while the second computer will connect to the WiFi network and will act as the client (it is equipped with an ASUS PCE-AC88 WiFi adapter).
This way, I can measure the throughput at various spots inside the home for a single Deco unit, as well as add two more nodes, one at about 35-40 feet from the main router positioned in line of sight, while the second Deco unit will also be positioned at about 35-40 feet from the main device, but with two thick concrete walls in between. So, first, I connected the two computers to the main router unit and, from the client to the server, I managed to measure an average of 558 Mbps (at no more than 5 feet) and an average of 592 Mbps at 15 feet (once again, the adapter got a bit overwhelmed at close range, so, immediately after I put some more space between the client and the router, I got a better throughput); at 30 feet, the speed went down to 274 Mbps. Testing the wireless performance from the server to the client, I managed to measure an average of 340 Mbps at 5 feet and around 312 Mbps at 15 feet; at 30 feet, the speed decreased to 208 Mbps.
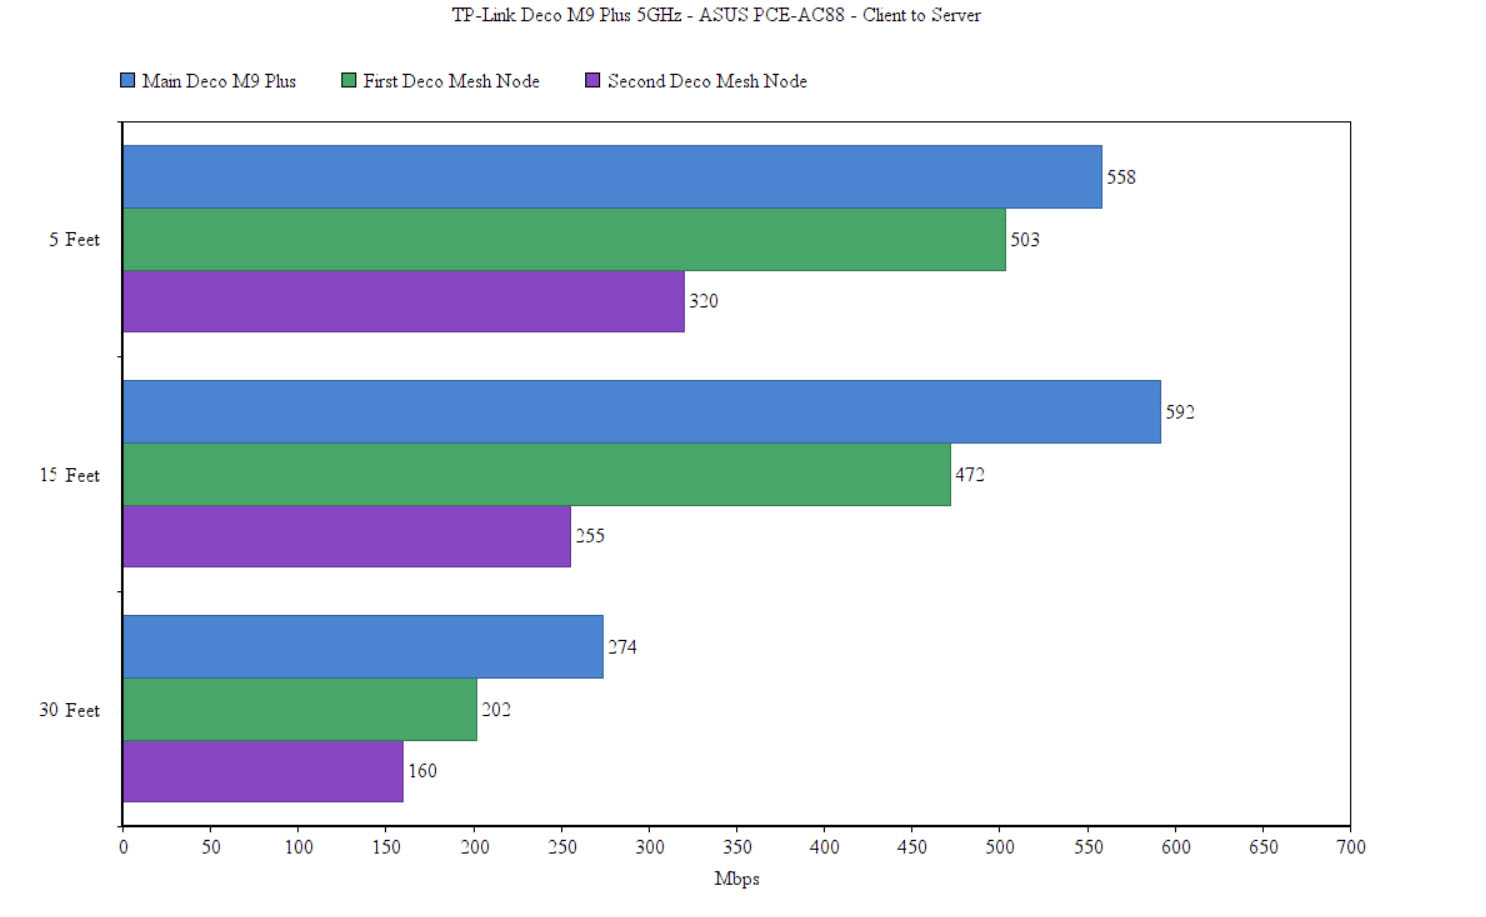
On the next step, I added the second Deco M9 Plus unit to the network and positioned it at about 35 feet away from the main Deco (it’s worth pointing out that after you’ve configured the first Deco unit, which will act as the main router, any additional routers will automatically become mesh nodes so, besides detecting them using the app, you don’t have to do anything else). Afterwards, I connected the laptop to the secondary mesh node (using a 1Gbps cable) and I measured the performance from the client to the server: at 5 feet, I saw an average of 503 Mbps, while at 15 feet, the speed went slightly down to 472 Mbps and at 30 feet, I measured an average of 202 Mbps. So far, these are among the best results I have seen on a tri-band WiFi system (closely rivalling the fantastic performance of the Netgear Orbi) and it’s clear that the backhaul handling is done right for the first hop.
Testing the wireless performance from the server to the client, I measured an average of 236 Mbps at no more than 5 feet away from the Deco node, while at 15 feet, the speed went slightly down to 215 Mbps and, at 30 feet, I measured no more than 125 Mbps. It’s worth noting that after I went further than 40 feet from the main router with the secondary unit, the connection would sometimes drop, so 40-45 feet seems to be the sweet spot.
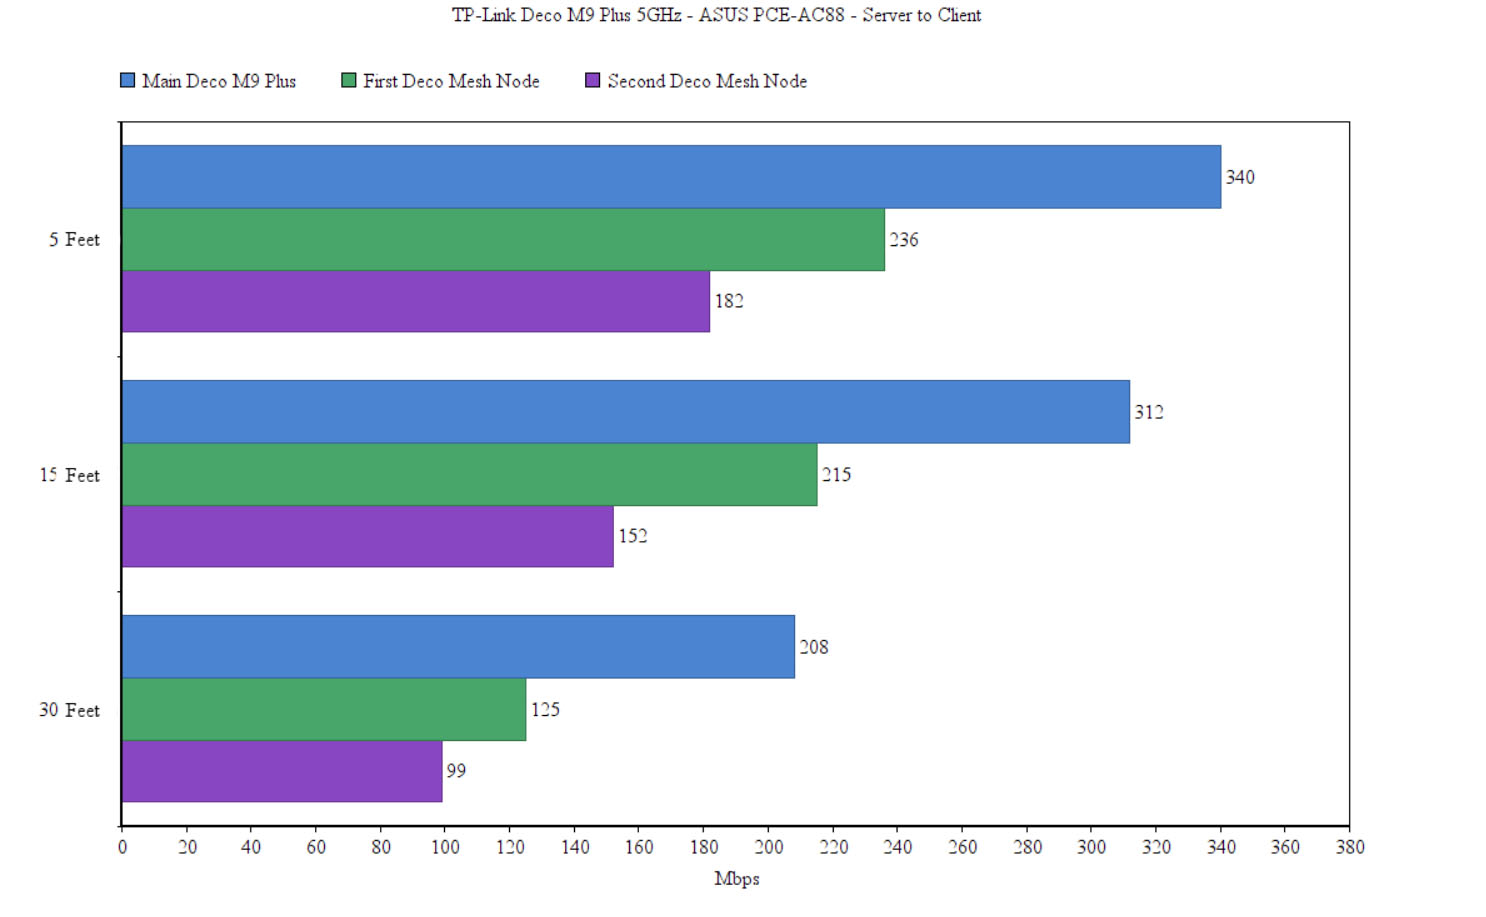
Usually, you will be able to find available the two-unit Deco M9 Plus pack, but, since, I got a third unit, I decided to also put it to test. To do so, I positioned it at about 40 feet from the main Deco, but with two thick concrete walls in between them. That being said, testing from the client to the server, I measured an average of 320 Mbps at 5 feet and at 15 feet, the speed went slightly down to 255 Mbps; at 30 feet, I measured no more than 160 Mbps. From the server to the client, I managed to measure an average of 182 Mbps, while at 15 feet the speed went down to 152 Mbps and at 30 feet, I measured an average of 99 Mbps.
Note: The TP-Link Deco M9 Plus was tested using the firmware version 1.2.3 Build 20180818 Rel. 68699.
Setup and Interface
Just like the Deco M5, setting up the TP-Link Deco M9 Plus is quick and intuitive, but it still kept the app-only interface, so a web-based UI is completely missing (a similar approach to the Google WiFi). The first step requires you to download and install the app, create a new TP-Link account using a valid email address (or simply log in if you have already used the Deco app) and choose which type of device you’re trying to install (in our case, it’s going to be the Deco M9 Plus). On the next step, you’ll be guided to correctly perform the hardware installation (connect the Deco unit to a power source and then using one of the two Ethernet ports, connect the device to the modem).
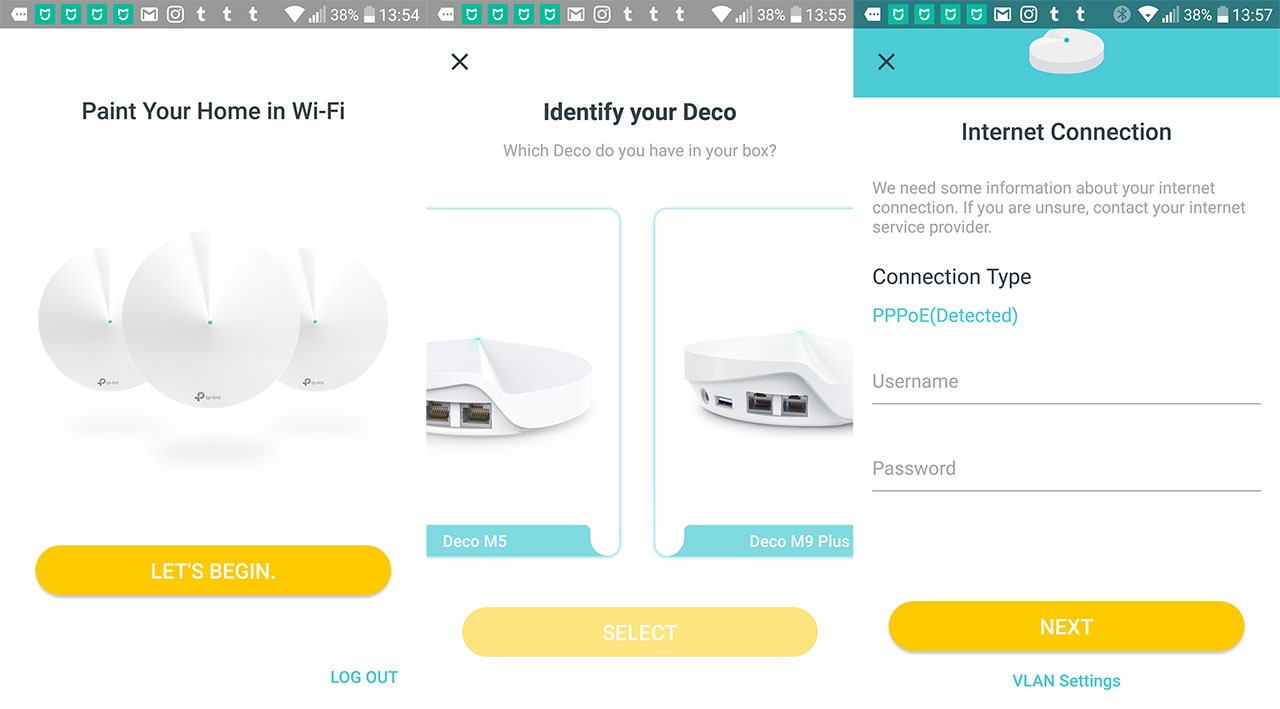
Afterwards, you need to wait for the mobile device to detect the Deco unit (make sure to enable Bluetooth) and, after it gets connected to the router, you need to select the location, configure the network connection (in my case, it was PPPoE, so I had to enter the ISP username and password) and create a new WIFi network (name and password). After that is done, connect to the new SSID and either add new Deco units to the network or simply finish the initial configuration process to gain access to the full mobile interface.
The UI itself is very consumer-friendly and you get immediate access to important options: the Dashboard shows the number of connected Network Devices and the Locations of the clients, but there are also shortcuts to the Antivirus section, the Parental Controls and, on top, there’s the Internet icon which, when tapped, will show all the Deco units from the network (tap on any device to see the status of the unit and tap on the top right corner to either Reboot or Remove the device – you can also send Feedback). If you tap on the Network devices, the app will show the name of each connected client (tap on any client to view the Download/Upload speed, create a Shortcut or set up the Automation and enable the High Priority on a specific schedule).
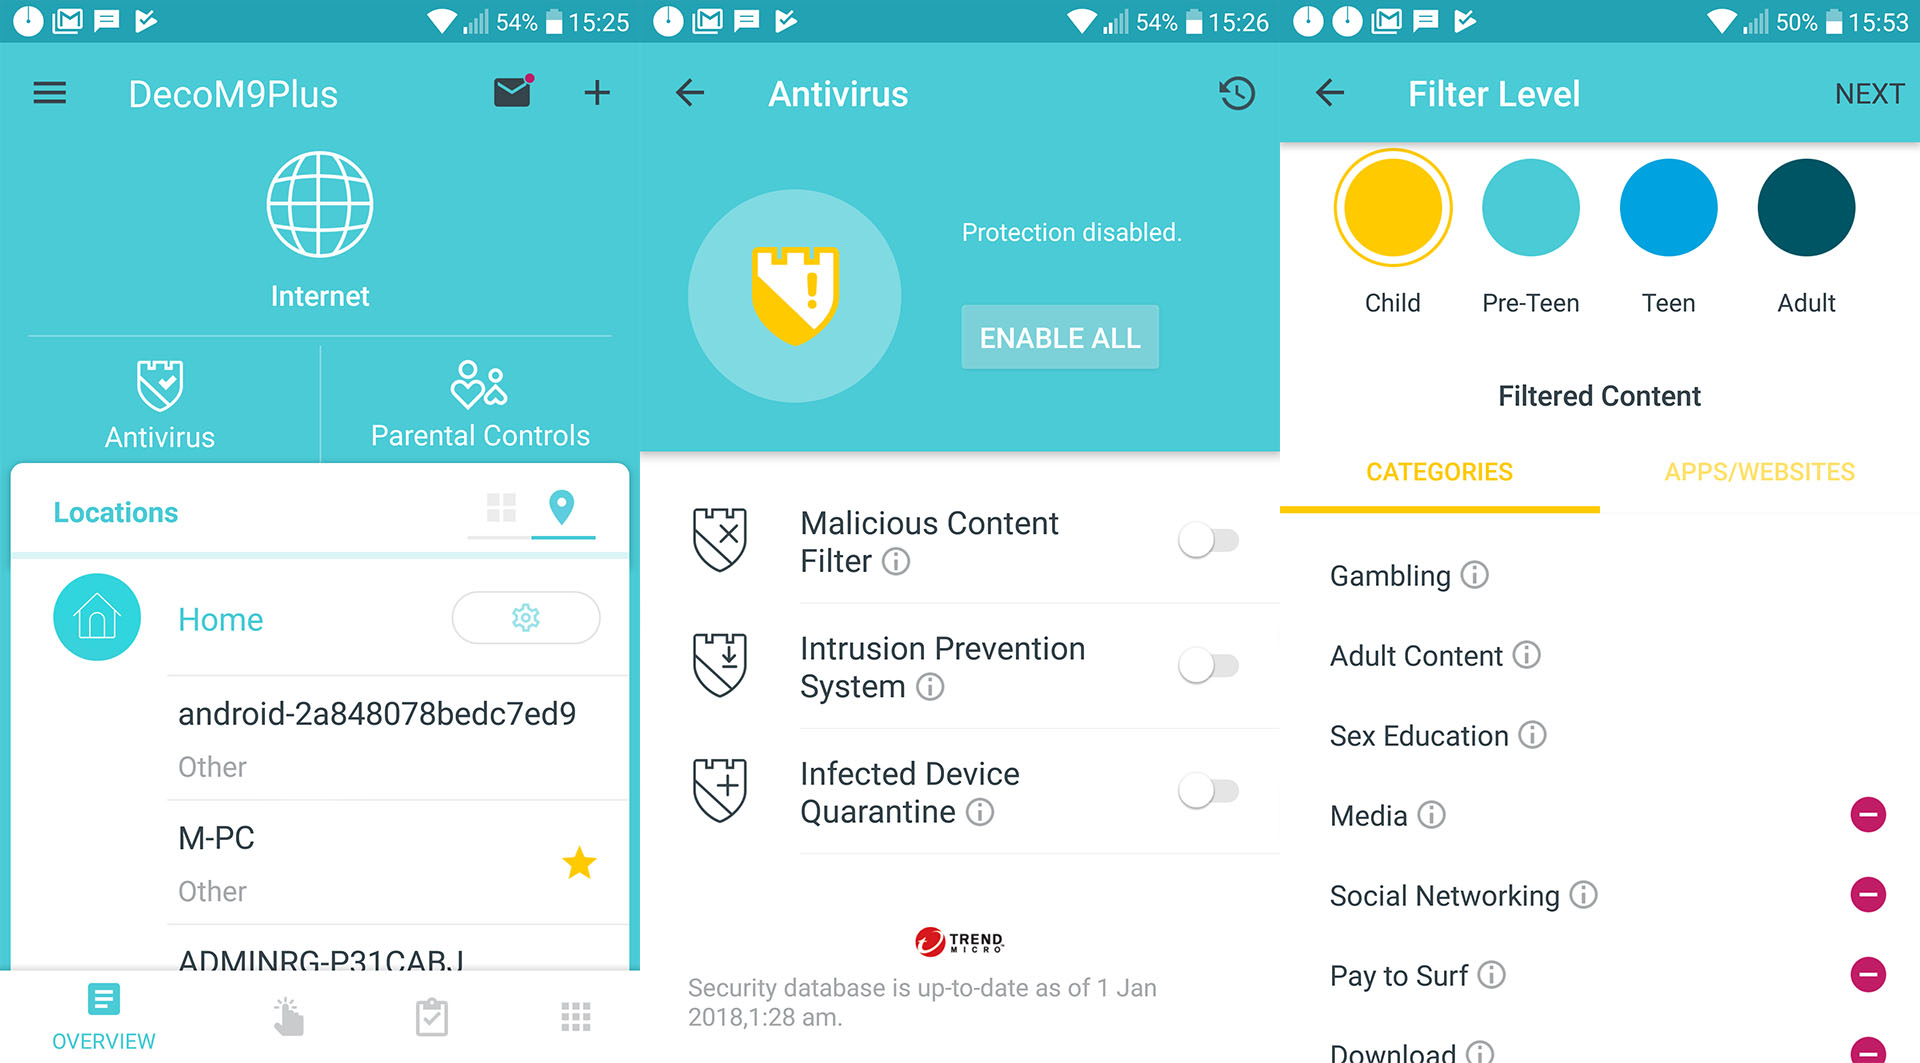
The Antivirus section allows you to enable the Malicious Content Filter (it uses Trend Micro’s database to block the access to any potential malicious websites), the Intrusion Prevention System (inspects the network traffic in real-time, so it can protect your network and devices from outside attacks – it can have an impact on the overall performance of the router) and the Infected Device Quarantine – this is especially useful if you have multiple IoT device connected (something that will inevitably happen because the Deco M9 Plus is also a smart home hub) because some of these devices aren’t always patched, so they can quickly become infected and this feature makes sure that it isolates the compromised device, so it doesn’t infect all the other connected clients.
The Parental Controls section allows you to create profiles (and apply them to your connected devices), each with its own Filter Level (you can choose between Child, Pre-Teen, Teen and Adult) – you can also select the Filtered Content (Categories and Apps/Websites) and create Time Limits (schedules). Besides the Dashboard (Overview) section, you can also visit the Shortcut section, the Automation (here, you can configure the Time Settings, Add a Trigger, Add an Action and finally, set an Automation Name – it doesn’t feel as fluid as the SmartThings hub implemented on the Samsung Connect, but it gets the job done) or select More, which features two main sub-sections: the Router Settings and the Homecare.
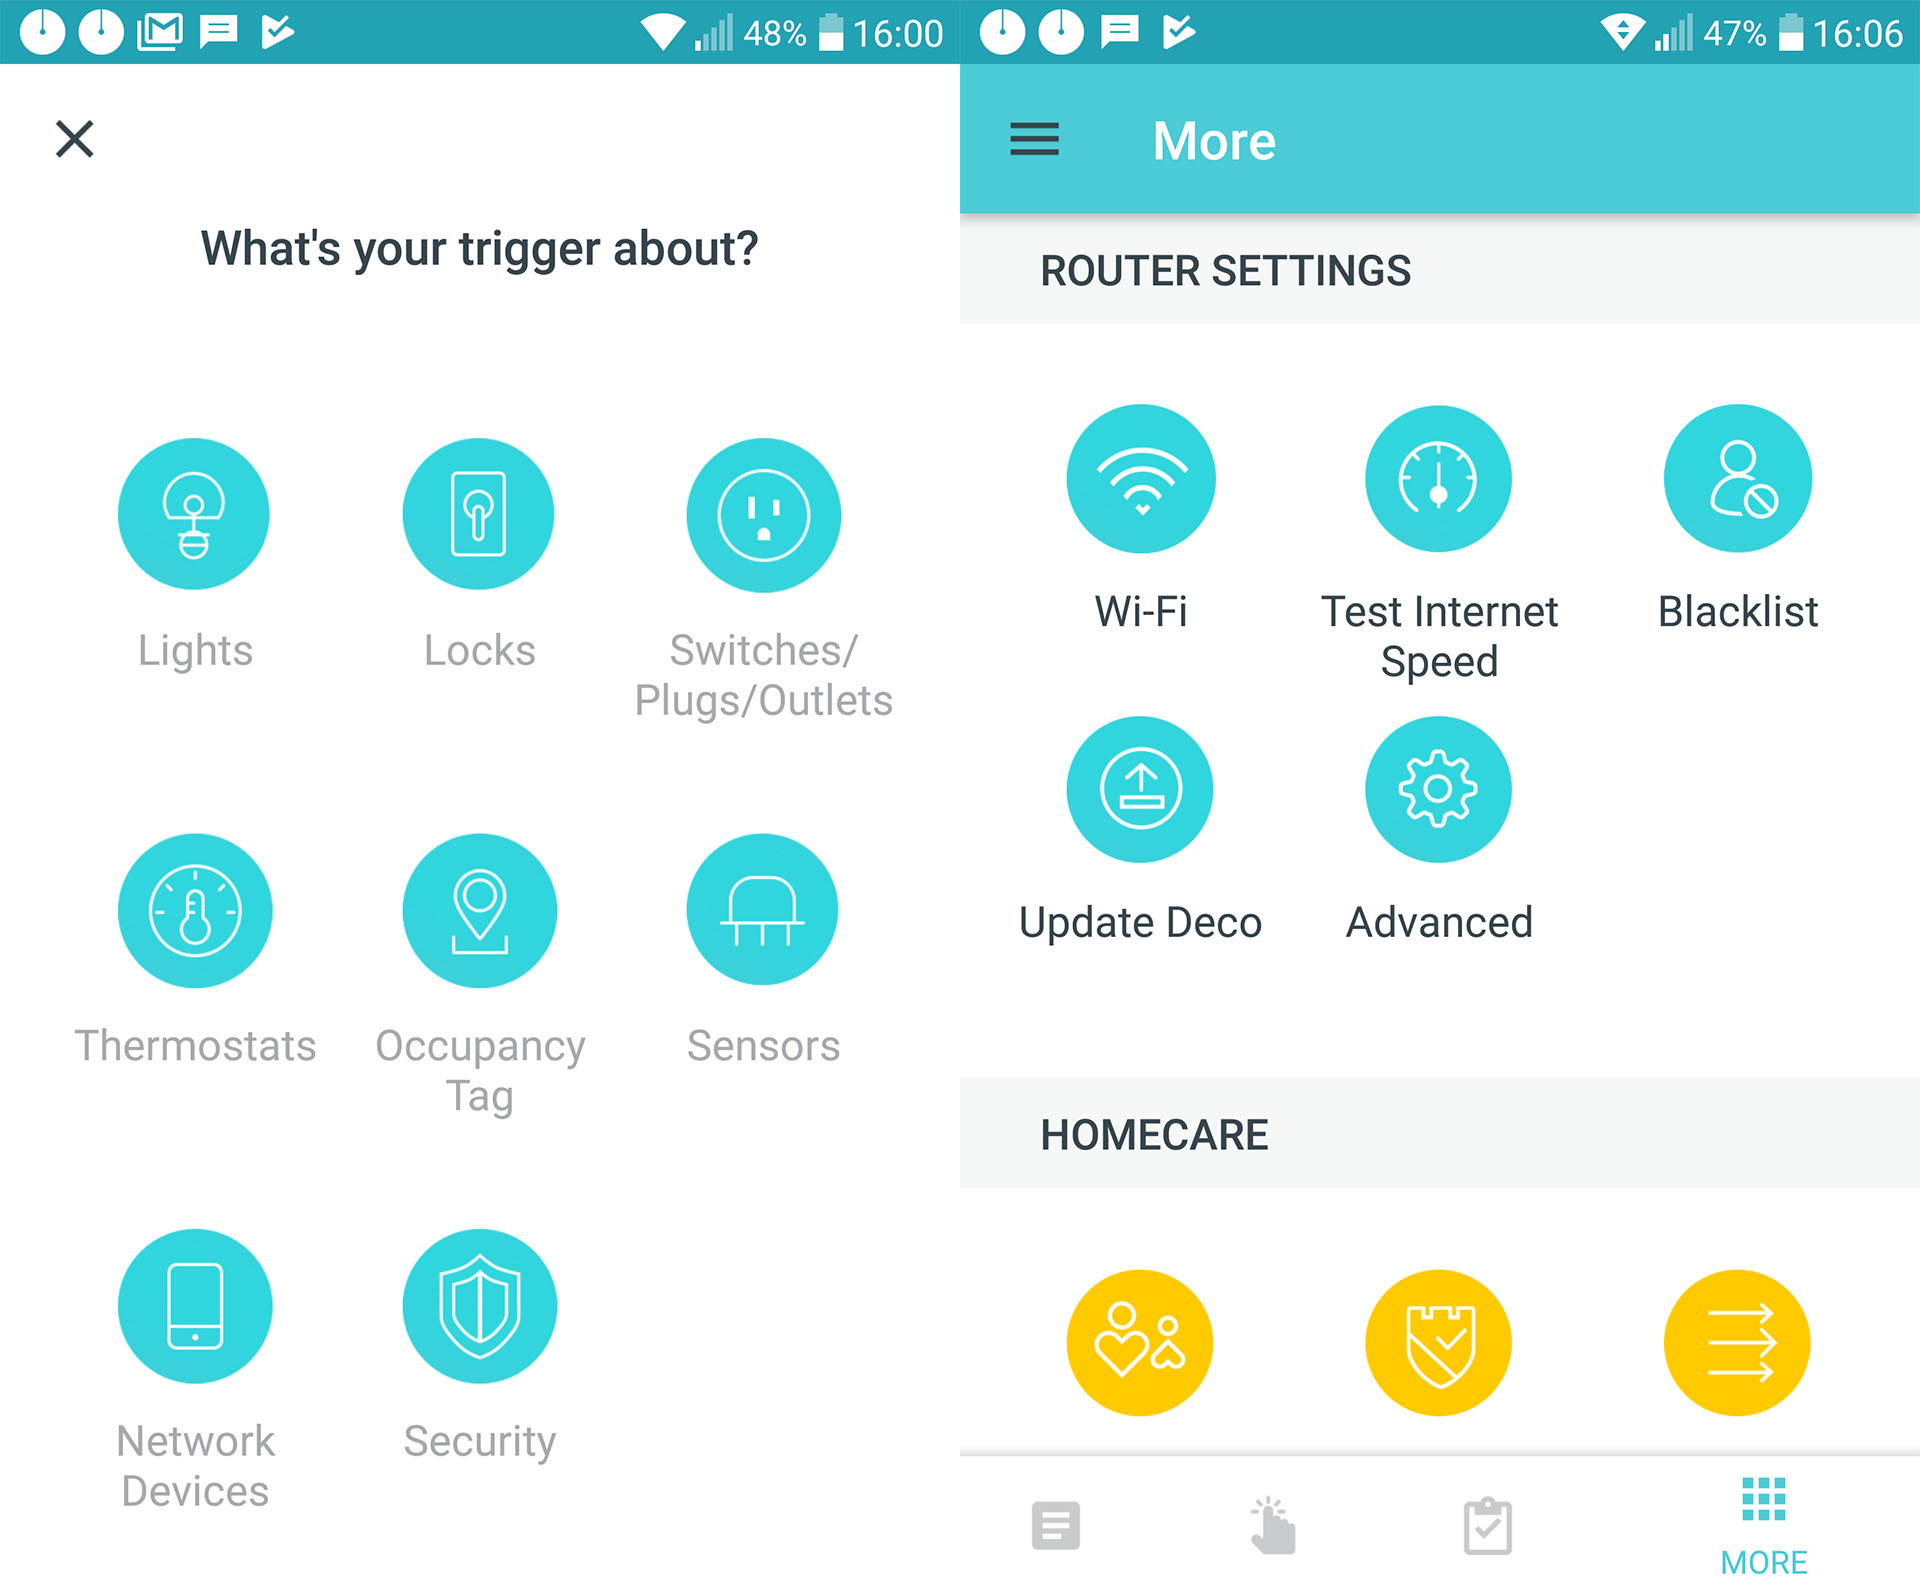
Under the Router Settings, you can set up the WiFi (change SSID and password or enable the Guest Network), Test the Internet Speed, create a Blacklist to block unwanted devices, Update the Deco units to the latest firmware or visit the Advanced area, where you can configure the IPv4 or IPv6 connection, set IP Address Reservations, Port Forwarding, enable the TP-Link DDNS, VLAN or Fast Roaming. Here, you can also control the LED light, enable/disable the Notifications and select the Operation Mode (Router or Access Point).
The HomeCare sub-section allows you to configure the Parental Controls, the Antivirus options, the QoS (there are some preset profiles that you can choose from or you can create your own Custom profile, by selecting the applications priority), view the Monthly Reports (a very intuitively designed log for all that happened during the current month) and create new Managers (administrator accounts).
Overall, I could easily find my way around the Deco app, but, besides configuring some basic elements, you won’t really get access to in-depth settings, so most of the time, you feel like on auto-pilot. I know that most people, especially those that are not tech-savvy will appreciate the minimum necessary input to have a working, secured network, but I do prefer a web-based interface and I do like to be able to control almost every aspect of the network and of the Deco units (I also wasn’t able to find the way the Deco M9 Plus is connected to the clients).
Note: I did notice that the TP-Link Deco M9 Plus doesn’t give the possibility to have to separate networks for each band and it’s also worth noting that the system needs an Internet connection to give IP addresses to the clients.
Conclusion
Using the right WiFi adapter, the TP-Link Deco M9 is able to offer a fantastic wireless performance and the backhaul traffic handling is done better than on most of its direct competitors. Furthermore, the application will cater to the needs of the majority of people (you get decent Parental Controls and QoS, as well as Antivirus and protection against malicious websites), but I did expect a bit more flexibility in the amount of available configurations (and possibly a web-based interface?). These reasons alone make the M9 Plus a compelling solution, but TP-Link has also implemented smart home hub technologies and it supports Amazon Alexa commands and the IFTTT protocol, so, if you want a good WiFi system which also acts as a smart home hub, then look no further.
TP-Link Deco M9 Plus
Pros
- Great Wireless Performance
- Built-In Antivirus Protection
- ZigBee, Bluetooth, IFTTT and Alexa Support
- Can Create A Mesh Network
- Small Form Factor Design
Cons
- You Can't Separate The Two Radio Bands
- No Web-Based Interface
- No In-Depth Configuration Available
Mark is a graduate in Computer Science, having gathered valuable experience over the years working in IT as a programmer. Mark is also the main tech writer for MBReviews.com, covering not only his passion, the networking devices, but also other cool electronic gadgets that you may find useful for your every day life.