
The Xiaomi Mijia Aqara gateway camera is a small form factor device suitable for home monitoring (it will work great as a baby cam), being able to capture daylight, as well as night-time videos (at 1080p), it can easily be mounted on the wall or ceiling (by magnetic attachment or using the adhesive two-sided tape), it features the ZigBee technology and it has a dedicated app to help the user to manage the camera itself, as well as other additional compatible gadgets (the Aqara camera can act as an IoT gateway).
| Xiaomi Mijia Aqara | |
|---|---|
| LightInTheBox.com | Check Offer |
That being said, let’s have a closer look at this device and see if Xiaomi has managed to find the proper balance between the app user-friendliness and all the necessary features to make this device a compelling option for anyone looking for a small monitoring camera that can be integrated in a smart home environment.

Design
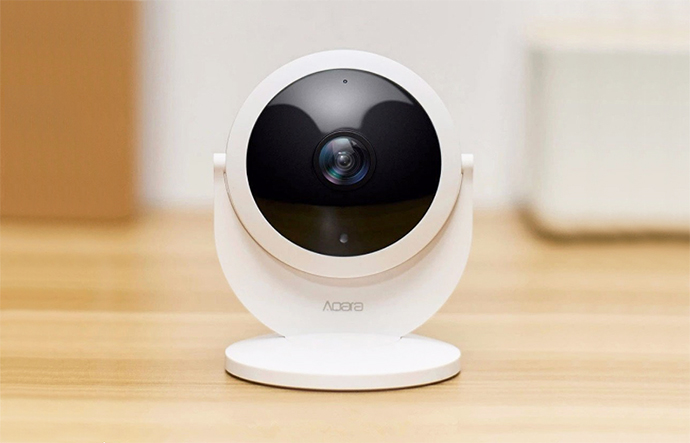
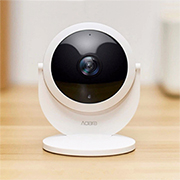
Indoor focused cameras are known for their unobtrusive nature and the Xiaomi Mijia Aqara follows the same design language as the other cameras with a similar price tag, focusing towards simplicity, minimalism and practicality. The case of the Aqara camera is completely made of plastic and it’s covered by a white matte finish (which does not retain fingerprints at all); furthermore, there are no sharp edges found anywhere, Xiaomi preferring the more welcoming look of soft rounded corners.
The device features a main part (the camera itself) which resembles a hemisphere and a decently built stand, which wraps around the camera and connects to it on the left and the right side through two small hinges, therefore allowing a full 360 degrees rotation.
The stand is also composed out of two sections, a larger circular base (which has a relatively narrow circular double-sided tape attached to its bottom side – it provides an alternative to the magnetic attachment if you don’t want to drill holes into the wall or ceiling and mount the device using the included metallic disc) and the vertical piece of plastic which attaches to the camera (unlike the base, it did not feel as sturdy, but it does seem to be solid enough to ensure a smooth rotation for both the camera section and the stand – yes, you can also swivel the Aqara camera to full 360 degrees).
Unfortunately, you can’t adjust the position of the device from within the software, since it lacks the necessary internal hardware, so you will have to adjust it manually (something to be expected, considering this is an inexpensive indoors camera).
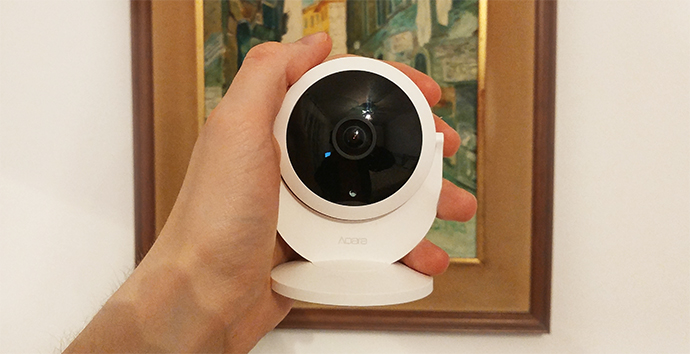
The Mijia Aqara Gateway Camera is a device of small proportions (it measures 3.93 x 2.75 x 3.0 inches with the stand), so it can easily fit inside the palm of my hand and it’s also quite lightweight (weighs 0.22 lbs), but since the camera is built in a balanced way, it didn’t feel flimsy, especially because of the properly sized stand.
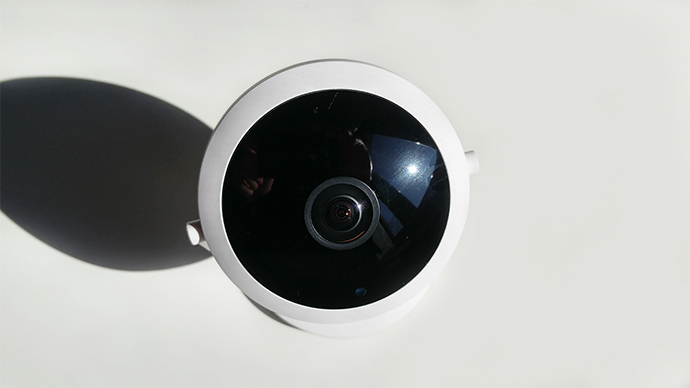
On the front, there is a black glossy area, with the 2.0-megapixel camera sensor (1/2.7 inch colour CMOS) along with the prime lens resting in the centre and on the upper side, there’s a LED indicator (which will change its colour and lighting pattern depending on the status of the device: if the LED is flashing red, then it waits for the connection to the app; if the LED is slowly flashing red, then it is upgrading its software; if the indicator is flashing blue, then there is a problem with the connection to the network and, lastly, if the LED is solid blue, then the device is connected to the local network and it is working properly), while underneath, there’s an IR sensor along with the microphone.
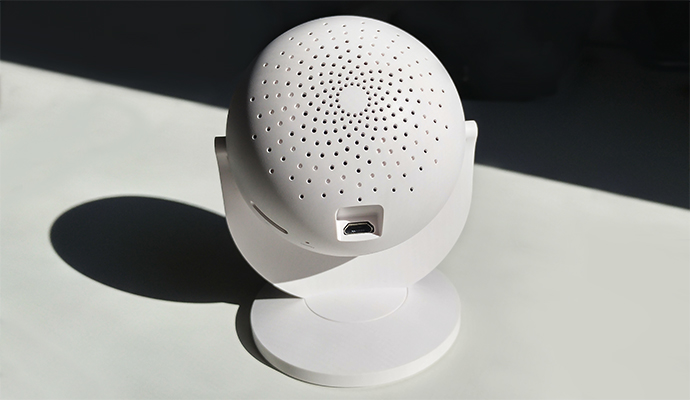
If you turn the camera around, you’ll notice lots of small holes which allow the sound from the built-in speaker to break through (the sound is surprisingly loud, going up to 80db and it’s also decently clear), while underneath the speaker, there is a narrow carved-in area which ends with a micro-USB connector (5V 1A, with a 100 – 240V input voltage) along with a card slot (it supports up to 128 GB – in case this is not enough, it also uses Cloud storage) and a small recessed Reset button accessible using a paper clip (I would have preferred to see an On/Off button as well for an increased level of convenience).
Although I couldn’t find any relevant cut-outs (except the small holes for the speaker), it doesn’t seem that the Xiaomi Mijia Aqara would have any trouble with the heat management and, while I have noticed that the camera gets lightly warm, it has never overheated.

Furthermore, since this is an indoors-type camera, the focus of the manufacturer was not necessarily towards building a rugged device, but the Aqara felt reasonably solid, regardless of the plastic construction and it will continue to function if the environmental temperature is between 14 – 104 degrees Fahrenheit and if the humidity levels are up to 90 % (RH).
Setup and Features
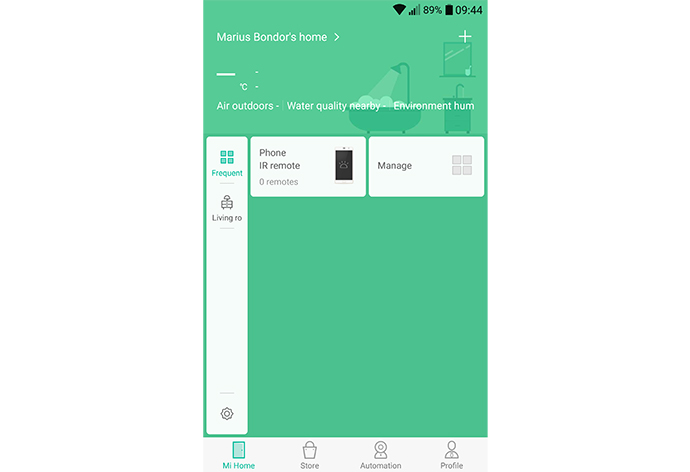
In order to set up the Xiaomi Mijia Aqara Gateway Camera, you need to download, install and run the Mi Home app (compatible with both iOS and Android OS). Usually, the setup and configuration process of some of the latest IoT smart devices is very intuitive and quick, but the Mi Home app has proven to be quite challenging especially since the app can act a bit strange is set to any other countries outside China.
Sure, the dashboard is properly translates to English, but, if I chose the U.S. as the location, I could not complete the installation since the camera would not see the QR code on my smartphone, so, I had to switch to Mainland China (be aware that some regions have a slightly different setup process).
The second problem that I encountered was that the camera preferred a wireless router instead of an access point or else it would not see the wireless network and the connection would continue to time-out. So, the first thing you have to do is to reset the camera to factory default settings (use a paper clip and push the Reset button until you will hear a phrase spoken in Chinese) and then wait until the LED light will switch from red to flashing blue, as well as for the Chinese lady to give you the confirmation that the camera is ready to be paired to the app.
Now, you need to open the app (the mobile device needs to be connected to the local WiFi network) and the Aqara camera should be automatically detected – tap the camera name (it should have some Chinese letters, but this can be changed later) and wait until it gets automatically paired to the mobile app (you can choose to have a shortcut to the new Aqara device on the dashboard).
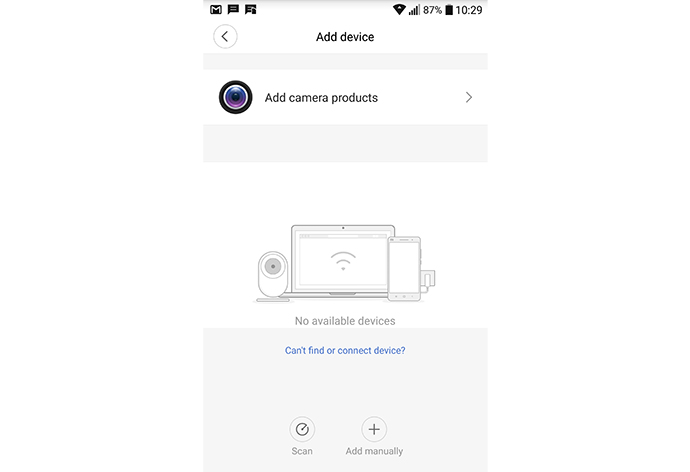
If the camera is not automatically detected by the app, you need to press the plus sign on the top right corner, choose ‘Add camera products’ and select the Aqara camera. From here you will need to reset the device and continue to follow the same aforementioned steps. When the set up process is done, the LED light on the camera will turn solid blue and a new window will open on the mobile app with a panoramic view of your room.
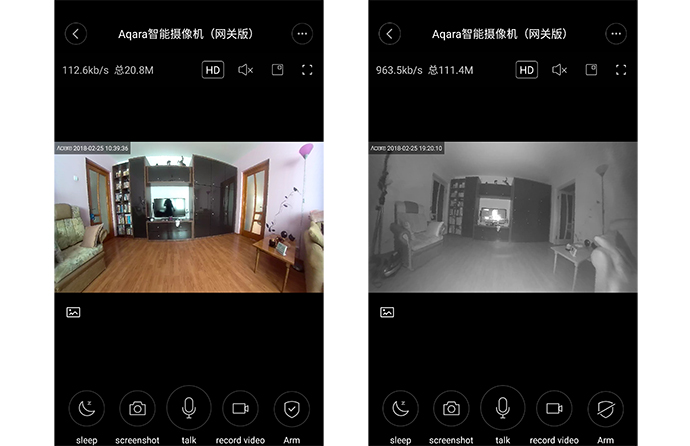
During daylight, the quality of the captured video is decent (it is shot at a 1080p resolution) and it features a fisheye lens, so it covers at all time a 180-degree wide view, but there is a noticeable split second delay. The camera is equipped with an infrared sensor, so it can also film during the night, but, as expected, the image quality does take a hit and, if a person sits more than 10 feet away, you won’t be able to clearly distinguish its facial features.
The Mi Home app does offer a few interesting options to explore, so, on the main window of the Aqara camera, you set the camera on Sleep mode, take a screenshot, press the microphone icon to speak through the camera’s speaker, record a video, enable Arm (which activates the motion sensor and, in case it detects movement, it will alert you via the app).
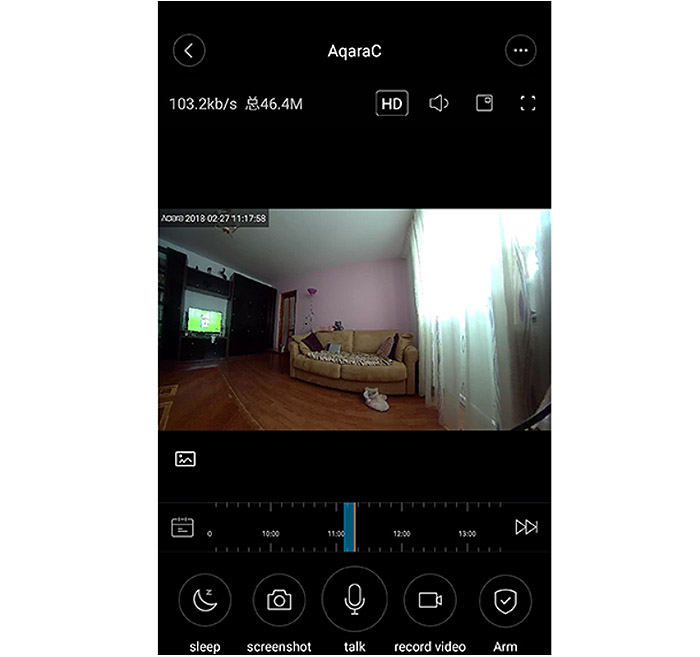
Furthermore, towards the top of the window, you can see the download/upload rate, choose between High or Standard Definition (HD / SD), mute / unmute the speaker or change the view mode.
If the camera has recorded any videos, the interface will have a timeline which will allow you to quickly access those moments by choosing a specific hour, minute or you can choose a specific day from the calendar (which is not fully translated in English).
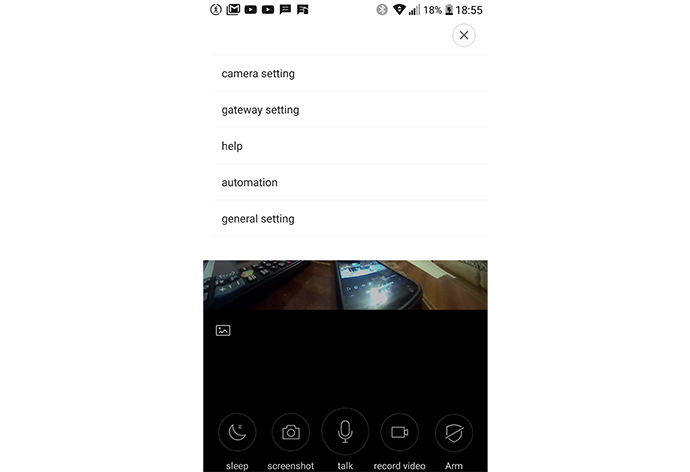
In the right top corner, you can find the main menu, where you can change the Camera settings (enable the Motion Detection, Flip the captured video vertically, enable the Time watermark, the correction screen (which has the role of removing the ‘tunnel vision effect’ created by the lens), enable the loop recording, enable the LED, allow the infrared lights to turn on automatically when the sensor detects that it’s night time, change the SD card settings, set a timer for when the camera will be active (an interesting addition!) or change the Volume of the speaker), the Gateway settings (in my case, I could set up the alarm), view the Help page, visit the Automation section or change the General settings (change the name of the camera (unless you like the Chinese characters), add an access password, share the device with your contacts, manage the Locations, check for any new available firmware updates, remove the device from the app, add a Home shortcut, view some network statistics (such as signal strength, RSSI, IP/MAC address) or send feedback).
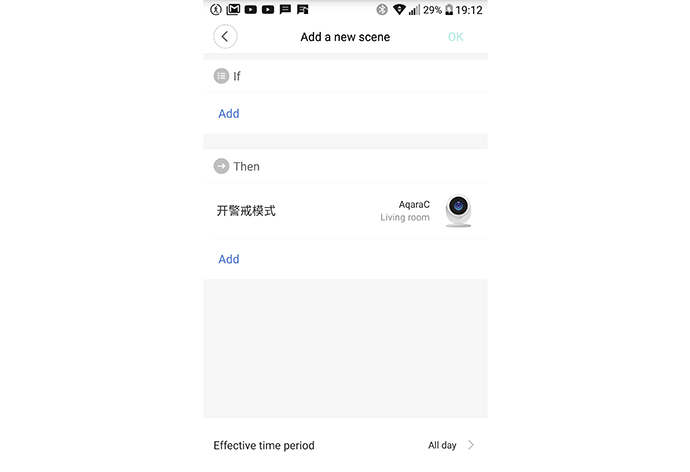
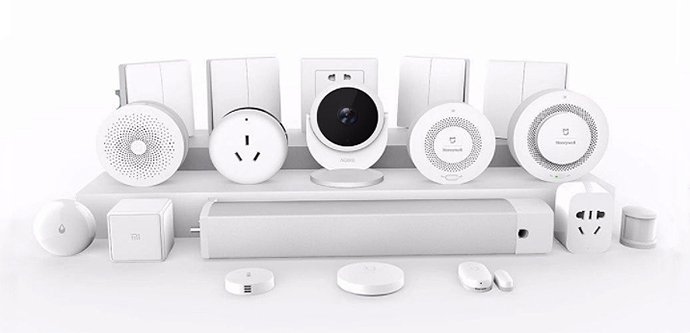
The Automation section requires more attention since here, you can add new scenes which function on the IFTTT parameters, so, if you have multiple smart (compatible) devices, they can connect to the Aqara camera which will act as an IoT gateway (it has integrated the ZigBee module), you can set various actions to be triggered if certain conditions are met (for example, if the front door is opened, the camera will automatically record and send you a video of the person entering the home).
Of course, there are also some default camera-related actions that can be of great help to the user: if the user receives a call/message on its Mi phone or if the outdoor weather changes (some of the options that you can choose from are the sunrise/sunset, outdoor temperature, outdoor humidity), then the camera will send a notification, arm the device, run a scene and so on (these options are in Chinese so you’ll have to experiment with them until it gets translated).
Note: Xiaomi has released some firmware updates to solve the issues the camera had with the network SSID, but I did notice that it still remains incredibly sensible to any network changes (for example, I had to reset a router and, while every other connected device just fine, Aqara went offline and would refuse any attempts at reconnecting to the app until I changed the country from the router interface).
Lastly, I want to point out that the Aqara camera can be accessed remotely from your mobile phone, so I could easily see what’s going on inside my home while I was away. Furthermore, I would instantly get notifications when movement was detected and I could watch the recorded video on the fly (I would have preferred the ‘Partition and graded’ feature that the other Xiaomi IP camera had, where you could specifically choose which area the camera should focus, such as the door and not be triggered by any type of change in the scenery).
Now, let’s talk about security. Sure, the camera itself can be set to require a password in order for the user to access its feed, but that’s really not nearly enough in this day and age. As can be seen in the ‘The Best Ways To Protect Your (IoT) Smart Devices From Outside Threats article‘, these type of devices (especially the inexpensive ones) are more vulnerable to outside intrusions and, since this camera can be accessed remotely, it is ideal to make sure you have a decent router with solid built-in security and, for some extra protection, it is ideal to create a separate VLAN for your IoT devices. Furthermore, you can go the extra mile (although it may be overkill) and get yourself a pfSense appliance where you can properly configure everything that comes and get out of your network.
Conclusion
Xiaomi Mijia Aqara Gateway Camera is a mixed bag since, on one hand, we are dealing with a small, unobtrusive device which can easily be positioned almost anywhere in the room, it has a decent video quality, lots of interesting features and an attractive price point, but the problem is the app’s ultra sensitivity to the network (it wants things done in a certain way or it completely refuses to work) and overall, the application feels a bit unfinished and rushed.
So, it’s clear that some corners had to be cut in order to maintain an accessible price, but, if you can get over its weird quirks, then this camera does offer some attractive features that its competitors do not, so it’s definitely worth taking into consideration for home monitoring without much pretense or as a baby cam.
Check the product here:
![]()
Xiaomi Mijia Aqara Gateway IP Camera
Pros
- Nice, Unobtrusive Design
- Decent Video Quality
- SD Card + Cloud Storage
- Remote Management
- Infrared + Movement Sensors
Cons
- The App Is Not Fully Translated
- Difficult Set Up Process
- Very Sensitive To Any Small Network Changes
Mark is a graduate in Computer Science, having gathered valuable experience over the years working in IT as a programmer. Mark is also the main tech writer for MBReviews.com, covering not only his passion, the networking devices, but also other cool electronic gadgets that you may find useful for your every day life.
Hi, good article. Thanks for that. Quick question – when I switch the server to China I am not able to use Alexa voice control (it is available in Europe). Any solutions to this issue? Thanks
Anyone can help me. I bought one of this camera but i cant connect to it. I download Mi Home then add camera. I followd all the steps up to the step where camera need to scan QR code from the app, it nerver read code from then app. Please help. Thanks
Hi.
As you can see in the review, I had pretty much the same problem. So, you could try some of the changes I made: you could switch to Mainland China, reset the device, try to connect again and make sure you are not connected to an access point – it is ideal to connect to the 2.4GHz network on a standalone router.