
The model and the plate will first go into the container number 1 and, after some stirring and washing, they will be then transferred to the second container. This way, I always have a container with dirtier liquid and a container that has a cleaner isopropyl alcohol for that last bit of cleaning. I know that people prefer to use a Wash and Cure station and I would have used one as well, but since I have just started with resin 3D printing, I decided to do it manually for now. After putting all the protective gear back on and having the paper towels ready, I removed the top cover and, after removing the knob, I slowly took the printing platform off with the model still attached.
With another hand I used the metal scrapper (it’s sharp, so kudos to Anycubic) to detach the model. It should easily pop off, but be careful so it doesn’t end up on the floor and paint the room with resin. Then, I put both the plate and the model in the first container and, after a few minutes of moving the model around, I took a small brush and continued to remove some of the thick remaining layers of resin. I then moved the model to the second tray and continued cleaning it until I was satisfied with the result. Afterwards, I put the model on a paper towel and moved it outside so it gets cured. If there are supports that need to be removed (the test model did not, but the next parts that I printed did), I used a cable snipper to carefully detach the unwanted bits of plastic immediately after washing the model with isopropyl alcohol.
Note: Be aware that while you can pause the printing, it’s not going to continue where it left off in case of a power outage. So, if your area has issues with a continuous power delivery, it’s best to use an UPS and put the Photon Mono 4K on pause until the power returns.
The Software
Every Anycubic 3D printers comes with the Photon Workshop software ready to be installed (from the provided 3GB USB drive) and, while it does have some interesting features that are seemingly easy to implement, there are some major issues that need to be addressed. After installing the Photon Workshop, I was greeted by a fairly simple interface and I could easily add a 3D model which I could move, rotate, scale and so on – to view it from various angles, hold right click.
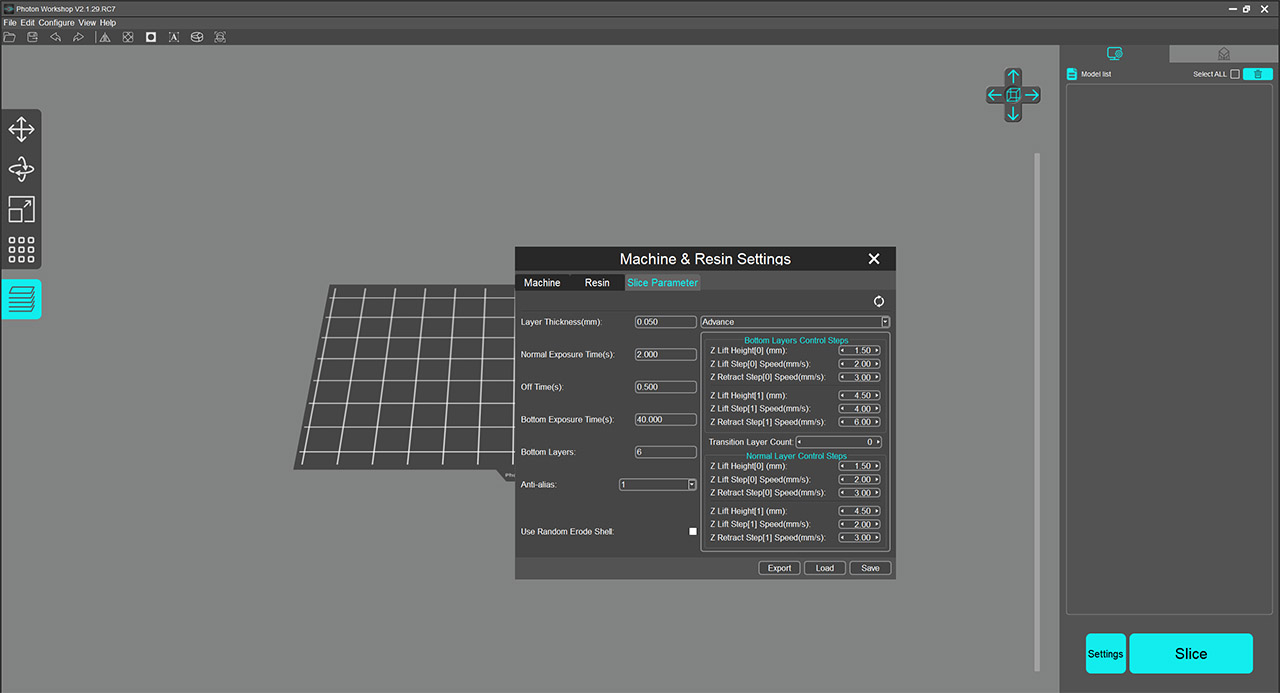
It’s best to go to Configure > Settings and select the Photon Mono 4K to get the suitable default settings for the 3D printing. This is especially useful for beginners that may feel intimidated by all the parameters that can be adjusted. Here, you can also set the Resin Type and Density, as well as adjust the Slice Parameters. Like I said before, if you don’t know what you’re doing, leave everything to default since the settings are suitable for most models. Otherwise, go ahead and change the bottom layer exposure time, the layer thickness (by default, it’s 0.05mm), the bottom layers and I also noticed that there is Anti-aliasing. That’s a bit surprising at this price point and it’s more surprising that it actually works (there are some trade-offs, such as the loss of some details, but we should get a better overall model).
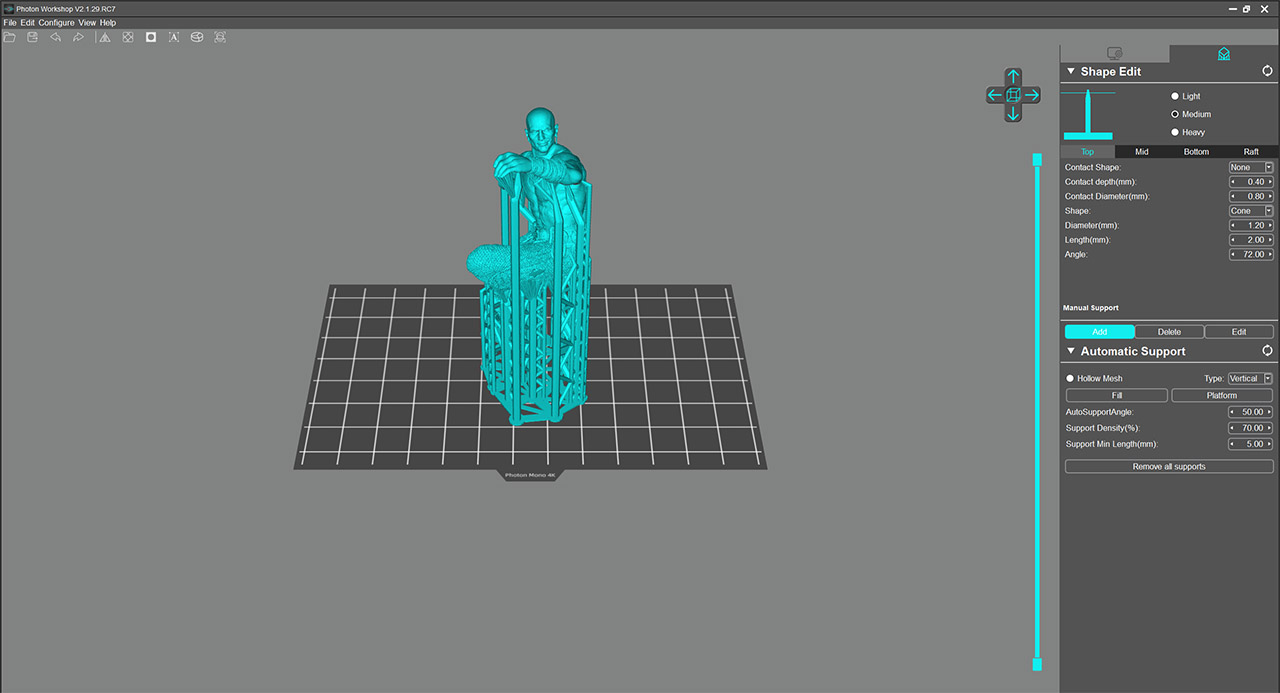
I know that some users have complained that the AA would only work with the Photon Workshop and not be properly added with other software, but, for now, I only used it with the default program (do let me know if you want me to check it with other third-party software). On the top right corner, you can click on the second icon to open the Shape Edit section and here, you can set the angle at which the model will sit at, you can add supports and there is the option to hollow the model. I have tried adding manually a few supports and it worked fine, but, there is an automatic option where the software will automatically detect where the supports are needed and add them. This is normal for most other software, but with the Photon Workshop v2, it would fail. It’s not that it didn’t add the supports properly, it’s that the program would become unresponsive.
There is also the possibility to add supports within the hollowed part of the model, but again, the software would immediately get in a coma for anything that was automatic. That’s not good and Anycubic seriously needs to address these issues. In any case, you do have third-party software available for slicing, so it doesn’t really affect the 3D printer’s usability in any way.
Note: After slicing, I did like that the Photon Workshop would give an approximate time of how long it would take (although, I would add an hour to that estimation) and about how much resin it would need.
The Printing Performance and my Mistakes
Since the Anycubic Photon Mono 4K does not come with any bottle of resin, I bought my own from Elegoo (color gray) and the first model that I printed was the test cube that was already added to the USB drive. I left the default settings and, after about 3 hours and a half, the model was done and ready to be cured. And it’s almost perfect. It’s very difficult to spot any imperfection, the lines are consistent, there is no warping, no thinner lines and all the details are there. I have noticed that on one side there is a very small deviation (I am seriously nitpicking), but overall, it’s a very well done model. And this particular (torture) cube is very difficult to properly print especially on the entry-level models – let’s say it’s the equivalent of the 3DBenchy from the FDM 3D printers.
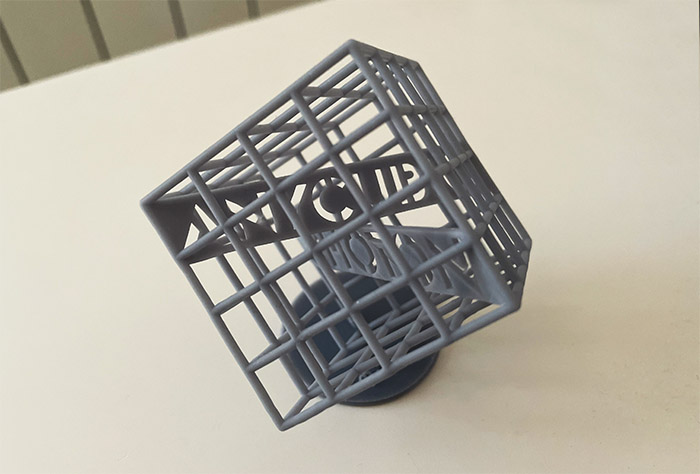
So, yes, the Anycubic Photon Mono 4K should be able to handle pretty much anything you throw at it and the 4K resolution does help with the details. If I stopped here, it wouldn’t have been that much of a test, so I decided to print a miniature model, since this is one of the main reasons to buy a resin 3D printer in the first place. Considering that it’s been years since I created a 3D model (the good ol’ days of 3DSmax), I decided to buy a detailed model and I got this specific model from Dmstash.com.
The 3D model was dirt cheap and it got delivered as a smaller and larger version. What I noticed is that the model was already ready to be printed: it was put at an angle and there were already supports in place (I added a few more, but that has proven to be a bad idea). I also noticed that the base of the model had modeled a small hole for resin drainage which again removed a lot of work from my end. And that’s great for a beginner that doesn’t yet understand how to properly slice a model. Since the Photon Workshop was behaving strange and became unresponsive, I simply added a few more support beams and started the printing process.
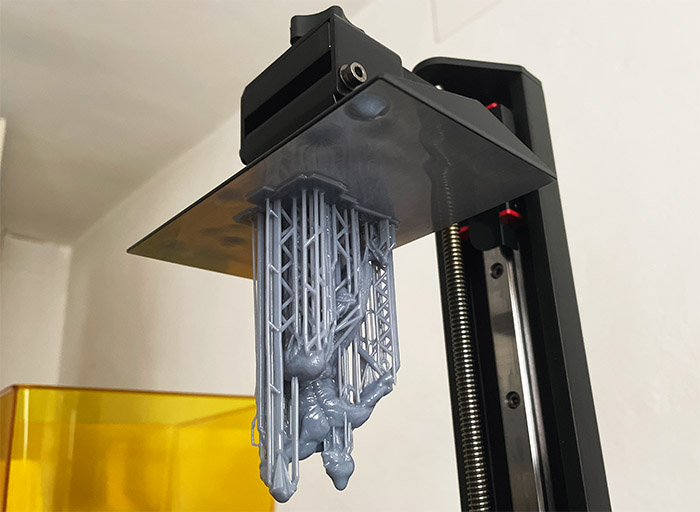
And that takes us to the mistake number one: don’t go overboard with the support beams. Since I was a bit anxious that things may not end up fine, I added too many supports which were too thick and have later proven to be a pain to remove and they did left some marks on the model. I also wasted too much resin on the supports which is mistake number two. The mistake number three was that I allowed the staff part of the model to print vertically. This meant that the print took 6 hours and a half – if I would have put it at a better angle, closer to horizontally, the model would have been done in no more than three hours. So yes, be aware that the height of the model is going to matter far more than how wide it is. After all four parts were done, I glued them together and the end result is definitely impressive. I could see the fingernails on this small model, as well as the face expression, so there is a high amount of details.
Since this is the first proper model (not some stress test), it’s not perfect, as I could see some spots where the supports weren’t properly removed. But I also saw some occasional hiccups from the printer itself since the texture on one leg was missing for about a tenth of an inch. It won’t ruin the model as I could barely see it, but it’s important to keep in mind that this is still an entry-level resin 3D printer (and even so, it’s still performing surprisingly well).
Conclusion
The Anycubic Photon Mono was already an excellent resin 3D printer for beginners and the move towards a higher resolution will surely help get more people into this interesting hobby. Everything that applies to the more expensive models will apply to the Photon Mono 4K as well, so, besides the provided accessories, you will have to get quite a few objects by yourself. Also, you will need to watch (or read) some guides on how to properly perform the cleaning and curing of the models. In the end, all the effort will pay off since the Anycubic Photon Mono 4K is able to print some gorgeous models, far better than most FDM printers, especially in the same price range. It’s not the perfect device, but the Photon Mono 4K is fairly silent, not the fastest, but neither the slowest to print a model and the small display works really well for some basic adjustments and for checking the status of the print. So, if you want to give resin 3D printing a try, then the inexpensive Anycubic Photon Mono 4K is one of the best options available right now.
Anycubic Photon Mono 4K
-
Pros
- Very good print accuracy
- 4K resolution
- The resin vat is metered
- The display is useful
- If the lid is open, you can't start the print
Cons
- The native software needs some work
- In case of a power outage, you can't resume the print
- I already had some fairly deep scratches on the platform after printing four models
Mark is a graduate in Computer Science, having gathered valuable experience over the years working in IT as a programmer. Mark is also the main tech writer for MBReviews.com, covering not only his passion, the networking devices, but also other cool electronic gadgets that you may find useful for your every day life.