
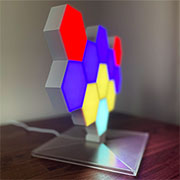
The Cololight Plus Kit is currently the newest member of the Hexagon series and you may have noticed that it looks pretty much identical to the Cololight Pro, so what are the differences between the two? The modules themselves seem to be identical across both kits, but the Cololight Plus comes with a large transparent stand and it supports Apple’s HomeKit out-of-the-box.
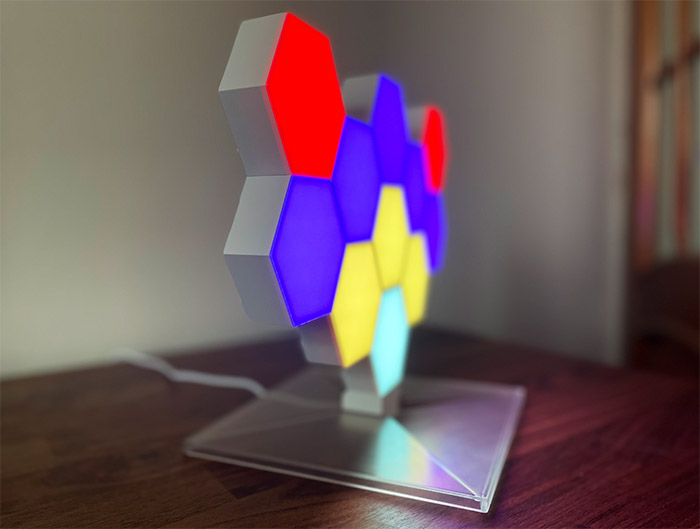
So, as expected, you can use Cololight hexagonal units from the Pro series alongside the Plus line (and the other way around), it’s just that the controller is going to be different. That being said, the Cololight Plus kit still offers the same flexibility in how you can inter-connect the hexagonal units, allowing you to create some really cool designs. And yes, it’s possible to rely on the aforementioned large stand or to mount the units on the wall, thus creating that background effect that’s very common on YouTube videos.
The people that have gaming rigs and want to make their room to also shine alongside other RGB peripherals will appreciate the Cololight Plus, but then again, these small pucks can be used for various other applications as well (I use them to create a calming mood in the room). I have recently tested the Cololight Mix and it was an excellent RGB light (although it had some shortcomings), so let’s put the Cololight Plus kit to the test and see how well it performs, especially now when this type of devices seems to get more popular (so there’s more competition).
Note: Besides the 7-unit Cololight Plus box, I also got five other hexagonal units, as well as the wall-mounting kit.
Design and Build Quality
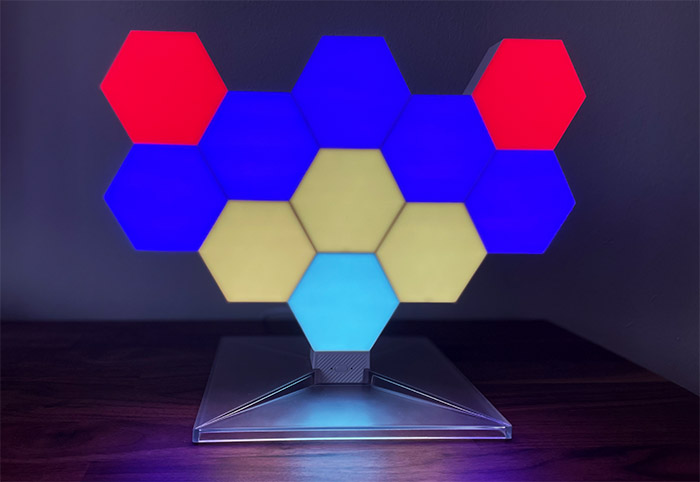
I really liked the circular LED lights on the black boxes from the Mix series, but the Cololight Plus units are very different even though there’s pretty much the same concept behind them. You get multiple units inter-connected and the light will shine potentially creating a fluid transition between the modules. But, while the Mix had a centralized unit, the Cololight Plus relies on a small controller to which you can attach any unit, so there’s no main device surrounded by extensions.
Furthermore, each unit is hexagonal and it’s covered by a white matte finish – the size of each module is 3.4 x 2.9 x 1.2 inches (8.6 x 7.4 x 3.0cm), so they’re fairly small. And they’re also quite lightweight, so there is the question of stability. The Cololight Pro had this issue with its small controller stand, so I think that the Plus kit is far better in this regard considering the size of the stand (it’s 7.9 x 7.9 inches or 20x20cm). The manufacturer has also taken into account the stability of the structure itself because after adding multiple modules on top of each other and at various angles, the units may no longer stay properly connected. To mitigate this issue, there is what is called a fixator which resembles the connector, but it’s far smaller and its role it to solely keep two Cololight Plus modules tightly attached to each other (there is no data or power transfer).
The controller is much smaller than an LED module and it needs to be inserted inside the stand – there is a dedicated area in the middle – and there is a cable permanently attached to the device which is 3.28 feet long (or 1 meter). So it’s not very long and that may be an issue if you want to install the panels on the wall and you will need to extend the cable. The controller also has a button in the center which you can use to move between the available LED effects and, as with the Cololight Mix, you don’t really need to use the app, but you are going to lose the ability to customize the way the LED modules work.
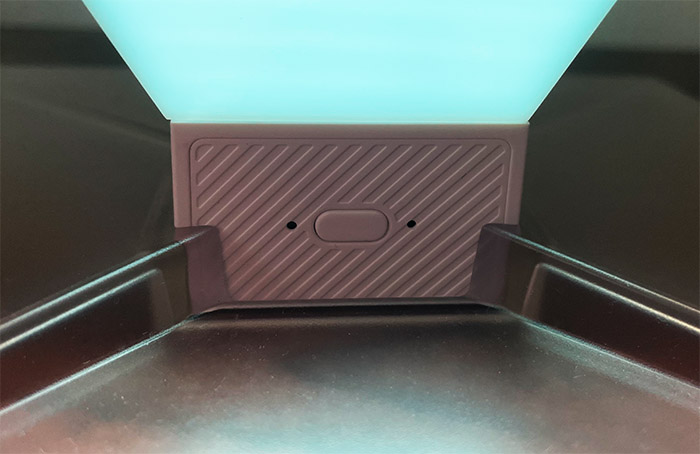
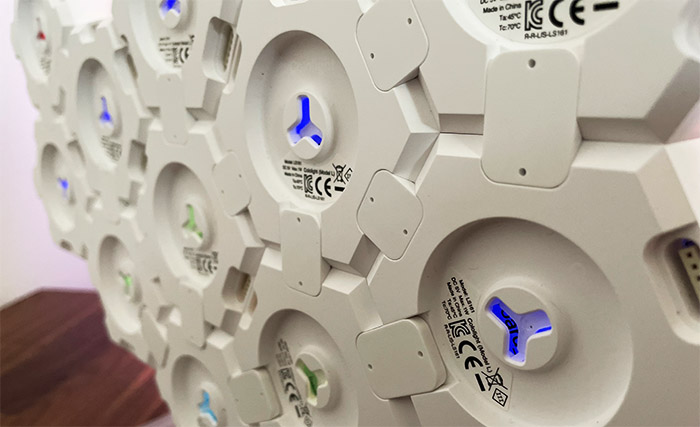
Besides the central button, there is a recessed Reset button on the left that you need to use to put the device in pair mode and on the right, there’s an LED which will flash blue to let you know that the controller is ready to be paired. If you turn around any of the available LED modules (all are identical), then you’ll be able to see that there are six connecting ports that can be used to deliver power and data to other modules and an additional port that can be used to power up the device. So, be aware that you need to use the larger connectors that are able to reach to the secondary ports, otherwise, the module will not power up. You will also notice that in the middle of each module, there is a dedicated area for the mounting plate.
And there are some plates in the package that simply need to be pushed inside the aforementioned area. Afterwards, simply take the double-sided circular tape and attach the hexagonal modules anywhere on the wall. I did like that the Cololight Mix were magnetic, so they could be attached to metallic surfaces, but that’s not the case with the Cololight Plus kit.
How to install the Cololight Plus kit?
The hardware installation is by far the more fun part since you get to create a pattern to how the LEDs will shine. If you decide to go the stand route, then first insert the controller in the middle of the stand and then take a module and a connector. Attach the module and then do the same with the second unit, the third and so on.
If it seems that the modules lack in terms of stability, take the ‘fixators’ from the packages (smaller than the connectors) and attach them to a few modules. It should then become more stable. If you want to mount the Cololight Plus on the wall, then take the first module, attach the bracket to its rear panel and using the double-sided sticker, mount the module to the wall. Be sure that it’s next to the desk since the next device that you’re going to attach is the controller and that cable is not going to be very aesthetically pleasing. Perform the same steps as with the first module with every additional module until the wall is covered by the LED light.
It seems that you can go up to 255 panels on a single controller (the app showed 100), although I am not sure if a single power adapter is enough (it’s not stated anywhere), but know that my 11 panels were properly handled by a single controller connected to a RAVPower 65W charger.

After putting everything together, it’s time to install the Cololight Plus on the app. And it’s the same app that I used with the Cololight Mix. So, after installing the Cololight app (iOS and Android), I had to tap the three lines on the top left corner and click on Add. Now, I needed to select Cololight from the list and Cololight Plus from the second list.
Afterwards, the app will show the instructions on how to install the modules: press Reset for 5 seconds until the LED starts flashing. Then, the app will require permission to access the Home Data. I said no and it turns out it was a mistake, because I couldn’t continue the installation process, so I agreed to give it permission.
Then, a window will cover more than half of the display where you will be asked to either Scan a Setup Code or Hold the iPhone near the Accessory. I had no idea what that meant, so I searched around the box and I finally found the QR code on the User Guide. Apparently, the code is also on the controller and I would have easily found it if I wasn’t so hasty to insert it into the stand, so I lost some minutes due to that. After Cololight Plus was detected, I tapped on it and I got the message that I was ‘Unable to Add Accessory’.
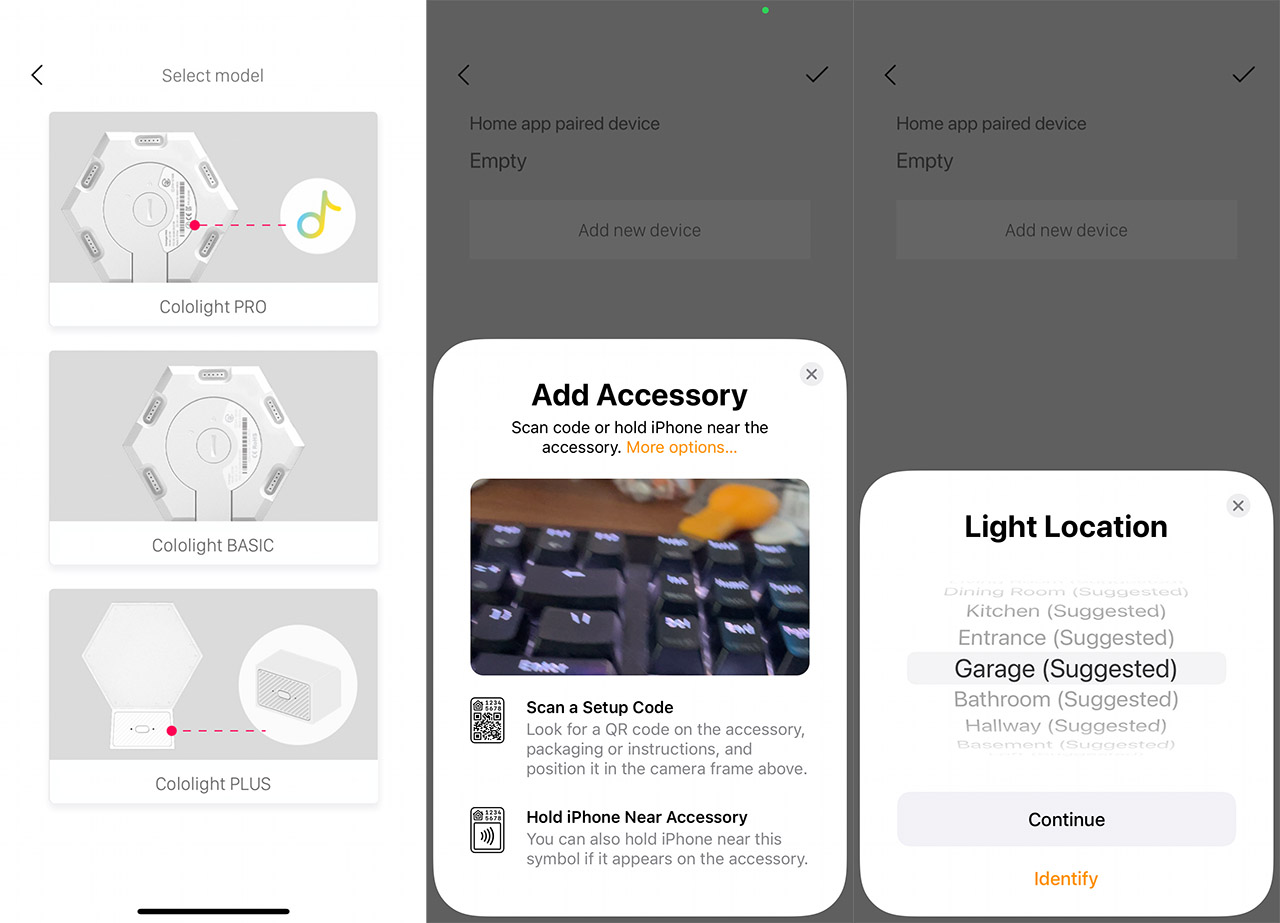
The issue was that the phone was not connected to the 2.4GHz network – if only I was advised to do so beforehand. After finally knowing all the necessary conditions, I was able to connect to the LED lights and I was asked to select the Light Location and to give it a Name. I found the installation process of the Cololight Mix far simpler and more intuitive, even though both devices are developed by the same manufacturer.
The Mobile Application
The App layout and the options are the same as on the Cololight Mix, so expect to move through various pre-set effects on the main page and on the bottom right, there is a menu where you can adjust the brightness level, as well as create custom effects. Either from scratch or by editing a preset, the former opening the possibility to create completely new effects. And you can choose the colors, the speed at which the LED will change and the effect itself. The possibility to rely on the mobile microphone to light up the LEDs to the music rhythm remains an available option.
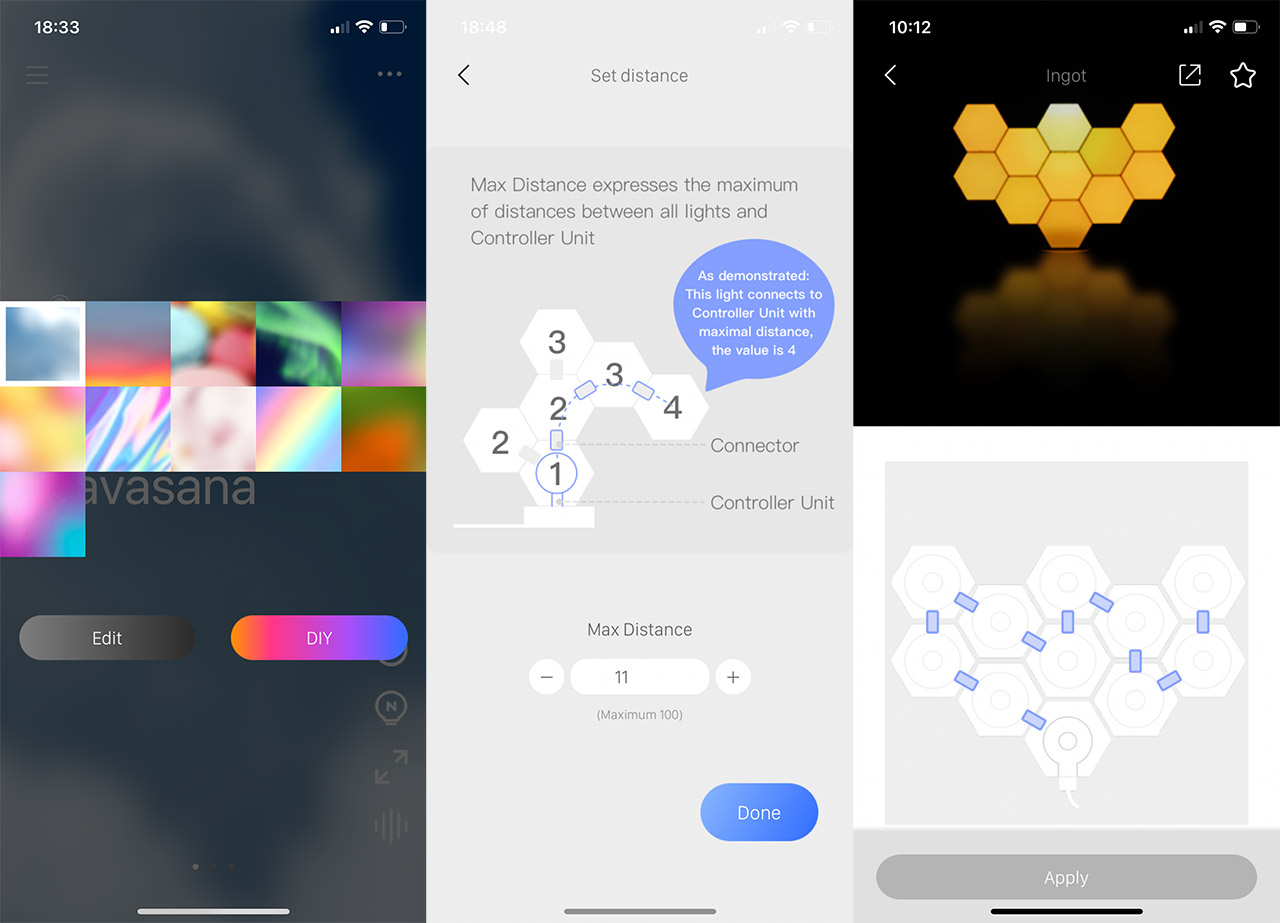
There is another menu at the top right corner and here, you will be able to set the distance (which is the maximum number of modules in a straight line), Sync the currently playing effect with HomeKit, set a Timer or Countdown, view a History log and adjust some general Device Settings. Swiping to the left will take you a new set of effects, static ones that show a single color and then you’ll be taken to the Official Lab. Here, there are some particular effects that can be applied to your Cololight Plus, but only if you have the right amount of modules installed. Also, to get the best effect, you need to follow the provided schema for how to install the units.
You’re also able to create your own effects and the way to do it made far more sense than when I tested the Cololight Mix (I guess it was still a work in progress).
Indeed, I was able to virtually create the layout of my Cololight Plus, to select the effect and lastly, I was able to choose a different color for each portion of the circuit. Be aware that it’s not possible to select a different effect for every module.
The Performance
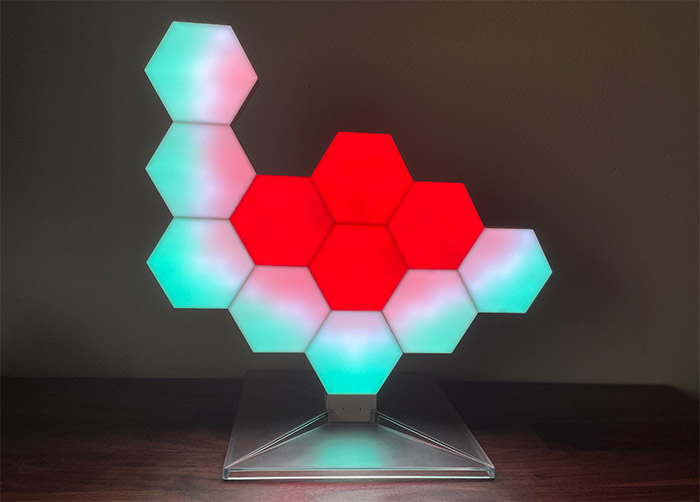
In really wanted to see what’s inside a Cololight Plus module with my own eyes, but the manufacturer seems to have glued the plastic parts together, so I will have to rely on the info provided by them. It appears that each module has 19 LEDs and, since there’s a built-in driver IC, every LED is programmable. If I were to put the Cololight Mix and the Cololight Plus next to each other, I would say that the former seems more organic and fluid, but the latter is also able to produce impressive-looking effects.
For example, I checked some of the effects from the Lab and, after carefully following the schematics, I have managed to create the Ingot and the Watermelon.
As you can see, it’s possible to add and remove modules while the LEDs are powered on and yes, the entire structure feels less solid than it did with the Cololight Mix. Then again, mounting the lights to the wall will make it far more solid – I forgot to mention that besides the double-sided stickers, it’s very much possible to rely on the screws that are provided into the package.
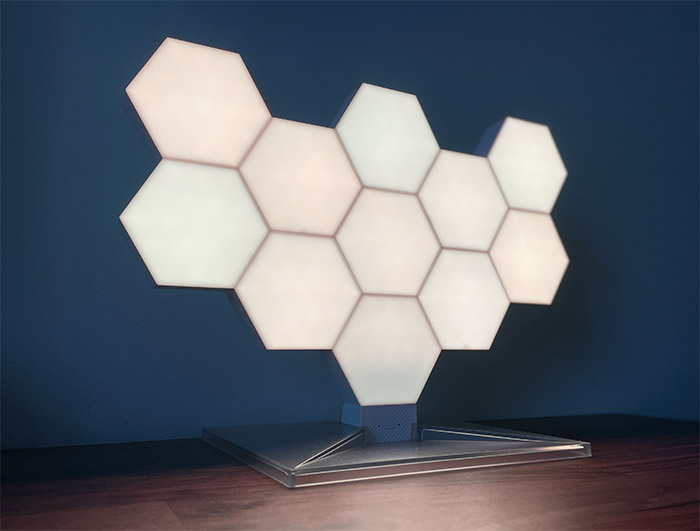
Then, there’s the color accuracy which is not that great, lacking a bit in contrast, but what was interesting was seeing that the Tea White color wasn’t the same on all panels, some had a warmer tone, while other were colder. And, on a closer inspection, this seems to be the case with all colors. Then again, for the price tag, I suppose the LED animation effect itself is going to overshadow any color inaccuracy.
Although some people that are more sensitive to it, may see it as an issue.
As I already mentioned, it’s possible to adjust the brightness of panels and it can go up quite a bit, glowing brazenly even if it was a very sunny day. At the same time, it seems that the levels can only reach up to 10 lumens per panel, which on paper may not seem much, but in person, the entire kit seems way brighter. I wanted to see how much power a single module needs, so, after using the Gosund smart plug, it seems that one Cololight Plus unit requires 2.1W (that’s along with the controller and WiFi connection). Adding two units pushed the power consumption to 3.7W and, after adding all 11 modules, the device showed a power consumption of 16.1W which is about what an LED bulb required nowadays (and far less than the traditional light bulbs that could go up to 100W and beyond).

Note: Besides working with HomeKit essentially out of the box, the Cololight Plus also supports the integration with Amazon Alexa, Google Assistant and with Stream Deck. The support for the open-source Home Assistant is still not yet available, but hopefully it will be soon.
Note: I know that some of you expected the performance of the NanoLeaf, but the touch-sensitive panels would have shot up the price far higher than what the Cololight Plus currently retails for.
Conclusion
The Cololight Plus kit is built on top of one of the first LED lights entries in the market (the original hexagonal Cololight), so in a sense, it still feels like it hasn’t yet reached the point where the manufacturer is done with the series. There are some serious improvements with the app (I really liked the Lab section which now has a better layout and it’s overall more clear than before), the stand is far better and it’s easy to install the modules on top of each other, as well as on the wall. There is an entire kit for wall mounting, but it’s a separate package. It’s clearly not the perfect system, but there’s nothing that will break the user experience, so, if you’re in the market for an LED light system, do take a look at the Cololight Plus kit since there aren’t many such devices that offer a similar feature package at the same price point.
Cololight Plus
-
Pros
- Lots of room for creating the perfect model.
- The preset effects are very cool, but I also really liked the option to create your own effects.
- The app is easy-to-use.
- The stand is stable + the option to mount the modules on the wall.
- Support for HomeKit
Cons
- The app installation can be a bit confusing.
- The color tone is not identical on all modules.
- The power cable is a bit short.
Mark is a graduate in Computer Science, having gathered valuable experience over the years working in IT as a programmer. Mark is also the main tech writer for MBReviews.com, covering not only his passion, the networking devices, but also other cool electronic gadgets that you may find useful for your every day life.