
The two USB ports are mainly dedicated for adding additional 3G/4G/LTE modems or temperature sensors (as the user interface suggests), but, since these can also be used for connecting storage devices, I decided to measure the read / write speeds using an external SSD (Samsung T5 256GB). The Vigor2926 will work only with FAT16 or FAT36 formats, so I had to change from NTFS to FAT32 in order for the router to ‘see’ the new drive. That being said, using the FlashFXP software and by moving a 3GB multimedia folder, the router delivered an average of 10.26 MBps while reading the folder and an average of 10.13 MBps while writing it.
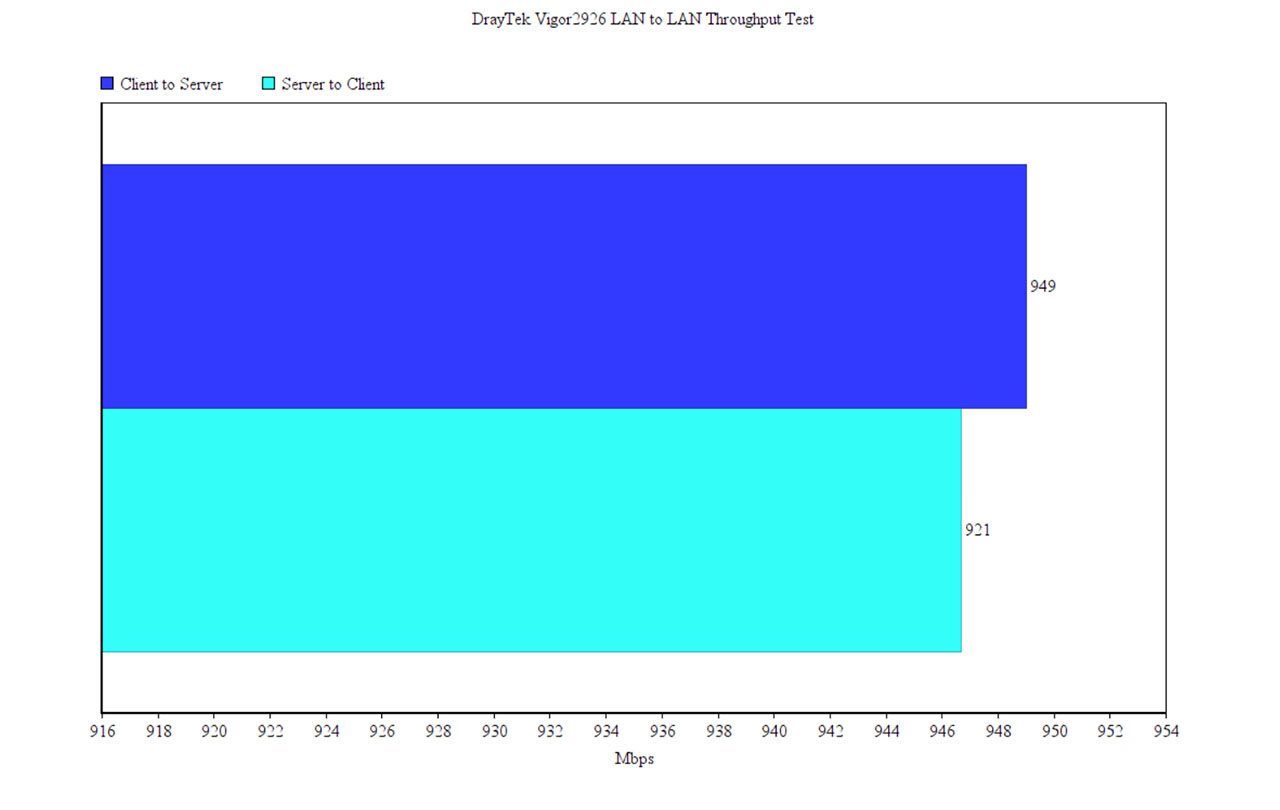
Lastly, I decided to connect two computer to the router, one set as the server and the other as the client and I measured the average throughput: from the client to the server, I measured an average of 949 Mbps and, from the server to the client, I got around 921 Mbps.
Installation and Software
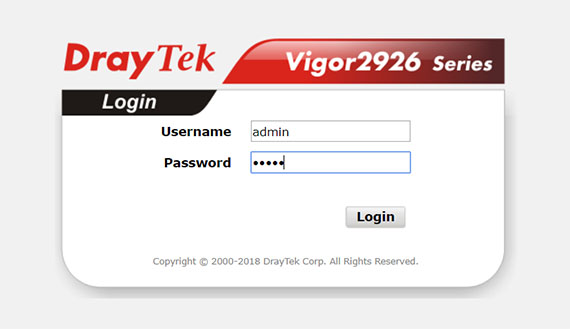
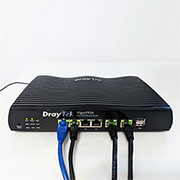
After you’ve connected the power cable to the back of the router, insert the Internet cable from the modem to a WAN port and connect an Ethernet cable to a LAN port and a computer. Afterwards, open a web browser, go to the default router IP address (192.168.1.1) and, when prompted, enter admin / admin for the user name and password. This will immediately display the main page of the DryaTel user interface. Of course, you’re not done because the first thing you need to do is change the default password: from the left menu, select System Maintenance and Administrator Password and here, you can quickly add a new password and, if you want there are other parameters that can be added or changed (use Mobile one-Time Passwords or 2-Step Authentication and administer the Local Users – yes, you can enable User Mode for a simple configuration).
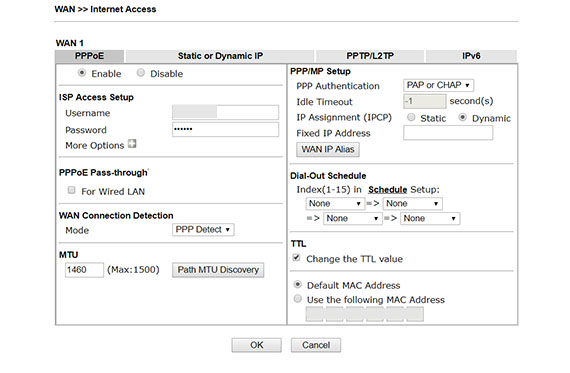
On the next step, you need to configure the Internet connection. To do so, go to WAN, Internet Access and select the WAN port to which you connected the cable (in my case, I used WAN1) by clicking Details Page and selecting the type of connection that you have. In my case, it was PPPoE, so I had to enter the ISP username and password and set the MTU (you can use Path MTU Discovery to automatically find the actual path MTU). Next, the router will restart and I gained access to the Internet.
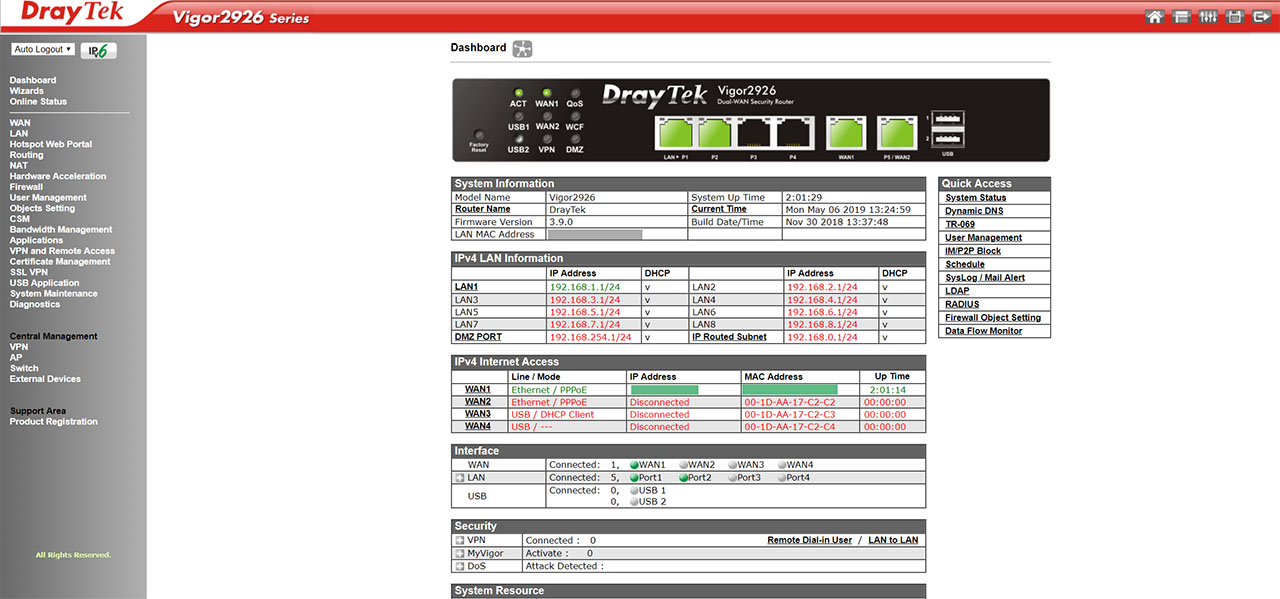
The user interface is surprisingly user friendly, with all the settings well laid out in their own respective category and, on the main page (the Dashboard), DrayTek has added a graphical representation of the router, showing the connected ports and the active LEDs (it is interactive, so you can quickly access the settings for a particular port), while underneath it, there’s System Information, IPv4 LAN and WAN Information (from these two tables, you can click on any port to change its settings), the Interface info (includes all the connected clients), the Security info (VPN, Vigor and DoS) and the System Resource (current CPU and memory usage). On the right side, there’s a Quick Access menu which allows you to access the most common settings.
Underneath the Dashboard, you can access the Wizards to easily configure the Internet connection (Quick Start Wizard), undergo the Service Activation Wizard (to activate the Web Content Filter (WCF) Service (the BPkM which is free or Cyren, which offers only a 30-day free trial), the APP Enforcement Service and/or the DDNS Service), run the VPN Client Wizard or the VPN Server Wizard (both will require to setup a profile on the VPN and Remote Access section). Further down, there’s the Online Status which is divided into the Physical Connection and the Virtual WAN and then there’s a series of options for an in-depth configuration. First, there’s the WAN settings, where, as we saw in the “Features and Performance” area, can be used to configure the multi-WAN feature, the Internet access, enable Multi-VLAN and enable the WAN Budget (useful if your ISP has put some limitations for the amount of data you can use every month).
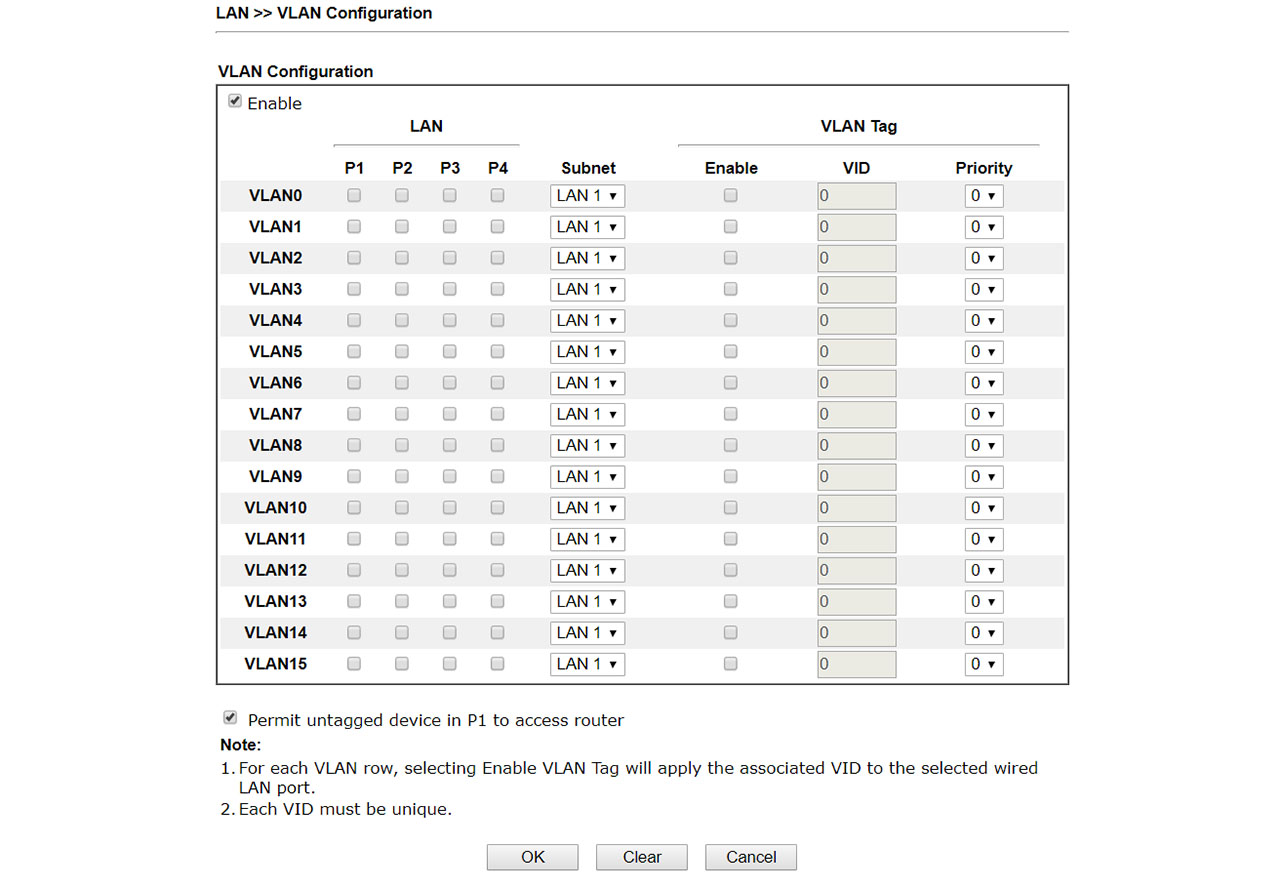
Next, there’s the LAN settings where you can configure every LAN port connection, enable DMZ and configure the Inter-LAN Routing from the General Setup; you can also configure the VLAN, Bind IP to MAC, enable LAN Port Mirror and enable Wired 802.1X (you can enforce RADIUS authentication before a device can communicate with the router after being connected to the LAN port). Underneath LAN, there’s the Hotspot Web Portal, where you can setup Profiles (which include the Portal Method, Captive Portal URL, choosing the type of Background the users will see, as well as the message and it also includes configuring outbound connections from hosts, HTTPS Redirection, Captive Portal Detection, landing page and more), see the User Information and configure the Quota Management (Bandwidth and/or Session limit).
Further down, there’s the Routing section (where you can set the Static Route, the Load-Balance / Route Policy table and enable BGP – useful for exchanging routing info with other routers), the NAT section, where you can configure which ports will be open, as well as how and when (Port redirection, DMZ Host, Open Ports, Port Triggering and ALG) and Hardware Acceleration (transmits data packets faster using the router’s hardware, but won’t work along with QoS, Bandwidth Limit or the Data Flow Monitor enabled).
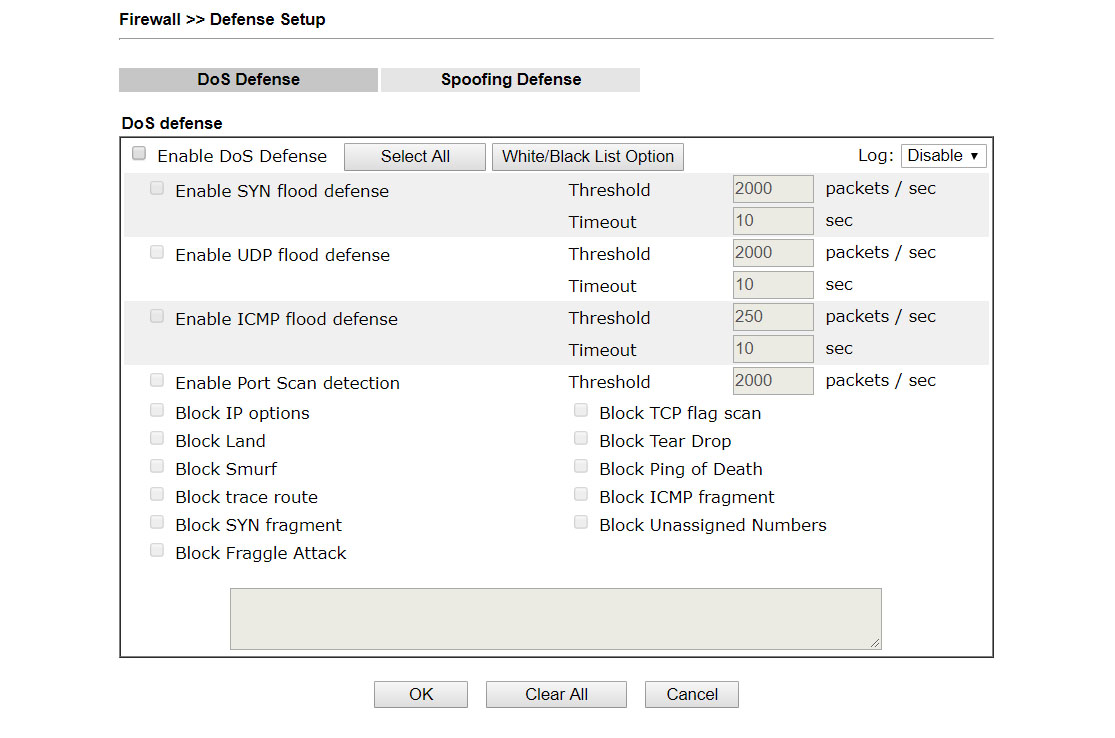
Still on the left menu, there’s the Firewall which allows you to do a General Setup (enable Call and Data Filter, as well as modify the Default Rule), create new filters in the Filter Setup, enable DoS Defence (includes SYN, UDP, ICMP defences and Ports Scan detection, and it allows you to block IP options, LAN, Smurf, Ping of Death, trace route and more) and Spoofing Defence (ARP and IP Spoofing) and run tests to Diagnose any possible Firewall problems. The User Management section allows you to filter the Internet access based on user profiles (if multiple users can log into the network – the case with shared computers), the Object Setting allows you to define Objects (IPv4/IPv6 Object or Group, Keyword, Service Type and more) that can be later applied in the Content Security Management (CSM), which is the next main section and it allows you to create APP Enforcement Profiles, configure APPE Signature Upgrade, URL Content Filter Profile, Web Content Filter Profile and create DNS Filter Profiles, all which can be applied to the Firewall Filter Setup.
The main menu also offers the Bandwidth Management (see in “Features and Performance”), Applications (DDNS, LAN DNS / DNS Forwarding, DNS Security, Schedule, RADIUS / TACACS+, Active Directory / LDAP, UPnP, IGMP, Wake on LAN, SMS / Mail Alert Service, Bonjour, High Availability and Local 802.X general Setup), VLAN and Remote Access, Certificate Management (Local and Trusted CA Certificate), SSL VPN, USB Application (includes Temperature Sensor and Modem Support List), the System Maintenance (here, you can view the System Status, set up TR-069 connection to the ACS Server, change the Admin or User Password, modify the Login Page Greeting, Restore settings from a configuration file (which makes it easy to migrate from the Vigor2925 without having to reconfigure everything), enable SysLog / Mail Alert, set Time and Date, enable SNMP / SNMPV3 Agent, perform IPv4 / IPv6 management and LAN Access Setup, enable or disable LEDs, buttons or ports via the Panel Control, view the Self-Signed Certificate, Reboot the router, Upgrade or Backup the Firmware and more) and Diagnostics (includes log info and tools for an easy diagnosis for any problem that may arise in specific departments).
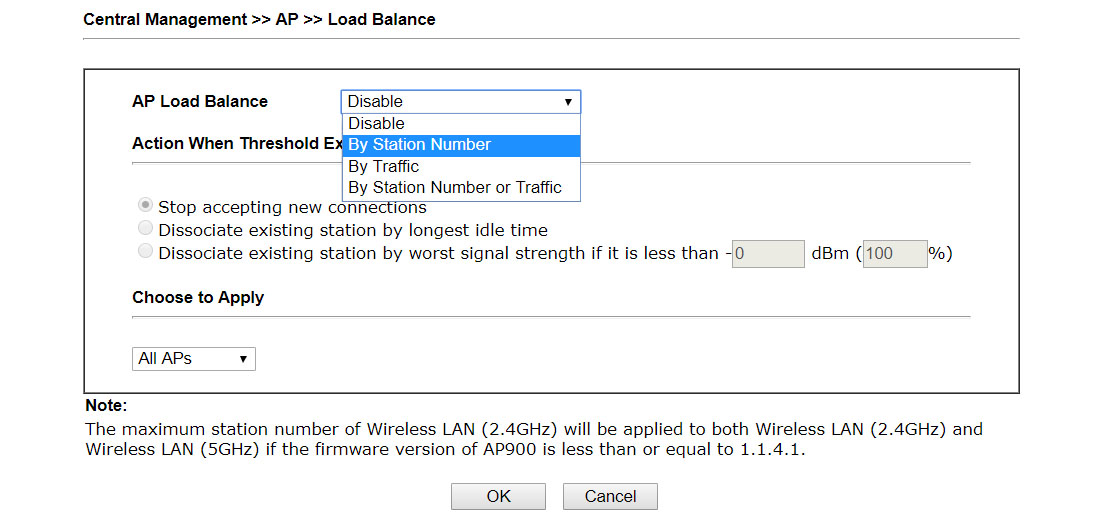
It’s interesting to see that DrayTek decided to also include some Central Management features, so you can monitor other compatible devices that are connected to the network, such as Access Points, Switches or other External Devices (it also includes VPN setup), but the Vigor2926 can also be added to the VigorACS 2 Controller (in the same manner as with the Vigor920RP Outdoor Wireless Access Point), so it can be monitored and configured alongside other DrayTek devices.
Conclusion
The DrayTek Vigor2926 has kept the same design for almost a decade (and it still manages to look better than a lot of consumer-type routers from the same price range), but this new series comes with improved internal hardware (which means better VPN speed performance), the multi-WAN feature works really well with a decent switch latency and the software is very well designed, with a plethora of features that ensure a complete control over how the network will behave. It’s true that the device is not the cheapest, especially since it lacks wireless capabilities, but considering that the software implementation (including the VigorACS 2 controller) is a lot more mature than on some competitors, it makes the Vigor2926 a great solution for SMBs and for enthusiasts as well (it you’re into this type of routers).
DrayTek Vigor2926
Pros
- Dual-WAN (FailOver and Load Balancing)
- VPN (Including SSL VPN)
- Hotspot Web Portal
- Good Routing Performance
- Centralized Management Software + Integration Within VigorACS 2 Controller
Cons
- A Bit Expensive
Mark is a graduate in Computer Science, having gathered valuable experience over the years working in IT as a programmer. Mark is also the main tech writer for MBReviews.com, covering not only his passion, the networking devices, but also other cool electronic gadgets that you may find useful for your every day life.
Hi Mark, Thanks for the review. Im just wondering whats the noise level like? We have just moved office and have a Meraki MX100 in the cabinet which is in our main board room now. The MX100 is great but it sounds like a small jumbo taking off constantly.
Thanks
Hi. Yes, the Meraki MX100 is known for its loud fans. As for the DrayTek Vigor2926, considering that it doesn’t have any internal fans, it should be completely silent.