The FS S3910-24TF is an entry-level model from the new fully managed Pro switch series released by the global high-tech manufacturer and, while it doesn’t have all the features of its more expensive siblings, it does come with everything that’s essential for an enterprise-level network infrastructure.
| FS S3910-24TF | |
|---|---|
| FS.COM | Check Product |
One of the highlighted features is the support for the physical stacking of up to four identical switches which will result in a higher bandwidth, a far easier management of the network (a single IP) and, of course, more ports. The FS S3910-24TF does offer 24 Gigabit LAN ports, but it also comes with an additional four SFP 1Gbps ports which will work great with FS’ own optical transceivers (and not only).
And the budget-friendly, yet very reliable optical transceivers are what made FS the darling of not only SMBs, but also of the enterprise-level market. The FS Ethernet switches are also focused more towards keeping the cost affordable and the interesting thing about their hardware is that if you come from Cisco, it’s going to be very easy to get around the new software. It’s also worth mentioning that the S3910-24TF supports layer 3 routing features (such as static routing, OSPF, RIP and more) so, without further ado, let’s check it out a bit more in detail and see if you should consider it for your network.
Note: Unfortunately, the S3910-24TF has no support for PoE, which is also true for the S3910-24TS, but you can get it with models from the S3410 series.
ALSO CHECK OUT: BEST ETHERNET SWITCHES OF 2021
Design and Build Quality
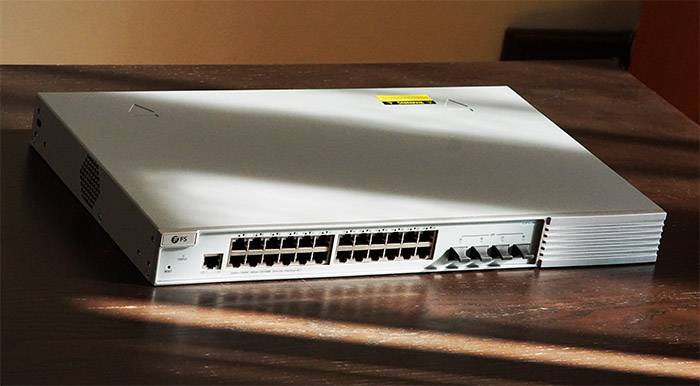
The FS S3910-24TF has a rectangular metallic case with the front made of plastic and, after a closer inspection, its purpose seems to be to avoid the wear of the metallic part from underneath (to avoid scratches). The entire device is covered by a light gray matte finish and, despite the large number of ports, the front section is still fairly simple, lacking any block of LEDs or huge logos (the FS logo is noticeable, but not overly intrusive). The S3910-24TF is one of the largest Ethernet switches that I have tested so far (it measures 17.3 x 10.5 x 1.7 inches or 40.0 x 26.8 x 4.3 cm) and, as the tear-down process has revealed, it could have been a lot smaller, maybe even half the size, but FS decided to reuse the same metallic case as it did with the S3910-24TS which is fine from the cost perspective.
Furthermore, the switch is designed to be mounted on a rack and it does have the rack-mount ears in the package (1U), but you also get the option to leave the device on a desk by relying on the four rubber feet (that you need to attach to the bottom of the Ethernet switch).
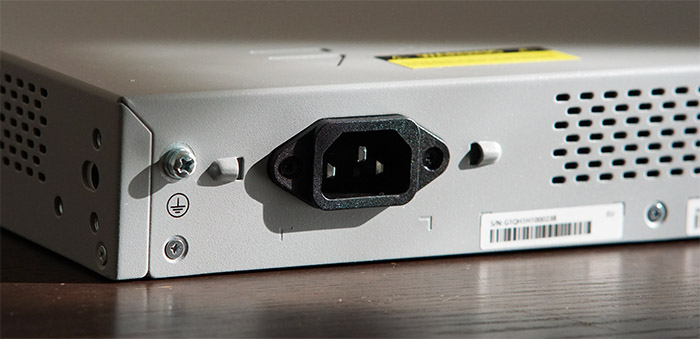
I would recommend against it since like I said before, the FS S3910-24TF is huge and will eat up a lot of space. It’s interesting to see that FS decided against adding a fan to keep the temperature in check (despite there being a seemingly dedicated set of ventilation holes on the left side). But again, it’s understandable considering the vent holes on the rear side and the right side which, along with the unused interior space are more than enough to keep the temperature at a reasonable level.
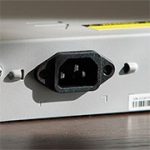
If you are familiar with other FS switches, then you know that the manufacturer has sometimes added hot swappable power supplies but since this is an entry-level model, it does not have this feature. So, the rear side is simply occupied by the power port (there is no power brick, so the PSU is internal) and a ground screw (that’s attached to the power supply). It’s worth mentioning that the Ethernet switch does have 8KV lightning protection which is great, but you should still invest in a proper UPS (and/or PDU) to fully protect your expensive devices.
On the front of the S3910-24TF, FS has added a recessed Reset button (press and hold it for 5 seconds to return it to restart the switch) along with a Status LED which, by default (when everything is working properly), should be solid green.
In case it gets solid yellow, you should check the working temperature since it’s rising above the acceptable threshold and, if the LED gets solid red, then the temperature has exceeded its upper limit and the system will restart – it can also mean that the switch is faulty. Next to the LED, there’s an RJ45 Console serial port for serial management which is followed by the 24 Gigabit Ethernet ports positioned into two blocks. There is one LED for each port: the LED will blink when there’s activity and the color will depend on the connection type – will light up green when it makes a connection at 1,000Mbps and will light up yellow for a connection at 10/100Mbps. Lastly, there are four SFP port protected by silicone covers and each supports a connection of 1Gbps.
Internal Hardware
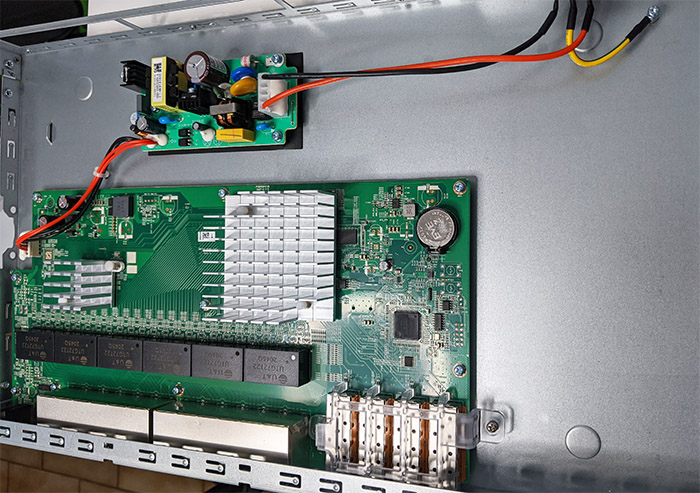
Before venturing forward and opening up the case, know that there is a sticker that suggests not to open the device due to possible electric shocks and secondly, there is a seal on the right side covering one screw which, if damaged will void the warranty. Of course, I don’t need warranties (they’re overrated – I’m joking), so I removed the six screws on the sides and the four screws from the back (as well as the grounding screw) to easily slide the top of the case backwards. You can also detach the plastic front (use a prying tool and gently detach it) to reveal the fully metallic section of the switch.
As you can see, there is a lot of unused space and the PSU occupies very little, while the PCB has some components covered by aluminum heatsinks. To remove them, you will need to remove some additional screws that keep the board attached to the bottom of the case and also don’t forget to detach the transparent plastic piece that covers the SFP slots.
A lot of manufacturers rely on some soft pads to push the heat towards the heatsinks, but FS decided that it’s better to use thermal paste, so, if you want to see the chips, you will need to reapply the thermal paste afterwards. Luckily, I did have some paste lying around, so I managed to also further improve the internal temperature – not that it actually needed this type of improvement.
| FS S3910-24TF | |
| CPU | Broadcom B50292B0KQLEG octal GPHY |
| RAM | 512MB Micron 0ZP45 D9SHD |
| Storage | 256MB NAND Micron 29F2G08ABAEA |
| Switch | Broadcom BCM56152A0KFSBLG |
As for the components themselves, I saw a Broadcom BCM56152A0KFSBLG Ethernet switch chipset, a Broadcom B50292B0KQLEG octal GPHY, 512MB of RAM from Micron (0ZP45 D9SHD), 256MB of NAND flash memory from Micron (29F2G08ABAEA), a Lattice LCMX02-640HC semiconductor and 5x UTG72T22 2045Q Ethernet PHY ICs.
Note: The FS S3910-24TF features a switching capacity of 56Gbps and a forwarding rate of 42Mpps.
Setup and Features
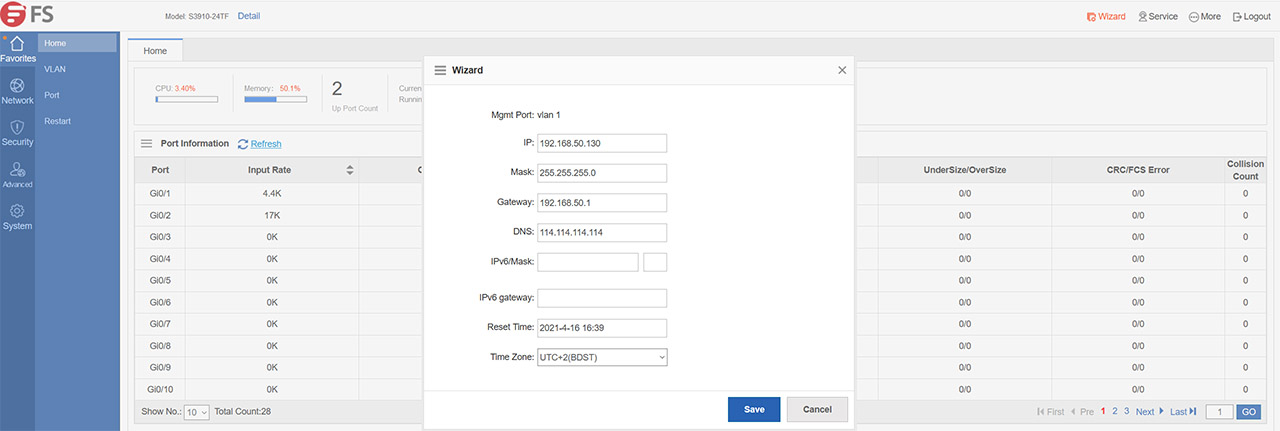
After powering up FS S3910-24TF, you have two options to access the configuration page, either using a serial cable and rely on the Console port (SSH or Telnet) or by using the web-based configuration software (very similar to a Cisco switch). I did have a serial port, but since some people may not, I decided to go the second route, so I connected the switch to the router and I used another Ethernet cable to connect the S3910-24TF to my computer (any LAN ports will do). Since the default IP address of the Ethernet switch is 192.168.1.1, it meant that it was in another subnet (the IP address of my router was 192.168.50.1). So, to access the interface, I needed to detach the cable from the router and then I went to the Ethernet adapter settings and set a manual IP address to the computer.
I changed it to 192.168.1.2 and then I could enter 192.168.1.1 in the URL of any browser to gain access to the FS software. By default, the credentials are admin/admin for the username and password, but you will be immediately prompted to change the password.

Mark is a graduate in Computer Science, having gathered valuable experience over the years working in IT as a programmer. Mark is also the main tech writer for MBReviews.com, covering not only his passion, the networking devices, but also other cool electronic gadgets that you may find useful for your every day life.

