
The MakeID L1 is a very compact label maker that uses direct thermal printing technology to easily add an image to a special type of paper (heating coated) and the highlighted feature is the ability to feed images directly to the label maker via Bluetooth. Indeed, there’s an app and you can either select preset models or create custom ones.
| MakeID L1 | |
|---|---|
| MakeIDLife.com | Check Product |
| Amazon.com | Check Offer |
But, being compact and easy to carry means that it can’t really be used for some major projects, where you need hundreds of labels printed quickly. It’s still plenty fast, but I think that the LabelID L1 was mostly designed for hobbyists and for the people that simply love to label their stuff. And you’d be surprise how effective putting a name to a box is (especially after you forgot about its content). Also, it’s worth mentioning just how effective the direct thermal printing technology is when compared to the inkjet type of printers.
The most important thing is that there are no toners or any other similar consumables that you need to replace, only the special paper. And we do know just how much pretty much all large companies love to push their original toners as a subscription model to a device you own, but not really (just search the web for the sad state of printers). Then, the print quality should be constant over time and regardless of the image that’s printed (it’s going to be only in black and white). A device such as MakeID L1 should also have a long life since there are less parts that can fail over the time. But, we do need to test and see how it actually performs.
Design and Build Quality
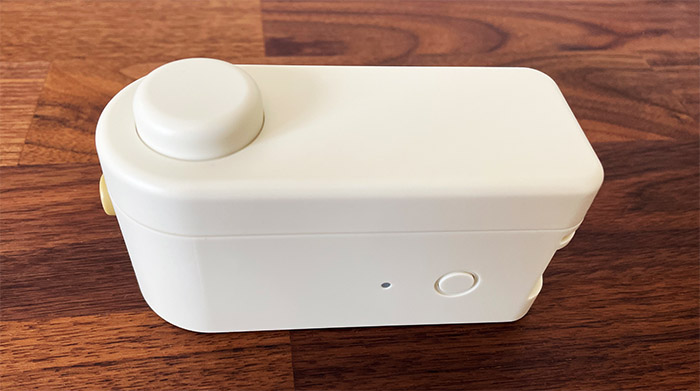
Most of the portable label printers that are available on the market have a screen and some text input keys to allow the user to create the label from within the device. So, since the MakeID L1 label maker relies on an app to accomplish this task, the device itself is both simpler and smaller. Indeed, it measures just 3.94 x 2.17 x 1.57 inches and, as expected, it is made of plastic. And it’s not really a modern design, but I guess the manufacturer went for that sort of vintage look, which they definitely achieved. I am not really a fan of it since it looks like an old electronic device, but I know some of you will love this effect.
So, the plastic case is covered by a yellowish matte finish and, besides an LED on the side, there isn’t really a flashy element to stand out. The LED will be solid green when the device is fully charged, as well as when the label printer is in stand-by or ready to print. The indicator will be solid yellow when you’re charging the device and it will flash red when the label is abnormal or the upper part of the device is not properly closed (it’s surprisingly easy to not close the lid all the way down).
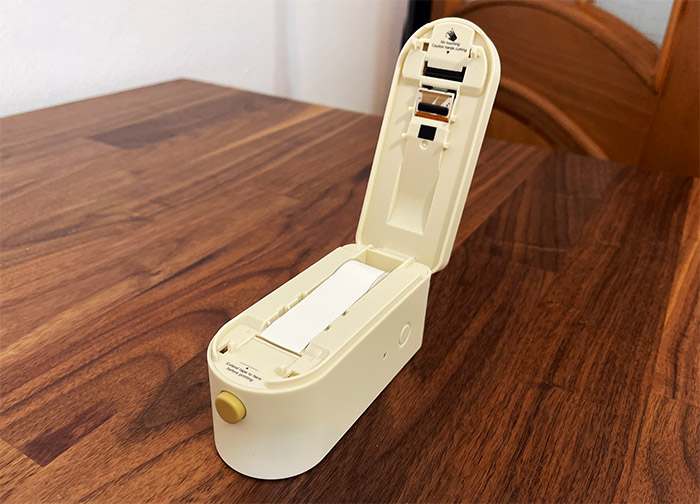
That being said, to open the upper section, press the front-facing button and it should pop right off, allowing you to see the internal section. The first thing that you’ll notice is the roll of heating coated paper which you will need to remove and properly install. Then, there is a small rubber wheel attached to a motor to move the paper, while on the upper section of the MakeID L1, you’ll be able to see the printing mechanism. That section has a sharp element, so don’t touch it if you don’t want to get a nasty cut. If you close the lid, you will see that there is a large circular button: if you push it, it will extend the aforementioned sharp element to cut the paper.
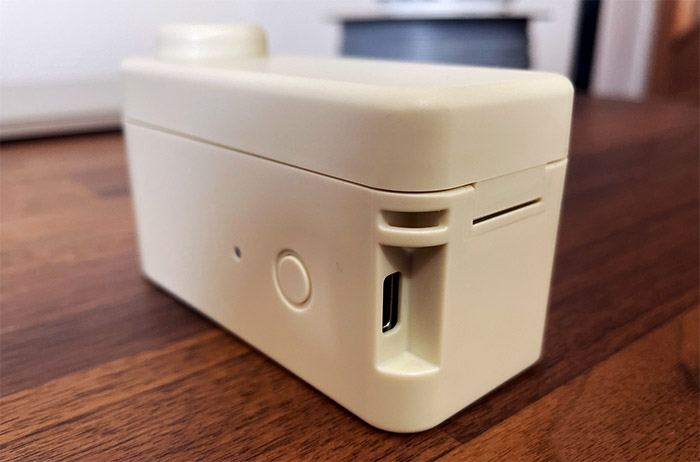
You need to use this button after the label has been printed. Next to the LED, there’s a Power key which turns on or off the device – long press it for 2 seconds. Lastly, on the rear side of the MakeID L1, there’s a USB-C port used to charge up the inner battery (there is a short USB-C to USB-A cable inside the package).
How to install the paper?
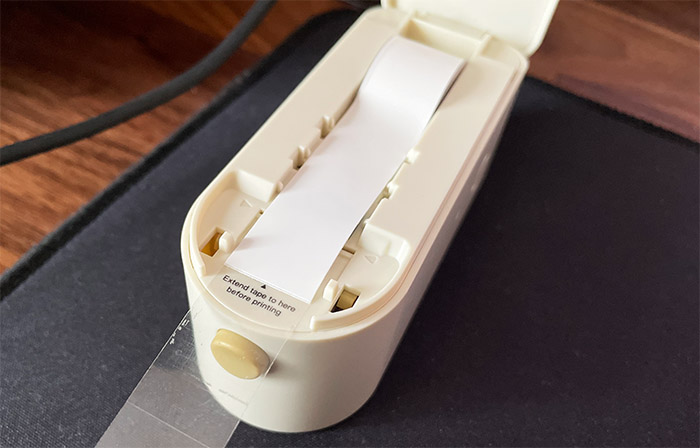
The process is not difficult at all. Open the upper section, then take the roll of paper and extend it up until the transparent part meets the actual paper. Then, position it inside the MakeID L1 until the paper part reaches the guide printed inside the device. You can even be a bit more generous because afterwards, you’ll cut that part out anyway. Close the label maker and press the Cutter button (the large circular one) to cut the unwanted portion of the paper roll. Now, it would be a good time to install the app.
The Mobile Application
The MakeID L1 label printer will only function alongside a mobile application, so go ahead and install the MAKEID-Life app which is available on both iOS and Android OS. I did so myself and I was immediately asked to give the app permission to connect to Bluetooth and it makes sense considering that this is how it communicates with the device. Then, there’s the User Agreement and the Privacy Agreement. Here, things are just as problematic as with other IoT apps. The app will collect the regional ID and the model of the printer that you’re using, as well as what exactly you’re printing and the type of paper + length. There’s also the region where the device is located – if you cannot be identified using this info, then you’re going to remain incognito, as the app itself mentions.
Overall, the app is less intrusive than what I saw with other devices, which is not really a form of praise. After reading the terms, I could connect the printer which appeared automatically in the list. I selected the model (L1-A) and I gained full access to the app GUI.
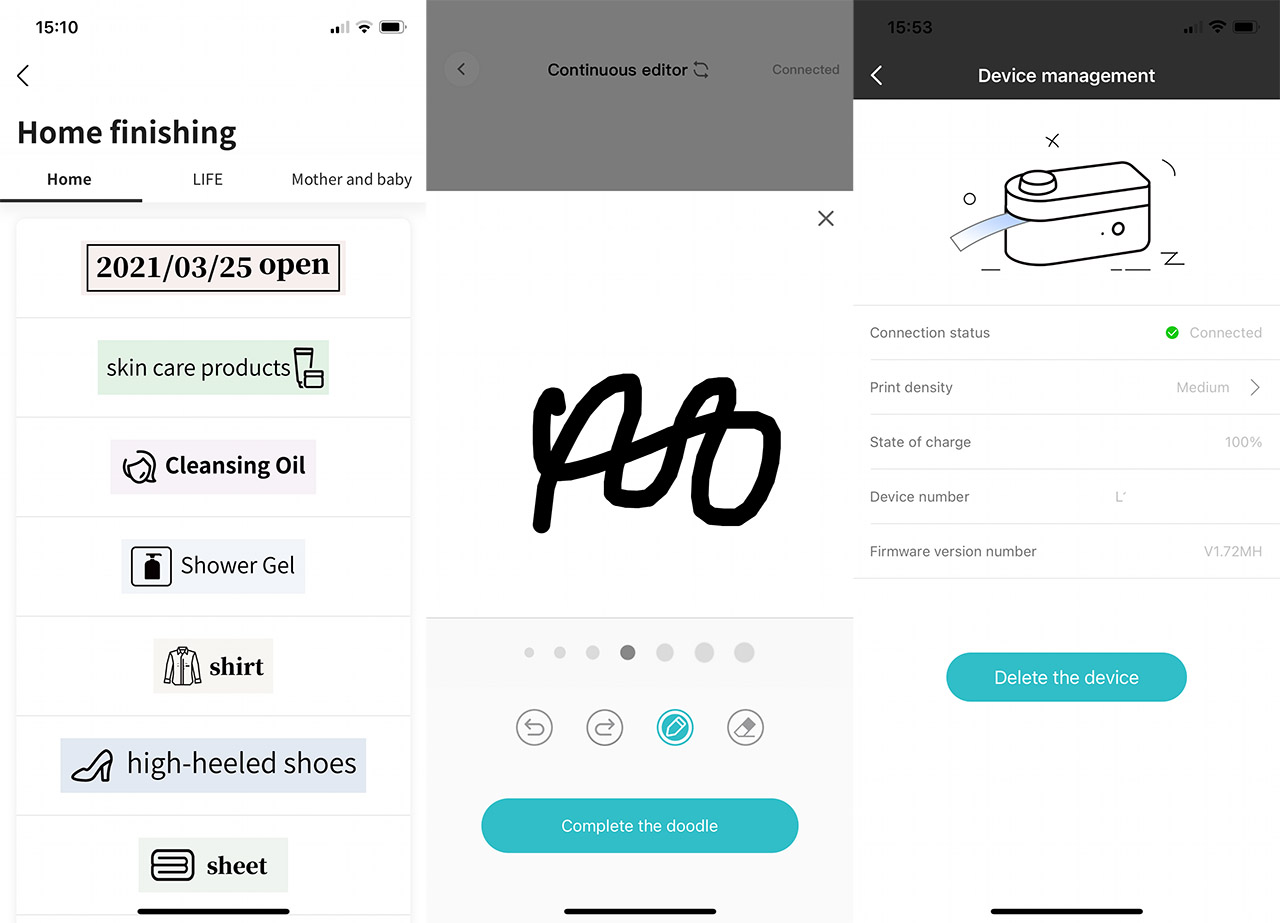
The first thing that you’ll most likely use first is the Template section and here, it’s possible to choose between three categories: Home, Life and Mother & baby. Simply tap on any label and, after about 5-10 seconds, you’ll be able to adjust the way it looks.
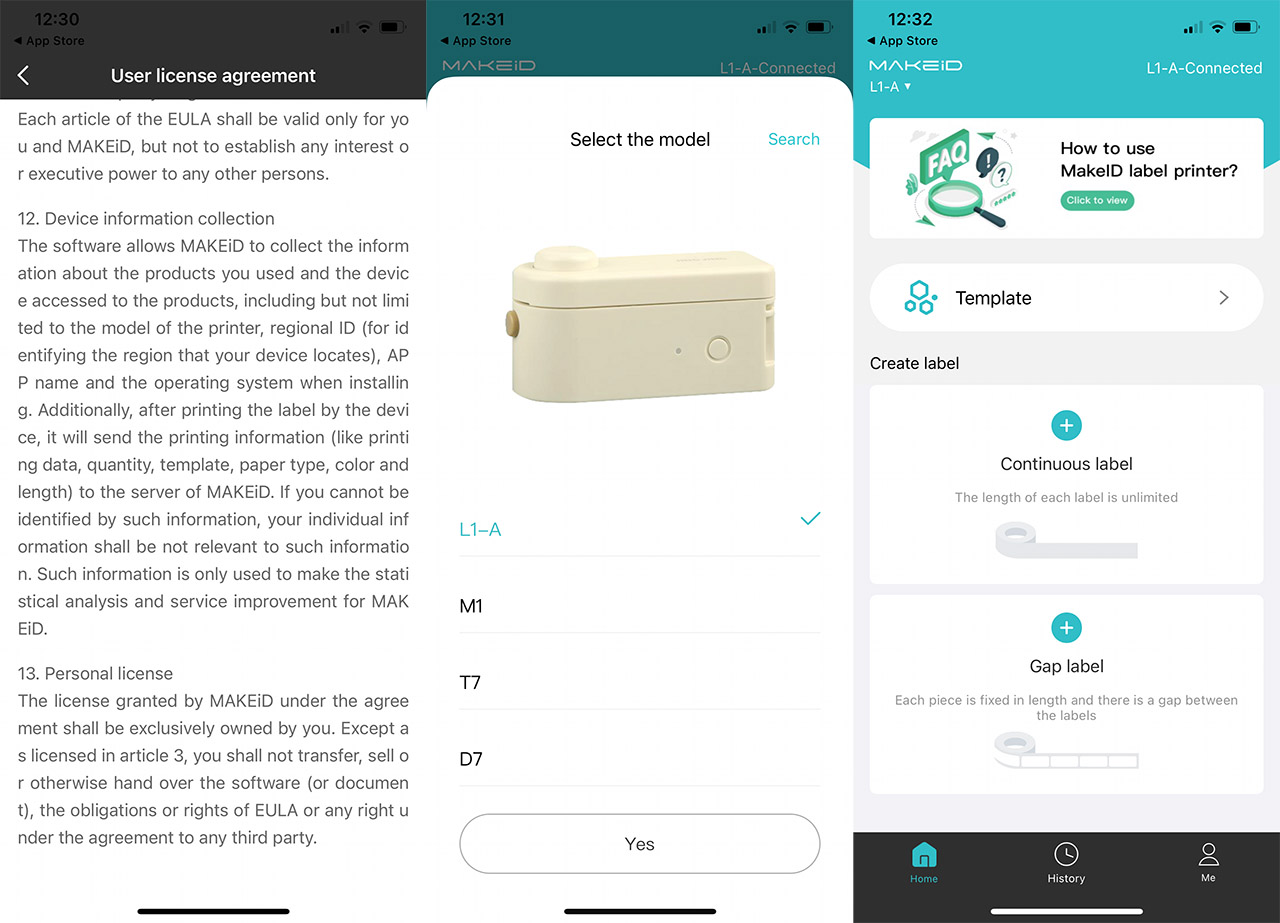
The Model is fixed to 16mm (height), but you can change the length. Further down, you get the chance to completely change the template, modifying the text, the template itself, adding a sticker, a picture or even directly draw on the screen. After you’re satisfied with the result, click Print. Select the number of copies and if the label should be cut. This last option means that the MakeID L1 will print a dotted vertical section where you will be able to cut later with a pair of scissors. Returning to the main page, there is a dedicated section for creating custom labels, either continuously or with a gap. And the concept is the same as before, just without the template to be edited.
The app will also allow you to see a History of all printed labels, so you can re-print them at any time and lastly, there’s the Me section. I assumed this is the Profile section, but it’s actually a sort of settings area. That’s because you can tap on the status of the MakeID L1 to summon the Device management. Here, you can select the Print Density (if you need to go deeper, in case the model doesn’t have well-contoured lines) and see how much battery is left. Returning to the previous page, you can Set the margins (big, small or medium), run a Printer self-inspection (it will print a label to let you know everything is working fine) and you can also Switch the language.
Note: The app will connect to the label maker even if it’s not connect to the Internet.
The Printing Performance of the MakeID L1
Before the actual printing performance, I do need to mention how quick the app is when creating a new label or editing an existing template. And it’s not really that fast the first time you load the model. But, if you need to return to it after some time, it seems to persist in the cache, so the model will then load instantaneously.
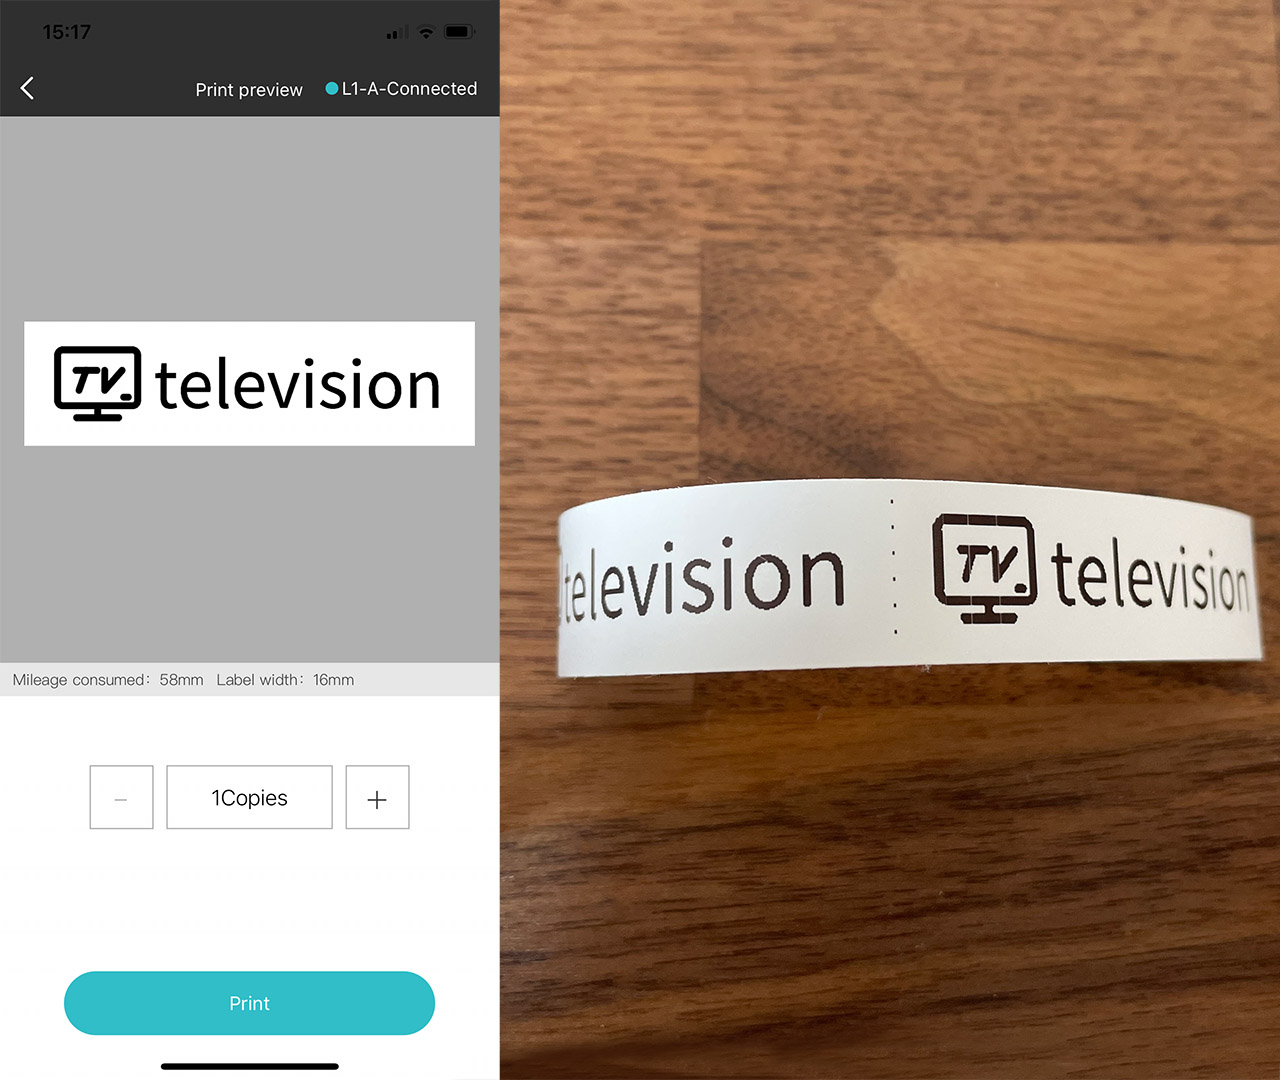
The first label that I created was a double ‘television’ template to see how exactly it splits the labels and, as I already mentioned, there are a few dots for helping with the cuts. I also did a video to show you how quick it prints multiple models and, as you can see, it’s fairly quick. There are far quicker label makers out there, but considering the hobbyist nature of the MakeID L1, I think it’s fast enough.
As for the quality of the print itself, the template models seem well defined, in line with other more expensive label makers (if you look very close, you can see the way the pixels are printed on the paper). Furthermore, I do need to mention that you can’t smudge the model off the sticker, nor can you wash it off, which is excellent.
Besides the templates and the text which is printed properly, I decided to also include a photo from my gallery. So, I chose a random one (a photo of the Cololight Plus) and after making it black and white, and cropping it, I decided to print it. And it didn’t go that well.
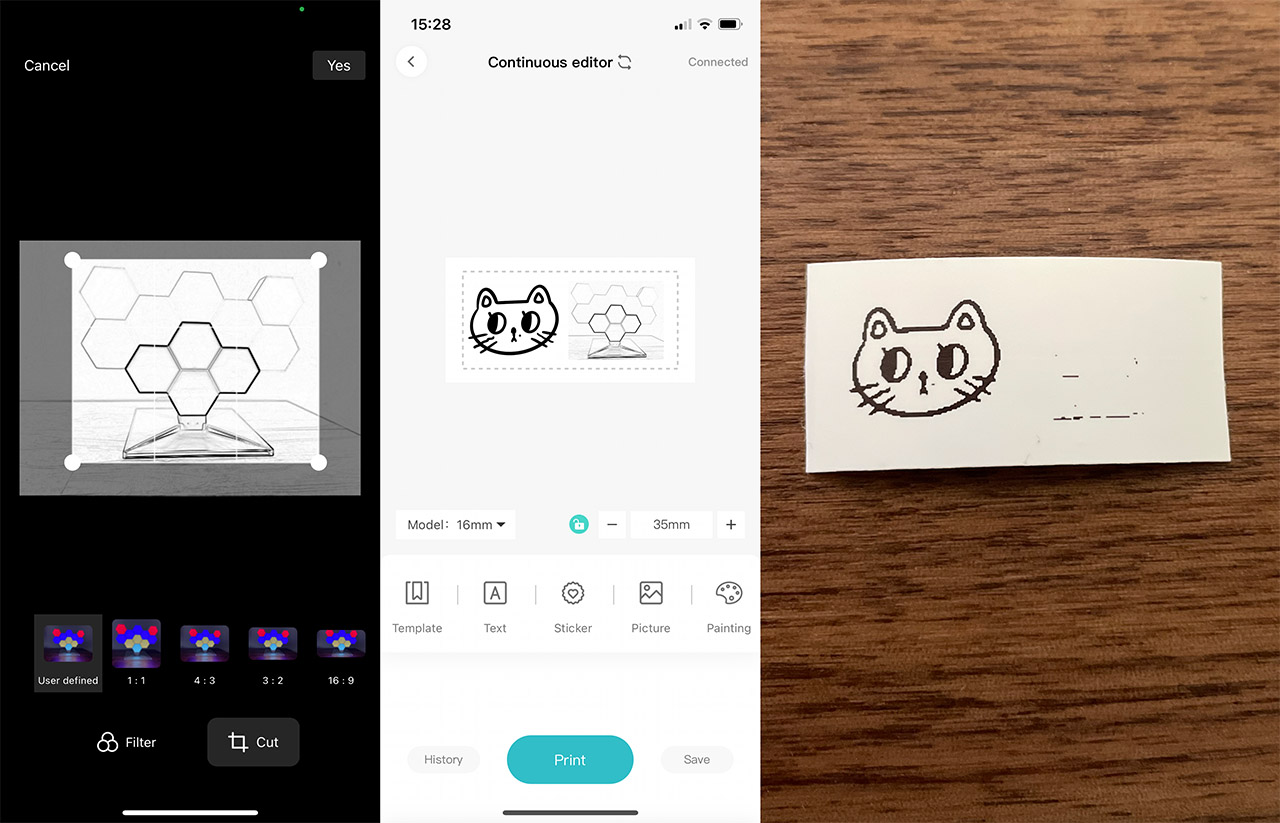
The reason why that happened was because the lines were not well defined. They need to be bold enough to be properly printed, so be aware of that behavior when selecting your own photos. Another interesting aspect is to check whether the MakeID L1 can print bar codes since I assume some smaller companies may use a label maker for this purpose. So, I decided to add a new photo to the app and here is where things got very weird. I gave it permission to access my camera and by doing so, it seems that the app no longer cared for my stored images, it only wanted to take a photo. So, I denied its access to the camera which once again, gave me access to the photos in my gallery. But, after adding a barcode from the web (the first that I found) and selecting it, the app crashed. Not good.
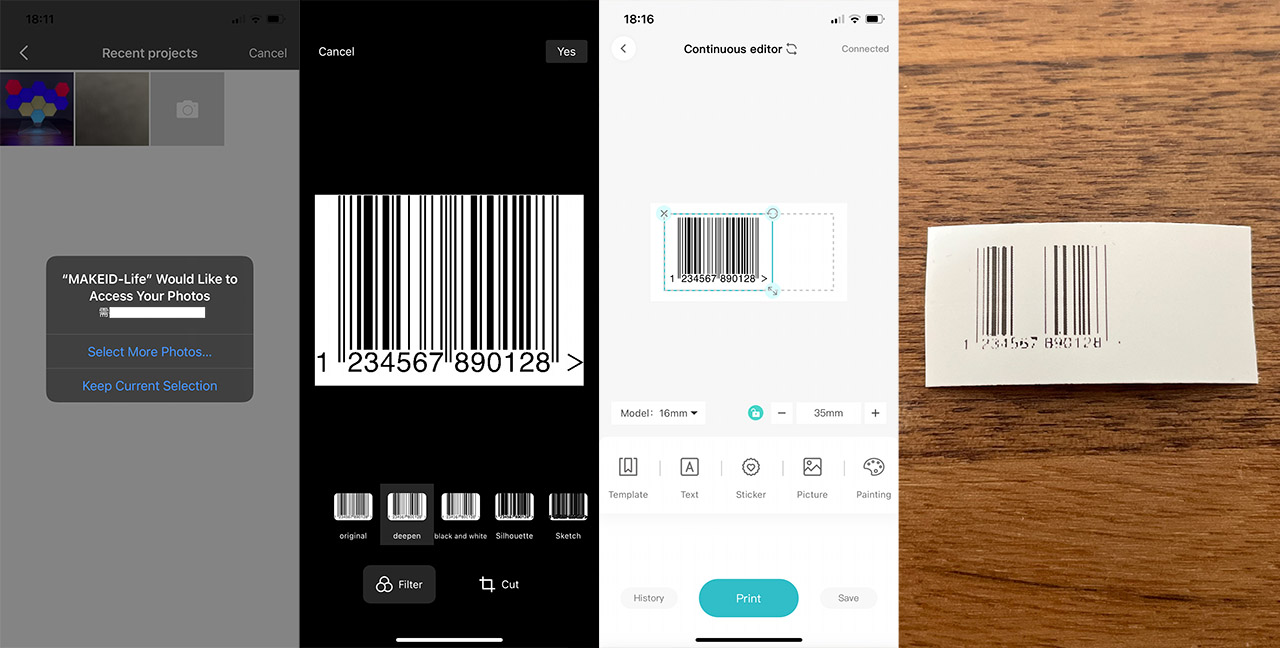
I finally managed to make it work after restarting the app, but again, the thinner lines will not appear at all, so bar codes are not suitable to print with the MakeID L1 label maker. The next aspect that I checked was the supported fonts. And there are 25 different font types, vertical and horizontal text alignment, left, center and right alignment and the option to bold the text, underline it or set it to italic. Which is far more than a lot of other label makers seem to offer (the limit comes from the built-in display + controls). Lastly, I was curious to see if the device has support for various types of tapes. The label maker seems to be compatible with pretty much all types of self-stick laminated label papers that go up to 16mm (or 0.63 inches).
Conclusion
I really like the concept behind the MakeID L1 label maker, since they made it so easy to quickly print a label. And the connection to the app via Bluetooth is what sets it apart from the rest of the traditional label makers that still rely on a built-in display and keyboard. But, while the device is cute, the app needs more work since I did experience some problems while trying to print my own photos. Also, it’s not suitable for bar codes. So, the targeted audience consists of the people that simply like to label stuff around their house and keep everything organized, and they should get the most out of this device – still, the manufacturer does need to update the app, otherwise, I would look at other solutions.
MakeID L1
-
Pros
- Compact and easy to use
- The app allows for a higher range of customization
- With the exception of the paper, there aren't other consumables that you constantly need to change
- Fairly long battery life
- USB-C charging port
Cons
- The app behaves weird with photos from the gallery
- Thinner lines will not be printed at all, so no chance on printing barcodes
- The app crashed a couple of times
Mark is a graduate in Computer Science, having gathered valuable experience over the years working in IT as a programmer. Mark is also the main tech writer for MBReviews.com, covering not only his passion, the networking devices, but also other cool electronic gadgets that you may find useful for your every day life.