
Reolink has recently unveiled a new series of indoor-suitable cameras with a special focus on the image quality (Super HD quality with the resolution above the often used 1080p) and there are three models available, the base E1 (the most affordable from the bunch), the E1 Pro that I tested a few days ago (had an excellent image quality during the day and the night) and lastly, there’s the Reolink E1 Zoom which besides featuring an even better camera sensor (5-megapixel), it also offers the possibility to zoom (3x) into a specific spot to get a better view of a far away object/person.
| Reolink E1 Zoom | |
|---|---|
| Amazon.com | Check Product |
| Reolink.com | Check Product |
I know that it may feel a bit overkill for simple home use and I assume that it will sit better in a larger office or even warehouse, where the zooming aspect may actually come in handy to check on some dubious people or packages. Most would agree that the interior cameras segment has been thoroughly covered by the manufacturers, but, in reality, the image quality always felt lacking (especially true for the entry-to-mid-level market) which was balanced out by free (but limited) Cloud storage.
The E1 series puts itself in the position to fix the video quality aspect and yes, there is free Cloud storage available as well (you get 1GB of storage and 7-day video archive). That being said, let’s check out the Reolink E1 Zoom and see if it’s worth considering as a good measure for improving the security of your home (or office).
Design and Build Quality
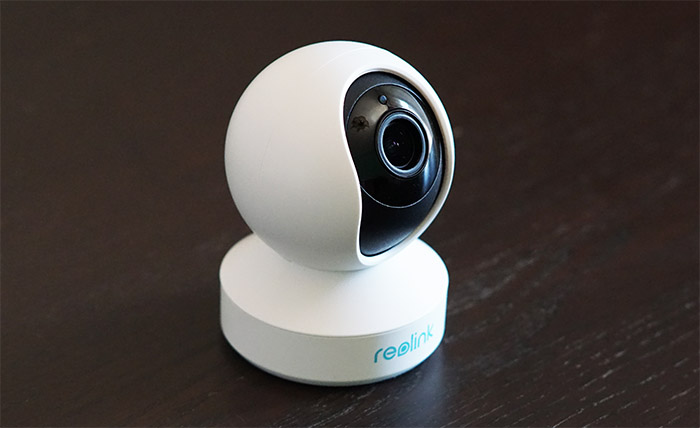
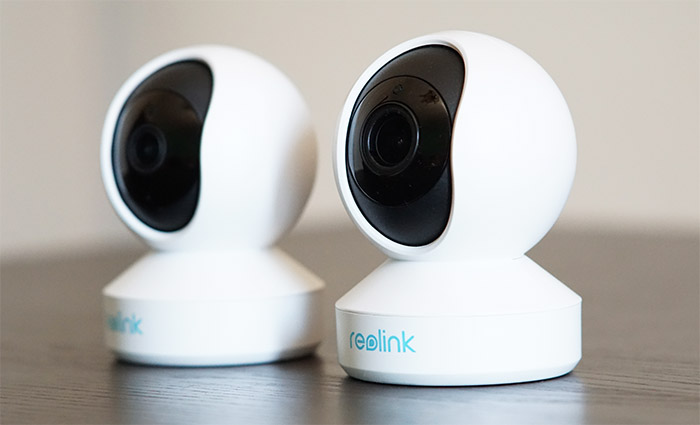
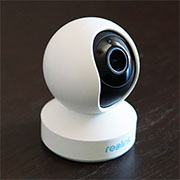
The Reolink E1 and E1 Pro are identical design-wise, both featuring a plastic case covered by a white matte finish and with a spherical top which sits on a larger base; the E1 Zoom has the same shape and look, but, while the E1 and E1 Pro are 4.2 inches tall and have a 3-inch diameter, the E1 Zoom is 4.37 inches tall (the spherical section is 2.87 inches tall) and the base has a diameter of 3.11 inches. So yes, it is a bit larger which was to be expected considering the necessary internal hardware, but it’s still nice to see that Reolink has managed to keep the camera as compact as possible. And no, it will not look out of place even if it’s positioned anywhere in the room due to its minimalist look (besides resembling those small babycams, it also has a single white cable, since there is no Ethernet support) and at the bottom of the case, there are three silicone feet to keep the device into place.
The camera is also a bit heavier than the E1 Pro (and the E1), weighing 8.81 ounces and this does give it a more premium feel (once again, after opening the case, I found that the motor and other heavier components are positioned immediately above the base, where the two mains sections of the case get in contact). If you don’t want to keep it on a desk and would fare better surveilling the area from the ceiling, Reolink has added a mounting kit to help you in this regard: there are a few screws and a small bracket that can be rotate into the bottom of the base of the camera. On the spherical part, there is a fairly large cut-out to expose the internal black section (seems made out of ceramic) where you can see the fairly large glossy circle that contains the camera lens, the ten IR LEDs (the E1 Pro only had 8), the daylight sensor (which, when the brightness level goes under a certain threshold, it enables the night vision), a built-in microphone and the Status LED.
This LED will be solid blue when the camera is starting up and after the WiFi connection has been successful; the LED will flash blue if the WiFi is not yet configured or when the connection has failed. If you have a look around the case, you will also identify the speaker punctured holes that spread out over the rear side of the camera (the speaker along with the front-facing microphone allows you to have a two-way communication with a family member or to scare off any potential intruder – and yes, the speaker can get really loud); there’s also a proprietary power connector which wasn’t the best decision when pretty much all the devices from the competition are either using the older microUSB connector or the better USB-C.
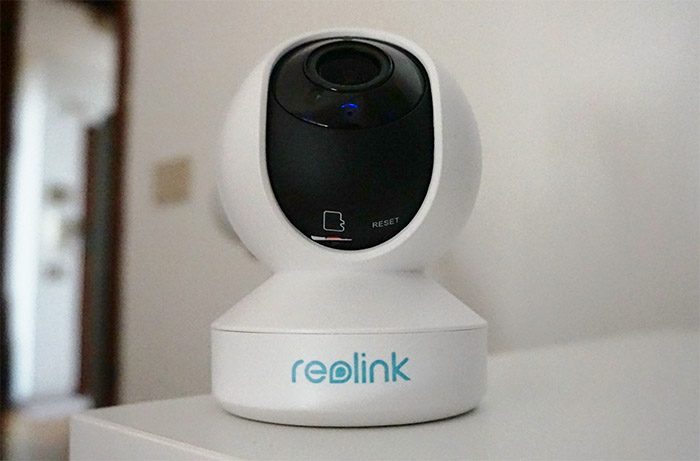
It’s not going to be obvious to the user, but the E1 Zoom has a microSD card slot which can be accessed by moving the camera sensor towards the top: while it kind of made sense on the E1 Pro, Reolink had to push the slot quite low due to the larger internal components, so it’s not very easy to access.
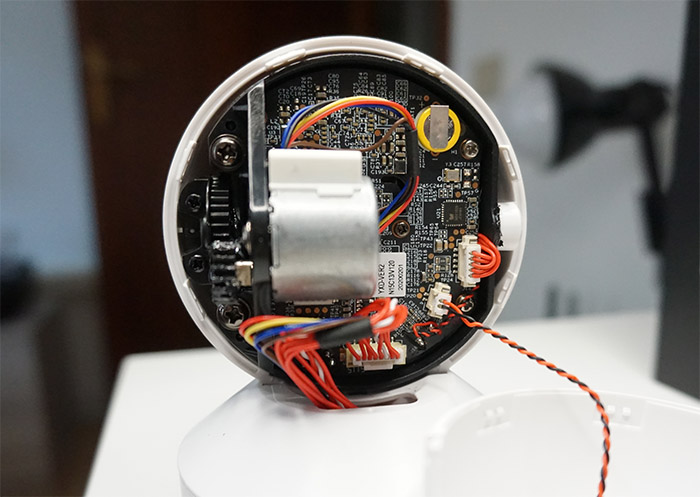
Next to the card slot (which supports up to 64GB), there is a Reset button that you need to press and hold for at least 5 seconds to return the E1 Zoom to its default factory settings. After opening up the case of the Reolink E1 Zoom (I used a prying tool to pop off the rear side of the plastic case – it can lead to warranty void), I noticed that the internal layout is fundamentally different than on the E1 Pro: there is now a larger and more complicated motor system, the main components on the PCB are on the other side and I could see how the larger camera (than on the E1 Pro) sits directly attached to a sort of optical chipset. Among the components, I could identify the Novatek NT98515MBG (a step up from the chip on the E1 Pro), the same GigaDevice 25Q127CS1G (16MB of flash memory) and a Ruimeng MS41929 JC9HW3 integrated circuit.
Note: The Reolink E1 Zoom features a 5-megapixel camera sensor (1/2.7″ CMOS sensor), with an aperture of f/1.6 (f/2.8-8mm autofocus), it supports 3x optical zoom and the resolution is 2560 x 1920 pixels.
Reolink Zoom E1: Installation and Features
Considering that it doesn’t have an Ethernet port, you won’t be able to connect it directly to a router, access point or switch (it could have supported PoE which is a nice feature to have for surveillance cameras), so it’s going to completely depend on the wireless connection to your router. This means that the hardware installation is only going to require for you to connect the power port into the Reolink camera and that’s it. The following steps are going to be pretty much identical to the E1 Pro (and the base E1): download and install the Reolink app on any mobile device (compatible with both iOS and Android OS) and power on the E1 Zoom. At this point, the camera will start ‘talking’ loudly every few seconds (which I still find extremely annoying) and from the app, click on the Plus sign to add the E1 Zoom – the process involves scanning the QR code from the bottom of the device, so make sure that there is enough light in the room (I had to rely on an older tablet, but the detection system was surprisingly quick).
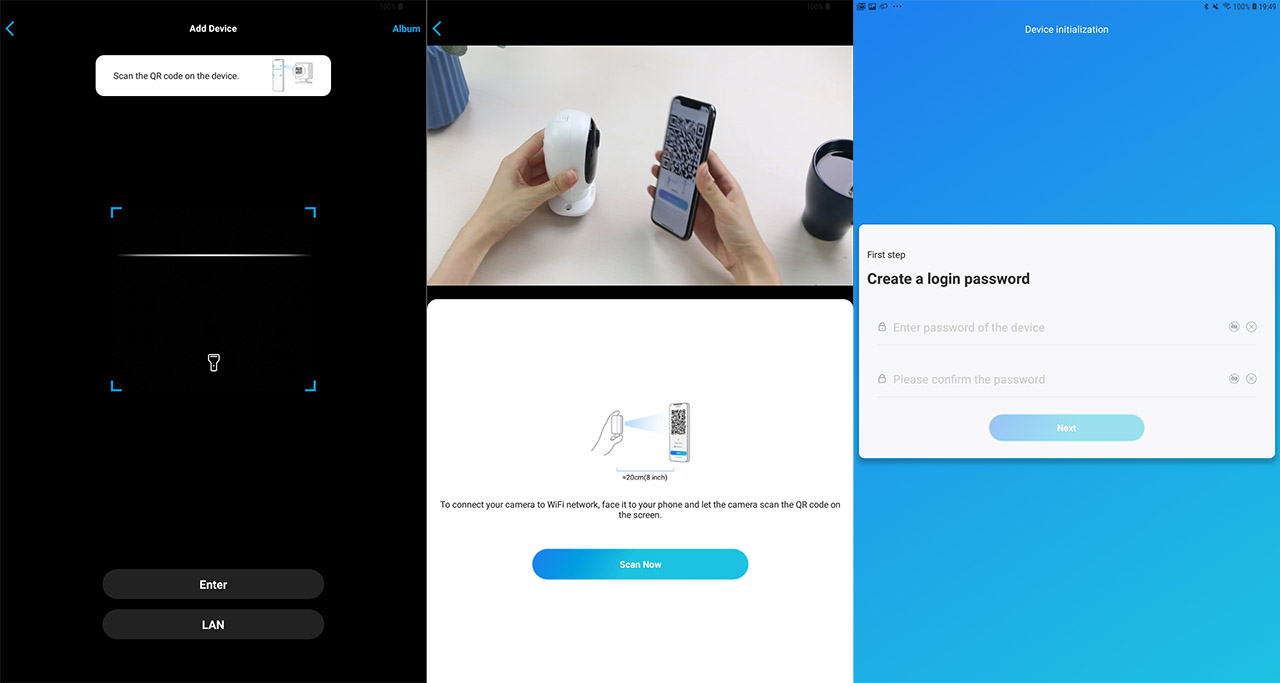
After the app sees the camera, you will be asked to configure the WiFi network (I had already set it up when I tested the E1 Pro, but for whatever reason, it didn’t detect it, so I had to do it all over again) and, while Reolink says that the E1 Zoom is dual-band, it doesn’t support 802.11ac (goes only up to 802.11n), so you’ll most likely have to connect it to the 2.4GHz SSID. On the next step, you will have to scan a QR code from the phone/tablet with the camera and this can be a bit tricky since it may not be obvious what the camera sees – just slowly move it forward and backwards until you hear a voice that the pairing has been successful; after that’s done, you need to set a password for the default admin account, give the camera a personalized name (useful if you have more than one camera installed) and that’s pretty much it, you can now visit the user interface.
The App and the Image Quality
The application is very much the same for all three models from the E1 series with some minor differences (in our case, it’s going to be the zoom adjustment), so expect to immediately see the live footage streaming from the E1 Zoom, along with the current bitrate which is capped at 4Mbps (the highest resolution will go up to the maximum supported bitrate) and on the right, you get access to an alarm icon (press it to trigger the alarm horn – useful if you need to quickly scare off the intruders) and there’s a view mode icon which allows you to see up to four Reolink cameras at the same time. Underneath the live footage, there’s the same control buttons: Play/Pause, Mute, capture Photo or Video, the image quality and Maximize. If you tap on the image quality, you get to choose between low, medium and high (5-megapixel) and be aware that at the highest quality, you will experience some latency (about 2-3 seconds). The good news is that the (unzoomed) image is crispy clear and you can see all the details of a room (the fabrics, the patterns on the objects, everything).
Reolink E1 Zoom
-
Pros
- Excellent image quality
- The zoomed image remains clear
- Has both an app and a computer client
- Accurate motion detection
- The power cable is quite long
Cons
- The card slot and the Reset button are awkwardly placed
- No Ethernet port
- There is a significant amount of latency when the image quality is set to high
Mark is a graduate in Computer Science, having gathered valuable experience over the years working in IT as a programmer. Mark is also the main tech writer for MBReviews.com, covering not only his passion, the networking devices, but also other cool electronic gadgets that you may find useful for your every day life.