
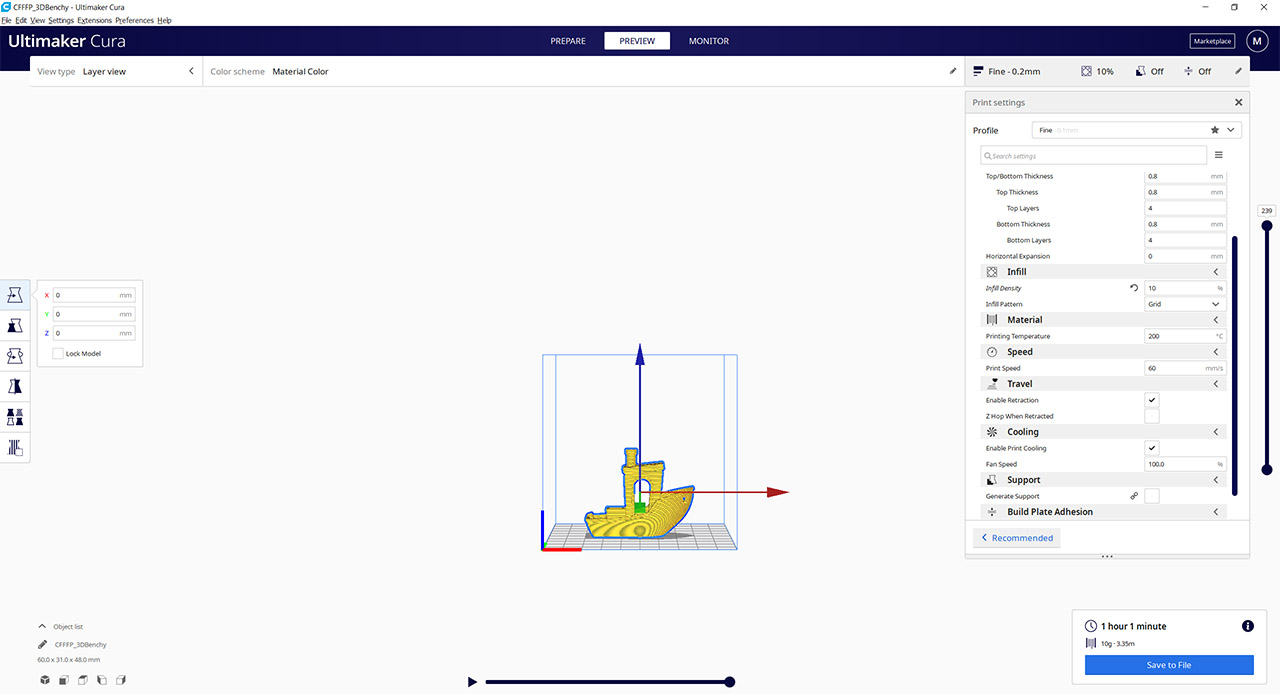
You can change the Layer Height, the Infill Density (and Pattern), the Printing Temperature, the Printing Speed, enable Retraction (useful if you don’t want that annoying stringing effect), the Fan Speed, if you want to Generate Support for the model and more. After you have selected the suitable settings, you can check how the model is going to be seen by the printer in Preview and then simply click on Slice to get both an approximate time for the print and to save the file to a MicroSD card (or to send it directly to the printer).
Test and Performance
The Selpic Star A 3D printer supports PLA, TPU, PETG and ABS filaments, but I had available a roll of black PLA and a roll of red TPU filament which should be enough to show both the strengths and the weaknesses of this device. Since it’s the easiest material to work with, I used the white PLA filament that was included into the package to print one of the most difficult 3D models, the 3D Benchy. Why did I choose this model? Well, it’s because it was designed to help properly calibrate a new 3D printer and to check on both the printer capabilities and the quality of the filament. This way, you can check out the model accuracy (the dimensions, the symmetry), as well as check for warping, layer alignment and more.
Furthermore, it’s a great way to compare your model to what other users got (that either had the same 3D printer or a different one). Considering that this is the first model that I printed using the Selpic Star A, I decided to go with the recommended settings from the User Manual. This means that the Layer Height was set to 0.1mm, the Wall Thickness was 0.8mm, the Print Temperature was 200 degrees, the Print speed was 30mm/s, the Fan Speed was set to 100%, the Infill Density to 20% (the Pattern was Grid), but I left out both the Generate support and the Build Plate Adhesion (for a better model accuracy).
Using these settings, Ultimaker Cura approximated that it should take roughly 3 hours and 45 minutes, but it took far more than that and, after 10 hours, the model was finally ready for analysis. The first thing that I noticed is that there are a lot of strings even though I have enabled Retraction, but other than that, it’s a fairly decent model. That being said, let’s check the dimensions: the bridge roof length should be 23mm (0.9 inches) and my model had 22.5mm (0.89 inches); the chimney inner diameter should be 3.0mm (0.12 inches), the outer diameter should be 7.0 mm (0.27 inches) and the depth of the blind hole should be 11mm (0.43 inches) – the printed model was accurate in this regard, except for the inner hole diameter which wasn’t really rounded (and the diameter was inconsistent between 2.5 and 3cm).
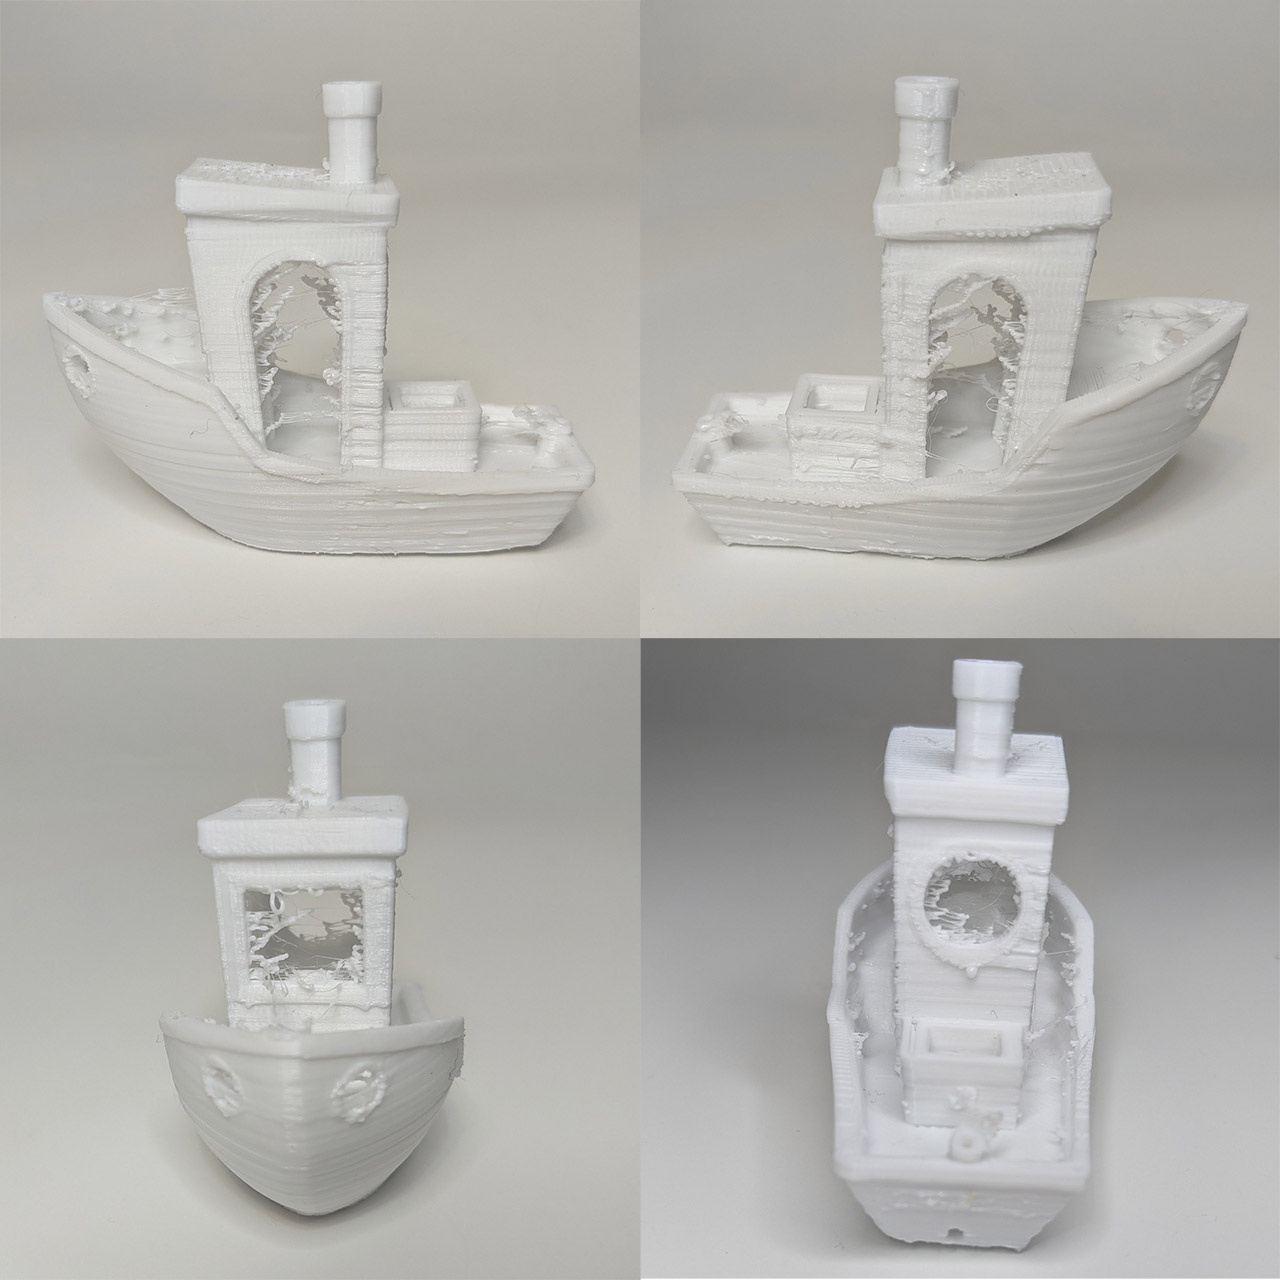
The overall length should be 60.0 mm (2.36 inches) and the model was accurate here; the same as the overall horizontal width and height. Now, returning to the finer details, let’s check the cargo-box – the dimensions were overall accurate expect for a slight deviation inside the cargo-box (the length – by 1mm / 0.04 inches). The hawsepipe and the bridge front window were a bit affected by the stringing effect (also saw that the upper side of the bridge front window wasn’t straight) and that’s a very difficult area since the printer head needs to go from one area to the other and bridge two suspended sections together.
Afterwards, I checked the nameplate and it was illegible. Some other aspects that I noticed is that there were a few areas where the layer seemed to have gotten thinner and I blame the filament considering that overall, the plastic was decently cohesive and there was no over or under extrusion.
Of course, 3D Benchy should not require more than 2 hours, so I decided to change the settings and match them to the ones recommended by the developers of this benchmark. This way, I set the Layer Height to 0.2mm, the Infill Density to 10% (still kept to Grid), the Line Width to 0.4mm and the speed to 60mm/s. I know that you will immediately ask why not go faster, since the 3D Benchy works fine at 150mm/s as well? Because the maximum supported speed for the Star A Selpic seems to be 60mm/s.
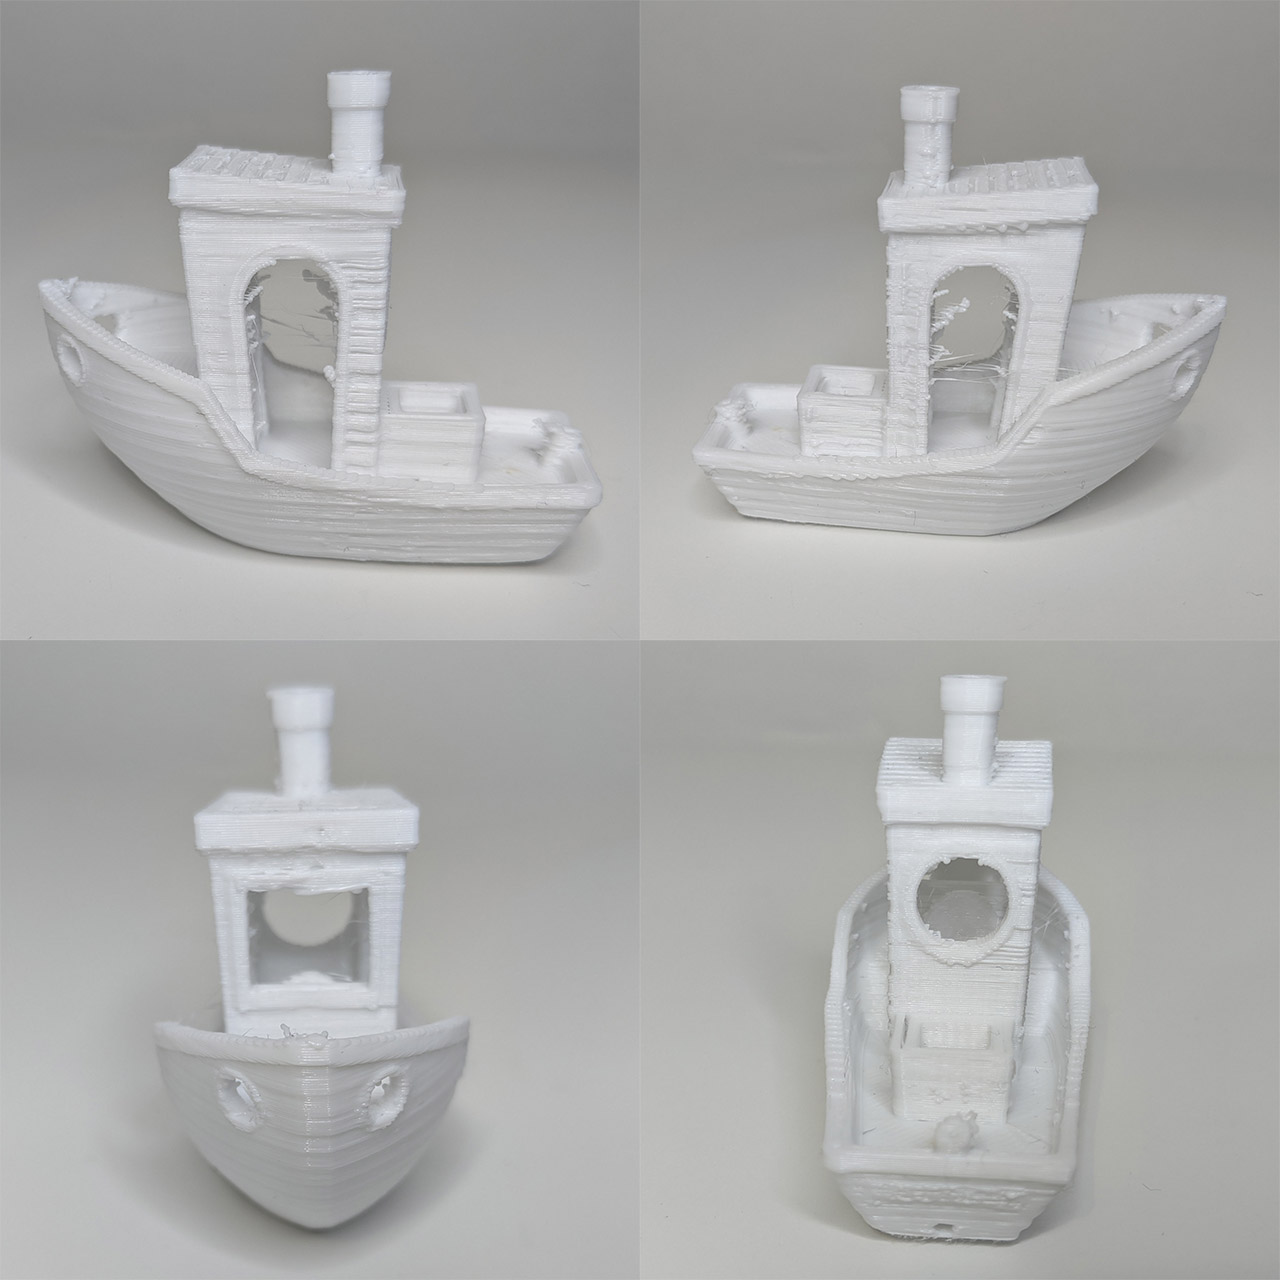
That being said, I left the 3D printer to do its thing and, after 3 hours and a half, I got the new model. Surprisingly, the amount of stringing is far lower than on the slower 3D print and overall, it seems like a better model. At a closer inspection, the dimensions were pretty much the same as on the first Benchy and some weaknesses have been accentuated, such as the aforementioned filament loss (it may not be the filament after all since it happened in the same spot) and I also saw a few sections where the plastic was sliced. Considering the price tag of the 3D printer, this is a bit of nitpicking since the model actually looks decent and it’s fairly accurate.
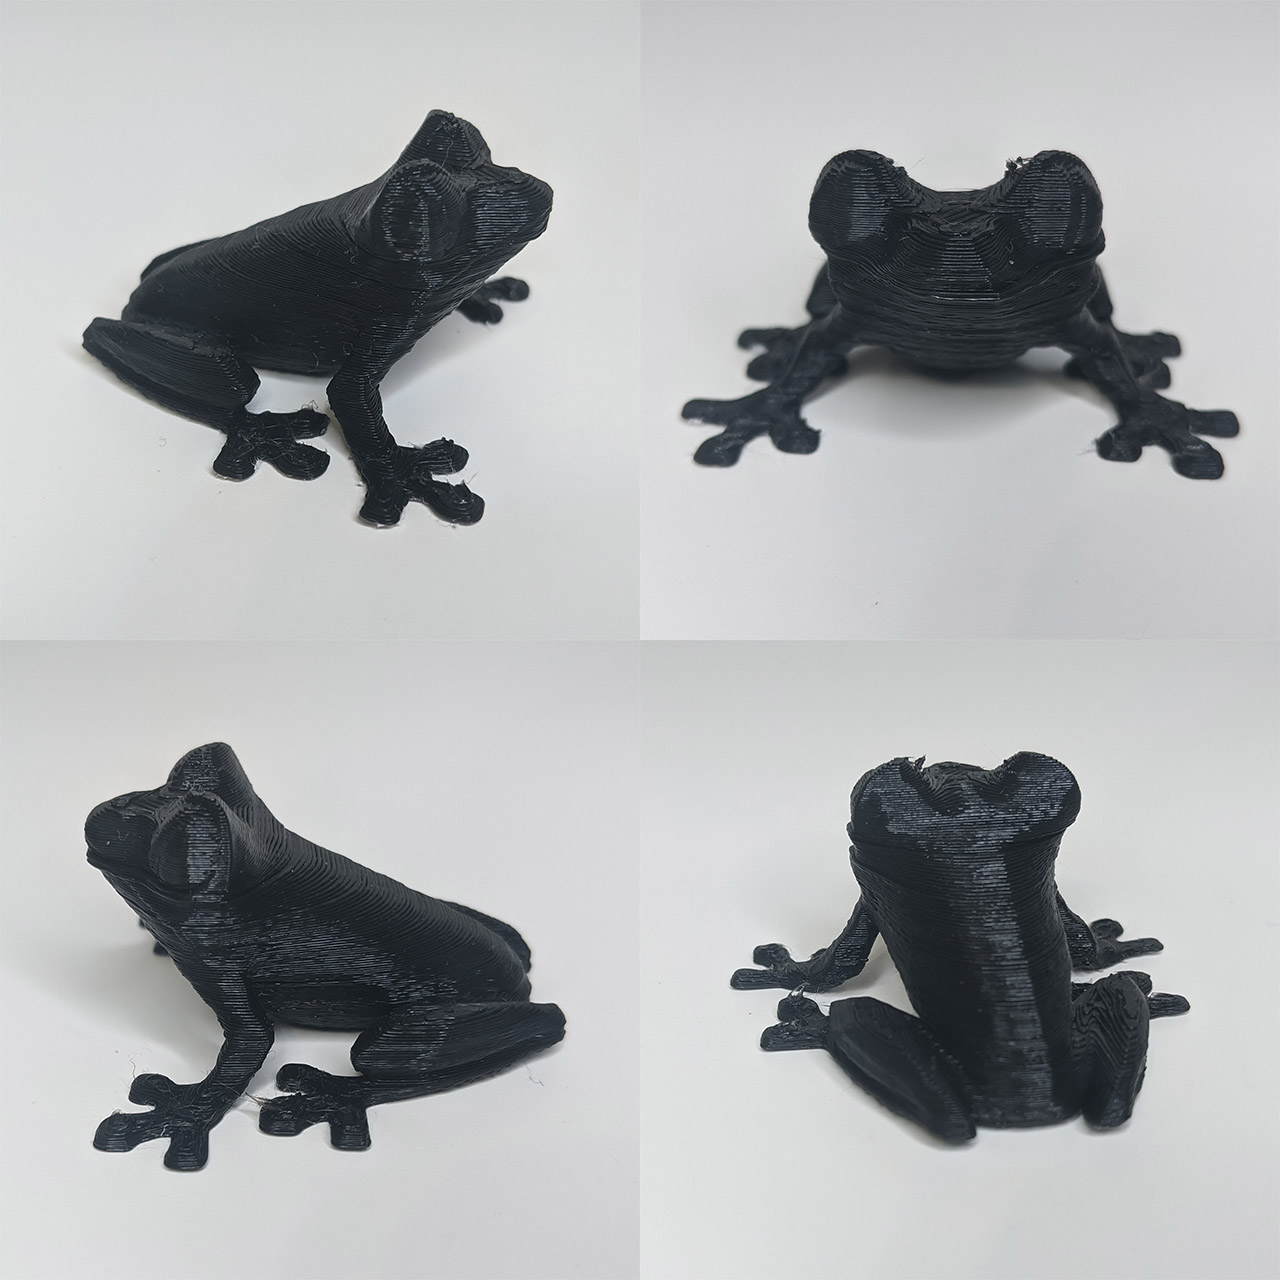
Since the white filament was almost done, I decided to use a black PLA+ filament that I had available and print a small frog (credit to MorenaP from Thingiverse.com), just to see how the printer would handle a quicker print (I kept the same settings as on the second 3D Benchy). As you can see, it did a fine job, with pretty much no stringing, the extrusion was good, the fingers of the frog are clearly defined, as well as the eyes. And, most importantly, there were some hanging parts that were handled properly.
Lastly, I took out a roll of flexible filament (TPU) – which I know, it can be torture for a lot of 3D printers – and I fed the wire into the printer head section. As expected, some settings needed to be changed since the TPU filament has a far different behavior than PLA. So, I decided to follow some of the instructions from this very helpful video: I changed the Layer Height back to 0.1mm, the Wall Thickness to 1.6mm and set the Infill Density to 20% (with 6.0mm Infill Line Distance). I also pushed the Printing Temperature to 230 degrees C, kept the Flow to 100%, I enabled Retraction and I know that some of you keep it disabled when dealing with TPU, but I set the retraction Distance to 1.4mm, the retraction Speed to 25mm/s and the Retraction Prime Speed to 10mm/s. This should be enough to ensure that the 3D printer will get the job done, right? Well, not quite. I have tried printing a model about 5 times before giving up and the same thing happened each time. The model will get a few layers in (sometimes not even that) and then the nozzle will get blocked. I cleaned it up after every attempt to make sure that there was no residue clogging the nozzle, but the same happened each time. So, for now, I have to conclude that the Star A doesn’t work that well with flexible filament, but I will try again in a few days with a different set of settings (maybe I will make it work).
Besides the 3D models, I have to also bring to attention that Selpic says that the printer is very quiet, not reaching 60dB and it’s true, it’s surprisingly quiet with mostly some vibrations and buzzing (like you would get from a notification from your phone), but the motors would sometimes get a bit louder for a short period of time, but overall, it is indeed one of quietest 3D printers I had the possibility to use.
Conclusion
Despite getting more affordable each year, the 3D printer is still out of reach for a large portion of people, so it’s laudable that Selpic has managed to build a decent device that’s both easy to assemble and intuitive to use, while keeping an affordable price tag. As you already saw, the printer works really well with a PLA filament even with very challenging models and I found the Ultimaker Cura to be a very suitable software for the Star A for both beginners and advanced users. Of course, not everything is perfect since the filament holder seems fragile and the 3D printer doesn’t seem to handle TPU filaments that well, but again, it’s one of the most affordable devices of its kind, so I suppose that a few compromises were to be expected.
Selpic Star A
-
Pros
- Has a compact design and it's lightweight
- Has a part cooling fan
- Has a Pause/Resume function
- Easy to assemble
- Comes with some useful add-ons
Cons
- The filament holder is flimsy
- I could not make it work with a TPU (flexible) filament
Mark is a graduate in Computer Science, having gathered valuable experience over the years working in IT as a programmer. Mark is also the main tech writer for MBReviews.com, covering not only his passion, the networking devices, but also other cool electronic gadgets that you may find useful for your every day life.