
I am confident that you are familiar with the Google Cloud platform, as well as the Apple iCloud, but, while these services are great for storing your data, there are some privacy concerns and I doubt that many of you bother to encrypt your data before moving it to the Cloud. For privacy reasons alone, you should consider using a NAS (Network Attached Storage) to create a home server and it’s interesting that this is a growing trend which went far beyond the enthusiast stage (more and more people are conscious about the security of their data and for good reason).
The manufacturer that currently dominates the home-focused NAS market is Synology and, despite being more than two years old, one of the most popular entry-level NAS is Synology DiskStation DS218+, a 2-bay device which supports up to 32TB (16TB per drive), has expandable RAM, it features a completely tool-less design and most importantly, it comes with the excellent DSM UI.
This OS has proven over the years to be one of (if not) the best NAS software since it’s easy to set up and manage despite a large number of features, so even people that aren’t tech-savvy can create a reliable home server.
It’s worth mentioning that Synology has recently released the DiskStation DS220+ (in June 27th), so let’s have a look if the Synology DS218+ is still worth it in 2020 or if you should consider newer solutions.
Design and Build Quality
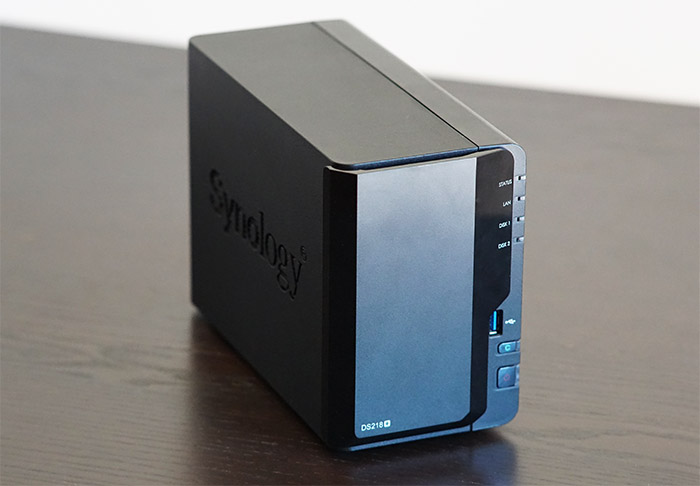
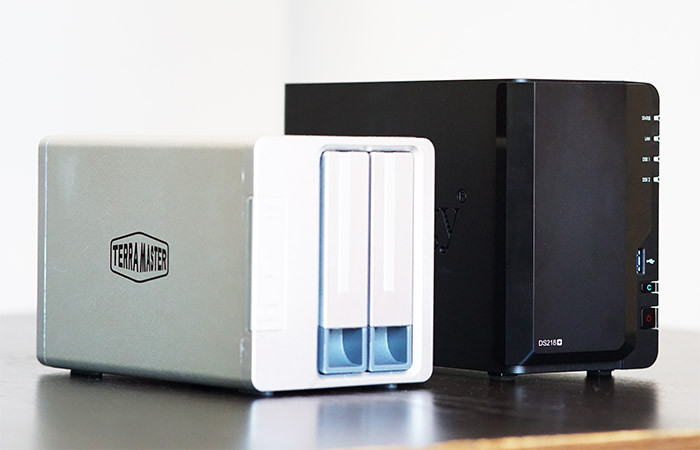
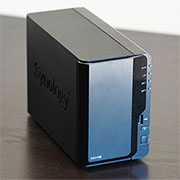
The enterprise-level NAS is usually very large, has lots of bays available and it’s going to sit nicely in a rack; of course, you can’t bring the industrial look inside the home, so the smaller 2-bay NAS is designed to be as compact as possible and a bit of style won’t hurt either. The Synology DiskStation DS218+ is a small box covered by a black matte finish, it has rounded corners and there is a Synology logo on the left and right side of the case. The material of choice is plastic which does make the device a bit more lightweight than some of its competitors (it weighs about 2.9 lbs without any disks installed). It is interesting to see that the TerraMaster, a rising NAS manufacturer, went with a metal shell for its entry-level F2-210, but size-wise, they’re pretty much the same, the DS218+ measuring 6.49 x 4.25 x 9.13 inches, so you shouldn’t have any trouble tucking it near the corner of a desk.
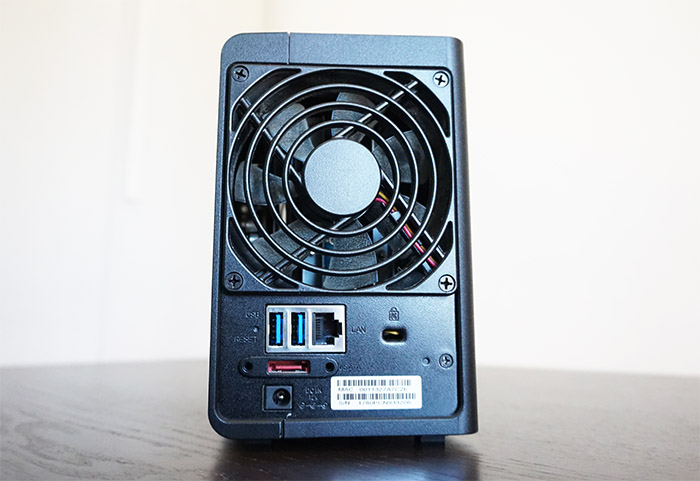
The case airflow system seems to be done well since I could see some cut-outs on the bottom of the case, next to the main circuitry, as well as on the front, from underneath the plastic cover – the four silicone feet are tall enough to keep the air moving underneath the device. There is also a small fan that pushes the air through the rear side (the fan measures 3.62 x 3.62 x 0.98 inches) and you can control the speed from the DSM UI. At its lowest level, the fan shouldn’t exceed 19dB, which is almost inaudible, but you shouldn’t really worry about the fan noise because the problem can be the type of HDD that you use, especially the older 5400rpm ones (the quietest solution is to use SSDs, but it’s also the costlier one). Overall, the fan does a good job at maintaining a suitable internal temperature and the unit did not get hot even when it was moving files.
Underneath the grill for the fan (which, by the way, can be changed for something better and quieter), there is also a couple of USB 3.0 ports which sit next to the Gigabit Ethernet port – yes, this model is equipped with a single Ethernet port, so you won’t be able to aggregate more than one link for a higher bandwidth. Next to the USB ports, there’s a small recessed Reset button (press and hold it for four seconds until you hear a beep to return the NAS to its factory default settings). On the rear side of the device, you’ll also find a Kensington lock, an eSATA port and the DC power connector. On the front of the Synology DS218+, there is a removable plastic cover which can simply be pulled out to expose the two drive bays – the cover relies on four rubber nubs to stay in place and it’s a bit of an unorthodox approach since the rubber can wear off in time (although I doubt many will access the drives on a daily basis).
To unlock any of the two trays, you need to push upwards on the locking plastic piece and simply slide the tray outside. If you plan to add HDDs, the process doesn’t require for you to use any tools and you have to simply remove two plastic pieces from the sides of the tray, insert the HDD and then put those plastic pieces back to lock the drive into place (you may need to adjust the silicone gaskets if the plastic piece doesn’t enter back smoothly). But, the tool-less approach is available only for HDDs and, if you plan to add any SSDs (it supports the 2.5-inch SATA ones), you will have to rely on the screws provided in the package. Besides the drive enclosures, you can also find the third USB 3.0 port on the front side, as well as the USB copy button (press it to copy the data from any connected USB devices to the internal drives) and the Power button with an indicator (press once to power on the NAS – to power it off press and hold it until you hear a beep and the LED indicator starts blinking).
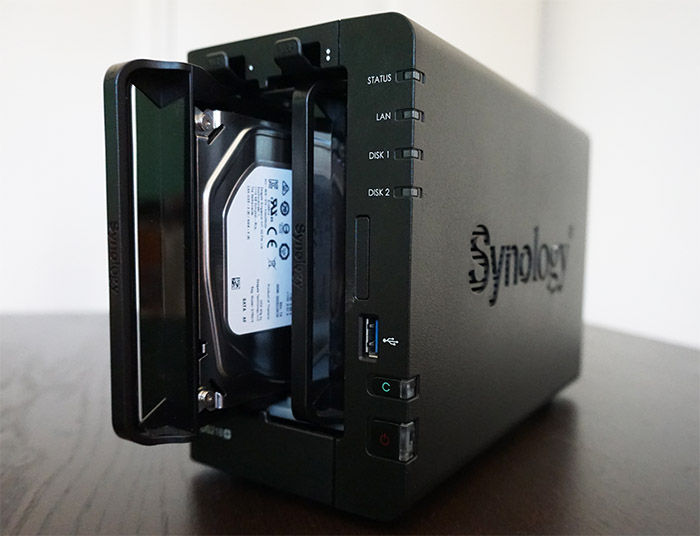
A bit higher on the front panel, there is another set of LEDs: one for Status (when it’s green, it means that everything is fine and, if the LED starts flashing orange, the volume either is degraded, it’s not created or the DSM is not installed), one for LAN (flashing green shows that the network is active), one LED for Disk 1 and the last one for Disk 2 (solid green means that the drive is ready and idle; static orange means that there’s either a drive error or the port is disabled).
| Synology DS220J | Synology DS218+ | Synology DS220+ | |
| CPU | Realtek RTD1296 | Intel Celeron J3355 | Intel Celeron J4025 |
| CPU Frequency | quad-core 1.4 GHz | dual-core 2.0 (up to 2.5) GHz | dual-core 2.0 (up to 2.9) GHz |
| RAM | 512MB DDR4 | 2GB DDR3 (+4GB) | 2GB DDR3 (+4GB) |
| LAN Ports | 1 | 1 | 2 |
| Hardware Encryption Engine | Yes | Yes | Yes |
| USB Ports | 2 | 3 | 2 |
| Maximum Internal Raw Capacity | 32TB (2x16TB) | 32TB (2x16TB) | 32TB (2x16TB) |
| Internal Drives | EXT4 | Btrfs/EXT4 | Btrfs/EXT4 |
| Number of Drive Bays | 2 | 2 | 2 |
| Hot Swappable | No | Yes | Yes |
Internal Hardware
The way a NAS is build already allows the user to get a view of some of its components after removing the drive trays and this is the case of the DiskStation DS218+ which exposes an empty RAM slot, allowing you to add up to 4 GB of additional memory (it supports DDR3 and for a better compatibility, you should go for CL13, 1866MHz). In case you want to change the existing 2GB of RAM as well, you will have to tear down the case completely and to do so, you need to disconnect the two plastic parts which are held together by plastic hinges (be careful not to break them) – it’s worth mentioning this cool guide on how to do it without risking breaking anything.
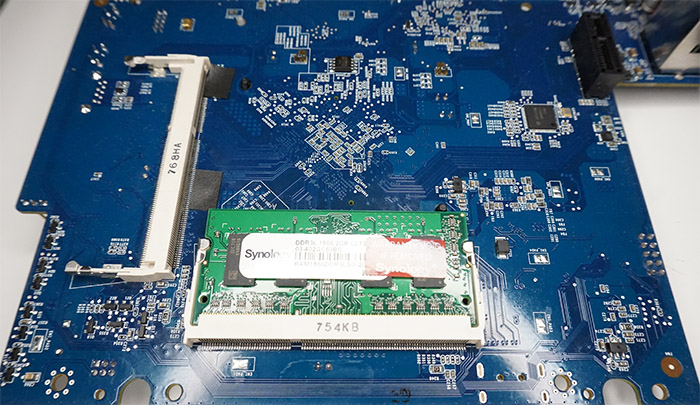
After you’re done removing all the parts and have gained access to the PCB, you will be able to see that removing the RAM is an easy process, but it will void the warranty. Other than the DDR3L 1866 2GB CL13 RAM, I could also identify the dual-core Intel Celeron J3355 which is clocked at 2.0GHz (it can boost up to 2.5GHz, if necessary), there’s also 16MB of NOR flash (Winbond 25Q128FWSQ), an Intel Ethernet ICs Controller IEEE 10/100/1000Mbps (1718AHP WGI211AT), a Marvell Kynix 88SE9170-NNX2 PAOU63OA 5JW IC chip and a Microchip PIC16F1829 microcontroller.
Installation and Software
After you have added the HDDs (or SSDs) into the trays and pushed them back inside the NAS, connect the power cable and turn the device on; afterwards, take an Ethernet cable (you will have to use your own, since Synology did not add one in the package) and insert one end into the back of the DS218+ and the other end into one of the LAN ports of your router.
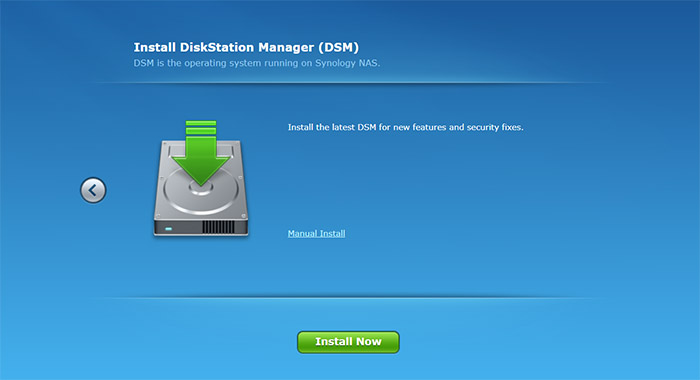
Press the Start button and open a browser on a computer that is on the same network as the NAS: insert find.synology.com which should automatically take you to the Web Assistant (if the NAS is not detected, you can also try entering diskstation:5000 in the URL). Next, press Connect, Set up and Install Now to install the newest version of DSM available – it is very important to understand that any HDD or SSD that you have inserted into the NAS will have its data erased when the operating system will be installed.
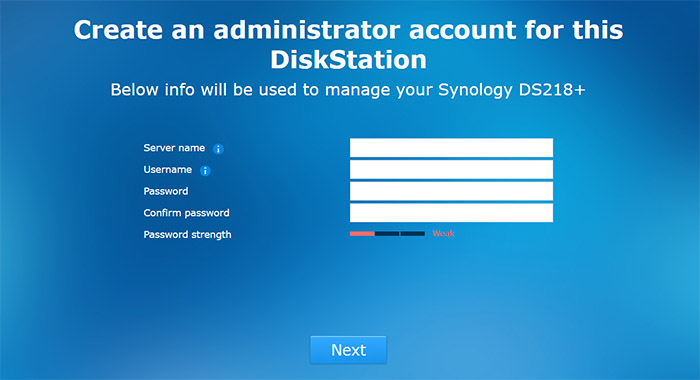
The installation process is said to require about 10 minutes, but I got to continue the configuration in about 3 minutes. At this point, enter a Server Name (the name that you’re going to see when connecting to the NAS from any device from the network), a Username (the administrator) and the password. The NAS is often the target of hackers, so make sure to pick a strong password and don’t put the username as admin (or anything universally used as a default).
Afterwards, you can set up QuickConnect in case you want to connect to the DS218+ remotely without relying on port forwarding and after that’s done, you should be able to Install a batch of recommended packages (yes, DSM OS allows you to install any type of package you want, therefore supporting a large degree of customization).
The DSM UI and Security
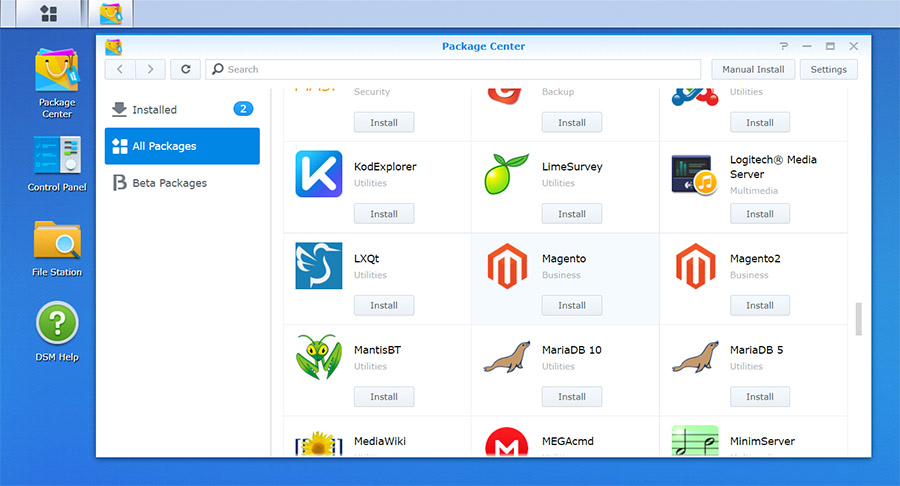
The DSM user interface is very simple and it reminds me of the Linux/Windows OSes with their multiple windows approach. On the left, there are four icons, one is for accessing the Package Center, one for the Control Panel, one for the File Station and the last for the DSM Help. The Package Center is where you can download various packages (about 58 applications to choose from), including Back-up suitable apps, Antivirus, media servers, mail servers, text editors, VPN servers, a Virtual Machine Manager, a Surveillance Station (you can connect IP cameras and use the NAS as a CCTV recording station) and some third-party development tools such as Node.js, Joomla, MariaDB, GitLAB, PHP, Python, Ruby and there’s even WordPress. These are the ‘stable’ packages, but you can also have a go with the Beta packages which are not yet completely polished but should work in most cases (includes some Synology businesses apps, as well as the Cloud Sync and more).
Any installed apps can be accessed from the top left button which will summon a dedicated window with all the icons and you can drag and drop them to create shortcuts on the desktop. The Control Panel can be viewed in Basic and Advanced mode (I chose the latter since it has more options available) and here, you can configure the Shared Folder (by default, the volumes are btrfs which is a bit slower than ext4 in terms of writing, but you do get data protection features, data integrity protection and more), the File Services (SMB/AFP/NFS/FTP and more), create Users and Groups, enable QuickConnect, configure Port Forwarding, the Network (it is advisable to use non-standard external ports for better security) the DHCP Server (yes, the NAS can assign IP addresses to your LAN devices) and under Security, you can set trusted proxies, enable the Firewall, block IPs that fail too many login attempts (you can limit this number) and more.
Synology DS218+
-
Pros
- The fan noise is acceptable
- The RAM can be upgraded
- Lots of applications to choose from
- the DSM UI is excellent for both beginners and advanced users
- Tool-less installation of HDDs
Cons
- 2GB of RAM may not be enough for some applications
- Only one Ethernet port available
Mark is a graduate in Computer Science, having gathered valuable experience over the years working in IT as a programmer. Mark is also the main tech writer for MBReviews.com, covering not only his passion, the networking devices, but also other cool electronic gadgets that you may find useful for your every day life.