
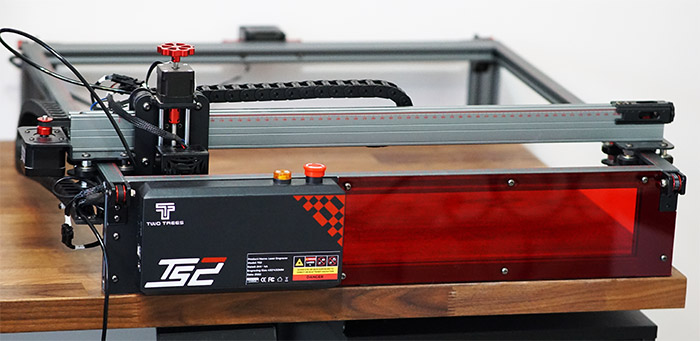
The Two Trees TS2 is currently the flagship DIY laser engraver model from the TS series, sporting a very interesting layout for the stepper motors, ensuring better stability, despite the size of the working space and there are also some interesting features that you don’t usually see on a device in this price range.
| Two Trees TS2 | |
|---|---|
| TwoTrees3DOfficial.comk | Check Offer |
Indeed, the Two Trees TS2 does have a large emergency stop button, there is a sensitive flame detecting sensor and I was surprised to see drag chains for the cable management. One thing that may be missing would be a touch-sensitive display to allow local control of the device, but you do get the option to either directly hook the Two Trees TS2 to your computer (via USB cables) or even use WiFi.
And there’s also an app! I have mentioned that you do get a larger engraving area, so does that mean that this is a device ready for large-scale production? The DIY aspect is a kind of a give-away. The manufacturer does promise that the Two Trees TS2 is powerful and quick enough to go above the hobbyist level of use, but you do have to put everything together yourself. Then again, the other model from the series, the TS3 has an enclosure and comes pre-assembled, but the working area is a bit smaller.
That being said, let’s put the Two Trees TS2 to the test and see both the approach and the improvements that the manufacturer has undergone to this fairly niche type of device, which is definitely growing in popularity.
UPDATE: I have retested the Two Trees TS2 to follow up on the cutting performance and it seems that it performs great as long as the settings are set in the right way.
The Assembly
The Two Trees TS2 laser engraver arrives in three separate boxes and, while there isn’t a clear delimitation about which is the correct order, it’s best to first take out all the frames. The front and back frames should be in separate packages (the one with the manual at the top and the other with some wood samples), while the axis frames should all be in the same box. In the box with the user manual, you’ll also find the small bags with screws – it’s nice that each is in a separate bag, labeled accordingly.
On the first step, the manual says to install the frames, but it’s not really dummy-proof, so I took the front and back frame (the rectangular frames) and I identified the Y-axis frame – it’s the one that has a circular cut-out within the metallic part with four wheels. The front and the back frames should have the motor and the control box facing outwards and the Y-Axis frames needs to be properly aligned with the frames in order to insert the two M5x25 screws on one side and one on the other side.
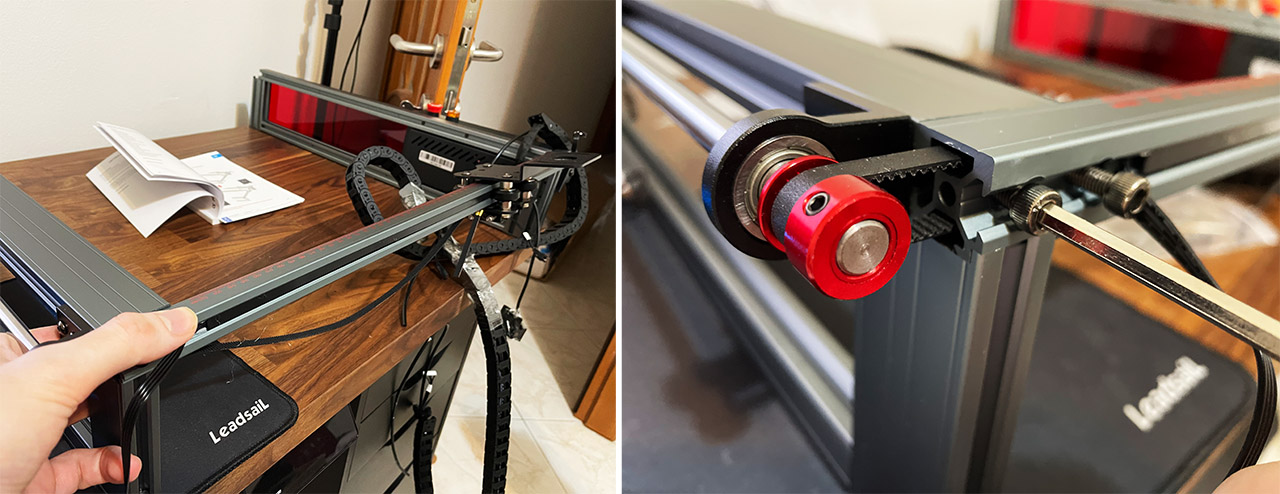
But before attaching the frames to the axis make sure to put the belt over the synchronous wheel on the rear-facing frame. At this point, the idler pulley should sit tightly on the other end of the Y-Axis. Use two M4x16 screws to properly attach it to the frame.
The Y-Axis belt will most likely be too tight – move the pulley to check if it’s too tight or too loose. And to fix it, take a Hex key from the package (there are quite a few) and identify the small screw at the bottom of the pulley. Adjust the screw so that the belt can move freely, but it’s not too loose as to have an impact on the engraver performance (you should feel just a little bit of resistance).
Then, the manufacturer says to do pretty much the same with the other Y-Axis – insert the three screws into place after making sure that the belt is over the synchronous wheel. I did so, but I quickly encountered a problem. That’s because on the next step, I had to install the X-Axis bar which is not really difficult since I had to make sure that the measurements point upwards and towards the front side (with the red glass).
Then, I used two M5x20 screws to mount the bar onto the section with the circular cut-out and another pair of screws (M4x16 and M5x20) on the other side. Obviously, the idea is to have the two pulleys perfectly aligned and they weren’t. The instructions mention absolutely nothing on how to achieve perfect alignment, so I had to try on my own. After loosing up the screws on the red circular pieces (the belt goes over them), I was able to move the X-Axis into the proper position.
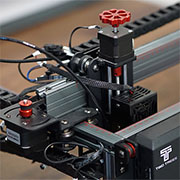
Now it’s time to install the laser module and to do so, you need to take four M3x6 screws and attach the module to the X-Axis. The instructions say to insert the four screws into the holes and I managed to do so easily with three screws (I had to operate the red valve to adjust the height of the module), but one screw was blocked by a part of the laser module. Sure, I managed to insert it eventually, but many people may give up and leave it with three screws. Afterwards, the instructions say to install the protective cover and so I did using the provided screws.
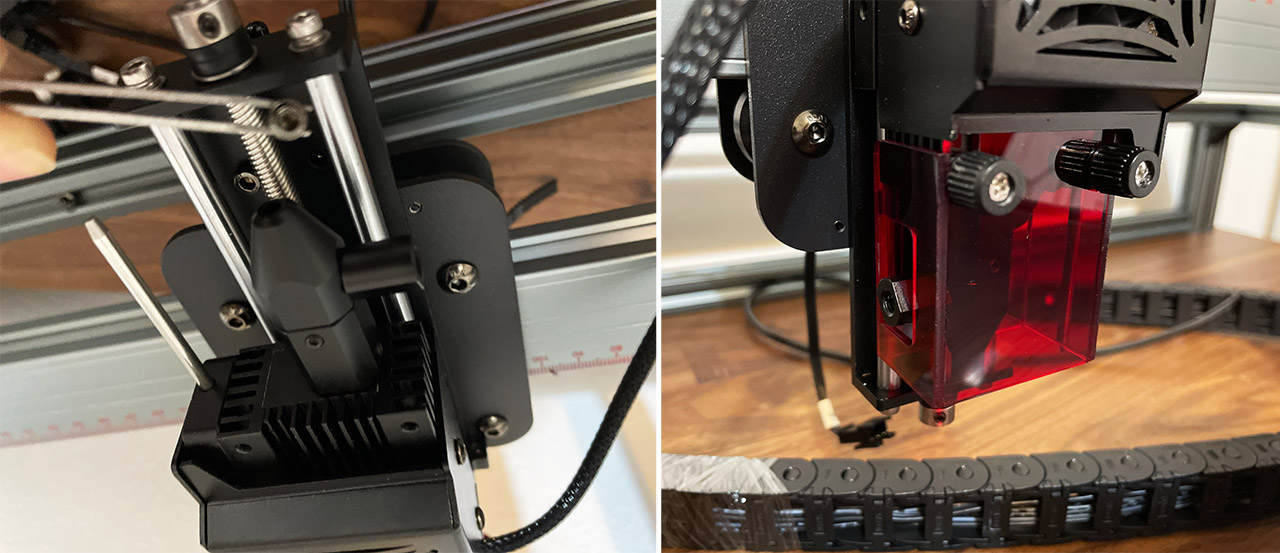
At this point, I was hopeful that I was near the finish line. Boy was I wrong because I had to install the X-Axis drag chain and trust me, I was just as confused as you are when I checked the manual. After broadening my swearing vocabulary, I finally figured it out where everything needs to get connected, as well as to and from which side the chain needs to be moved as to not go in front of the laser. I have attached a few more pictures as to help you in case you get stuck as I did.
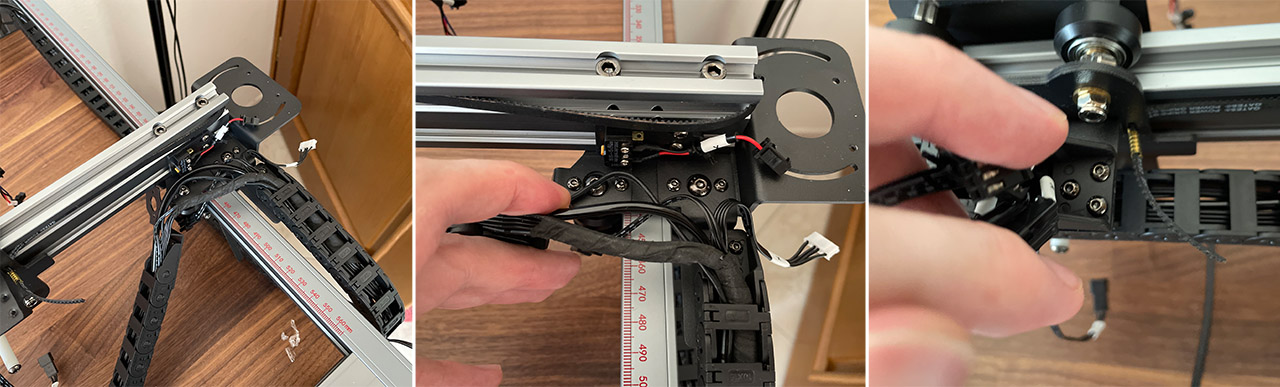
Afterwards, it was time to add the Y-Axis chain holder X1! You’ll find it in a separate bag and you need to use two screws to attach it to the left Y-Axis. The manual mentions another chain holder which apparently is already attached to the chain and that needs to be installed near the controller box, as seen in the photos.
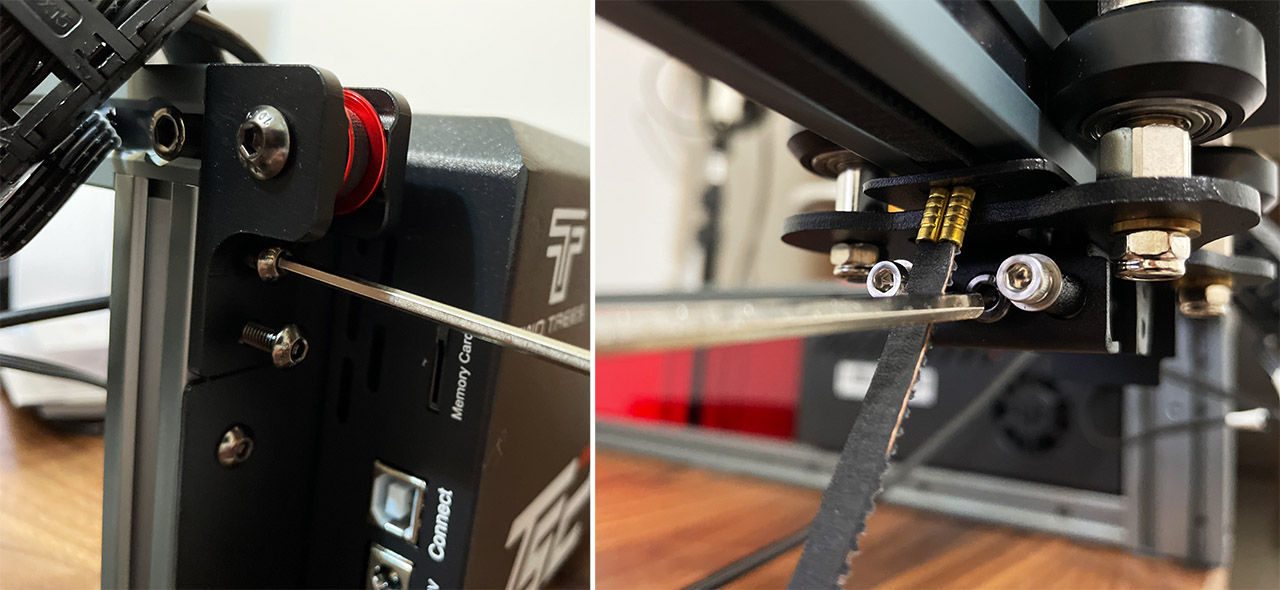
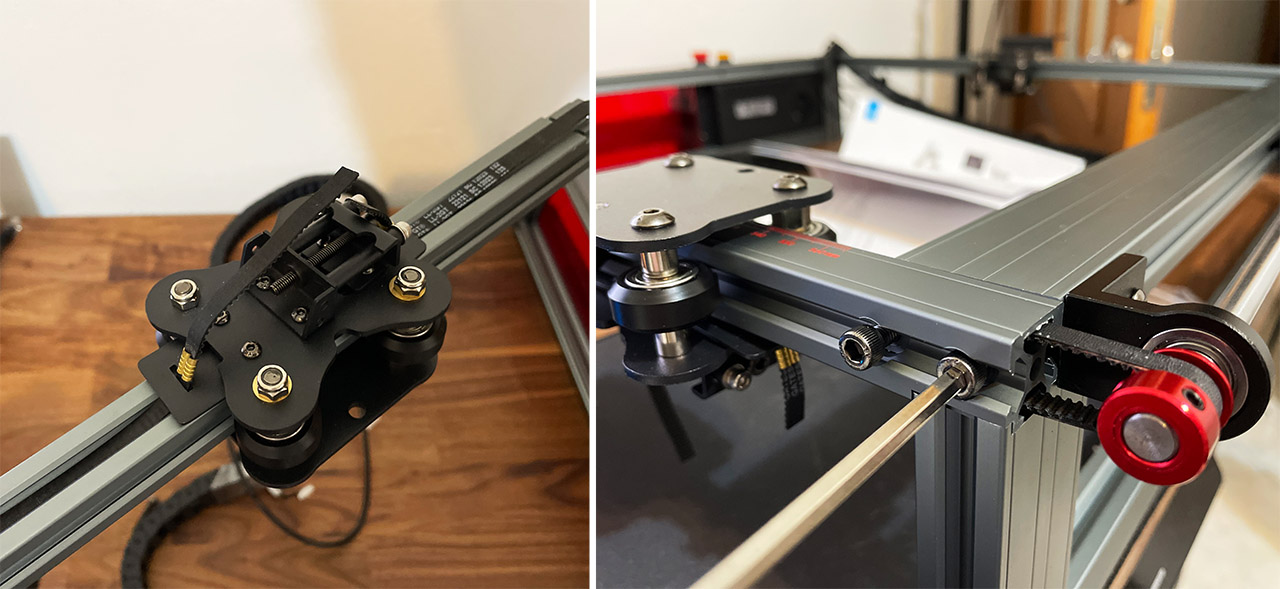
Lastly, I had to taker out the stepper motor from the package and attach it on one side of the X-Axis bar, near the place where I installed the chain. You will notice a plastic valve on the other side which you can operate to loosen up the belt – put the belt over the stepper motor and then tighten the valve again.
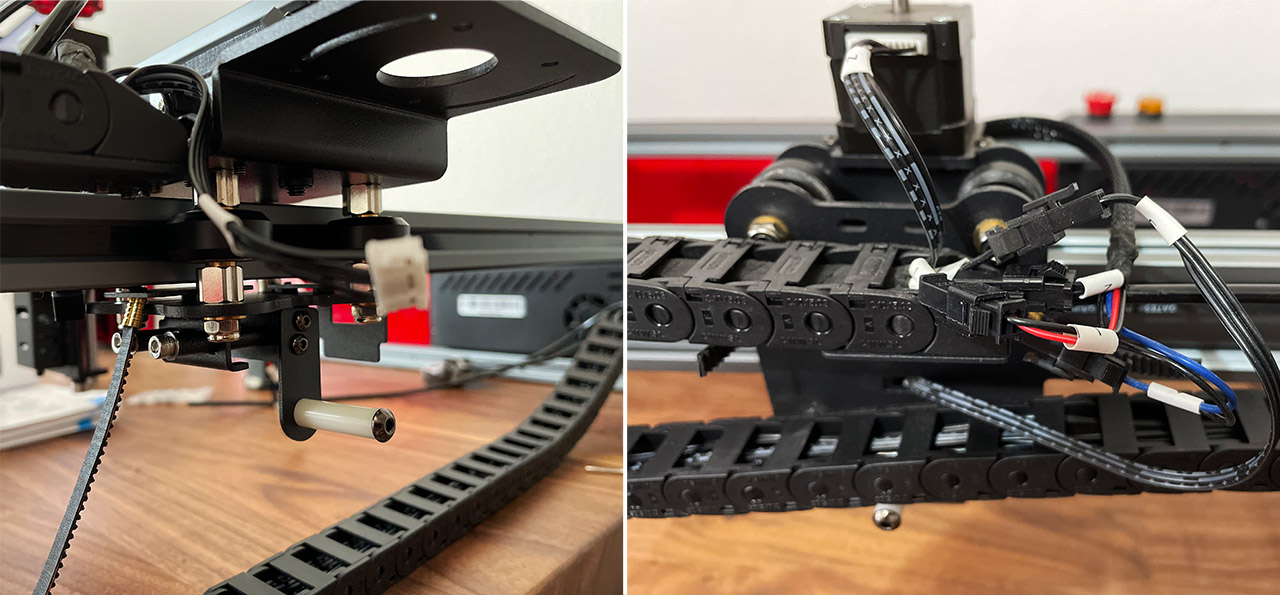
Now we have finally reached the wiring. And the user manual is actually very good in this regard (for a change). Attach the cable next to the stepper motor, the cable that sits loose next to the Y-Axis stepper motor and I know that the middle of the X-Axis is intimidating, but it’s actually quite easy. The manufacturer has labeled all the small cables, so all you have to do is to match these labels.
The Design and the Built Quality
As I mentioned in the intro, the Two Trees TS2 is a large laser engraver and I thought that the Longer LK5 had a big working area. But no, at 28.9 x 28.4 x 6.8 inches (73.3 x 72.1 x 17.2cm) and an engraving area of 17.8 x 17.8 inches (45.0 x 45.0 cm), my desk was barely wide enough to handle this laser engraver.
What was interesting is that despite the length of the bars and the frames, they’re still solid – I am actually tempted to think that the material is steel and not the widely used aluminum. The layout of the stepper motors is very interesting because while there’s a stepper motor on the X-Axis which moves the belt, it is properly counter-balanced and Two Trees has positioned the Y-Axis motor in the middle of the bar.

This should ensure that the weight is very balanced throughout the laser engraver and that there should be no stability issues. And it’s true, as long as you properly adjust the belts tension, the movement should be smooth and there should be no vibrations, which is excellent. In terms of aesthetic value, the Two Trees TS2 looks really nice, despite the bare-bones-like design, which is normal for these DIY laser engravers. There are some red accents, the control box is slim and fits nicely within the frame and the protective red screen is also a welcomed addition.
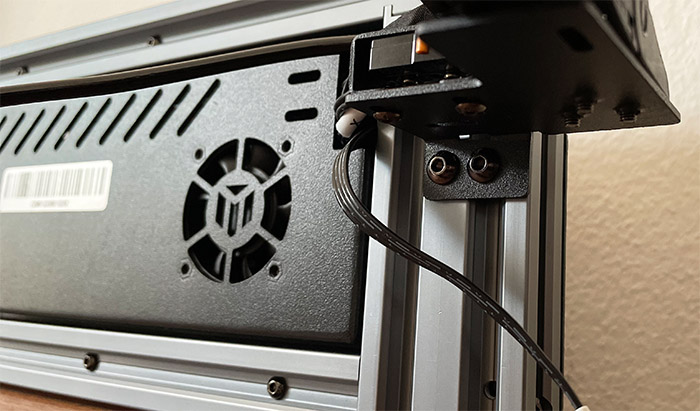
But, one of the most important aspects is the lack of cables pointing everywhere and that’s thanks to the drag chains that are a pain to install, but look great afterwards, especially due to that bike-chain-like movement. There are a few fans installed to keep a proper temperature when the Two Trees TS2 is functioning, the first being inside the control box. And it’s a 24mm standard fan that you can replace and actually should if you mind the loud noise it produces. Yes, it’s not quiet at all.
Then, there’s the laser fan which keeps a good temperature for the laser to operate. You may have noticed that inside the box, there was a small attachment for the air tubes. If you didn’t understand why there was an empty tube that was simply there, seemingly without a purpose.
Well, its purpose is to assist with the airflow of the laser, so you can use the attachment to install the tube next to the laser head and the other end of the tube needs to be attached to a compressor. Since the tube is not that wide, it’s not a bad idea to use a fairly capable air compressor, so that it can make a proper difference when using the laser. This way, you should also see less alarms from the sensor which can be a bit too sensitive indoors.
What’s inside the control box?
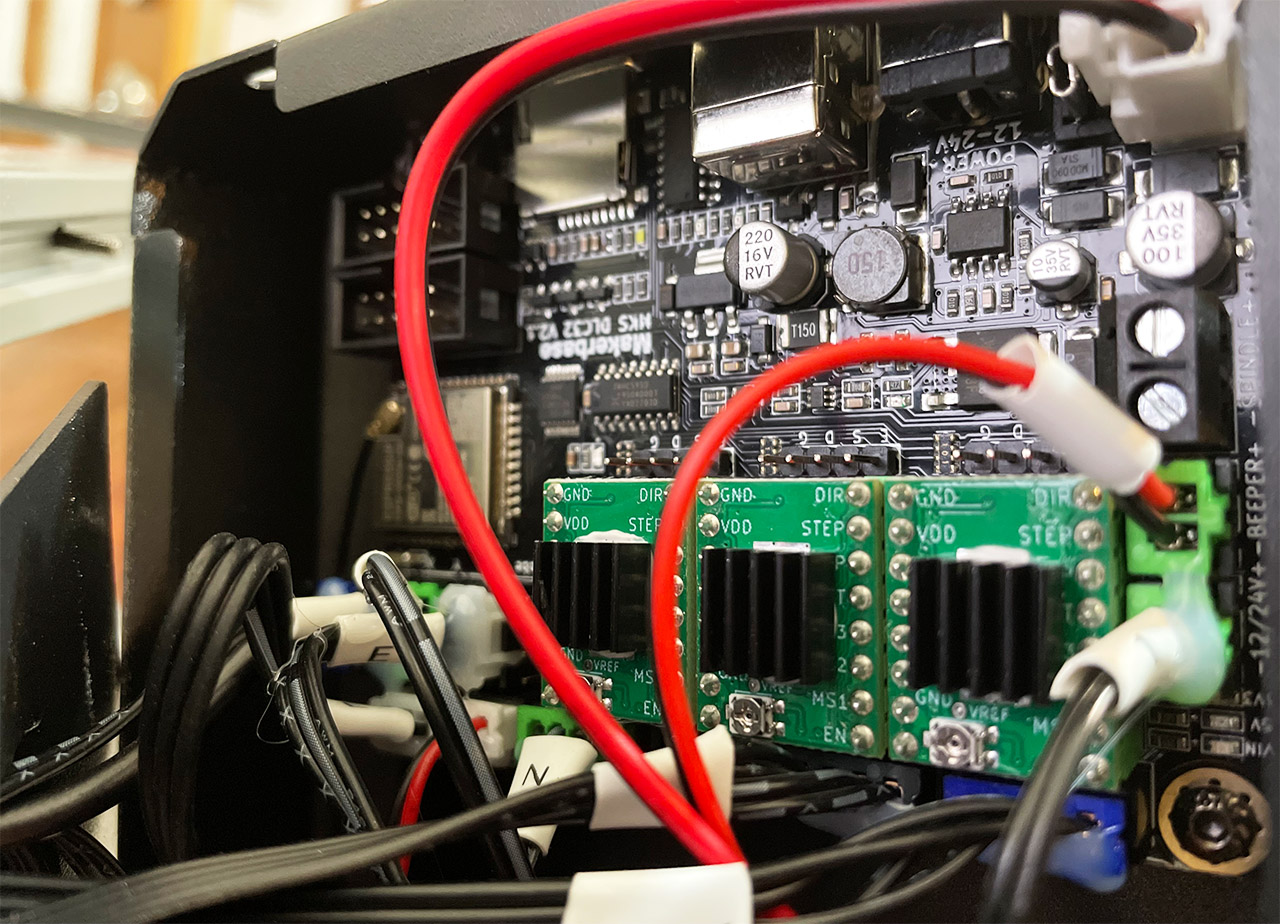
The process of removing the control box is not very difficult since there are a couple of screws on the side and more smaller screws on the rear side that you need to remove more carefully. You won’t be able to fully take it out since there are lots of cables attached to the box, but you need to slightly move it as to see the two other screws on the rear side that you also need to remove.
After that, the rear panel of the control box will detach by itself and you will be able to see the three stepper motor chips that sit on the 32-bit motherboard and I was also able to identify a few other components. There the ESPRESSIF ESP32-WR00M-32U WiFi + Bluetooth + Bluetooth LE MCU module, the Nexperia 74HC595D 8-bit shift register, the Mouser MP1584EN MPS, the Winsok Semicon WSF40N10 MOSFET and the CH34OC (Arduino clone).
The PC Software
In a similar manner to the Longer LK5 Pro, the Two Trees TS2 can be used with LaserGRBL if you prefer open source and free or it will also work great with LightBurn which is a bit more intuitive and easy to use, but it’s also not free. I decided to give LaserGRBL a try since I used LightBurn before and, to connect the PC to the Two Trees TS2 laser engraver, I had to select the port number and the baud rate.
These need to match the ones from your PC and you can find the values by opening the Device Manager on a Windows OS machine and identify the Ports section. Then, go lower until you see the USB-SERIAL CH340 – I had to modify the baud rate to 115200 to match the one from the engraver and then from the LaserGRBL software, I clicked on Connect. You should see some info underneath the gcode section – to check if everything is indeed working, click on the arrows.
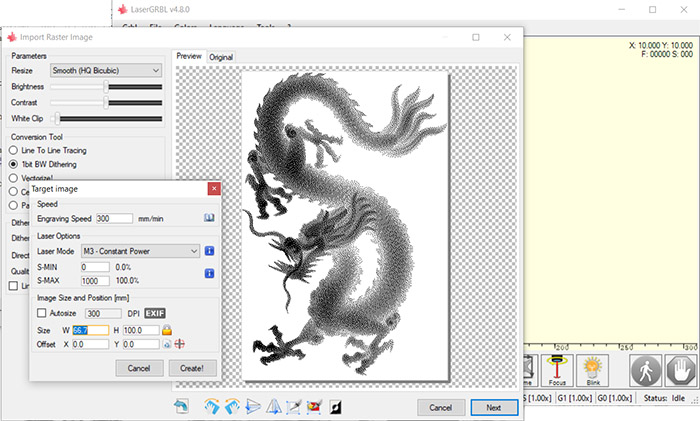
The laser module should move accordingly if it’s connected to the software. If you click on the File > Open File and select a BMP image, you’ll notice a few parameters on the left side. One of the most important is the Conversion Tool where you can choose Line to Line Tracing or 1Bit BW Dithering for engraving the model (the latter is better for grayscale graphs). If you want to cut into the surface, then it’s better to choose between Vectorize and the Centerline. The other important section is the Quality which, by default is set to 30.000 lines per mm.
You will need to adjust this more often than you think with some materials since paper or even some wood can trigger the flame sensor more often. Lastly, at the bottom, there’s the Direction Adjustment section, where you can Invert the colors, flip the image, crop it and more. Click Next to get a new window with options where you can select the Engraving Speed (Two Trees suggests 1000mm/min), then there’s the Laser Mode which can be Constant or Dynamic Power.
Two Trees TS2
-
Pros
- Large working area and improved stability
- There's an app - WiFi connection
- It's fast and can engrave really well
- Drag chains for cable management
- Emergency button + flame sensor
Cons
- The laser itself is silent, the motors more smoothly, but the fan is very loud
- It's not that easy to assemble the device
- It's a bit difficult to set up the WiFi, although rewarding at the end.
Mark is a graduate in Computer Science, having gathered valuable experience over the years working in IT as a programmer. Mark is also the main tech writer for MBReviews.com, covering not only his passion, the networking devices, but also other cool electronic gadgets that you may find useful for your every day life.