
The Voxelab Aquila S2 wants to be a unicorn among the budget-friendly 3D printers by using a direct drive extruder which can handle temperatures up to 300 degrees C (572 degrees F), so you’re no longer limited to only using PLA. I did try my luck at printing models using TPU on a couple of entry-level DIY 3D printers in the past and one failed miserably (Selpic Star A), while the other (Longer LK5 Pro) did produce decent models by seriously slowing it down.
And that shouldn’t really be the case with the Voxelab Aquila S2 since it was designed to work with difficult filaments. Furthermore, the manufacturer has added a magnetic PEI plate that you can bend to detach the printed model with ease. Of course, being a DIY 3D printer, you do have to put everything together yourself (allocate about a couple of hours), but I noticed that every part seemed more robust than what I saw on other brands.
I also saw that there is less experimenting into how everything is put together and that’s because Voxelab is actually a sub-brand to Flashforge that has been building 3D printers for more than a decade. And that experience can be seen on this compact budget-friendly 3D printer as well. Still, it’s quite difficult to create a budget-friendly device without cutting some corners, so let’s put the Voxelab Aquila S2 to the test and see how well (and how fast) it can print models with PLA and TPU filaments.
The Design and Build Quality
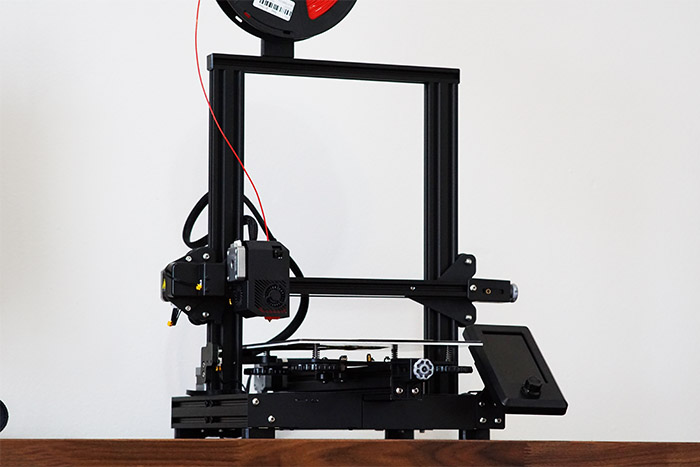
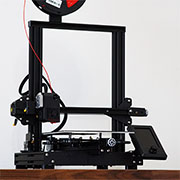
The Voxelab Aquila S2 is pretty much the direct successor to the original Aquila and yes, there have been several other printers released in between, but the actual reasons to upgrade from the first model are the new features of the S2. In terms of design, the Voxelab Quila S2 and its predecessor seem identical, both sporting a compact base and two Z-Axis bars that don’t come with additional support rods (as the Longer LK5 Pro did). But, since the bars are shorter, it doesn’t really seem that this will be an issue while printing. I noticed that the heavy metallic base had more impact on the stability of the printer and there were far less vibrations, which is excellent.
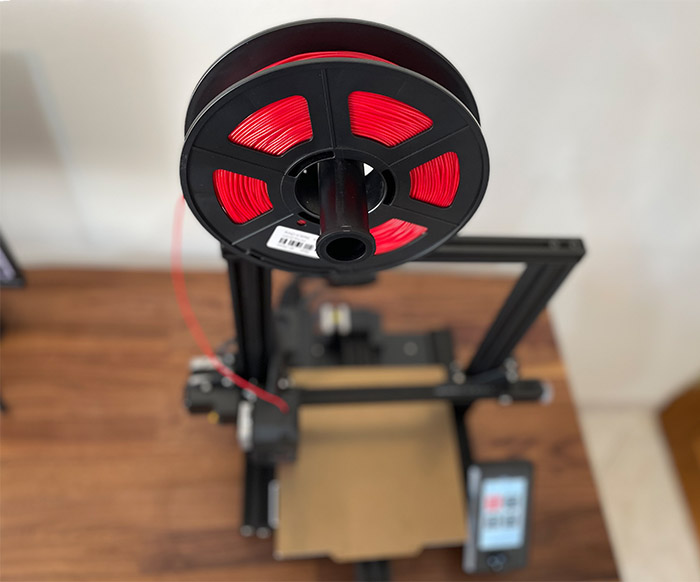
The support for the filament remains at the top, so the device will occupy less space from your desk and I really appreciate the cable management that keeps everything tight and tidy. But, there has been some significant changes with the extruder and less significant ones with the display. The latter now sits vertically instead of horizontally and this takes us to the small elephant in the room. The similarities with Crealty 3D printers. I say small because the manufacturer didn’t really hide that it took inspiration from Creality’s line of devices and I found it a bit funny that they just gave up and put the display in the same manner as the Ender 3 (it also looks very similar in design as well). Nothing wrong with that especially since it’s a very satisfying experience operating the display using the circular button.
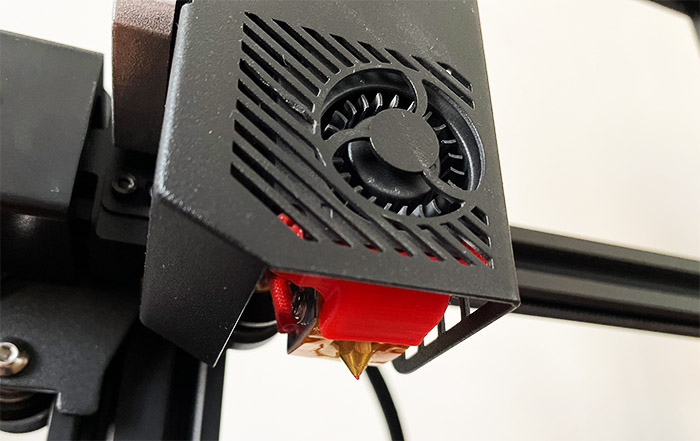
And yes, you can scroll through the menus rotating the button and access a specific function by pressing on it. The extruder has been changed from the Bowden Teflon tube to a direct drive extruder that should last longer, get far hotter and maintain a better filament flow. And there are two fans, one for the hotend and the other to properly cool down the layers in order to avoid model defects (less stringing). This takes us to the Creality CR-10 V3 which is also a 3D printer that has a direct drive-extruder, but this time, I think that Voxelab managed to do a bit more. And I mainly mean that the base is simply better. It’s a metallic box which encapsulates almost all the important circuitry, keeping the display close and sturdily attached.
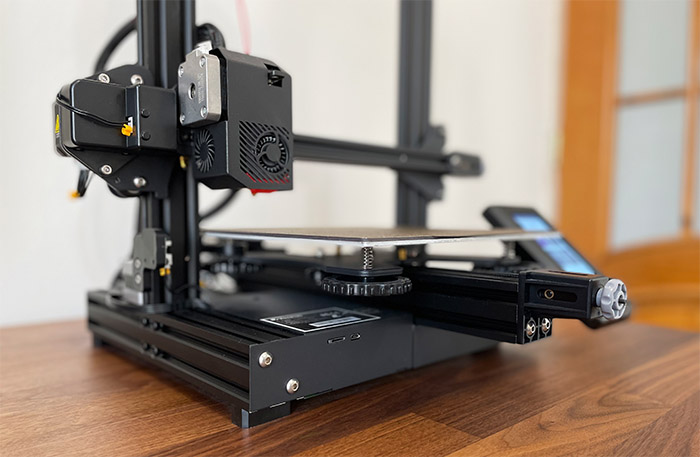
At the same time, the printing area is smaller than both the Crealty CR-10 V3 and the Longer LK5 Pro, being 9.4 x 8.6 x 8.6 inches (24.0 x 22.0 x 22.0cm), but, if you’re not interesting in large models, then you do gain a heated bed with a PEI magnetic plate. And it’s quite useful for detaching models, a bit better than glass because you can actually bend it without breaking it (although glass is more even when leveling).
What protection features does the Voxelab Aquila S2 have?
As for protection features, the Voxelab Aquila S2 can resume printing after a power outage and I was wondering if there’s a filament runout sensor. Since I couldn’t find any mention of it online, I checked the extruder which was right next to the stepper motor and there didn’t seem to be one. I really thought I missed something so I unloaded the filament, put a model to print and watched in awe as the hotend moved in air without a filament, so no, there is no runout sensor on the Voxelab Aquila S2. It seems that you can buy one for cheap (so why not just add it in the first place..). Next is the thermal runaway protection and this one is a sensitive topic considering that the original Aquila had major issues with it – the thermal runaway protection was disabled, so a fire could have started in certain conditions.
So, has Voxelab fixed it? Since it was a software issue, the community released a proper third-party firmware right away, removing this problem, but the official software took some time to receive the fix. So, in its current state, the original Aquila should have the thermal runaway protection active and the Voxelab Aquila S2 should as well.
Then again, you can check the available boards and select the N32 for open-source support which should allow you to rely on the community in case something similar occurs in the future.
I also saw that the the Voxelab Aquila S2 is advertised as having an all-metal hotend, even though there is a PTFE tube running from the heatsink to the nozzle. And there’s a very small heat break section in between (as mentioned by PrintsLeo3D), so it would be interesting to see if this can cause any problems in the future.
Putting Everything Together
The first thing that you’re going to notice after opening the package is a piece of paper with a warning: make sure to switch to the correct voltage before powering on the 3D printer. So do so immediately after taking the large metallic base from the box. I did like that there are four feet already attached, so I could immediately put the Voxelab Aquila S2 on my desk, I just had to be careful with the dangling extruder that was attached by a large cable. There are some instructions in the manual and to be honest, they weren’t as clear as with the Longer printers, but these are the steps.
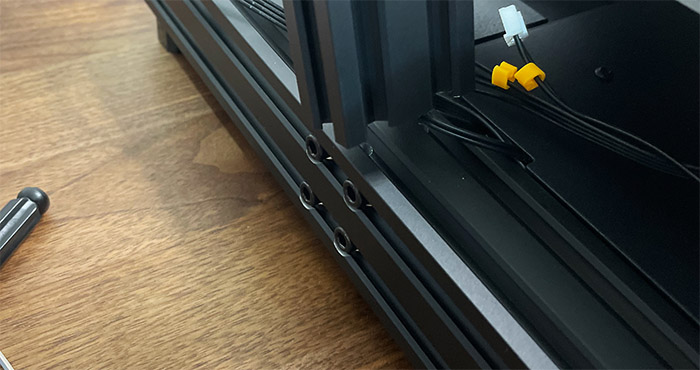
First, I took the Z-Axis profiles and, with the printer facing towards me (with the small wheel in the front), I attached the profile with the height limiter on the left side and the other profile on the right using the M5x45 screws (be careful with the cables). I really wish to tell you that there’s an easy way to install the profiles, but there isn’t, you just turn the main base around until hopefully you get the screws into the bars – it’s stupidly difficult due to the weight of the assembly and the bars that get attached in an area that’s not easy to access.
I suggest you put one screw underneath, keep it tight with the Allen key and then rotate the bar into place – then the second screw should slip in more easily. Do the same for the second axis.
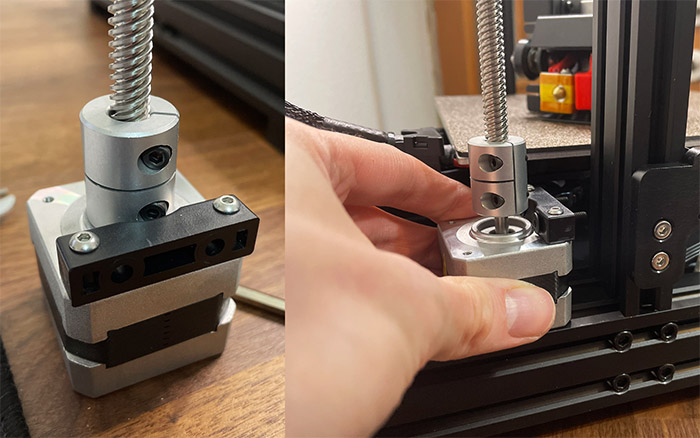
Then it’s time to prepare the rod and insert it into the Z-Axis motor kit. To do so, loosen the two screws aligned vertically, insert the rod and then tighten them back again. The manual doesn’t state it, but you do need to insert two screws into the plastic piece and attach the motor kit to the left Z-Axis profile. You won’t be able to after inserting the rod, so just unscrew the plastic piece, insert the screws and then attach the part to the profile.
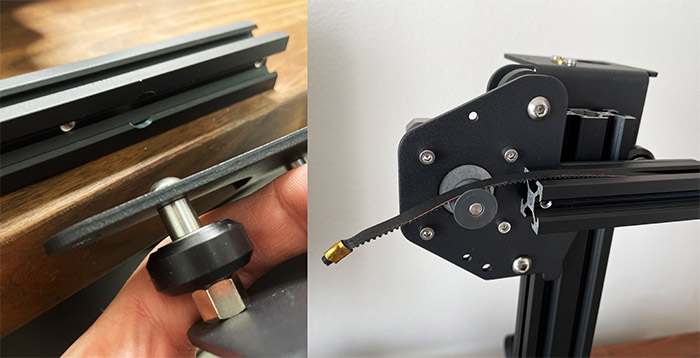
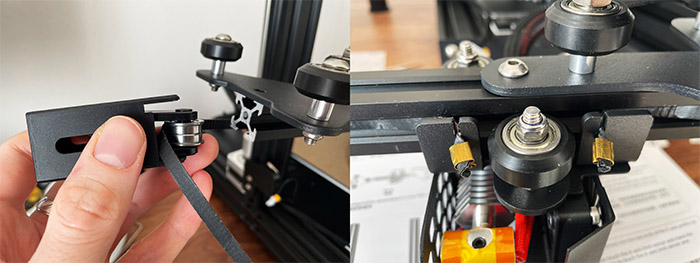
Now it’s time to take out the X-Axis profile from the box, insert it in-between the wheels of the passive block and then attach it to the bar using two M5x14 screws. Then, take the belt from the package and run it along the profile and around the cogwheel from the passive Z-Axis block. After that, take the extruder and insert the profile between its wheels, while keeping the belt in place. Immediately after, take the triangular Z-Axis passive block and attach it to the frame, but use only one screw, the one towards the inside of the frame.
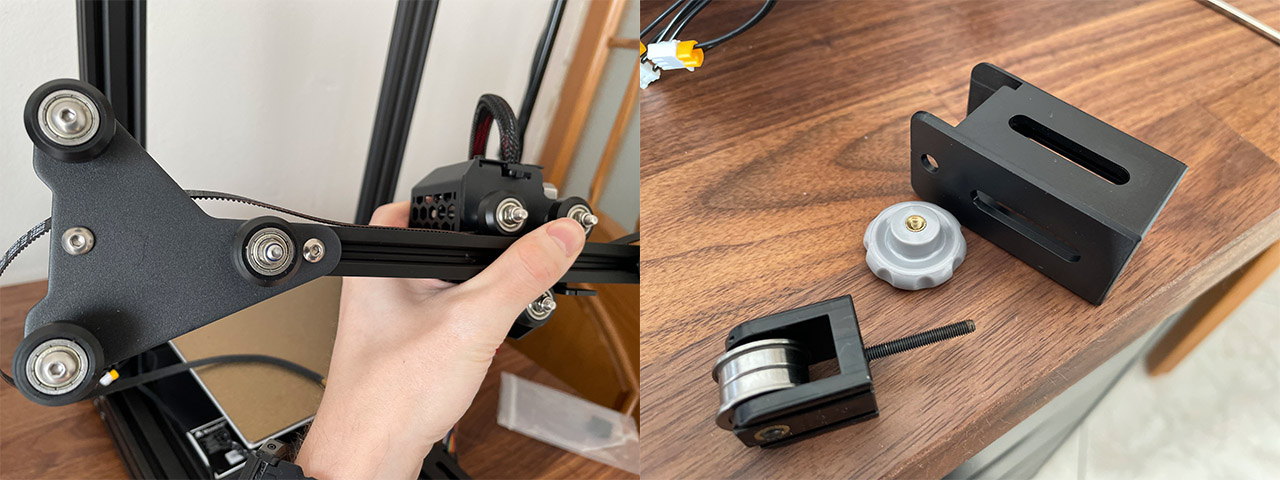
Now it’s time to install the X-Axis tensioner. You will need to completely disassemble it and then run the belt around the inner wheel. Position the plastic piece in a manner so it can enter the X-axis, align it with the screw holes and then attach it to the top of the X-Axis profile (you can put the wheel back, but don’t tighten it). To finish up with the belt, take one end and insert it into the dedicated canal from the extruder and do the same for the other end as well.
Then, it’s time to put the entire X-Axis through the two Z-Axis bars: you will have to align it with the rod and then rotate it into the dedicate hole from the X-Axis frame. After you manage to lower the X-Axis a bit, you can tighten the belt using the wheel from the right side: don’t over-tighten it, just make sure there’s a bit of tension. Do the same for the front-facing wheel.
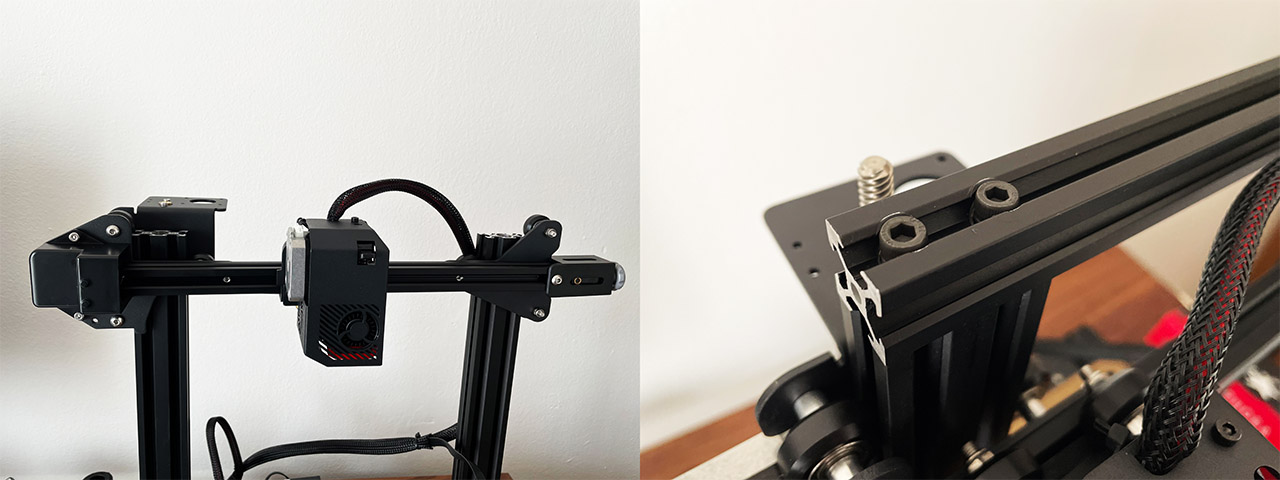
We’re not done because we now need to take the gantry profile from the package and attach it to the top of the Z-Axis profiles using four M5x35 screws (check the slightly recessed areas for the screws – that should be facing up). You will find two profile covers in a plastic bag, so use them on the left and right side of the gantry.
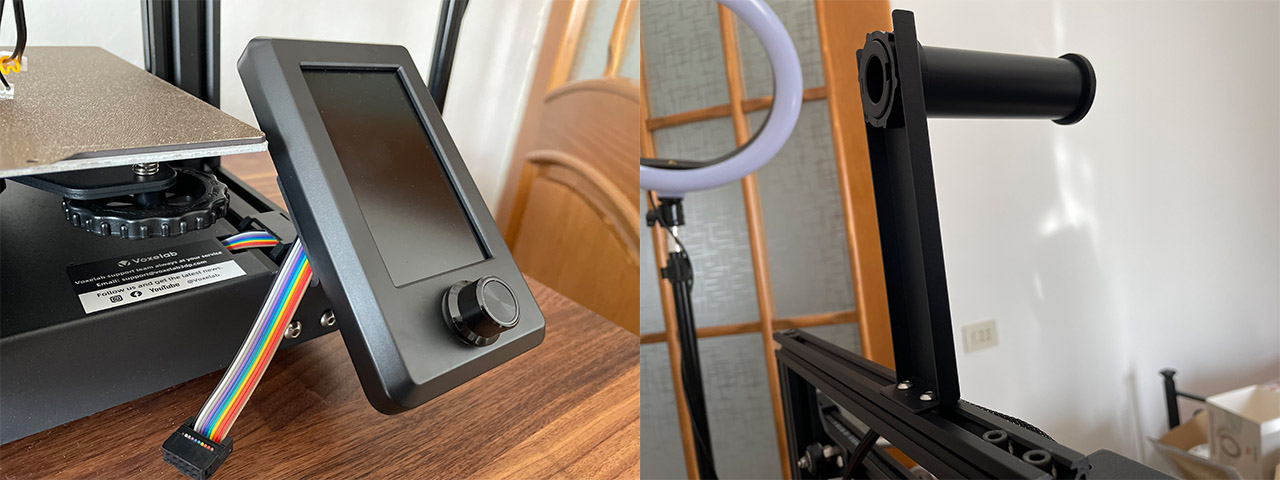
Afterwards, take the display from the package and attach it to the frame; now take the spool holder, assemble it and choose where to place it at the top. Insert the two M4 T nuts, rotate them and, using two hexagon socket button head M4x6 screws, attach the holder at the top of the X-Axis frame. Lastly, attach all the wire connector, as well as the power cable.
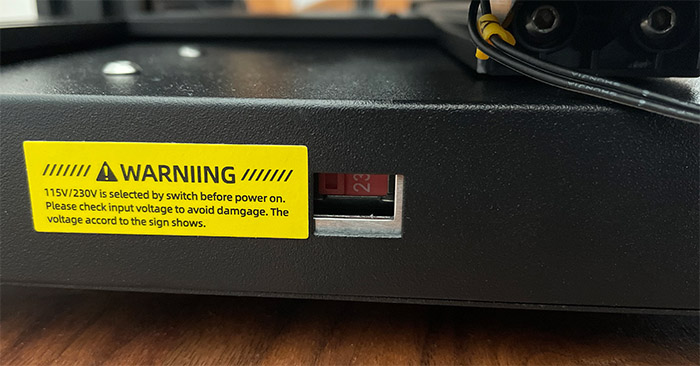
As I mentioned in the beginning, make sure to switch the voltage to the correct value for your country, otherwise you can fry the circuits. Turn the 3D printer on and prepare for the leveling.
Note: Inside the package, there are lots of spare parts, as well as multiple nozzles.
Leveling up the bed
Voxelab has one of the weirdest leveling processes out there and that’s because there isn’t a properly dedicated software section for it, not like on the Longer LK5 Pro. Before anything else, you need to take the small wrench to tighten the knobs underneath the bed if it’s wobbly. Then, in order to level the bed, you need to select the Control from the display and then Auto Home to put the extruder in the default position. Then, click on Disable Steppers.
That’s all the help you’ll get from the software, so you’ll have to manually move the extruder and the bed, and adjust it accordingly by rotating the four knobs underneath the bed. Use a piece of paper and the hotend should only slightly scrape the paper. That’s when you know that the leveling has been properly done. I need to mention that the Voxelab uses large knobs for leveling which is excellent.
The Display
After powering on the Voxelab Aquila S2, the display will turn on and it will show four tabs, as well as the current nozzle and hotbed temperature. The first tab is called Print and here you can access the models that are on the microSD card.
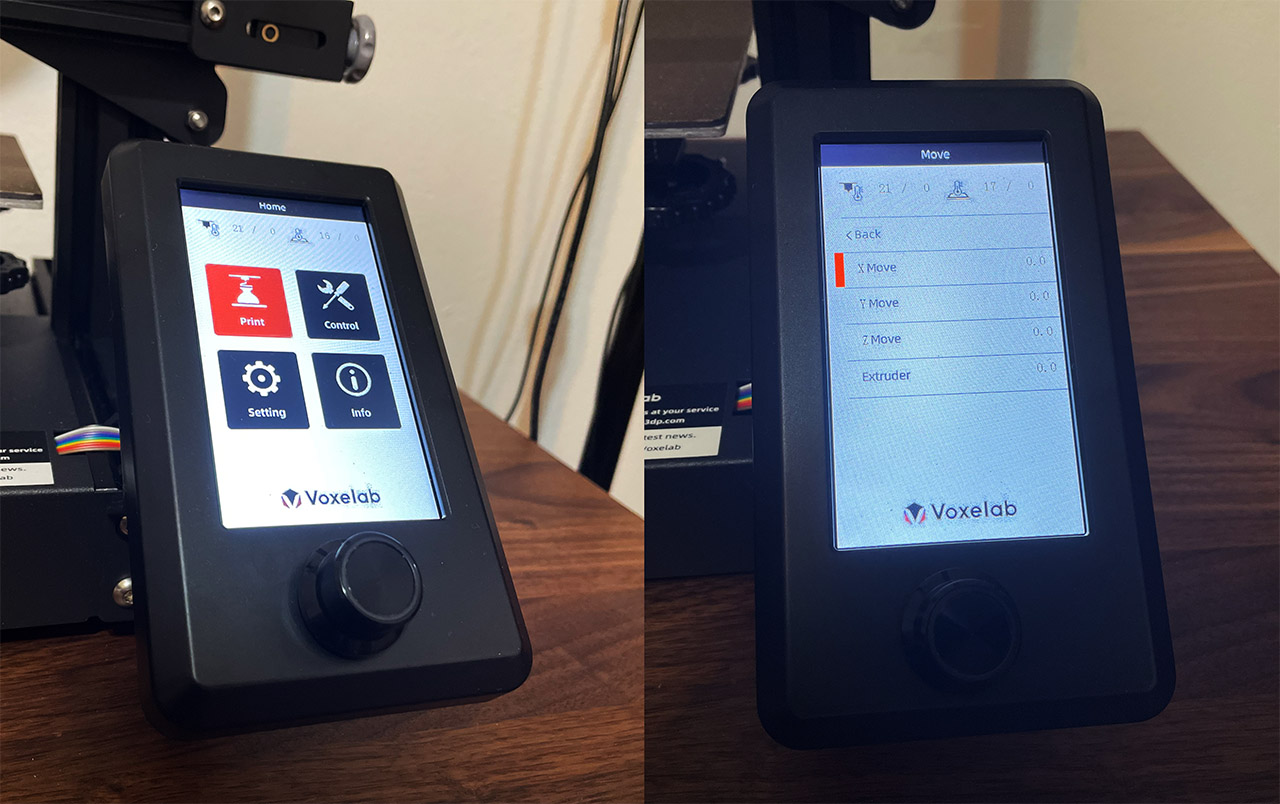
The second tab is called Control and here, you can adjust the position of the extruder, you can Preheat for ABS or PLA, load or unload the filament and cooldown the extruder. The third tab is called Settings and it allows you to set the Temperature for the Nozzle, Hotbed, set the Fan Speed, as well as set parameters for PLA and ABS, set the Motion settings (Max Speed, Max Acceleration, Max Corner and Steps per mm), change the Language, Read and Reset the Configuration. Lastly, there’s the fourth tab which will shows some general Info about the device. The knob is very satisfying to operate, but when pressing it (for the Enter function), the entire display moves and I am not really a fan of the high pitched sound it makes when an action is being registered.
Voxelab Aquila S2
-
Pros
- Direct drive extruder: up to 300 degrees C
- Can handle TPU filament with ease
- It's relatively fast and, when using PLA, it runs surprisingly silent
- Very little vibrations + solid base
- Magnetic PEI plate
Cons
- No filament runout sensor
- No dedicated bed leveling adjustments in software
- Putting everything together can be made simpler with clearer instructions and especially if the screw busts are labeled
Mark is a graduate in Computer Science, having gathered valuable experience over the years working in IT as a programmer. Mark is also the main tech writer for MBReviews.com, covering not only his passion, the networking devices, but also other cool electronic gadgets that you may find useful for your every day life.