
The X-Sense SC06-W is a smoke and carbon monoxide alarm (or detector) that was designed to not only quickly let you know that there’s fire and/or rising levels of CO in your house, but to also inter-connect with other wireless X-Sense from the Link+ line.
The X-Sense SC06-W is not an IoT device, so don’t expect more than just the aforementioned inter-connection, but that’s more than enough for most people that simply want this device to work as intended with as little additions as possible. This way, less things can go wrong (then again, the Nest Protect unit that I installed years ago is still going strong, so complex doesn’t always mean low quality). In any case, I have tested the XS01-WR some time ago and, besides the additional CO sensor, the concept behind the X-Sense SC06-W is very similar.
There’s the photoelectric smoke sensor, the possibility to add up to 24 Link+ X-Sense smoke alarms and, even if not as compact as the XS01 line, the SC06-W has a somewhat minimalist design, as to blend in as much as possible with the ceiling (it’s white and it has no large bright LEDs). I noticed that the manufacturer has also included a non-removable battery that should last about 10 years, the same amount as the device itself and there’s the UL 217 & UL 2034 compliance, which should not be mistaken to certification. That being said, let’s put the X-Sense SC06-W to the test and see how well it performs in case it’s truly needed (fire or CO).
Design and Build Quality
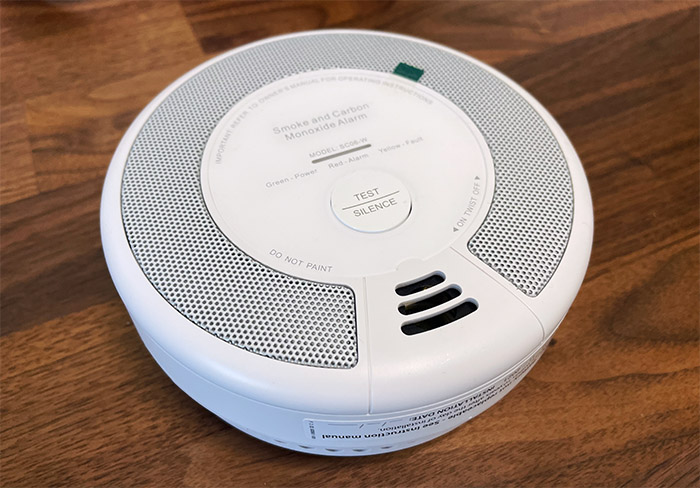
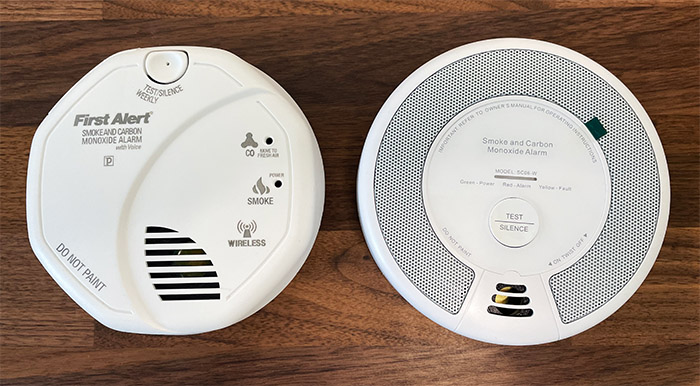
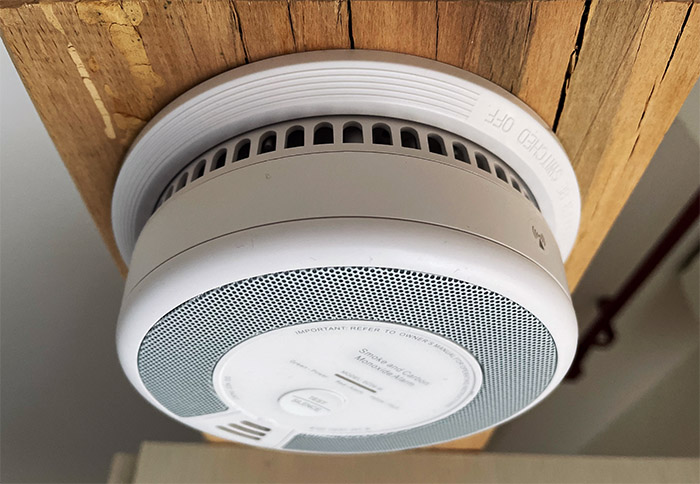
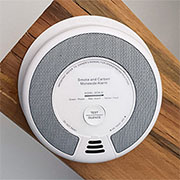
When I tested the XS01-WR and the XS01-WT, I saw that the manufacturer focused on making them very compact, and that’s not really the case with the X-Sense SC06-W. That’s because the CO sensor needs far more room, so the SC06-W did end up being as big as the other players from the market, such as the Nest Protect or the First Alert SCO501CN-3ST. Indeed, at 5.7 x 5.7 x 2.0 inches (or 14.6 x 14.6 x 5.1 cm), the smoke and CO detector will most likely stand out when mounted on the ceiling. And yes, X-Sense has covered the device by a white matte finish, while the grille and the written letters have a more grayish tone.
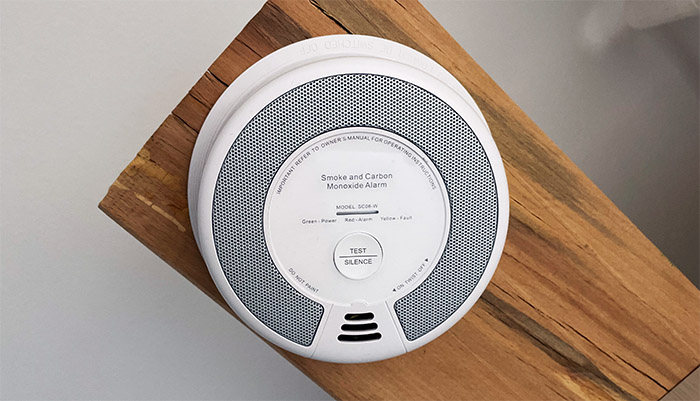
There is also no large LED, so the X-Sense SC06-W should remain fairly neutral in terms of design. The aforementioned grille almost completely surrounds the top side of the device, but its role seems to be purely aesthetic because I opened the case of the smoke alarm and the area where the smoke or the CO enters is on the sides. The speaker also has its dedicated area, so yes, the grille is there for design only – Nest did the same. At the top of the X-Sense SC06-W, you will also find a very narrow LED which will light up green when the device is powered on, it will flash red when the sensors are triggered and it will flash yellow if the smoke detector encounters an error (or when it was silenced). Next to the LED, there’s a circular Test/Silence button, so you can periodically test the device and to silence it in case of a false alarm.
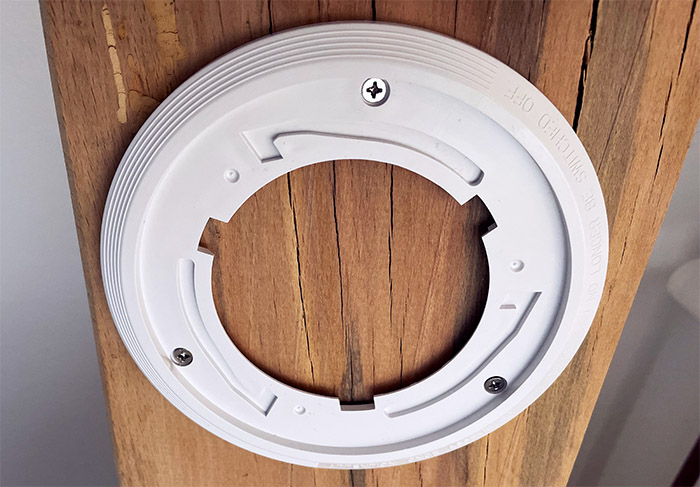
Further down, there are three holes for the speaker which can get quite loud, reaching more than 85dB. Turn the X-Sense SC06-W upside down to see the three hooks for the mounting plate, as well as a small switch. This switch is a bit peculiar because it can permanently disable the smoke and CO alarm. By default, it’s set to Off, so, to turn it on, you do need to move the switch to the On position.
But there is a third option, called Dis and yes, there is a sort of guard to supposedly protect it from being easily accessed, but it’s just a soft piece of plastic.
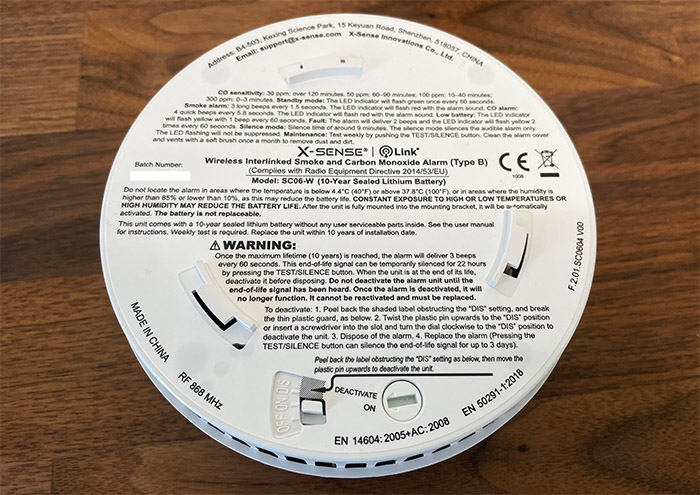
But there is an additional layer of protection to prevent you from accidentally pushing the switch to Dis and permanently disable the device. There’s a circular plastic screw head which you will also need to operate to allow the full movement of the switch. The idea is to shut down the device completely after 10 years, but I think that a recessed button that can be accessed with a metal pin would have been a wiser design choice. One other annoyance is that once I turned on the smoke detector, I couldn’t turn it back off. Lastly, I do need to mention the design similarities with the X-Sense SC06 (well, they’re actually identical), it’s just that the SC06-W gained the interconnection ability.
What’s inside the X-Sense SC06-W
The teardown process is not difficult, but you really shouldn’t open up the case of the device unless truly needed because not only will you lose the warranty, you can also risk damaging the alarm, thus rendering it unreliable. And you do want the device that may save your life in case of fire to work properly. That being said, I had to peel back parts of the label on the rear side to expose the four screws. After removing them, I could detach the bottom part of the X-Sense SC06-W and I could see the sensing chamber (where the smoke enters), the speaker and there were also some batteries.
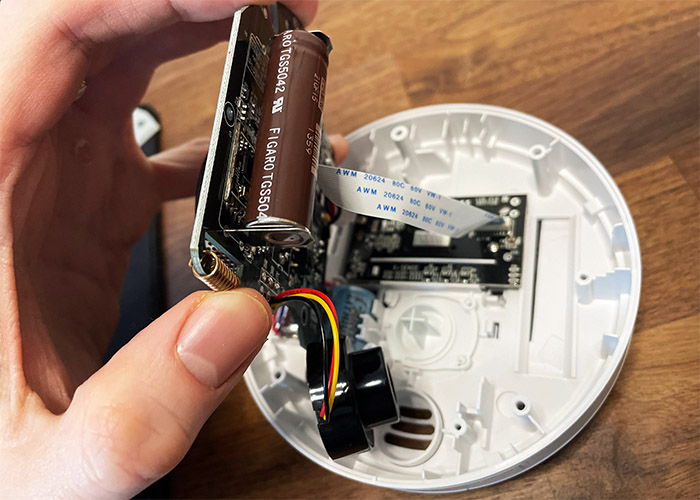
First, there’s the CR17450 battery which seems like it could easily be replaced, even though it seems to last for 10 years, so why bother? Then, there’s a CR2/3A 3V battery which also seems to power up the device. Lastly, I saw the Figaro TGS5042 which may look like a battery, but it’s actually the electrochemical carbon Monoxide sensor.
An interesting thing that I noticed is that on the board both the SC06-W and the SC07-W had a check mark next to them and there was a piece of plastic that had carved SC07 on it, so it’s very possible that the X-Sense SC06-W is the same as the SC07-W on the inside. The latter does have a display, which the SC06-W does not.
The Installation
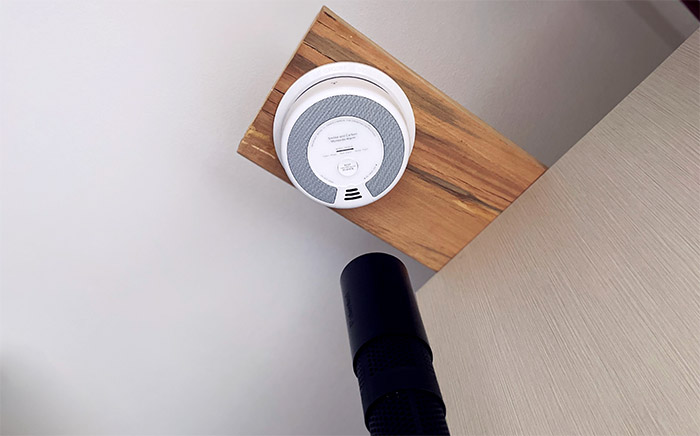
The X-Sense SC06-W comes with a circular bracket in the package, along with some screws and the first thing that you need to do is to choose the proper area for installation. It cannot be installed in the corners and you should leave at least 20 inches when you mount the smoke detector on the ceiling or at least 4 inches when the device is installed on the wall.
It’s also best to use one alarm for each bedroom and hallway, and make sure that in the kitchen, it’s not positioned above (or very near) the stove because you will get lots of false alarms otherwise. Since there is no need to connect it to some wires, simply install the bracket and then rotate the X-Sense SC06-W into place. The switch on the rear of the device will automatically move to On (and it doesn’t seem like you will be able to turn it off again). The X-Sense SC06-W was designed to be inter-linked with other wireless smoke and CO alarms from the Link+ line and yes, it does include the XS01-WR, so you can create a huge network of devices in your home that will trigger at the same time in case one unit detects smoke and/or CO.
By huge, I mean up to 24 wireless units at the same time, which is not a small number. In my package, I got three identical X-Sense SC06-W smoke and CO detectors which are already inter-connected, so I didn’t have to do anything else than just to install the devices in the right place. But, if bought separately, the pairing process is not that difficult. Take two units at a time, power them up and then push the Test/Silence button 4 times on one of the units. The horn will beep once and the LED will start flashing red. At this point, you need to quickly press the Test/Silence button on the second unit two times. The horn will sound once and the LED will start flashing red; afterwards the speaker will beep once on both units and this is the sign that the devices have been paired.

To add other units, you will need to chose one of the two units that are already interlinked, press the Test/Silence button four times and then press the same button twice on the new X-Sense SC06-W unit. Repeat the same steps to add as many smoke and CO detectors you want (up to 24).
The Features
The most important features of the X-Sense SC06-W are the two sensors, one for detecting smoke and the other for detecting rising levels of CO. And yes, the manufacturer has decided to use a photoelectric sensor for detecting smoke which works best at detecting smoldering fires.
This type of fire produces large particles which enter the sensing chamber located inside the smoke detector and, when the beam of light pointing away from the sensor is deviated by the particles, it triggers the alarm. It doesn’t seem that X-Sense has adjusted the photoelectric sensor to also detect fast-flaming fires (with finer particles) and I know that this was the ionization sensor specialty, but some serious progress has been made with the photoelectric technology as well, so hopefully, we’ll see it on future X-Sense devices soon. As for the CO detection, the SC06-W uses the Figaro TGS5042 electrochemical sensor (the same as I saw on the First Alert SC501CN) to accurately tell when the CO levels are rising in the room. The process revolves around the battery-shaped sensor that oxidizes CO to CO2 at one electrode and consumes O2 at the other end, so that there’s a signal current created that’s proportional to the amount of CO that’s detected in the vicinity of the X-Sense SC06-W.
The manufacturer mentioned that the SC06-W complies with UL 217 & UL 2034 standards, so it seems to have the required specifications (respects the EN 14604:2005, EN 50291 safety standards), but not the certifications themselves, so be aware that in some states, the building inspections may not pass if there are no UL-certified smoke and CO detectors. At the same time, I expected the X-Sense SC06-W to at least have a TÜV certifications, just like the SX01-WR, but I was unable to find any mentions of it.
Testing the X-Sense SC06-W
Before anything else, I need to talk about how I tested the smoke detectors that I analyzed so far. I actually have created a comprehensive guide on the best practices on how to properly test an smoke alarm without damaging it or risk starting a fire. And, as you may have guessed, you should never ever use fire to test the X-Sense SC06-W. That’s because you will most likely damage the device and it may not be immediately obvious, but the smoke particles will remain in the sensing chamber, making the smoke detector more prone to false alarms. Additionally, waving an object on fire underneath the detector may start a fire in the house, so just don’t do it.
Instead, you should periodically let the device do its internal tests and yes, it does seem that X-Sense is running actual diagnostic tests, so the entire process is not just for the show. In any case, to test how quickly the X-Sense reacts to smoke accumulation, I took a smoke can (aerosol that mimics the smoke) and I pointed it at the alarm, which was installed next to the ceiling.
This way, I checked its behavior at various distances from the device and how much smoke is actually needed to trigger the alarm (measured in seconds since I had no other way of quantifying it). The smoke can that I chose is from Sabre and I chose this brand because it has the option to elongate the neck, thus creating a more uniform smoke near the alarm, as you would get with real fires. So, no more than a foot away from the X-Sense SC06-W, I pushed smoke towards the device for about 1 second, 1 second and a half, and the alarm got triggered after 18 seconds. I need to mention that the other units that were connected needed a few seconds before starting sounding the horn as well (between 4 to 5 seconds, the response time wasn’t the same every time). Afterwards, I went lower, at about 2 feet underneath the device and I sprayed the artificial smoke for about 2 seconds and the alarm was quicker, sounding the horn after about 15 seconds. Lastly, I went even lower, at about 3 feet underneath the SC06-W and, after spraying for 3 seconds, the alarm got triggered after 10 seconds.
This means that even two seconds of smoke would have sufficed, so the X-Sense SC06-W is far more reactive than the XS01-WR (or the XS01-WT) which is definitely a great thing when dealing with actual fires, but it may also mean that it’s more prone to false alarms (which is why the position of the device is so important). I didn’t have the means to test the CO alarm, but X-Sense says that the alarm is set to start when there is an accumulation of 30ppm over 2 hours, 50ppm over 1 hour, 1 hour and a half, 100ppm between 10 and 40 minutes and 300ppm in less than 3 minutes.
The X-Sense SC06-W will start the horn for 3 long beeps every 1.5 seconds in case it detects smoke and 4 quick beeps if it detects CO. If you silence the alarm (don’t do it unless you running a specific test and know what you’re doing), the LED will flash red three times every 1.5 seconds in case of smoke, followed by yellow every minute and 4 times every (approx) 6 seconds in case of elevated CO levels, followed by yellow flashes three times every minute.
The Conclusion
X-Sense is slowly, but surely becoming a fiercer competitor to the already established brands (that have been developing smoke detectors for multiple decades) and the SC060-W does bring a few interesting (although not new) features to the table. There is the photoelectric sensor that’s quite reactive, far more than on the more compact X-Sense models and the CO sensor should work fine, since I’ve seen it on other devices as well. There’s also the ability to interconnect multiple devices even from different series, which, to a lot of people is a better option than being able to connect to a smart assistant (or app). Furthermore, the smoke and CO alarm is quite inexpensive, but I suppose that came at the cost of not being UL certified, only compliant.
X-Sense SC06-W
-
Pros
- Smoke and CO detection
- Photoelectric sensor
- The option to interconnect multiple devices, including from other series
- Easy to install
Cons
- The option to permanently disable the device is a bit strangely implemented.
- Can't turn off the device.
Mark is a graduate in Computer Science, having gathered valuable experience over the years working in IT as a programmer. Mark is also the main tech writer for MBReviews.com, covering not only his passion, the networking devices, but also other cool electronic gadgets that you may find useful for your every day life.