
The X-Sense XS01-WT can be considered the successor to the XS01-WR that I tested last year and, while at first glance, these two device seem identical, the new smoke detector has received a few upgrades to make it a far more worthy purchase. The XS01-WR was all about being an unobtrusive small puck that you could quickly install on the ceiling and then let it do its thing (detect fires).
| X-Sense XS01-WT | |
|---|---|
| X-sense.com | Check Product |
And that compactness factor has been kept with the XS-01-WT, but the manufacturer has also added a WiFi adapter inside the case so yes, we are now dealing with a smart smoke alarm. The interconnectivity with other XS01-WR devices has been dropped in favor of using a mobile application that will allow you to add up to 100 XS01 smoke alarms, but all will have to be from the WiFi-compatible series.
They clearly replaced the circuitry from the XS01-WR with the WiFi adapter in order to keep the XS01-WT just as compact and this lack of compatibility is a bit of a bummer for people that still use the previous gen smoke alarms.
I was happy to see that the new device is UL 217-complaint but it should not be mistaken for the UL certification, it just means that the XS01-WT was tested by a third-party and was found that it could receive the certification. The smoke detector does have the same ETL and TÜV approval, just like the X-Sense XS01-WR. That being said, let’s have a closer look at the X-Sense XS01-WT and see whether the newly added WiFi capabilities are enough of an incentive to upgrade your basic smoke detectors.
YOU CAN ALSO CHECK: THE BEST SMOKE DETECTORS OF 2021
Design and Build Quality
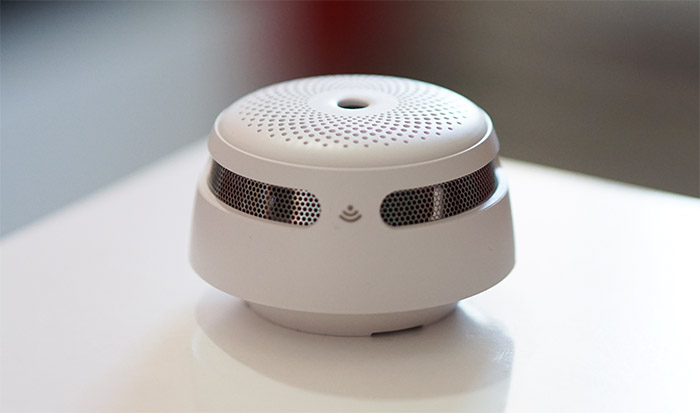
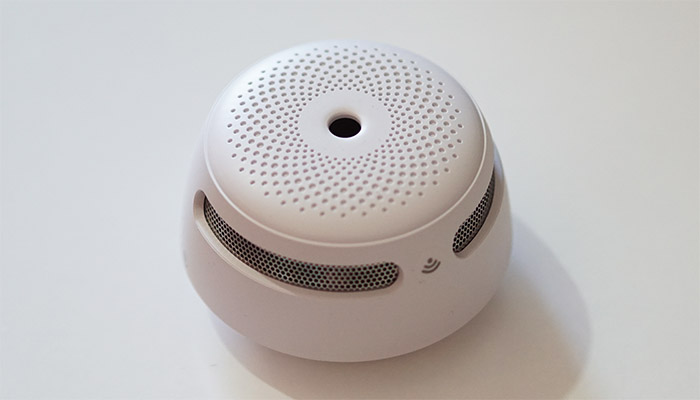
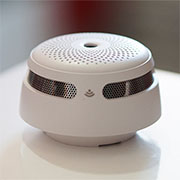
In terms of design, the X-Sense XS01-WT is pretty much identical to the XS01-WR, at least from the external point of view, sporting the same compact, puck-like look with a circular opening at the top and three larger cut-outs on the sides that expose a metallic inner chamber with punctured holes all around. The top is still very much similar to the Nest Protect smoke detector (the pattern that covers the upper section) and you can find the Test/Mute button on the side of the smoke alarm.
You need to press the button to run the self-test procedure from time to time to ensure that the device is still properly operational and, if the alarm is falsely triggered (and you’re absolutely sure about it), then you can press the button to silence the horn. The only notable new element could be the small WiFi sticker that also sits on the side of the device and can easily be missed if you don’t look for it. Inside the package, X-Sense has included a very small round bracket that can be attached to the ceiling or wall using two screws and, after connecting the XS01-WT, you will notice that the smoke detector sticks out a bit more than other devices from the competition.
It’s true that the X-Sense XS01-WT only has a 3.0-inch diameter and the matte white finish does make it blend in with the ceiling (or wall) up to a certain point, but the device is 1.9 inches tall, so it’s still going to be very much noticeable in the room. Although perhaps less than the far more flashier Nest Protect. Turn the smoke detector upside-down and the battery slot should be visible with the CR123A 3V battery already installed, but with the connector blocked by a transparent plastic tab (that you need to pull to enable the detector).
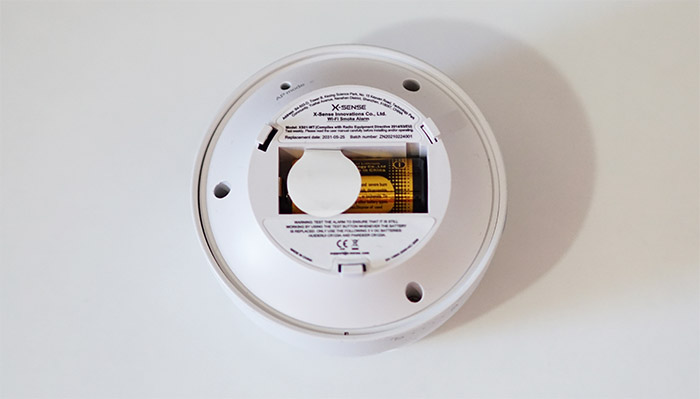
The manufacturer says that the battery should ensure that the XS01-WT will properly function for one year and the device itself should remain operational for up to 10 years. And that’s pretty much the standard with most other smoke detectors.
Installation
Just like the XS01-WR, the X-Sense XS01-WT is a battery-operated smoke detector, so the installation is very straight forward and it does not require any type of wiring. That’s why it can be done by pretty much anyone that can operate a screwdriver, but be aware that the position in the room is extremely important and it can make the difference in terms of seconds which can be quite a lot when in an emergency. That being said, it’s best to avoid putting the smoke detector underneath a stove or any other similar heat-generating appliances.
Also, it’s important to keep at least 20 inches from any nearby corner and the middle of the ceiling is considered to be the perfect spot to place the XS01-WT. The kitchen is not really the best place to have a smoke detector since you will experience a lot of false alarms in this room, which is why the hallways and the bedrooms are usually the better to have a smoke detector installed – you should also add a CO detector as well to make sure that you are protected from any gas leaks.
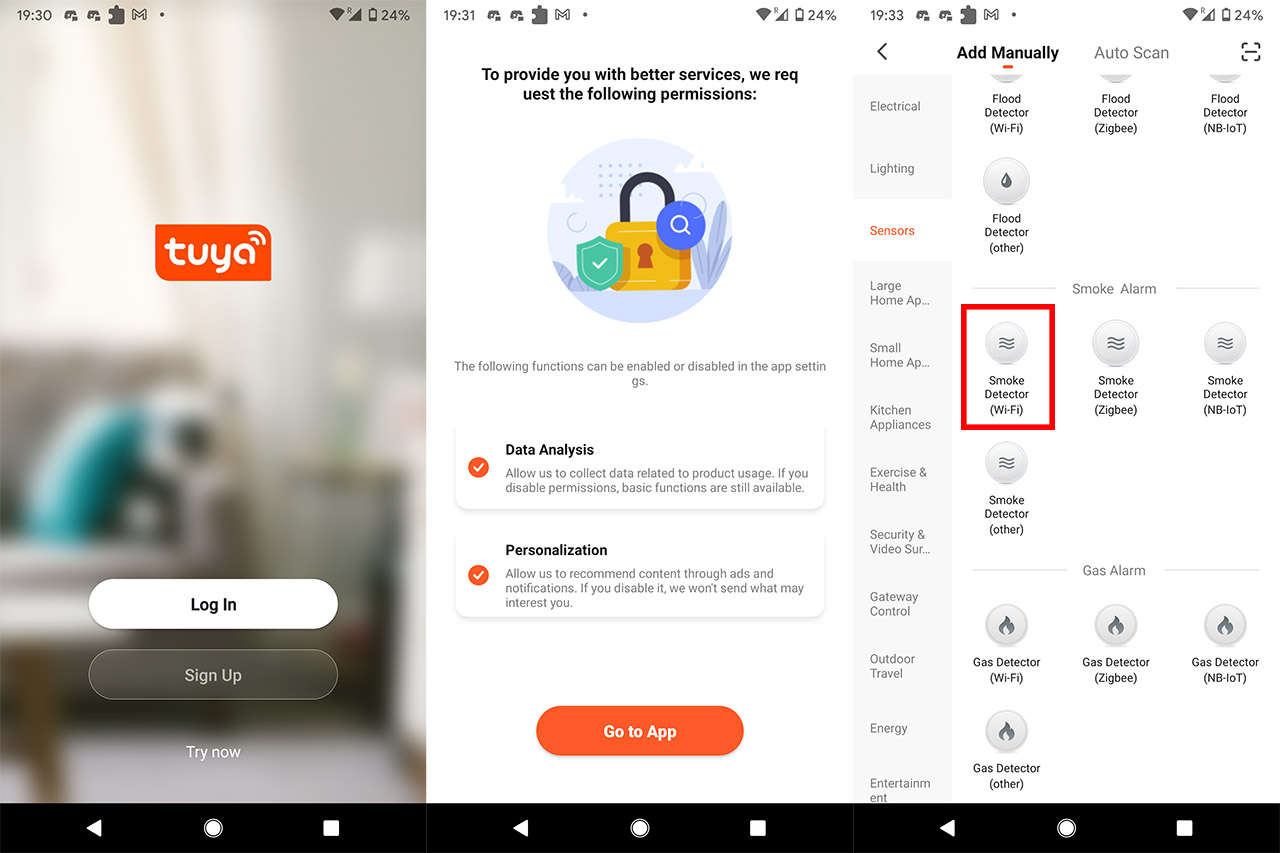
After you have mounted the bracket, pull the tab for the battery so that the Test/Mute button starts flashing blue. At this point, you should install the Tuya Smart app on your mobile device – you will have to agree with the terms to move forward and sign up for a new account, if you don’t already have one active (it’s going to require an email). Next, you’ll notice that the app will ask you to allow it to collect some data and to receive personalized ads and notifications – I disabled the latter, but you can disable or enable both. At this point, you should be able to Add a new Device and the app will ask you to make sure that the phone is on the 2.4GHz network because it does not support the 5GHz WiFi.
Afterwards, select the suitable device from the huge list – go to Sensors and select Smoke Detector (Wi-Fi) and then enter the SSID password. If the LED on the smoke detector has stopped flashing blue, press and hold for a couple of seconds until it starts flashing again. The X-Sense XS01-WT should now be successfully added to the app and you should also be able to run a Notification Test.
The App and the Features
The app interface is very simple and will display all the important information on the main page. You can see if there is any smoke alarm (there is also a log for any recent triggers), how much battery is left and, on the bottom right, you can access the Settings.
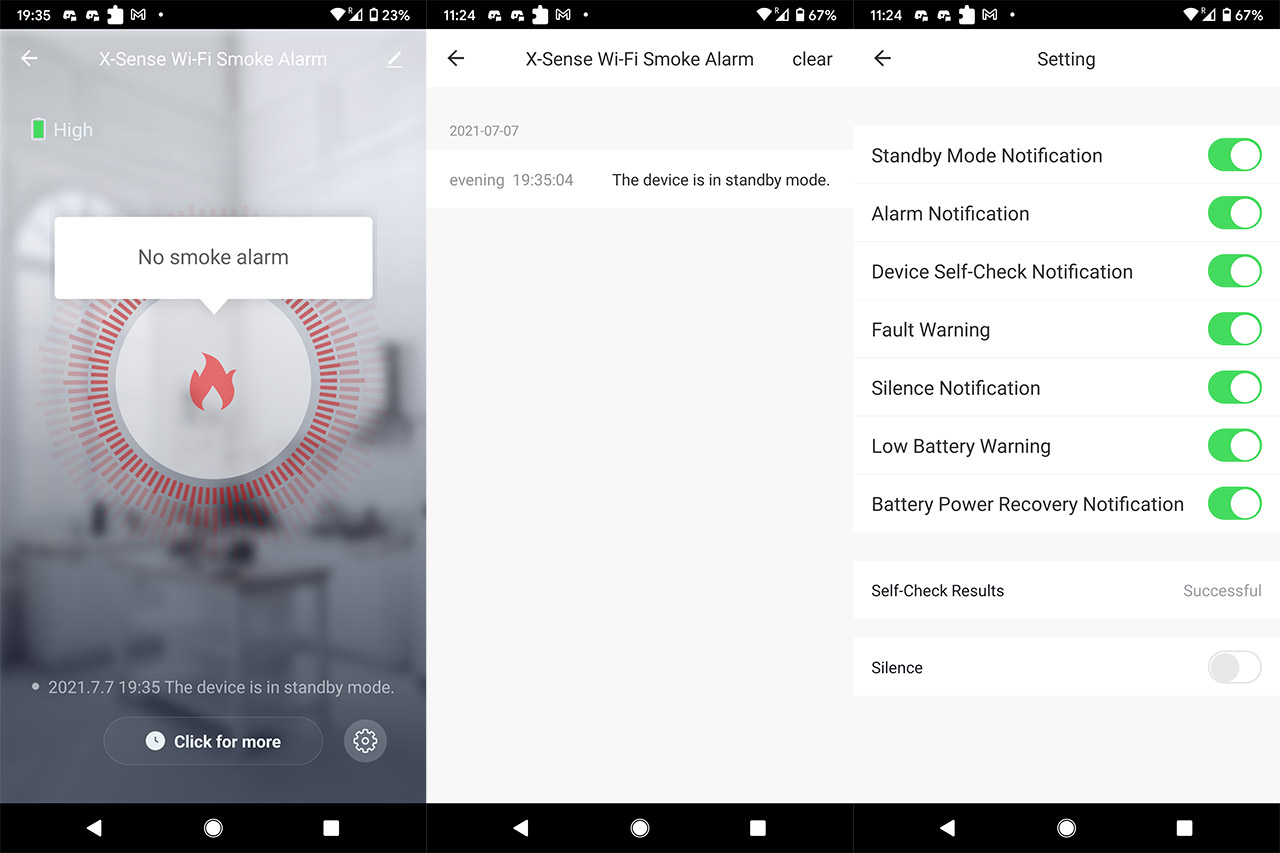
Here, you will be able to enable or disable the Standby Mode notification, the Alarm notification, the Device Self-Check, the Fault Warning, the Silence Notification, the Low Battery and the Battery Power Recovery Notifications. Additionally, you will be able to see if the Self-Check tests were successful and Silence the detector. That’s pretty much it and it’s enough for a basic, relatively no-frills smoke detector. The X-Sense XS01-WT does rely on a photoelectric sensor which works great at detecting smoke particles from smoldering fires. And the way it works is that it has a light beam pointing away from the sensor inside the chamber – as soon as the particles enter the chamber, the light gets reflected towards the sensor, thus triggering the alarm.
So, as you can see, it does not cover the fast flaming fires which were the specialty of the ionization sensor but, since it’s been removed from the market due to its impact on the environment (it does rely on a radioactive material for detection), the manufacturers have adjusted the photoelectric sensor to work great on detecting the entire spectrum of smoke particles. But, for the moment, the X-Sense will only do great with smoldering fires. I know that some manufacturers have added a CO detector in the same case of the smoke detector (Nest Protect or First Alert SCO501CN), you will have to purchase a separate one since the XS01-WT can only detect smoke.
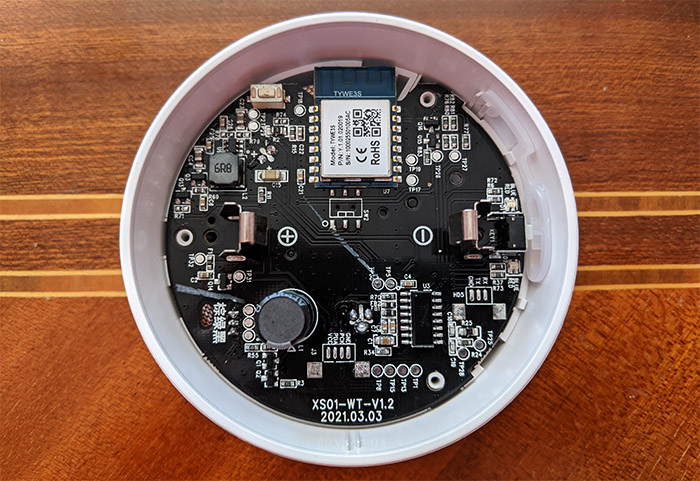
Note: I have opened the case of the X-Sense XS01-WT and I could see that the only difference from the XS01-WR is the TYWE3S low-power embedded Wi-Fi module (with a highly integrated wireless RF chip – ESP8266) which was developed by Tuya (yes, the same that provided the mobile application).
Reaction Test
I have tested a few other smoke detectors and wrote an analysis on which can be considered the best devices on the market, and yes, you should also regularly test your smoke detectors, but the professionals do say that you should never use real fire. So, that leaves you with the Test button which, if the device is built right, should test not only the circuitry, but also simulate a fire detection (check if the sensor is still functioning). Most known brands can be trusted in this regard and X-Sense does fall in this category, even if it’s younger than other more established (US-based) brands.
So yes, you should press the Test/Mute button and check if the device functions properly about once a week. Of course, I am not going to stop at only relying on the Test button, but will also have to check its reaction time, but since real smoke is out of question, I had to use synthetic smoke. I know that some people light up a piece of paper and then wave it underneath the detector ‘to make sure’ is still works, but this can easily become a dangerous situation and, in best case scenario, it can damage your device, leaving particles inside the chamber that will make it more sensible in the future, therefore more prone to false alarms.
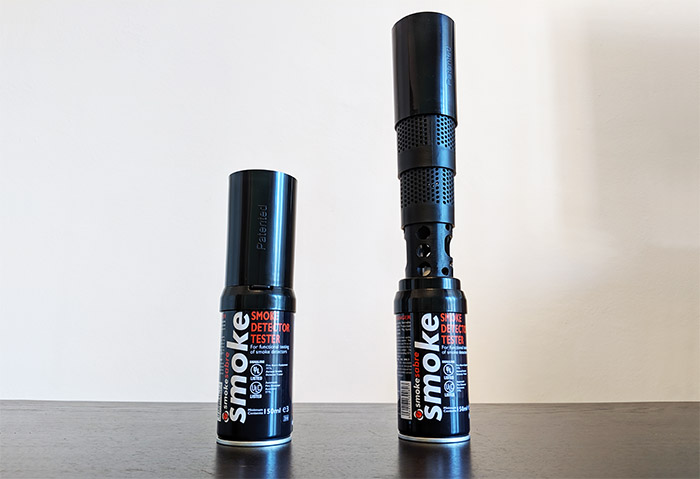
The synthetic smoke removes the dangers of setting your house on fire, but, if the test is done too often, the particles can build up inside the chamber as well – done less often, it’s a great way to check if everything is truly functioning properly. To test the X-Sense XS01-WT, I used the same Sabre fake smoke can that I used with other smoke alarms and, since the manufacturer has not changed anything except adding a WiFi module, the performance is going to be identical to the XS01-WR. Indeed, after sitting about 1 foot underneath the device and spraying the fake smoke for about 2 seconds has triggered the alarm.
After waiting 15 minutes to clear the smoke, I went down to about 2 feet and sprayed the smoke once again. It took about 4 seconds of spraying to trigger the alarm after about 5 seconds of smoke accumulation. I put the smoke detector a bit higher, at about 3 feet and sprayed the smoke once again. After I sprayed the fake smoke for 6 seconds, the alarm got triggered after about 5 seconds.
Don’t forget to also check out this comprehensive guide on how to test a smoke detector at home without damaging the device and without risking to start a fire.
Conclusion
One of the best things about the X-Sense XS01-WR was its small size and this has been ported to the XS01-WT as well, but, while it has gained the smart capabilities, it does not have support for the previous generation. So, you do get the possibility to use an app to check the status of the device, you also receive notifications besides hearing the loud horn itself (which is useful for when you’re not at home) and there is still the possibility to add multiple devices under the same umbrella, but only from the latest WT series. So, if you like the small form factor of the XS01-WT and don’t mind the newly added capabilities (although there is no compatibility with Alexa and/or Google Assistant), then the new X-Sense smoke detector is definitely worth checking out. Otherwise, the XS01-WR is still available for purchase.
X-Sense XS01-WT
-
Pros
- Small, compact case
- Photoelectric sensor
- Inexpensive
- Mobile application + notifications
- Has a decent reaction time to smoke
Cons
- Not compatible with XS01-WR
- Not UL certified
Mark is a graduate in Computer Science, having gathered valuable experience over the years working in IT as a programmer. Mark is also the main tech writer for MBReviews.com, covering not only his passion, the networking devices, but also other cool electronic gadgets that you may find useful for your every day life.