The Zyxel GS1920-8HP (v2) is a Cloud-ready Smart Ethernet switch which can be controlled and monitored in stand-alone mode or as part of a larger network (on multiple sites) using the Nebula Cloud management platform. As you may have noticed, the GS1920-8HP is part of a refreshed series of Ethernet switches, but, despite carrying the v2 in the name, it is actually the first 8-port switch from both series.
Still, despite the reduced number of ports, the lower PoE budget and the smaller size, the GS1920-8HPv2 was built to be an overall improvement over the switches from the first GS1920 family (just like the other members of the second generation), offering a more modern look, the full integration of the Zyxel NebulaFlex software, a way to quickly restore your device to the last custom default settings and, being the smallest of the bunch, it has also adopted a fanless design.
I have already seen the NebulaFlex management platform in action with the ZyXel NWA1123-AC HD wireless access point and it has proven to be a solid competitor to the Ubiquiti UniFi controller, so I think it will be interesting to see how the Ethernet switches are integrated within this environment and to focus towards the value that the GS1920-8HP v2 can bring to the small and medium businesses (and if it’s also suitable for a home network).
Design
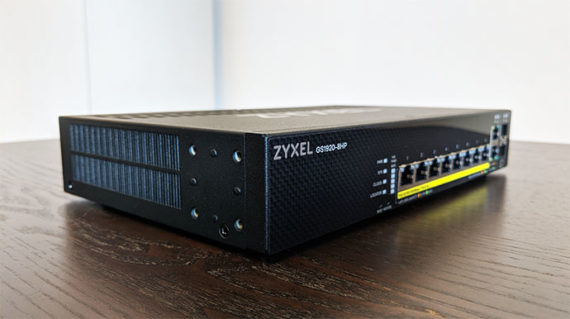
About 5 years have passed since Zyxel has unveiled its GS1920 series and, as expected for that time, PoE wasn’t the norm and all devices were large enough to not need rackmount ear extensions. The second generation of switches has mostly maintained the same size, but they all now support the PoE+ technology, including the new Zyxel GS1920-8HP which also manages to get away with a surprisingly compact case. The Ethernet switches usually focus towards the business sector, so it’s to be expected that the function over form approach would be the preferred one (there are some exceptions such as the Netgear Nighthawk S8000 or the Ubiquiti EdgeSwitch ES-8XP) which means that the Zyxel GS1920-8HP (v2) has a rectangular metallic body covered by a black matte finish (it is prone to smudges), but it’s the front side where Zyxel tries to differentiate itself from the other Ethernet switches from the competition by adding a carbon fiber coating. It doesn’t make a huge impact, but it is a nice signature design element for the new series.
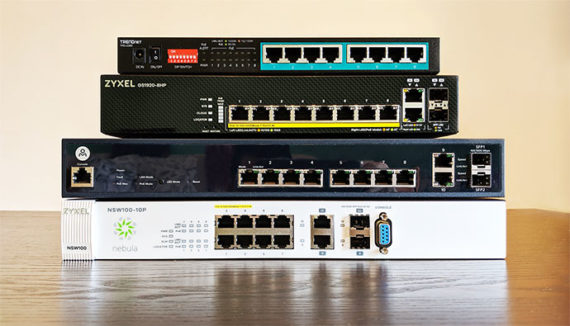
The size of the Zyxel GS1920-8HP is also a factor that needs to be taken into consideration because at its 10.51 x 6.38 x 1.73 inches, this can be considered a compact device, more than the two-year old Open Mesh S8 (which was already small enough for its time), but, I recently tested the TRENDnet TPE-LG80 and it was lot more compact than the Zyxel GS1920-8HP (about two times smaller).
So, how did TRENDnet accomplish that since the switch is also PoE and fanless? Well, first, it has an external power brick, while the GS1920-8HP has an internal PSU (you only need to use the cable provided in the box, so it is more rack-friendly) and secondly, the TPE-LG80 has a maximum PoE budget of 65 W, while the Zyxel switch has double the PoE budget, therefore needing more ways to cool the device and, since it has decided against adding a fan (the easy way out), it needs a lot of large alloy heat sinks (as can be seen in the Hardware section) as well as a multitude of ventilation cut-outs. For this reason, the GS1920-8HP is also surprisingly heavy for its size, weighing about 4.19 lb, which is a little under the Open Mesh S8 PoE Ethernet switch.
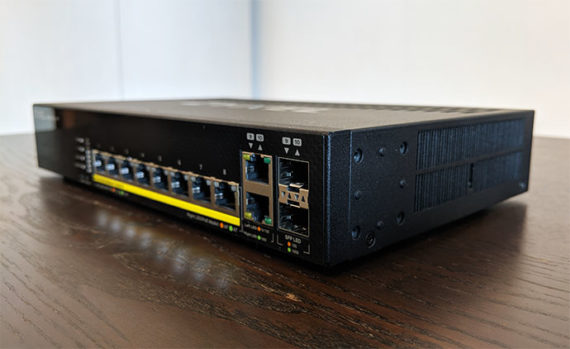
On top of the device, there is a subtle Zyxel logo (glossy black) and towards the rear side, the manufacturer has added two sets of fairly large ventilation cut-outs. On the left and on the right side, there are four holes (on each side) to allow you to add the mounting ears (they’re provided in the package – it will take 1U rack unit) and the rest of the area is covered by lots of narrow ventilation cut-outs (on the right side, there also seems to be a TTL Serial Console port). The rear side is mostly covered by the same type of ventilation holes interrupted by a 100-240VAC AC Input port, while a bit towards the left, there’s a Kensington slot and a M4 grounding screw (if you connect an outdoor device to this switch, you need to make sure that it is properly grounded by securing a 16 AWG (or smaller) ground cable). When I connected multiple devices and ran some tests, the Ethernet switch got a bit warm all around the body and it did get hot to the touch on the bottom side (next to the mounting holes).
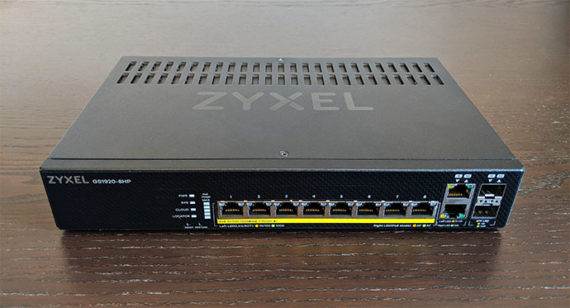
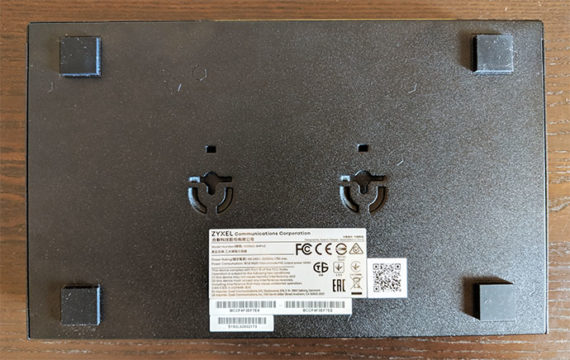
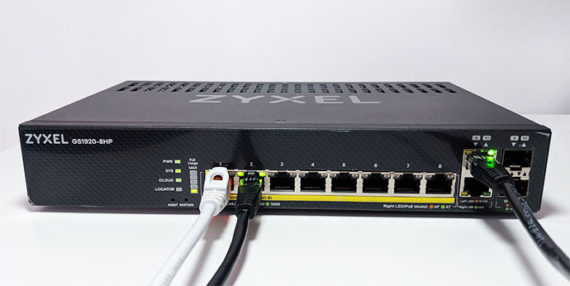
On the bottom, the Zyxel GS1920-8HP has four rectangular pads which have to role to keep the device into place (although its weight alone should be more than enough) and, in the middle, there are two areas with carved portions to allow you to mount the switch on the wall – the manufacturer suggests that it is better to mount it horizontally with the front panel facing down to ensure the best airflow (using the provided mounting ears, the switch can also be mounted under the table). The front of the device is the area with which you’ll interact the most, so here you’ll find the LEDs, a couple of buttons and the Ethernet ports.
From the left, there are four LED indicators: PWR (solid green means that the switch is powered on and solid amber indicates that the device is returning to the default factory settings; the LED will be flashing green when the switch returns to the last saved custom configuration settings), Sys (solid green indicates that everything is working properly, while solid red means that there is a problem with the switch; flashing green shows that the switch is rebooting and it performs self diagnostic tests), Cloud (if it’s off, then the switch is working in stand-alone mode; if the LED is solid green, then the switch is connected to the Nebula Control Center – blinking green shows that the switch is not yet registered to the NCC; if the LED is solid amber, then there is no Internet connection and it can’t connect to the NCC, despite being registered, a flashing amber LED indicates that the device cannot connect to the NCC and that it is not yet registered) and Locator (if it’s solid blue, then the device is uploading a firmware, otherwise, if it’s flashing blue, then it was configured to show its location in the rack – the default timer is set to 30 minutes).
The four LEDs are followed by another set of five LED indicators which show the status of the PoE (when it will reach its MAX Usage): from the bottom, the first three LEDs will light green and will each show 20% of the used PoE power (two LEDs means 40%, three LEDs will indicate 60% of the total PoE budget); the fourth LED will light yellow and will show you that the used PoE budget is above 60%, but still under 80%; lastly, the fifth LED will light red and will show that the PoE power budget exceeds 80% and, if the LED starts flashing, it means that less than 5% remains until the total PoE budget is reached.
Underneath the LEDs, there are two recessed buttons, one for rebooting the switch without turning the power off (the Reset button) and the other for returning the switch to factory default settings (press the button for more than seven seconds); the Restore button can also restore any custom saved default file if you press it for three to seven seconds (useful if you lock yourself out of the switch interface). Next to the LEDs, there is a monolithic block of eight Gigabit PoE+ Ethernet ports (the maximum PoE budget is 130W), each with its own set of two LEDs: the left LED will light green when the connection is made at 1,000 Mbps or amber if the connection is at 10 or 100 Mbps; the right LED will light green if the PoE port meets the 802.3at standard and will be amber if the ports meet the 802.3af standard.
Further to the right, there are two separate Gigabit Ethernet ports which do not support PoE and lastly, there are two SFP slots which can be used with compatible transceivers (one LED will be solid green or amber depending on the type of connection – 100 or 1,000 Mbps – while the other LED will blink when data is being transmitted).
Hardware
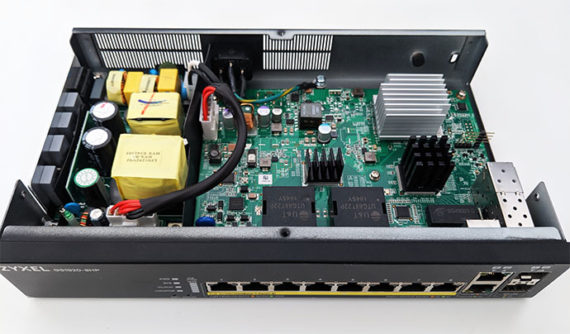
Inside the case, Zyxel has equipped the GS1920-8HPv2 with a Broadcom BCM59121B0KWLG PoE Controller, a Texas Instruments TPS23754 IEEE 802.3at PoE controller, 128 MB of DDR3L SDRAM (Nanya 1839 NT5CC128M16IP-DI), 32 MB of IC Flash Memory (Macronix MXIC MX25L25645G M2I-10G), a Trxcom SG48003 RJ45 (1000Mbps) microchip, a RealTek RTL8231 Fast Ethernet Phyceiver and 2x U&T UTG88T22P 1845Y quad port 1000 BAse-T Transformers (when compared to the older GS1900-8HP, the improvement is clear since it has double the RAM and double the available flash memory).
Unfortunately, I couldn’t remove the heat sinks which seem to be soldered to the board and, as you can see (in the image above), towards the left, there are the PSU hardware parts and it shows just how smaller the switch could have been if it didn’t include the PSU.
Note: The ZyXel GS1920-8HP features a switching capacity of 20Gbps, a forwarding rate of 15 Mbps, a packet buffer of 1.5 million bytes and 16K MAC address table.
Setup and Features
The hardware installation is very straight-forward, all you have to do is connect the provided cable to the back of the switch and to a power socket and the Ethernet switch will power on automatically (just like the OM S8, it doesn’t have On/Off button). Next, use an Ethernet cable to connect the switch to a router (in order to gain access to the Internet) and, after opening a web browser, go to the IP address of the switch. By default, it seems that the Zyxel GS1920-8HP has set its IP to static and it chose 192.168.1.1 which is most likely the IP address of your router, so you won’t be able to see the switch in the client list of your router.
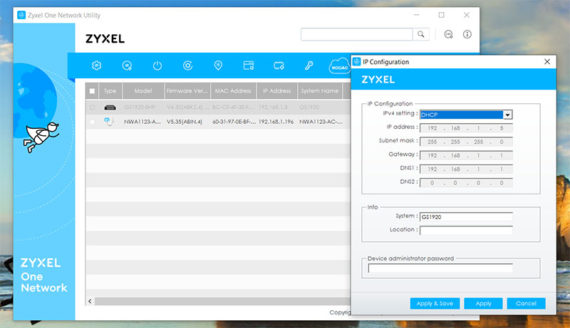
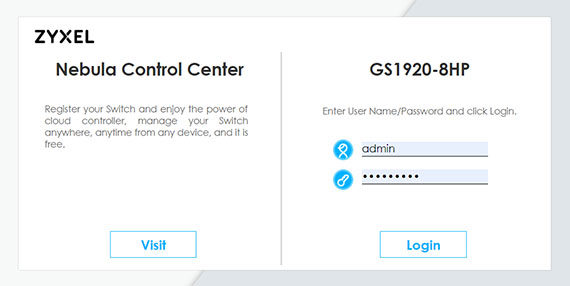
To remedy this, download and run the ZON Utility (available on Zyxel’s official website); the utility will immediately discover your Ethernet switch and you need to click on the IP Configuration tab: this will summon a new window where you will have to change the IPv4 setting from Static IP to DHCP (next, insert 1234 for the password and click Save and Apply). After this is done, re-enter the router’s UI and you’ll be able to see the switch with its IP address. Enter it into your browser’s URL section and you should be able to see two options: one to register the switch to the Nebula Control Center and the other to simply enter the username and password. The first option is going to adopt the switch to the Nebula Cloud while the second allows you to configure and maintain the device in stand-alone mode – for now, I chose the latter.
To enter the UI, I inserted admin/1234 for the username and password and I was greeted by a slightly dated-looking interface (be aware that if the switch is connected to the Nebula Cloud, you won’t be able to access the stand-alone options). The Menu on the left allows you to access the Basic Setting where you can see the System Info (includes the CPU and Memory Utilization, as well as the Hardware Temperature Monitor), perform a General Setup (includes setting the System Name, the Location, the Time Server IP Address and more), the Switch Setup (allows you to choose between 802.1Q and Port Based VLAN, set the Aging Time for MAC Address Learning and ARP, set the Generic Attribute Registration Protocol Timer and configure the Priority Queue Assignment, a feature which allow you to map a specific priority level – can be up to 8 – to eight physical queues), the IP Setup and the Port Setup (activate or deactivate specific ports, set the type of speed/duplex, enable Flow Control and select the 802.1p Priority level – it is related to the Switch Setup Priority Queue Assignment). The Flow Control feature has the role of preventing network congestion by matching the transmission of signals to port’s available bandwidth.
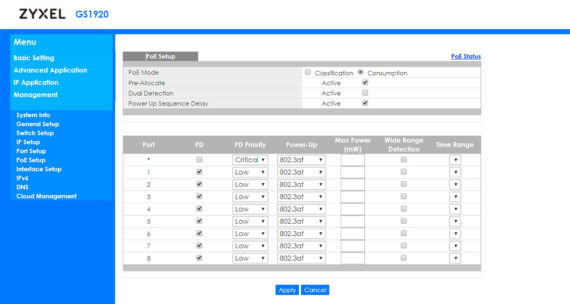
Under the Basic Setting, there’s also the PoE Setup (here, you can choose between Classification and Consumption PoE Modes, the former giving enough from the PoE budget that every newly connected device will be fully powered – the devices with a lower priority may not receive power at all – the latter ensures that every device receives some power from the PoE budget, but it may not match the device’s requirements), the Interface Setup (at the moment, it only supports VLAN for IPv6), IPv6 (allows you to configure the IPv6 Interface), DNS and Cloud Management (if you want to switch to the Nebula Cloud).
Underneath the Basic Setting, there is the Advanced Application section which contains the VLAN configuration (Static VLAN, Port VLAN Trunking, Subnet or Protocol Based VLAN, Voice VLAN and MAC Based VLAN), Static MAC Forwarding, Static Multicast Forwarding (forward streaming or control frames to specific ports), Filtering (MAC address port filtering) and the Spanning Tree Protocol: here, you can configure the Rapid Spanning Tree Protocol (useful for removing network loops), the Multiple Rapid Spanning Tree Protocol (this is a feature developed by Zyxel and it allows you to create more than one spanning tree, which operates independently, and assign ports for each tree) or the Multiple Spanning Tree Protocol.
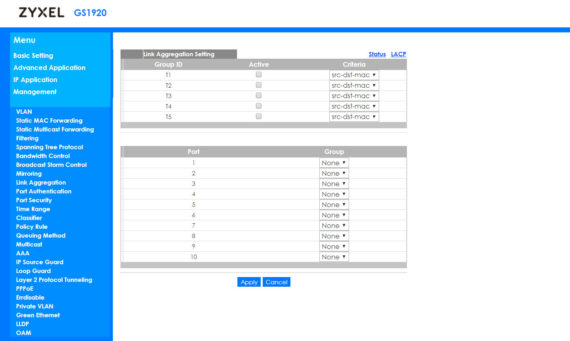
Underneath the Spanning Tree Protocol, there’s the Bandwidth Control (adjust the maximum bandwidth for incoming or outgoing traffic on one or more ports), the Broadcast Storm Control, the Mirroring (port mirroring), the Link Aggregation (allows you to bind multiple physical ports into a single logical higher-capacity link – it supports the LACP port trunking), the Port Authentication (802.1x and MAC authentication), the Port Security (only the packets with learned MAC addresses can pass – the switch can learn up to 16K MAC addresses), Time Range and the Classifier which allows you to configure the QoS – sort the traffic and configure Policy Rules.
Zyxel GS1920-8HP
Pros
- Fanless design = completely silent
- Eight PoE Ports (130W)
- Offers standalone and Cloud Management
- Lots of advanced, enterprise-type features
- Has a button to load a previously saved configuration
Cons
- The device runs a bit hot
- Lacks a Power On/Off button
- The UI is still not really consumer-friendly

Mark is a graduate in Computer Science, having gathered valuable experience over the years working in IT as a programmer. Mark is also the main tech writer for MBReviews.com, covering not only his passion, the networking devices, but also other cool electronic gadgets that you may find useful for your every day life.

