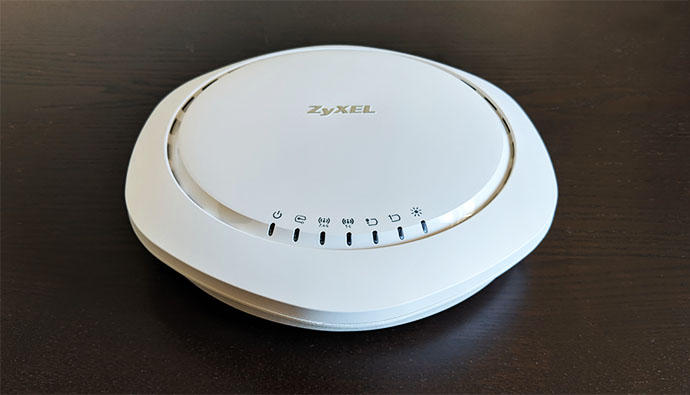
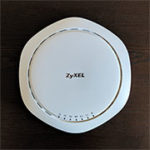
The Zyxel NAP303 is part of the Nebula Access Point (NAP) series, capable of handling a large number of clients, offering an optimized wireless experience thanks to the Load Balancing, Dynamic Channel Selection and Smart Client Steering and, using the Smart Antenna technology, it adjusts the signal transmission patterns to ensure that the interference are kept to a minimum regardless of the environment.
Unlike the stand-alone wireless access points, the NAP303 is able to be remotely configured and monitored alongside multiple other access points (as well as multiple switches and gateways) using the Nebula Control Center but, when compared to the NebulaFlex APs, such as the NWA1123-AC HD, the NAP303 has a very limited stand-alone user interface, so, if you aren’t interested in using the Cloud management software, then the NebulaFlex series may be more suitable for your needs.
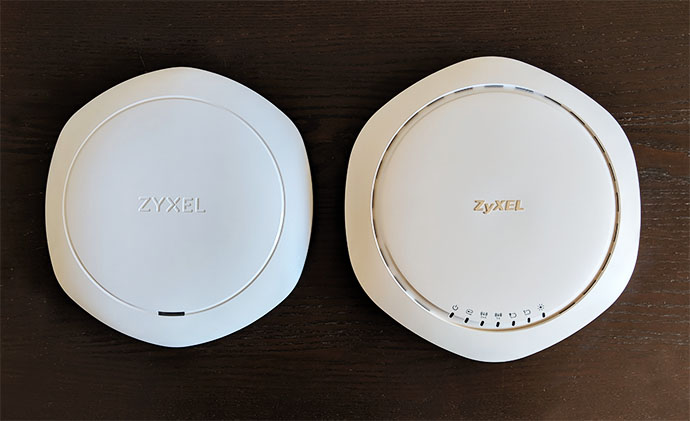
Although from the appearance point of view, the NAP303 wireless access point is pretty much identical to the WAC6503D-S and is very similar to the the NWA1123-AC PRO, there are some fundamental differences in terms of both internal hardware and performance (the NAP303 has less power draw and a better WLAN maximum throughput than the WAC6503D-S and it has six embedded smart antennas instead of the dual-optimized internal antenna of the NWA1123-AC PRO). That being said, let’s have a closer look and see how versatile can the Nebula Cloud management be when using the Zyxel NAP303 along other Zyxel devices and if a Cloud-only solution is better than the on-site management.
Design
Being an alternative to the wireless router, the gateway + access point combo is more common in the enterprise or SMB offices than inside a home mostly due to convenience (two devices instead of one), the advanced features or due to the usually higher cost, but a decentralized solution has always been the better option since it’s easier to update parts that are either discontinued or simply broken. This means that the design of the access point can be considered more industrial, but thankfully, its place is usually on the ceiling or on the wall, so a minimalist white case is the generally preferred option.
The Zyxel NAP303 shares the same design with the WAC6503D-S which means that both feature a relatively large hexagonal case entirely covered by a white matte finish and, similarly to the NWA1123-AC HD, the bottom side is made of a zinc alloy, while the top part if made of hard plastic. When I tested the Zyxel NWA1123-AC HD, I found that it’s one of the largest access points available (when put next to the Ubiquiti UAP-AC-PRO or Open Mesh A60), but the NAP303 is actually a bit larger, measuring 9.28 x 8.95 x 2.43 inches.
It still resembles a flush mount appliance and despite its size, it will fit in with the rest of the room when mounted on the wall or ceiling (the manufacturer has included a mounting kit inside the package which includes a couple of screws and a very interesting spring-operated rectangular bracket). If you want to keep the AP grounded, Zyxel has included four small circular silicone feet that you can add in the designated areas from the bottom of the device which should ensure that it doesn’t move around on your desk (the weight will also help a bit in this department – it weighs 2.17 lb).
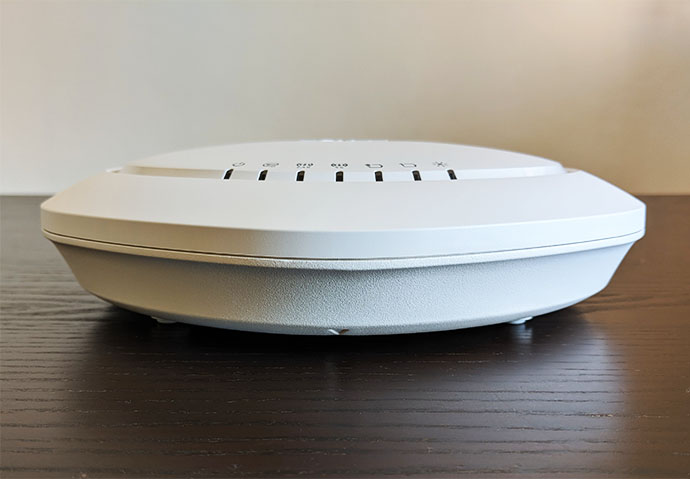
On the top of the case, there’s a narrow circular canal with lots of ventilation cut-outs to help keep the internal temperature in check and that’s pretty much all the steps that Zyxel has made to ensure a proper airflow which is a lot more than on most access points (the UAP-AC-PRO is completely sealed) and it’s also more than on the NWA1123-AC-HD which relies solely on the zinc alloy to keep itself cool. For this reason, the NWA1123-AC HD did fantastically well during the fall, but after summer came, there are some hotter spots on the bottom, something that doesn’t really happen on the NAP303 which was only slightly warm (on the bottom of the case) even when put under some stress.
On the top of the device, underneath the Zyxel logo and within the circular canal, there are seven LED indicators to show the status of the system: from the left, there’s the Power indicator (solid green indicates that the access point is ready to use and solid red indicates that there is a system failure; slowly flashing red indicates that the AP is booting up, but if it’s flashing fast, then the device is undergoing a firmware update), the Management LED (if it’s solid green, then the device is managed by NCC, but, if it’s slowly blinking green, then it’s connected to the NCC, but not yet registered; a slow blinking amber LED indicates that the access point is searching for the NCC), the WLAN 2.4 and the WLAN 5 GHz LEDs (on means that the WLAN is active), the Uplink LED (the LED is going to be amber if the connection is made at less than 1Gbps and it will be green if it is made at 1Gbps; the LED will flash when the AP is transmitting data), the LAN LED (functions in a similar manner to the Uplink LED) and the Locator LED (it will flash white to help you locate the access point – useful if you have deployed more than one such devices).
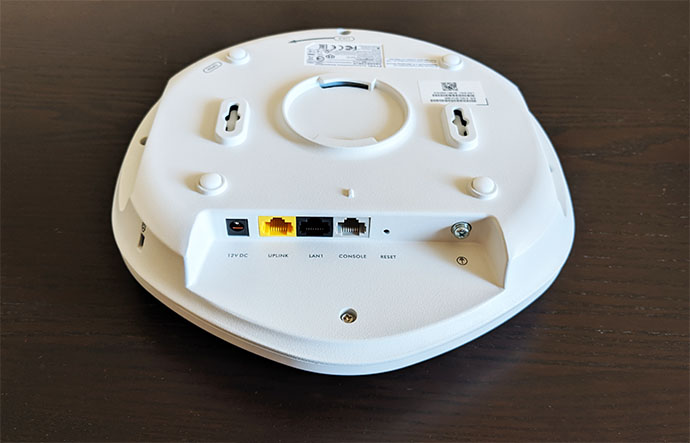
I will always find the LED array approach the superior and more intuitive way of showing the status of an access point instead of the single LED indicator that flashes a specific color (which can mean anything). On the bottom of the Nebula access point, besides the four feet and the mounting areas, there is a carved-in area where you can find the 12V DC Power connector (if you don’t want to use a PoE switch, the power cord is not provided in the package), an Uplink port (use this port to connect the AP to a PoE switch – it supports 802.3at/af PoE standards), a LAN1 port (useful if you want to connect any device via cable directly to the AP), an RJ-45 serial Console port (to run a terminal emulation), a recessed Reset button (press and hold it for about 10 seconds, until the Power LED starts flashing to return the device to factory default settings) and a grounding screw.
Hardware
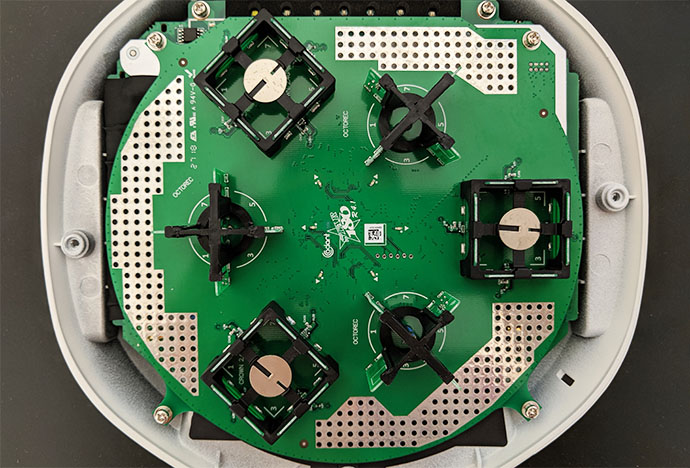
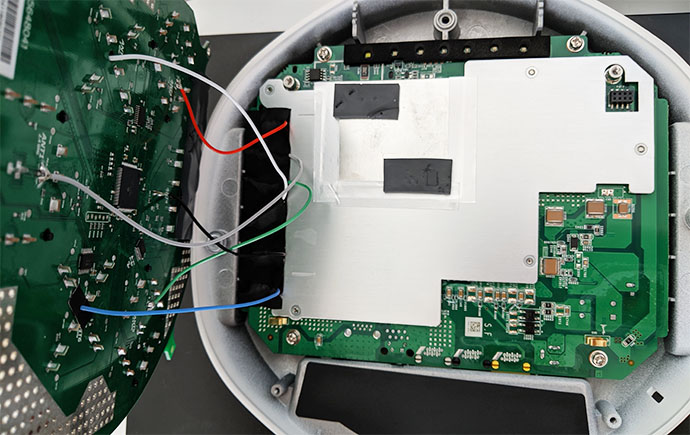
After I opened the case, I could immediately notice the strange antennas positioned on the top PCB and, after further investigation, it seems that the internal hardware of the NAP303 is identical to the WAC6503D-S (as FCC ID seems to suggest), so I didn’t have to go through the hassle of disconnecting the two PCBs from each other and removing the heat sink (which I’m pretty sure is soldered to the bottom PCB).
This way, I could identify a Qualcomm Atheros QCA8334-AL3C E56548-2B L2 Gigabit switch, 128 MB DRAM Nanya 1402 NT5TU64M16HG-AC, a Qualcomm Atheros QCA9558-AT4A WLAN 802.11n SoC, a Qualcomm Atheros QCA9880-BR4A WLAN 802.11a/b/g/n/ac SoC and a Lattice LCMX02-256HC 4TG100C semiconductor.
The Zyxel NAP303 is an AC1750 wireless access point, so it features a maximum theoretical data transfer rate of 450 Mbps on the 2.4GHz radio and a maximum theoretical data transfer rate of 1,300 Mbps on the 5GHz radio band.
Performance
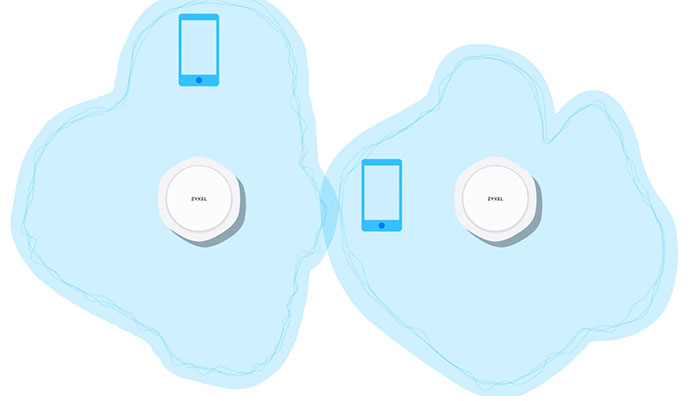
The Zyxel NAP303 is slightly better equipped in terms of features than the NWA1123-AC HD and, one of the most interesting one is the Smart Mesh technology which closely resembles the mesh tech implemented on the newer WiFi systems (such as Google WiFi, Eero or TP-Link Deco M9 Plus). Specifically, the Smart Mesh ensures that multiple wireless access point can inter-connect (with the sole requirement that one of them will be connected to the modem) and it creates optimized paths for the data depending on the signal strength, the number of connected clients and more. Furthermore, it ensures that even if a node fails, the data will still reach its destination by using any immediately available node. Even if you could technically inter-connect a large number of access points, the maximum recommended number of hops is two because the bandwidth will be limited due to the backhaul traffic which, when accumulated, it can render the system unusable.
This technology is useful if you intend to cover a larger site with more than one access point and the ability to seamlessly roam from one node to the other is definitely a necessity so, to ensure that the clients will get the maximum signal strength and the best throughput, the access point relies on the Smart Antenna which constantly adjusts the radio pattern for each connection between the client and the AP. This way, the interference are kept to a minimum and the coverage is better (since, to avoid any interference, other devices will reduce the power, therefore the coverage will be affected). Unlike MU-MIMO and the BeamForming, the Smart Antenna feature doesn’t require compatible clients, so it will work with any type of connected device. Furthermore, the NAP303 uses Dynamic Channel Selection to also maintain the interference to a minimum by automatically changing the channel when needed (which means that multiple APs won’t broadcast on the same channel).
There’s also the Smart Client Steering which ensures that one radio band isn’t going to be congested (it’s usually the case with the 2.4GHz radio band) and the Fast Roaming Pre-authentication (802.11r) which makes sure that the handshake between the access point and the client device is made before the user starts roaming from node to node (it will only work with compatible clients). Another interesting feature implemented on the NAP303 is the AC WAVE 2 MU-MIMO technology (Multi User Multiple-Input Multi-Output) and it makes sure that you can connect multiple devices to the access point which will be served simultaneously instead of letting them compete for the bandwidth – similarly to the Fast Roaming, it does only work with clients with compatible WiFi adapters and even so, in order to fully take advantage of this feature, it needs to be 3×3:3 MU-MIMO compatible (unfortunately, most MU-MIMO clients are only 1×1 or 2×2).
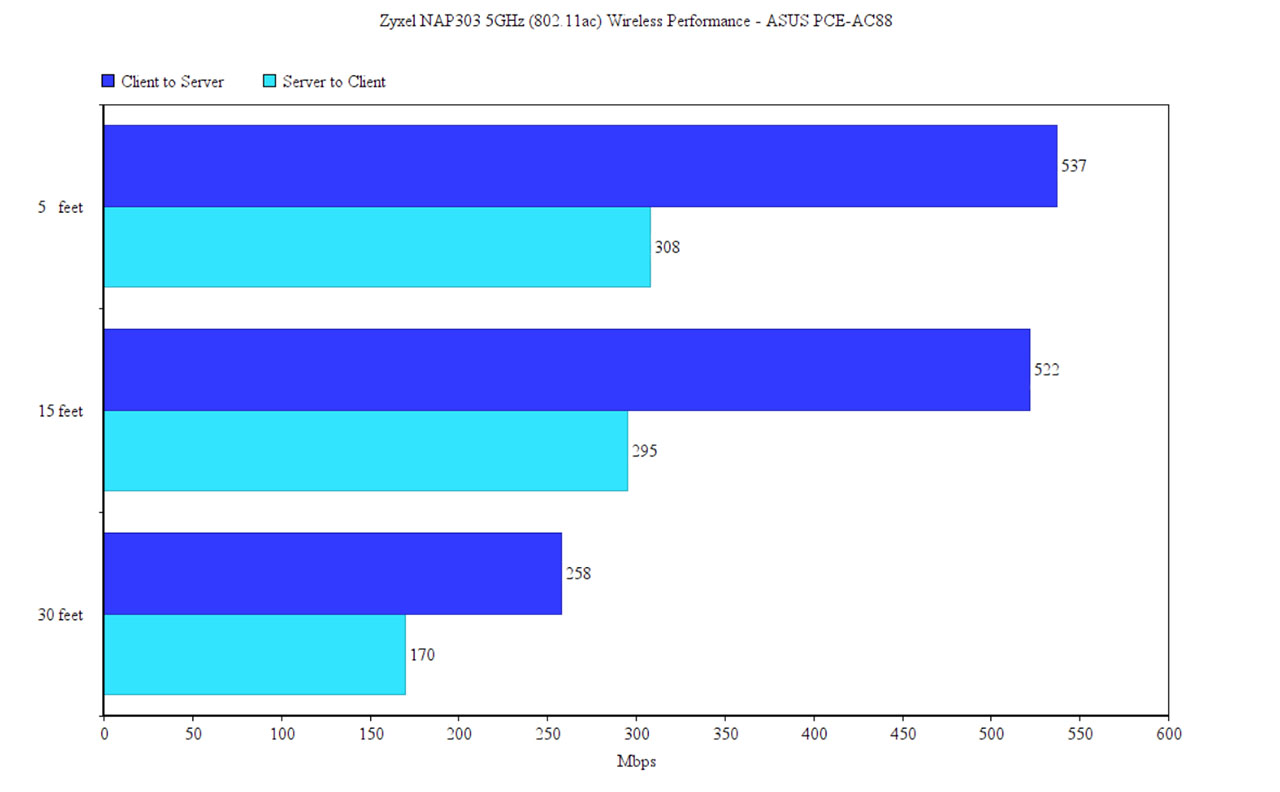
To test the wireless performance of the Zyxel NAP303, I took two computers, one is going to be connected directly to the access point via an Ethernet cable (will act as the server) and the other computer will connect to the AP via WiFi and will act as the client (it is equipped with the ASUS PCE-AC88 WiFi adapter). First, I connected both computers to the 5GHz network and, from the client to the server, I measured an average of 537 Mbps when the distance between the AP and the client was about 5 feet; at 15 feet, I measured an average of 522 Mbps and, at 30 feet, the average of throughput was 258 Mbps. From the server to the client, I measured an average of 308 Mbps, while at 15 feet, the speed went down to 295 Mbps; at 30 feet, I measured an average of 170 Mbps.
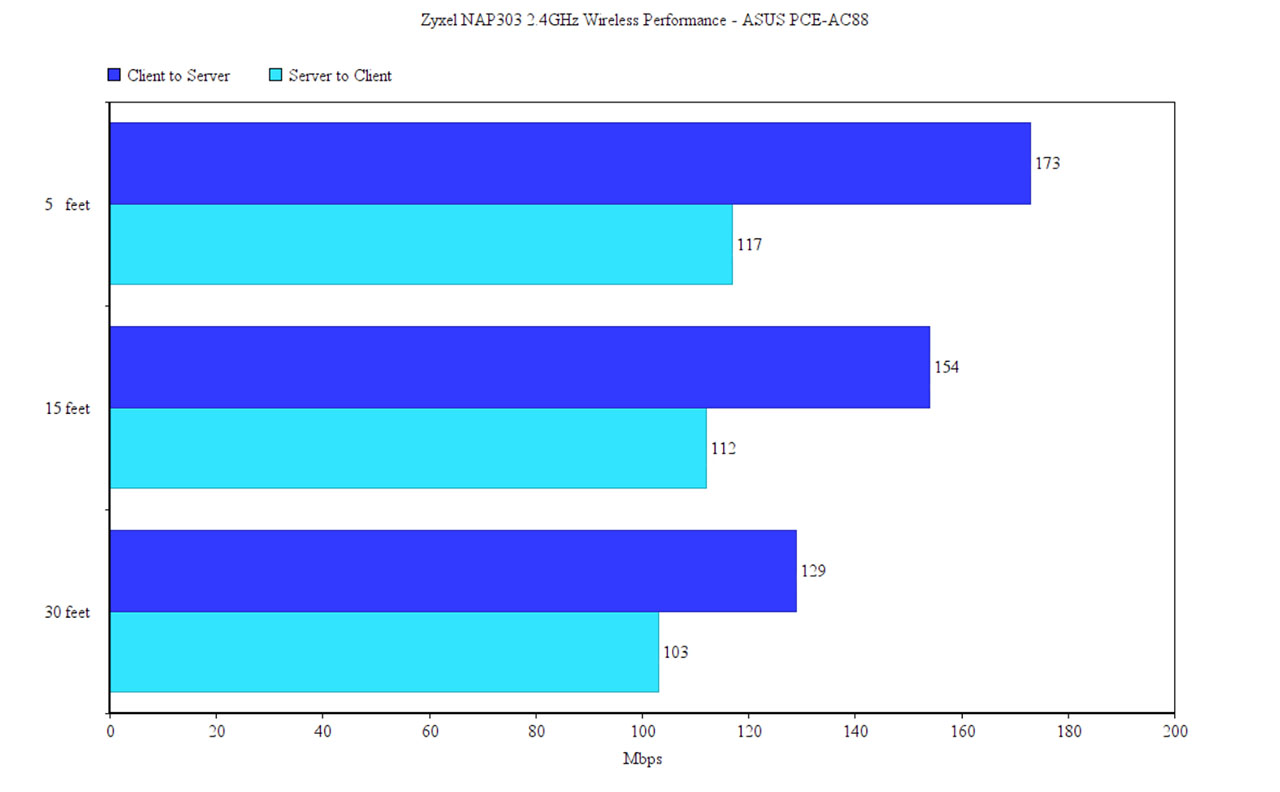
Afterwards, I switched the client to the 2.4GHz WiFi network and, from the client to the server, I measured an average of 173 Mbps at about 5 feet; at 15 feet, I measured an average throughput of 154 Mbps and, at 30 feet, an average of 129 Mbps. From the server to the client, I measured an average of 117 Mbps at 5 feet, an average of 112 Mbps at 15 feet and around 103 Mbps at 30 feet.
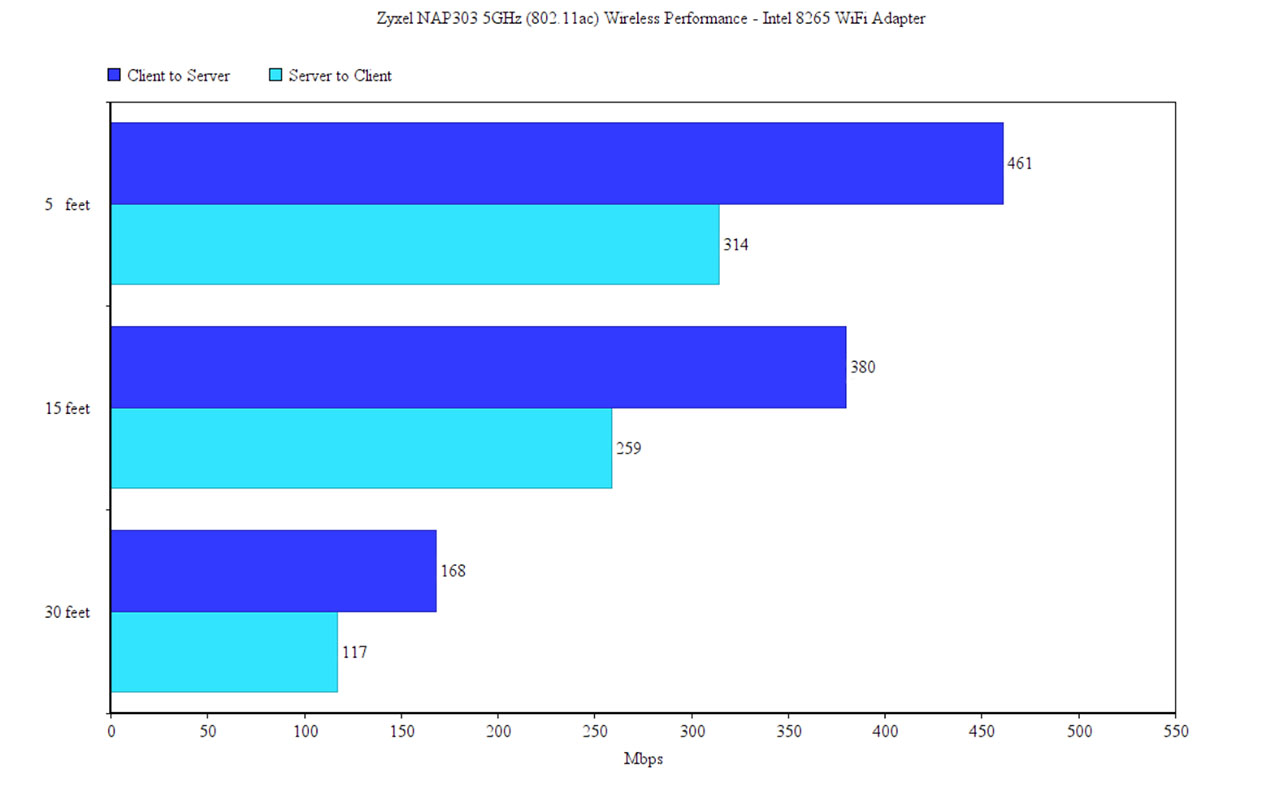
On the next step, I decided to connect the access point to a client which was equipped with an Intel 8265 2×2 WiFi adapter. This way, on the 5GHz band, at 5 feet and from the client to the server, I measured about 461 Mbps; at 15 feet, I got an average of 380 Mbps and, at 30 feet, an average of 168 Mbps. From the server to the client, I measured an average throughput of 314 Mbps at 5 feet and 259 Mbps at 15 feet; at 30 feet, the speed went down to only 117 Mbps. Unfortunately, the NWA1123-AC HD isn’t yet added to the supported list, so I couldn’t really test it alongside the NAP303 in a mesh network (when Zyxel adds it, I will test the Smart Mesh feature as well).
Software
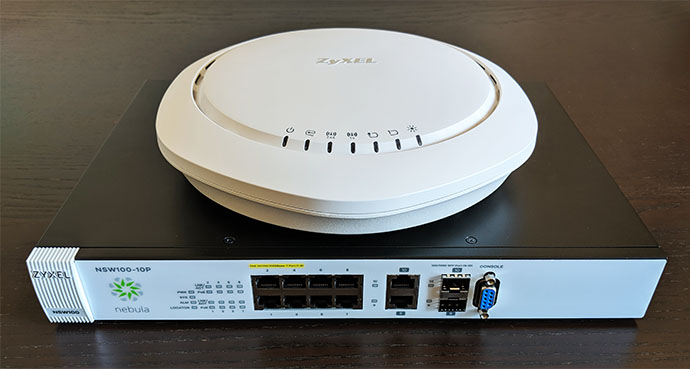
Just like the Linksys LAPAC1750C, the Zyxel NAP303 was created to be integrated within the Cloud controller immediately and you can register the device via the web based interface or using the Nebula application (for iOS or Android OS), but what if you still want to use it outside the Nebula Cloud? In this case, after you have properly underwent the hardware installation (use one Ethernet cable to connect to the LAN port and to a computer and another Ethernet cable to connect the AP to a PoE switch (I used a NSW100-10HP); alternatively, you can also power the device using a DC adapter or a PoE injector), you need to identify the IP address of the NAP303 and there are multiple ways to do it.
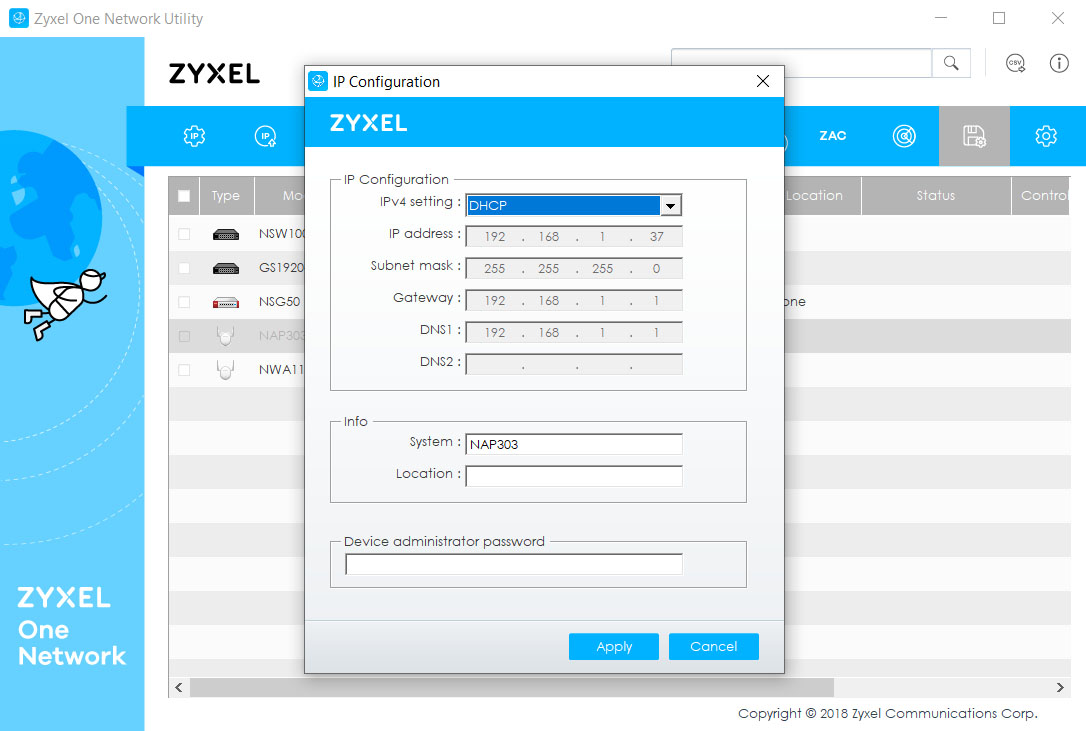
You can either go to the router’s client list (if you use an NSG50 gateway, you’ll find it in Gateway > Client) or you can use the ZON utility to detect all the connected Zyxel devices: in case the NAP303 has the same IP address to the router (usually the case when the IP is static), the utility will allow you to change the IP to DHCP (select the NAP303 and click on the IP Config). After you got the IP address (and it’s different than the 192.168.1.1), insert it into the URL of a web browser and log into the standalone UI (use admin and 1234 as username and password).
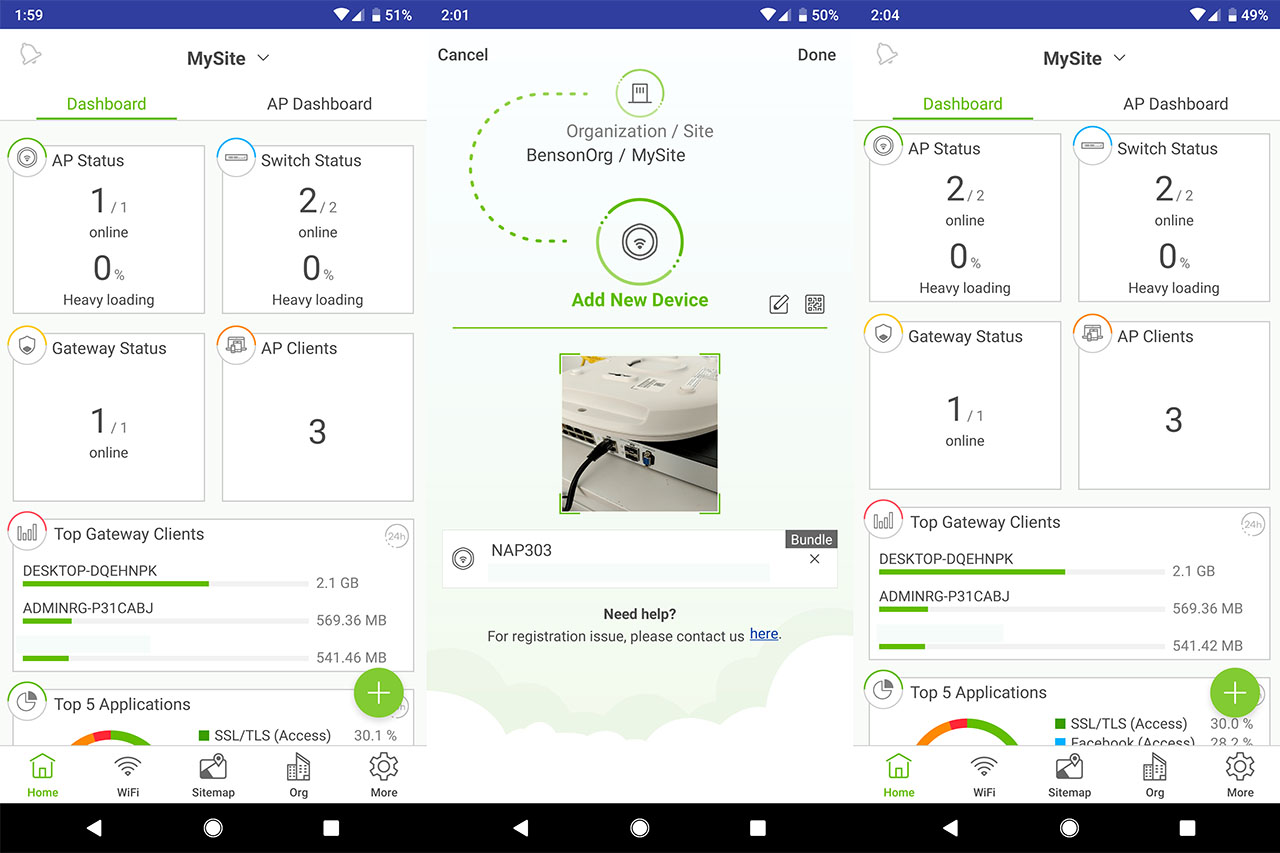
When I tested the Zyxel NSG50 gateway and the NSW100-10P, I saw the same type of bare bones UI and in the case of the NAP303, on the left, there’s a menu with two main sections, one is the Dashboard and the other is the Configuration. The Dashboard displays AP Information (various stats about the device), while under Configuration, you can set up the IP (static, DHCP or Proxy) or configure the VLAN (the Management VLAN ID + the ability to choose between Untagged and Tagged). And that’s it, this is all you can do using the standalone interface, so let’s register the NAP303 to the Nebula Control Center. To do so, I decided to use the Nebula app and, after I logged into my account, I could see the main UI, from where I had to click the green Plus button (if you don’t have an account, you need to create one and to add a new Organization and Site).
After you press the Plus button, it will display the Add New Device window (to the current site) where you will have to scan for the QR code from the bottom of the access point. After that press ‘Done’ and after a few seconds, the NAP 303 should now be a part of the Nebula Control Center. This way, you will be able to see the Status of the AP on the Dashboard, as well as the number of AP Clients and the Top Applications.

Mark is a graduate in Computer Science, having gathered valuable experience over the years working in IT as a programmer. Mark is also the main tech writer for MBReviews.com, covering not only his passion, the networking devices, but also other cool electronic gadgets that you may find useful for your every day life.

