
Pergear has been collaborating with other brands for a while, but lately, it has also been pushing its own set of lens and the manufacturer has recently unveiled its first 7.5mm FishEye lens which caters to those users that either want to try out some of its applications (but are severely budget-constrained) or to those that simply want to have fun with the lens and don’t really have a specific project in mind.
| Pergear 7.5mm FishEye Lens | |
|---|---|
| Pergear.com | Check Product |
This is not the only hyper-affordable 7.5mm lens from Pergear since I know people will immediately point out towards 7artisans FishEye 7.5mm, but the price tag and the fact that both are manual focus fixed lens is where the similarities end since there are some significant differences in both design and performance.
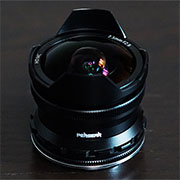
Indeed, the Pergear 7.5mm FishEye lens has 9 elements in 8 groups, the aperture has ten diaphragm blades, the aperture range is between F/2.8 and F/22, and the device has a full metal compact body that you couldn’t tell apart from other premium brands.
So yes, the current trend seems to be towards creating decently performing lens with a very good build quality, which shows that the market is currently changing, allowing more and more people to enter this once very narrow niche. That being said, Pergear 7.5mm FishEye lens seems very promising, especially considering the price tag, so let’s have a closer look and see where it is currently positioned in this increasingly more competitive market.
Design and Build Quality
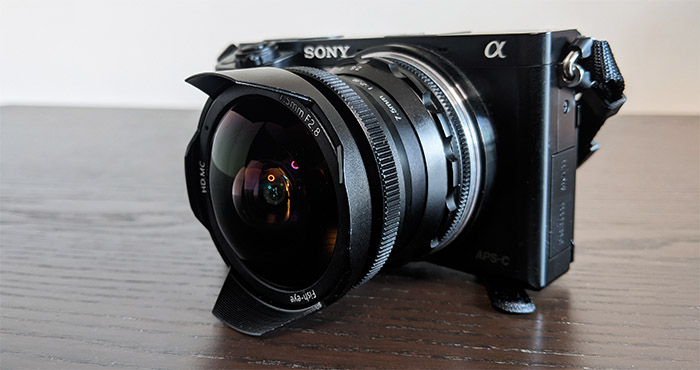
The Pergear 7.5mm FishEye lens comes in a small box along with a comfy pouch (that you can attach to your backpack) and a mini air blower which is a vital accessory for any photographer, since you can’t really remove those small specs of dust any other way. The body of the lens is fully metallic and, to be specific, it has a copper core, while the body itself is made of aluminum. I praised the Viltrox RBMH 85mm for its premium feel and for the fact that the manufacturer used high quality materials for an affordable lens and the same can be said about the Perger 7.5mm since I could not find any design flaw, the size was fine, the weight was right and all elements are properly put together. That being said, the body of the lens measures 2.4 x 2.1 inches (6.1 x 5.4 cm) and it weighs 11.2 ounces, excluding the two caps. The camera that I used is a Sony A6000 which weighs only about 112 ounces, so there will be only a slight, barely noticeable pull forward from the lens.
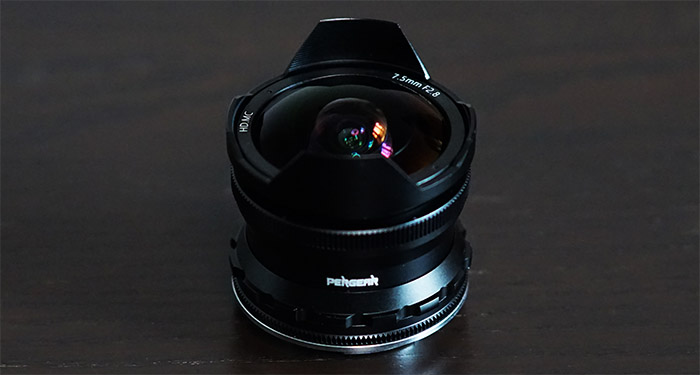
Pergear has used a standard sized cap for the part where the lens gets rotated within the body camera, but the lens cover is a bit weird. It’s a simple metallic cap that you have to slide over the front of the lens and no, it’s not magnetic, it relies on a soft textile band to stay in place. I can’t really say whether it will withstand the test of time, but I used the lens quite a bit during the last two weeks and the cap stood in place (a cap that could be rotated in place would have been better). The Pergear 7.5mm FishEye lens doesn’t communicate with the camera, so you will have to rely on the manual aperture and focus rings. The focus ring sits the closest to the front of the lens and it’s completely ribbed, allowing for a good grip; when moving it, I noticed that there is a bit of resistance and overall, the rotation is very smooth and satisfactory.
It’s worth noting that the focus range goes from 0.14 to 3 feet (to infinity) and yes, there are distance markings on the body of the lens in both feet and meters. The 7artisans 7.5 mm FishEye lens used a similar set of rings and for the aperture, it relied on a narrow ribbed ring, while Pergear decided to use ridges instead of a full ribbed design. If it’s the better system or not, it’s up to every user’s preferences, but I did like the feel of the ring and the rotation remains very smooth, despite offering a lot more resistance. The aperture goes between F/2.8 and F/22 and Pergear uses 10 diaphragm blades for a near ideal circular effect. The 7artisans 7.5mm FishEye has a slightly better aperture since it has 12 diaphragm blades but, unless you’re going for some perfect bokeh bubbles, the 10 blades of the Pergear should suffice – the Viltrox lens has 9 blades and the bokeh effect is perfectly fine.

Another important difference between the Pergear and the 7artisans 7.5mm FishEye lenses is the amount of elements since the latter has 11 elements in 8 groups, while the former has 9 elements in 8 groups. Of course, a higher number of elements doesn’t mean that the lens will perform better (sharpness-wise, mostly), but it’s true that the two lenses do have a different behavior when it comes to the sharpness distribution (Pergear went for a more uniform sharpness, while 7artisans preferred to put more detail towards the center of the image). Pergear has also added a multi-layer coating on the front element in order to both reduce the flare and the ghosting, as well as to apparently increase the light transmission for a better image quality. There is also a permanently attached hood, well, kind of, since there are only two metallic fins, but suffice to say that it didn’t really work that well at blocking the sun flares (mostly due to the bulbous nature of the lens). They’re going to be great for protecting the lens in case you accidentally bump the camera into things (please don’t do that).
The Pergear 7.5mm is clearly a wide angle lens (with some distortions for the fish-eye effect), but how wide is it really? It’s 130 degrees and if you don’t like the FishEye effect (why are you buying it, then?), then you can use various types of software ‘to straighten up’ the edges.

Note: The lens that I got is compatible with Sony, so it’s an E-Mount, but it’s also available with a Fuji mount, the M4/3 mount, the EOS-M mount or the Nikon Z Mount.
Features and Image Quality
The Pergear 7.5mm FishEye lens is fully manual, so, the shutter on your camera will be locked and you will have to enter the menu and select the shoot without lens mode, which is different depending on the model. I still use the good ol’Sony A6000 and to be able to use the lens with this camera, I had to enter the Menu, select the second set of options (the Cogwheel), and from there, I went to the third window, where I enabled the ‘Release w/o Lens’ option. This way, the shutter got unlocked and I could capture photos. Since this is a manual lens and you have to constantly adjust things to sit properly into focus, I’m not entirely sure how well it would work with videos, but with photos, it’s perfectly fine. So, if you wanted to start vlogging with this lens, you may want to search for something that has built-in autofocus – or constantly adjust the focus and aperture, like a pro.
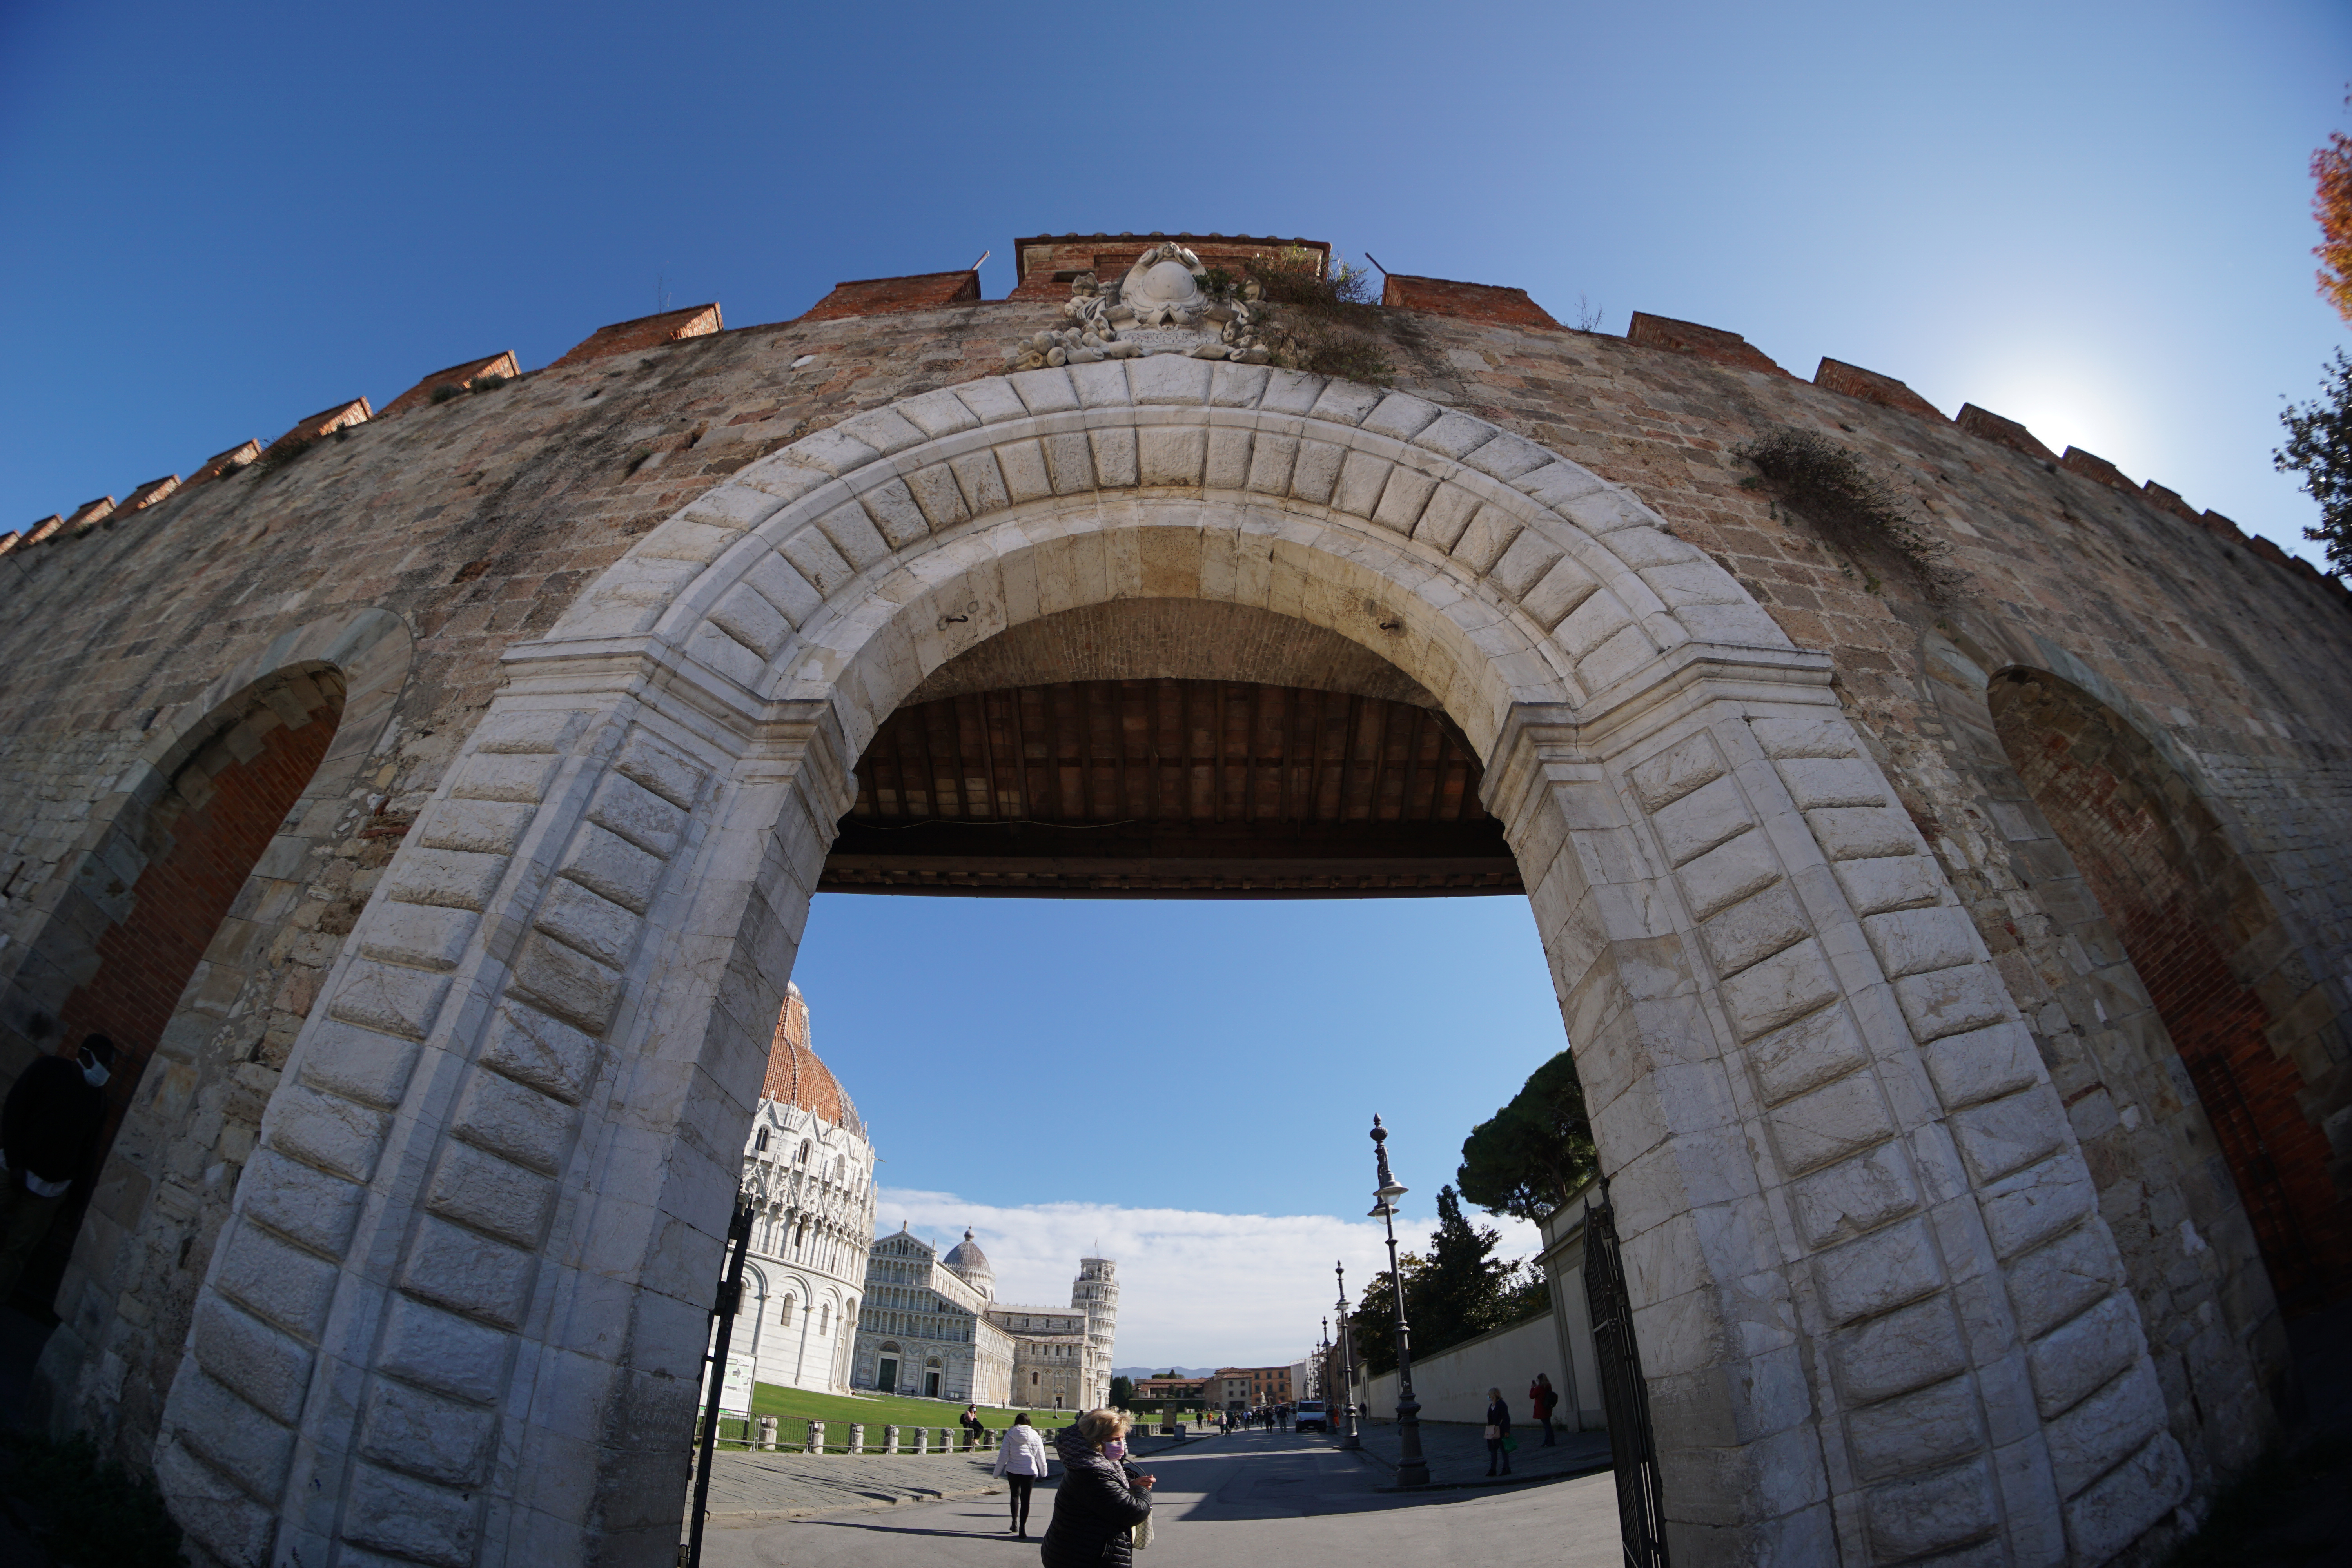
So, after adding an SD card to the Sony A6000 and connected the lens, I went into the city to try and capture some cool architecture shots. I headed out into the Piazza di Miracoli from Pisa and I took a few shots of the Baptistry. As you can see, I went for the more prominent distortion effect (diagonally), putting the Baptistry into the middle as the focus element and the image is very sharp in the middle and towards the sides, but it does lose some of its sharpness at about the last tenth of the image on the left and right side.
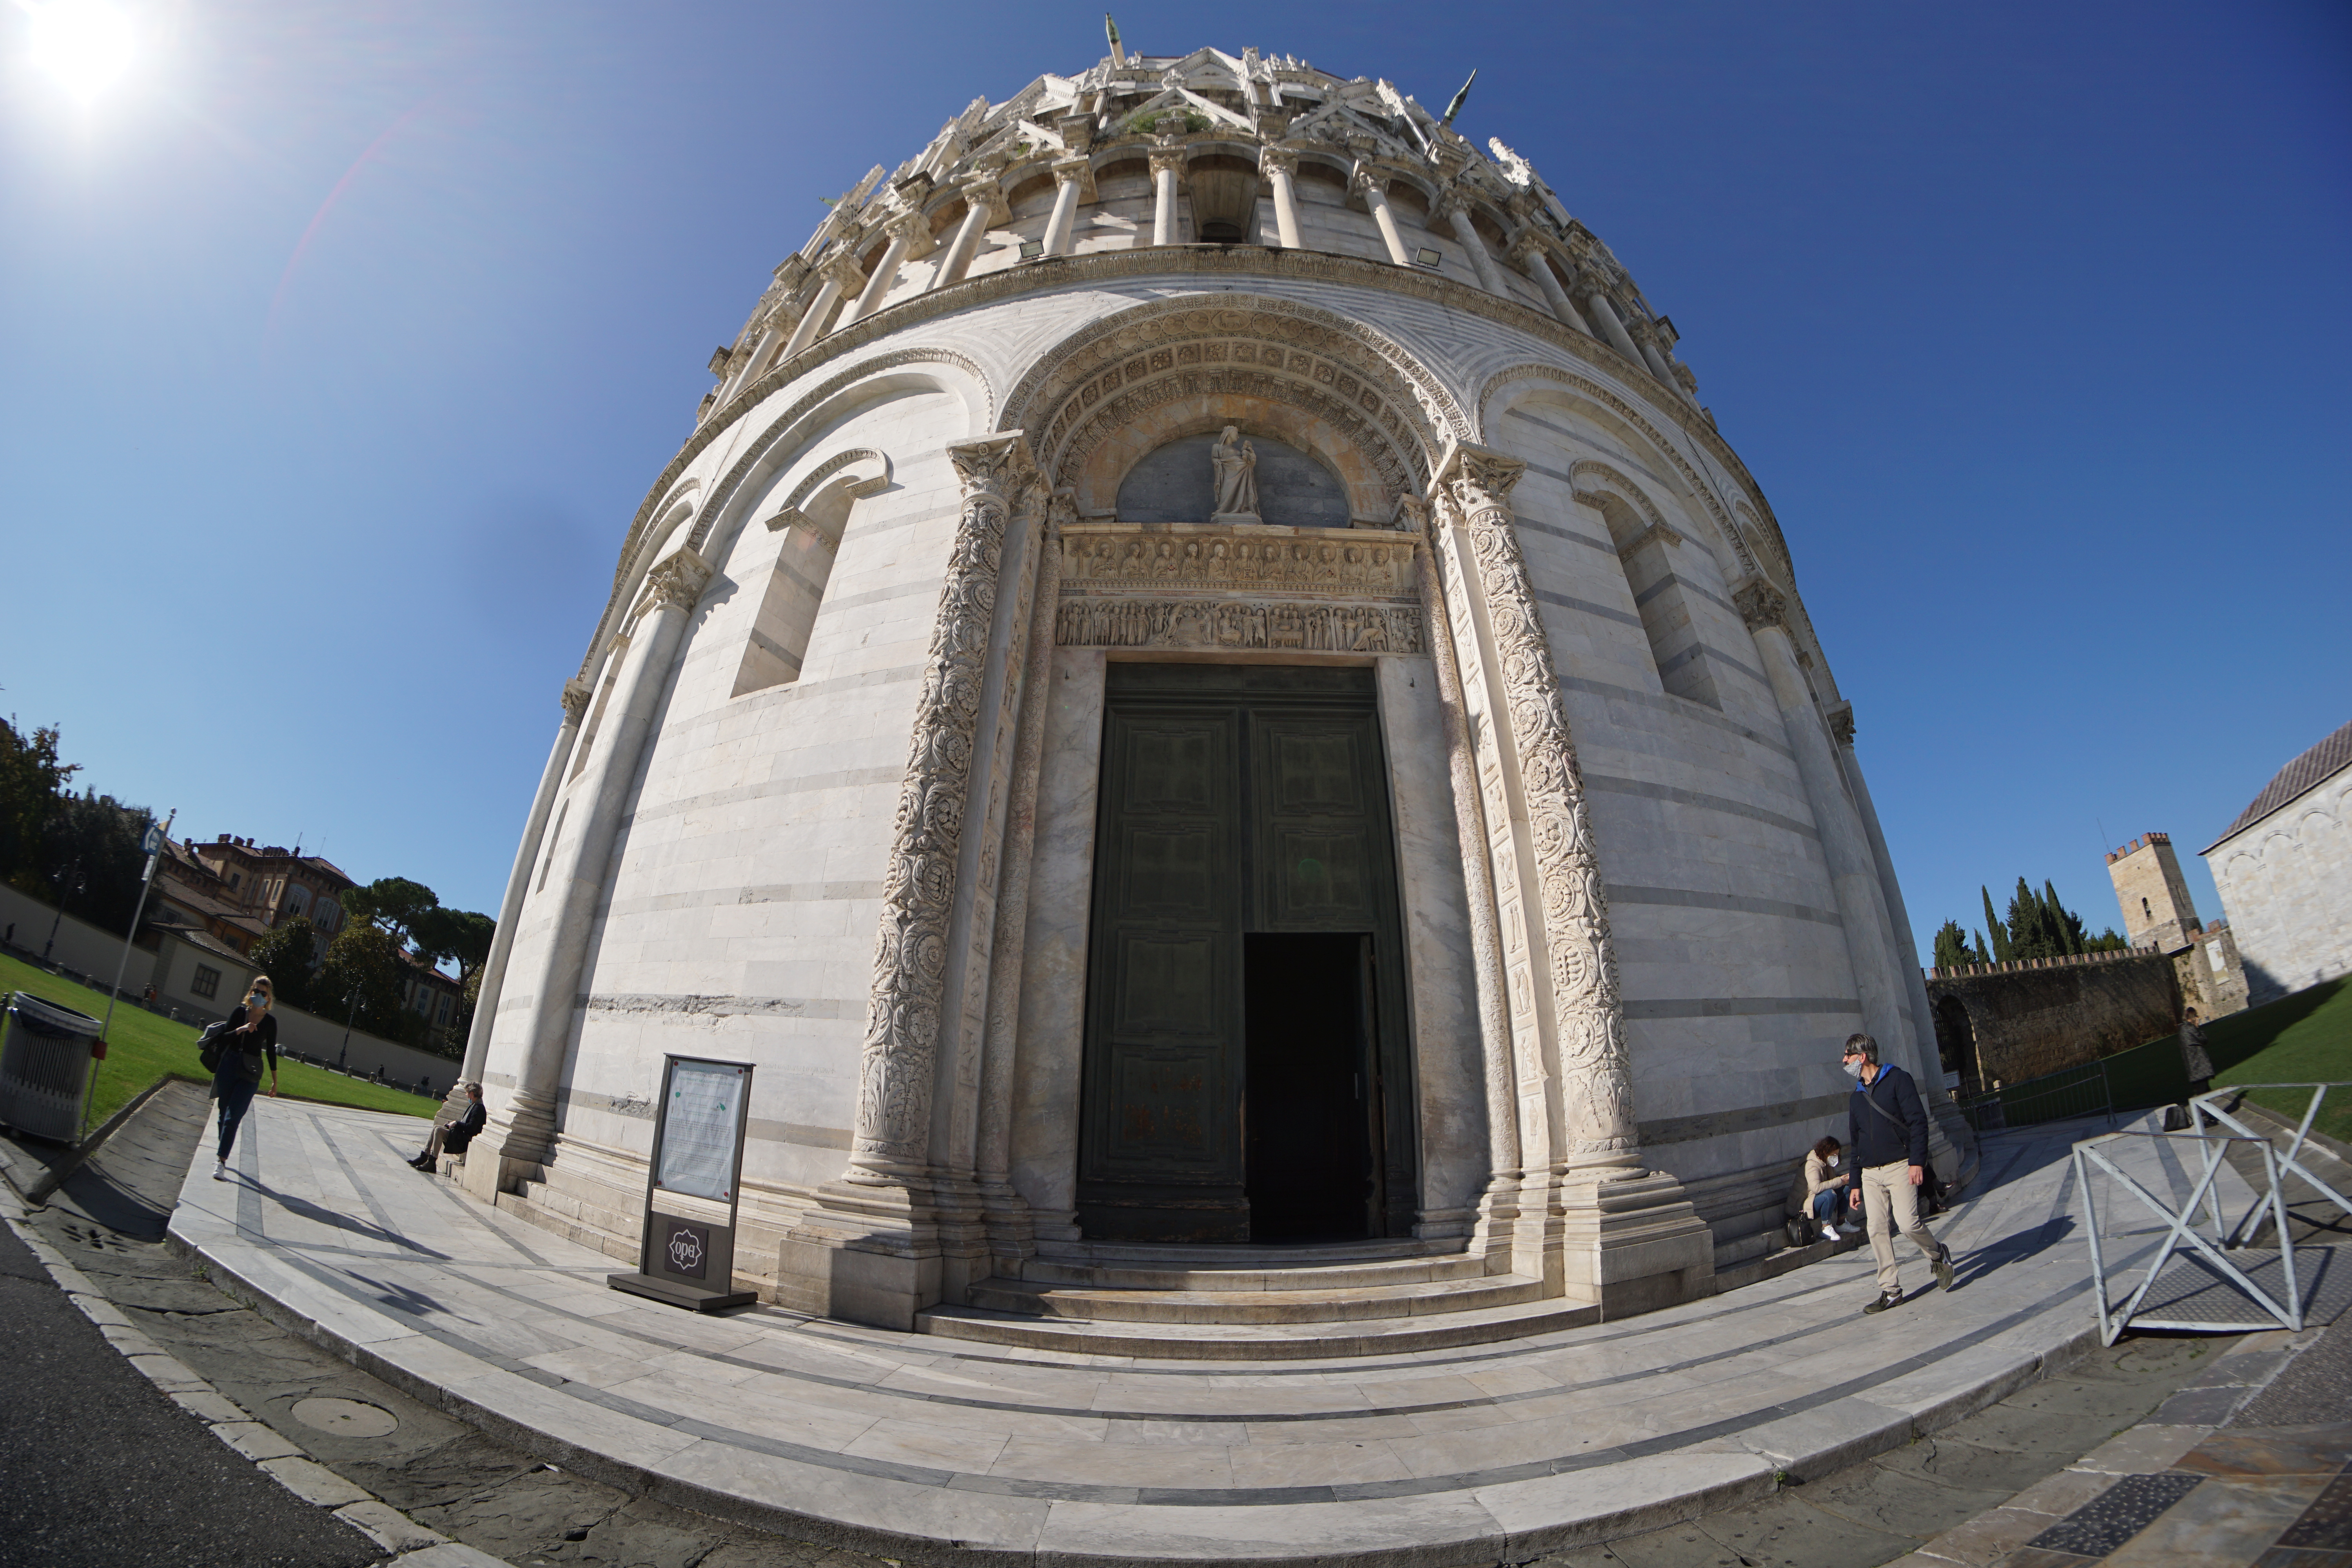
I also kept the sun in the photo to see whether it will heavily affect the exposure and as you can see, it’s more than acceptable, especially if you keep the ISO a little bit lower. As for vignetting, it doesn’t really apply to this type of lens considering that this is the intended effect. There are some noticeable chromatic aberrations where the sun shines on the building, but nothing that can’t be corrected in the software.
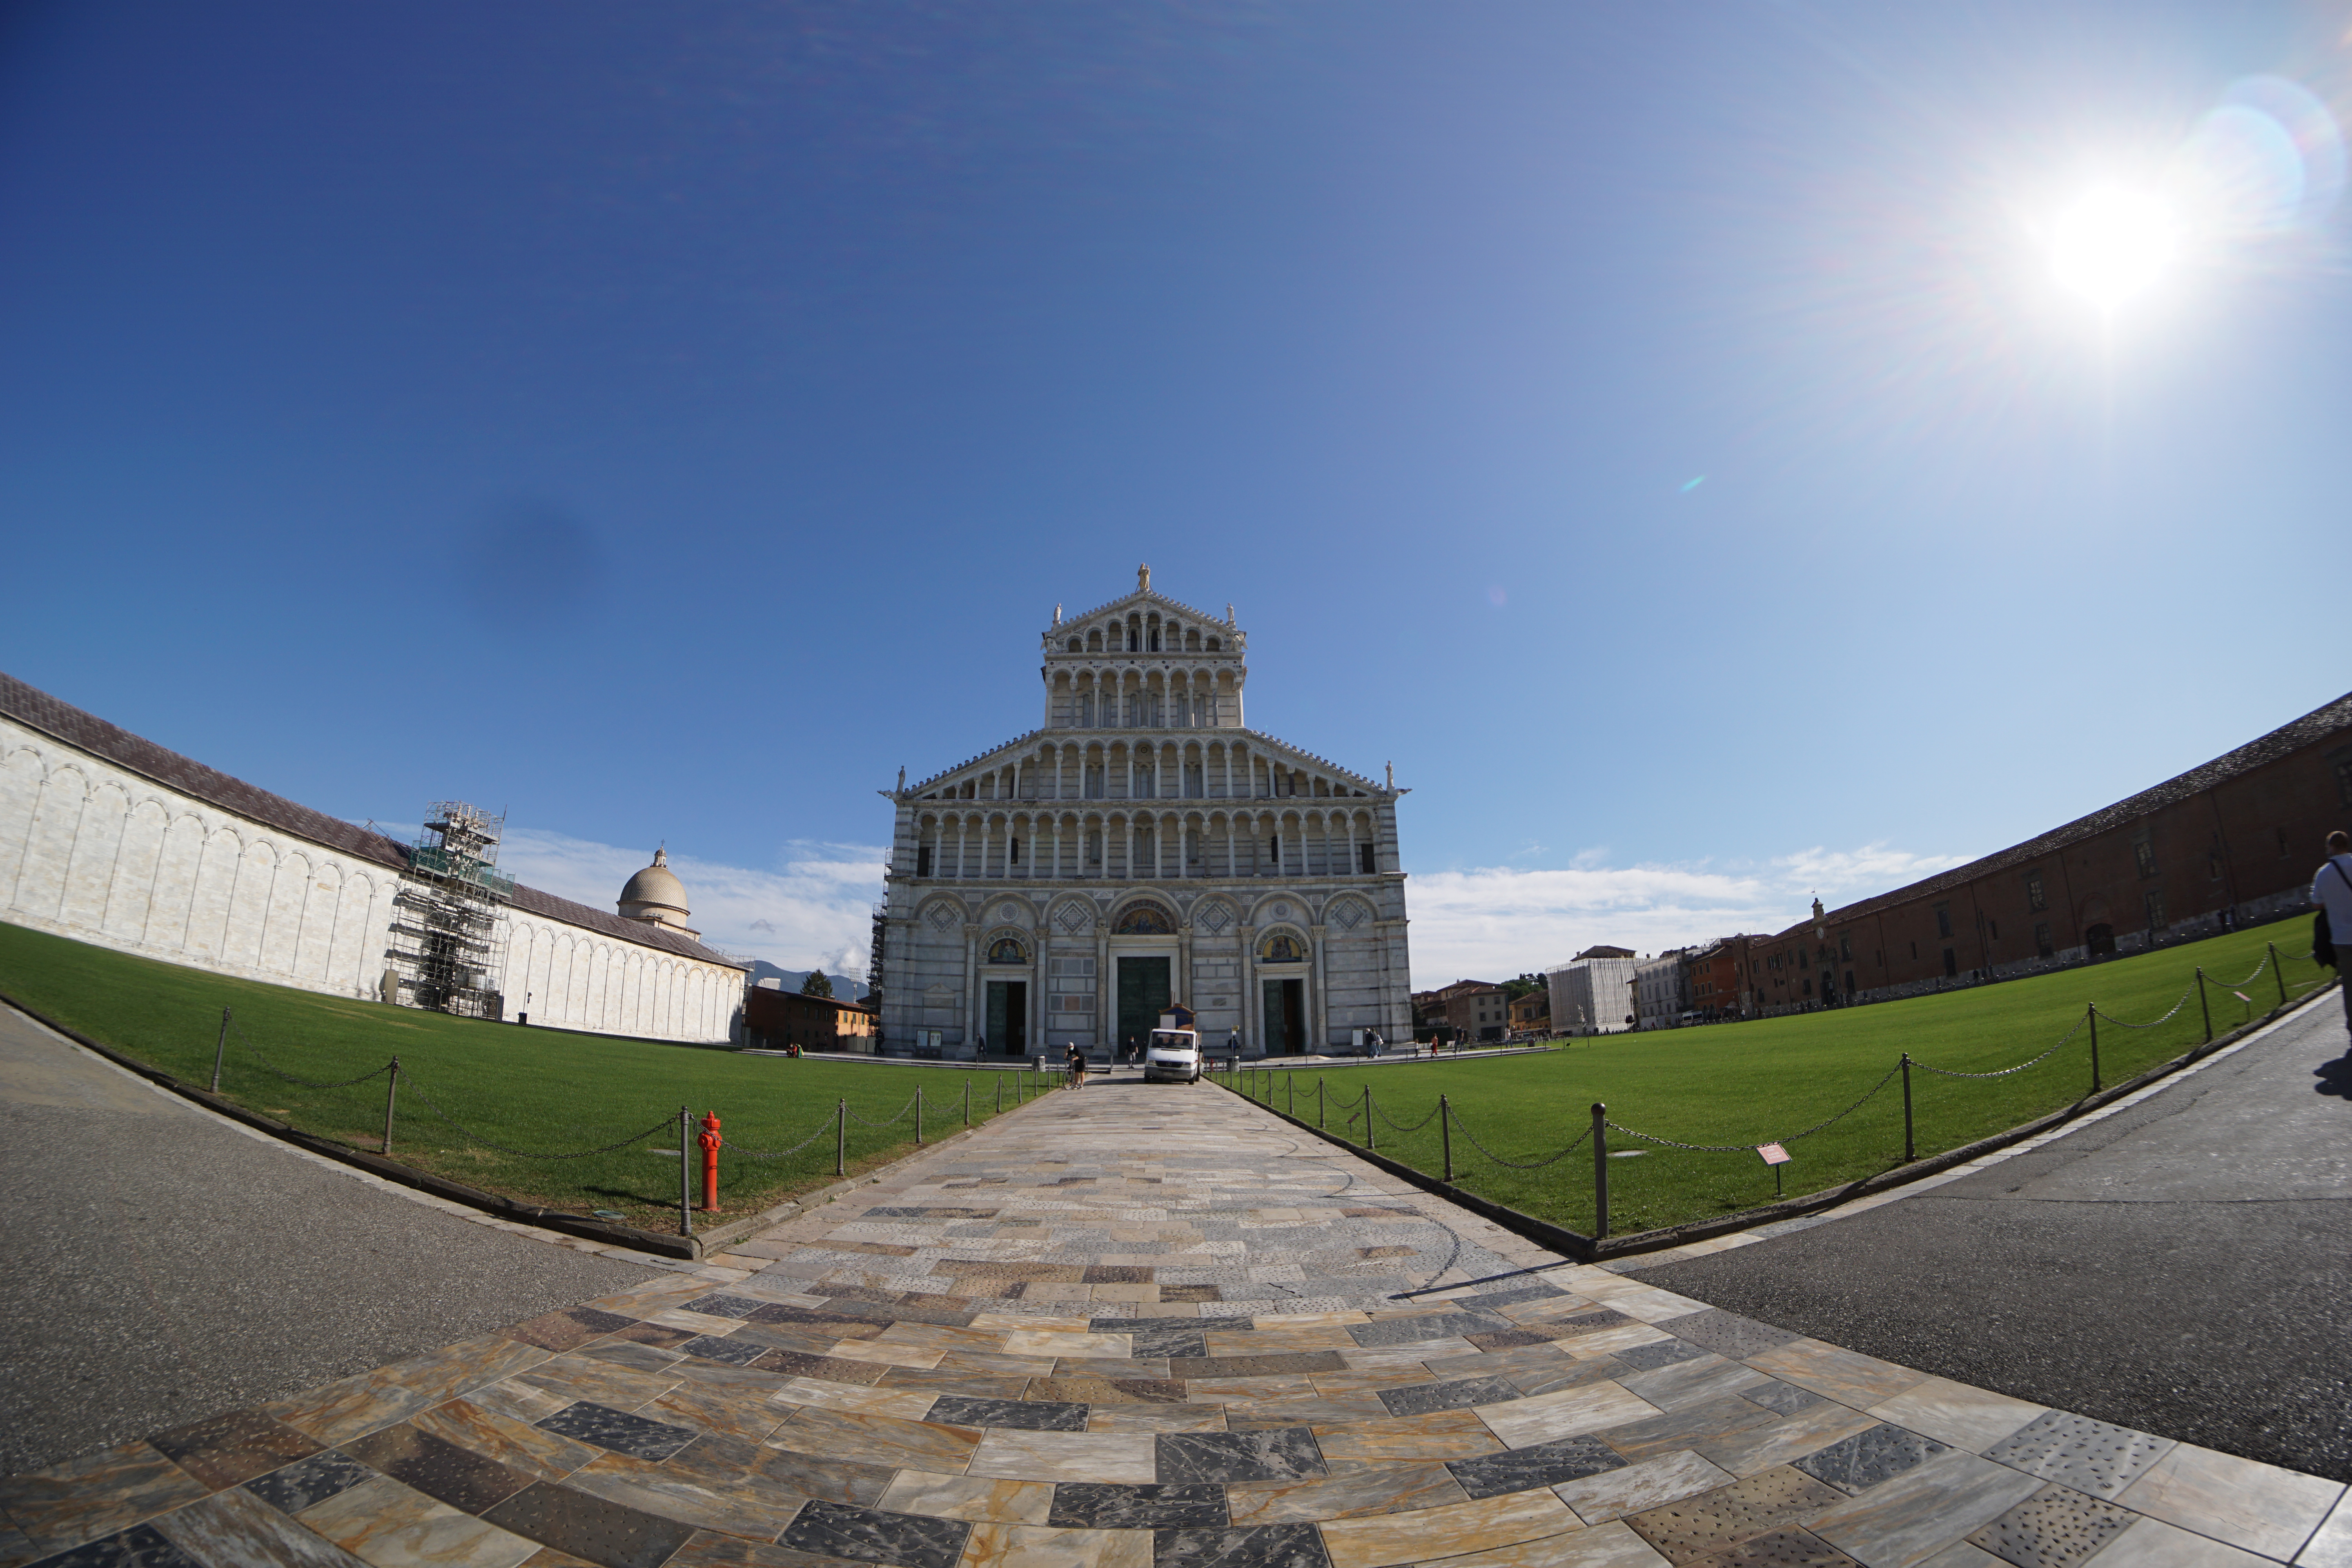
Next, I took a shot of the Cathedral, again with significant distortions, but this time towards the bottom of the photo. As you can see, the sharpness is very consistent until it gets close to the edges and there is very little amount of chromatic aberrations. This type of photo will do great for putting a monument into focus or even for a group of people (a wedding?).
The third photo has the distortions towards the top, while keeping the Piazza di Miracoli in the distance and just like on the previous shot, I saw little chromatic aberrations (the sun was covered by the arch), while the sharpness was again, very uniform – I know that some fisheye lenses make the center far sharper than the rest of the photo, but I prefer Pergear’s approach.
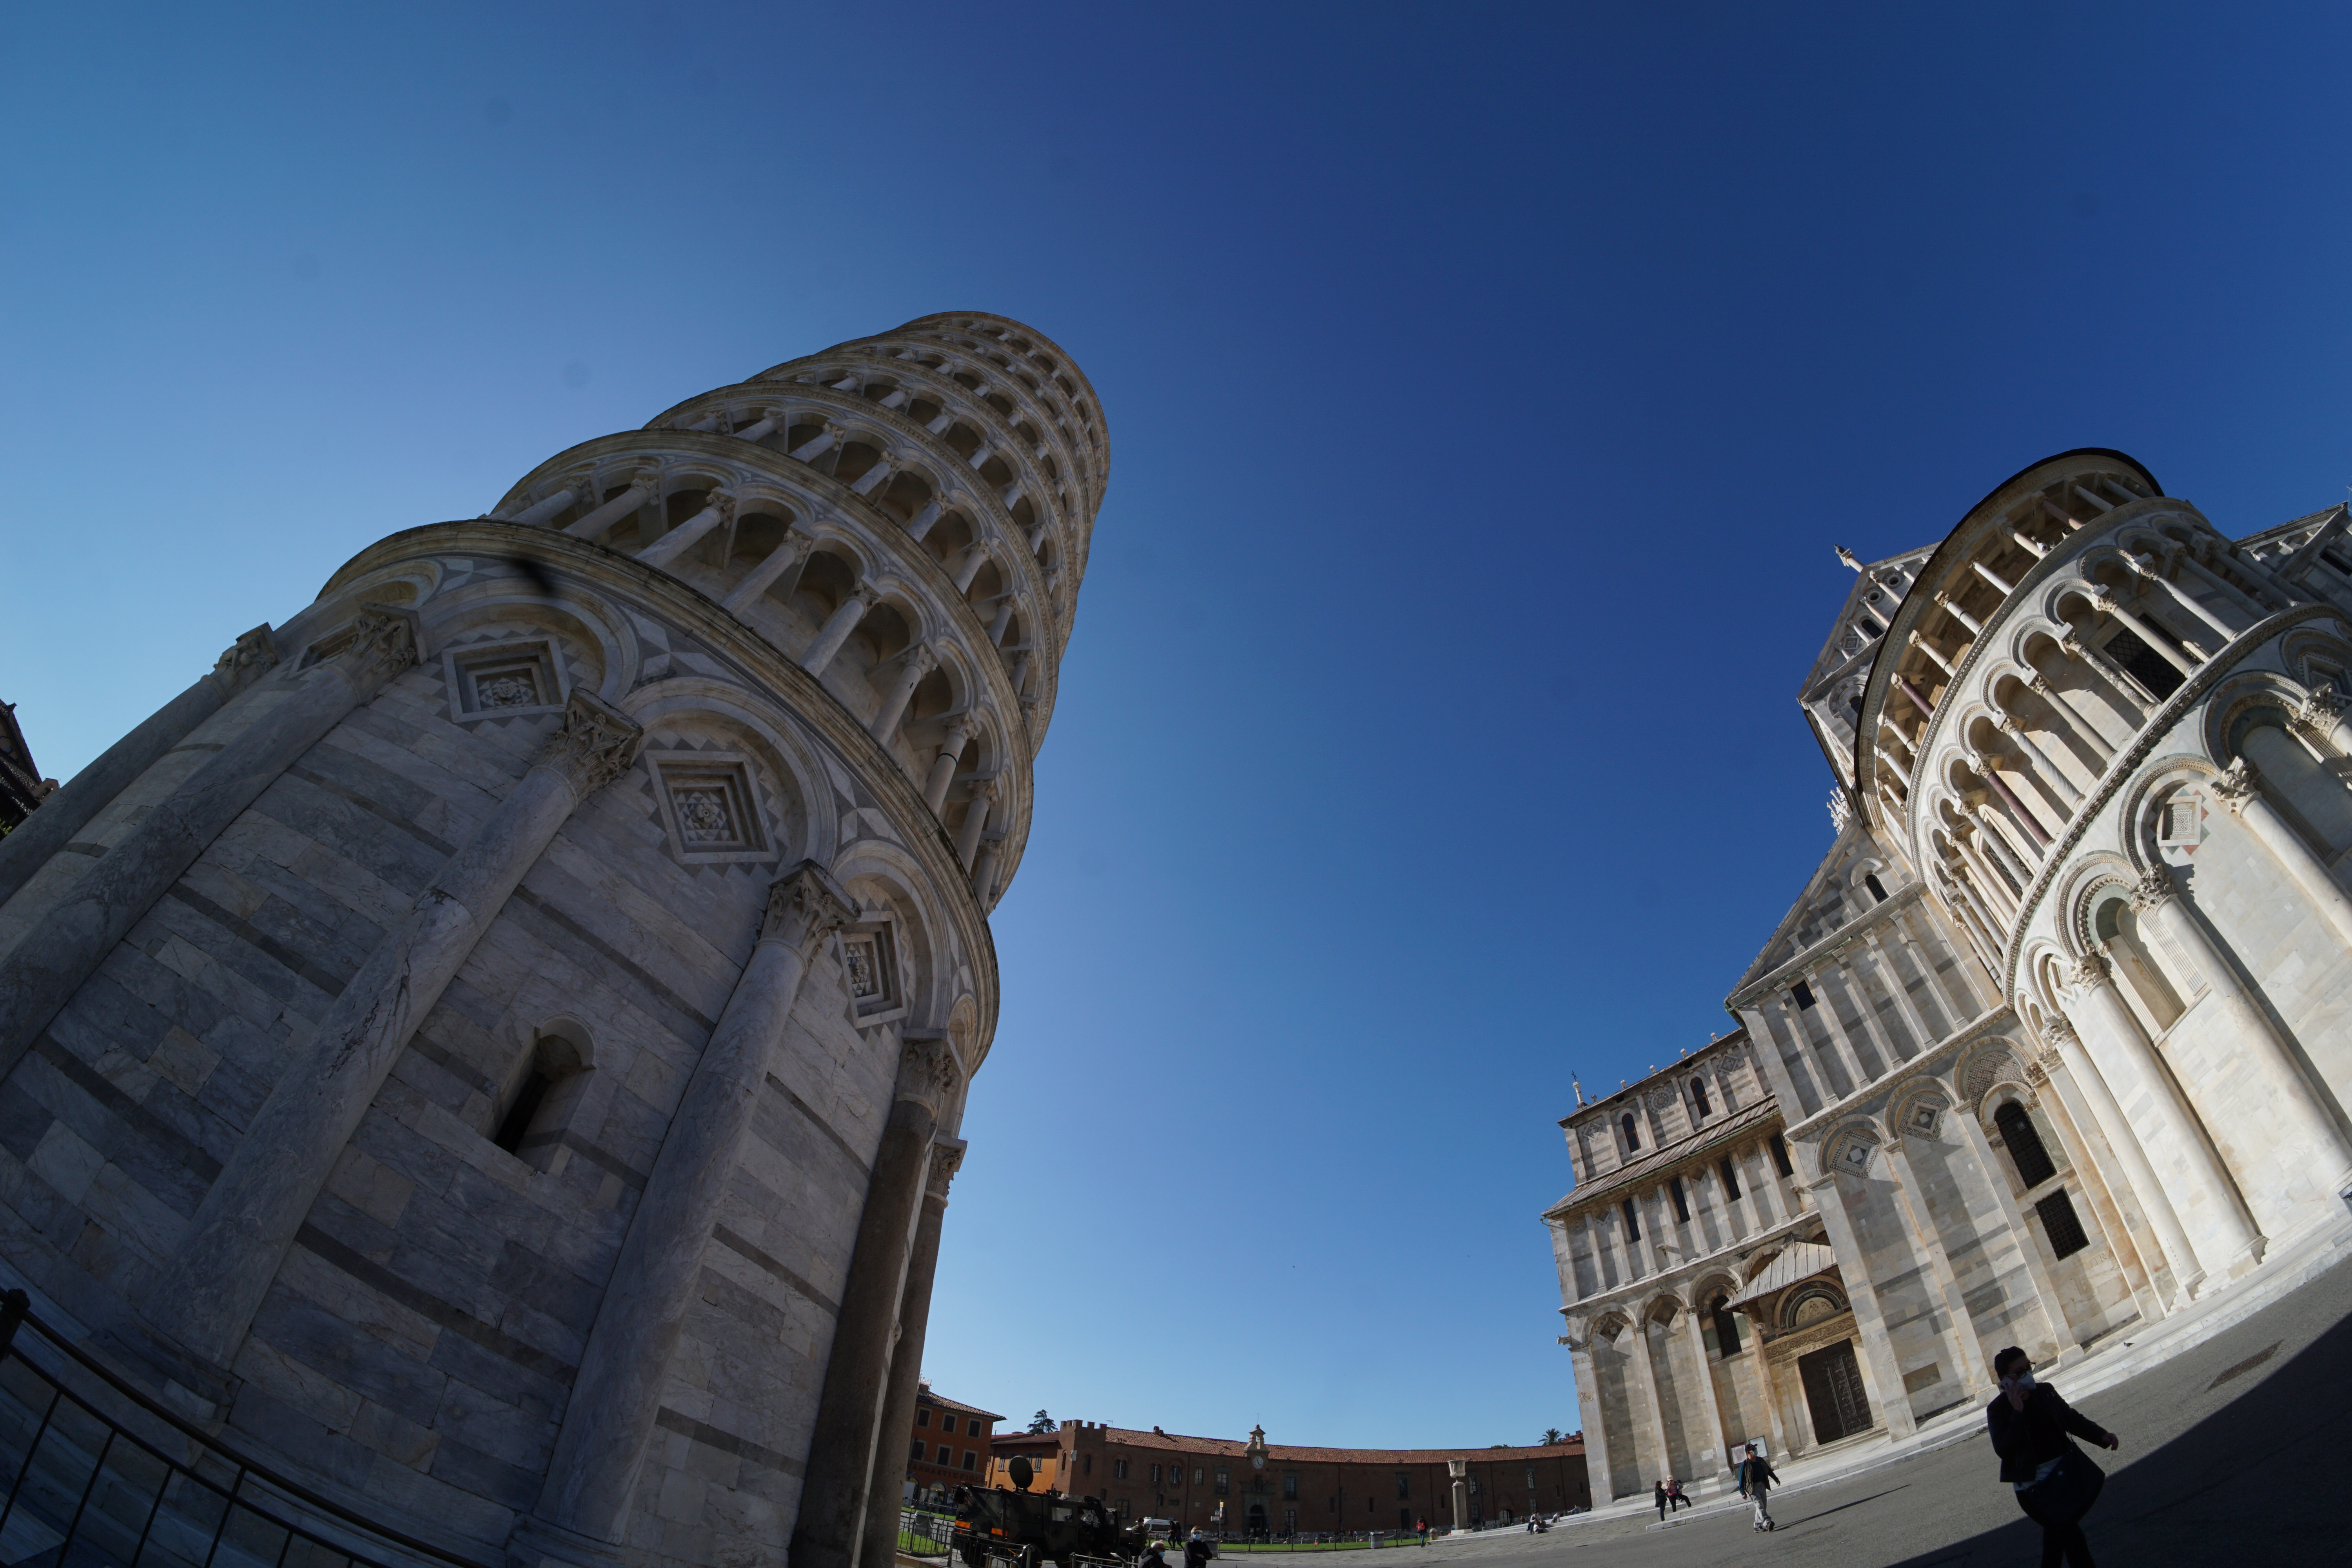
The last architecture photo captured both the Leaning Tower of Pisa and a part of the Cathedral and, as you can see, when you have a fish-eye lens, the tower can lean whichever way you prefer (also, mind the passing insect that decided to almost ruin the shot). This photo highlights the fact that the uniform sharpness goes beyond what I previously thought when I looked at the other photos, showing that as long as you have the building close enough, despite the distortions, the details will still be there, even near the edges of the photo.
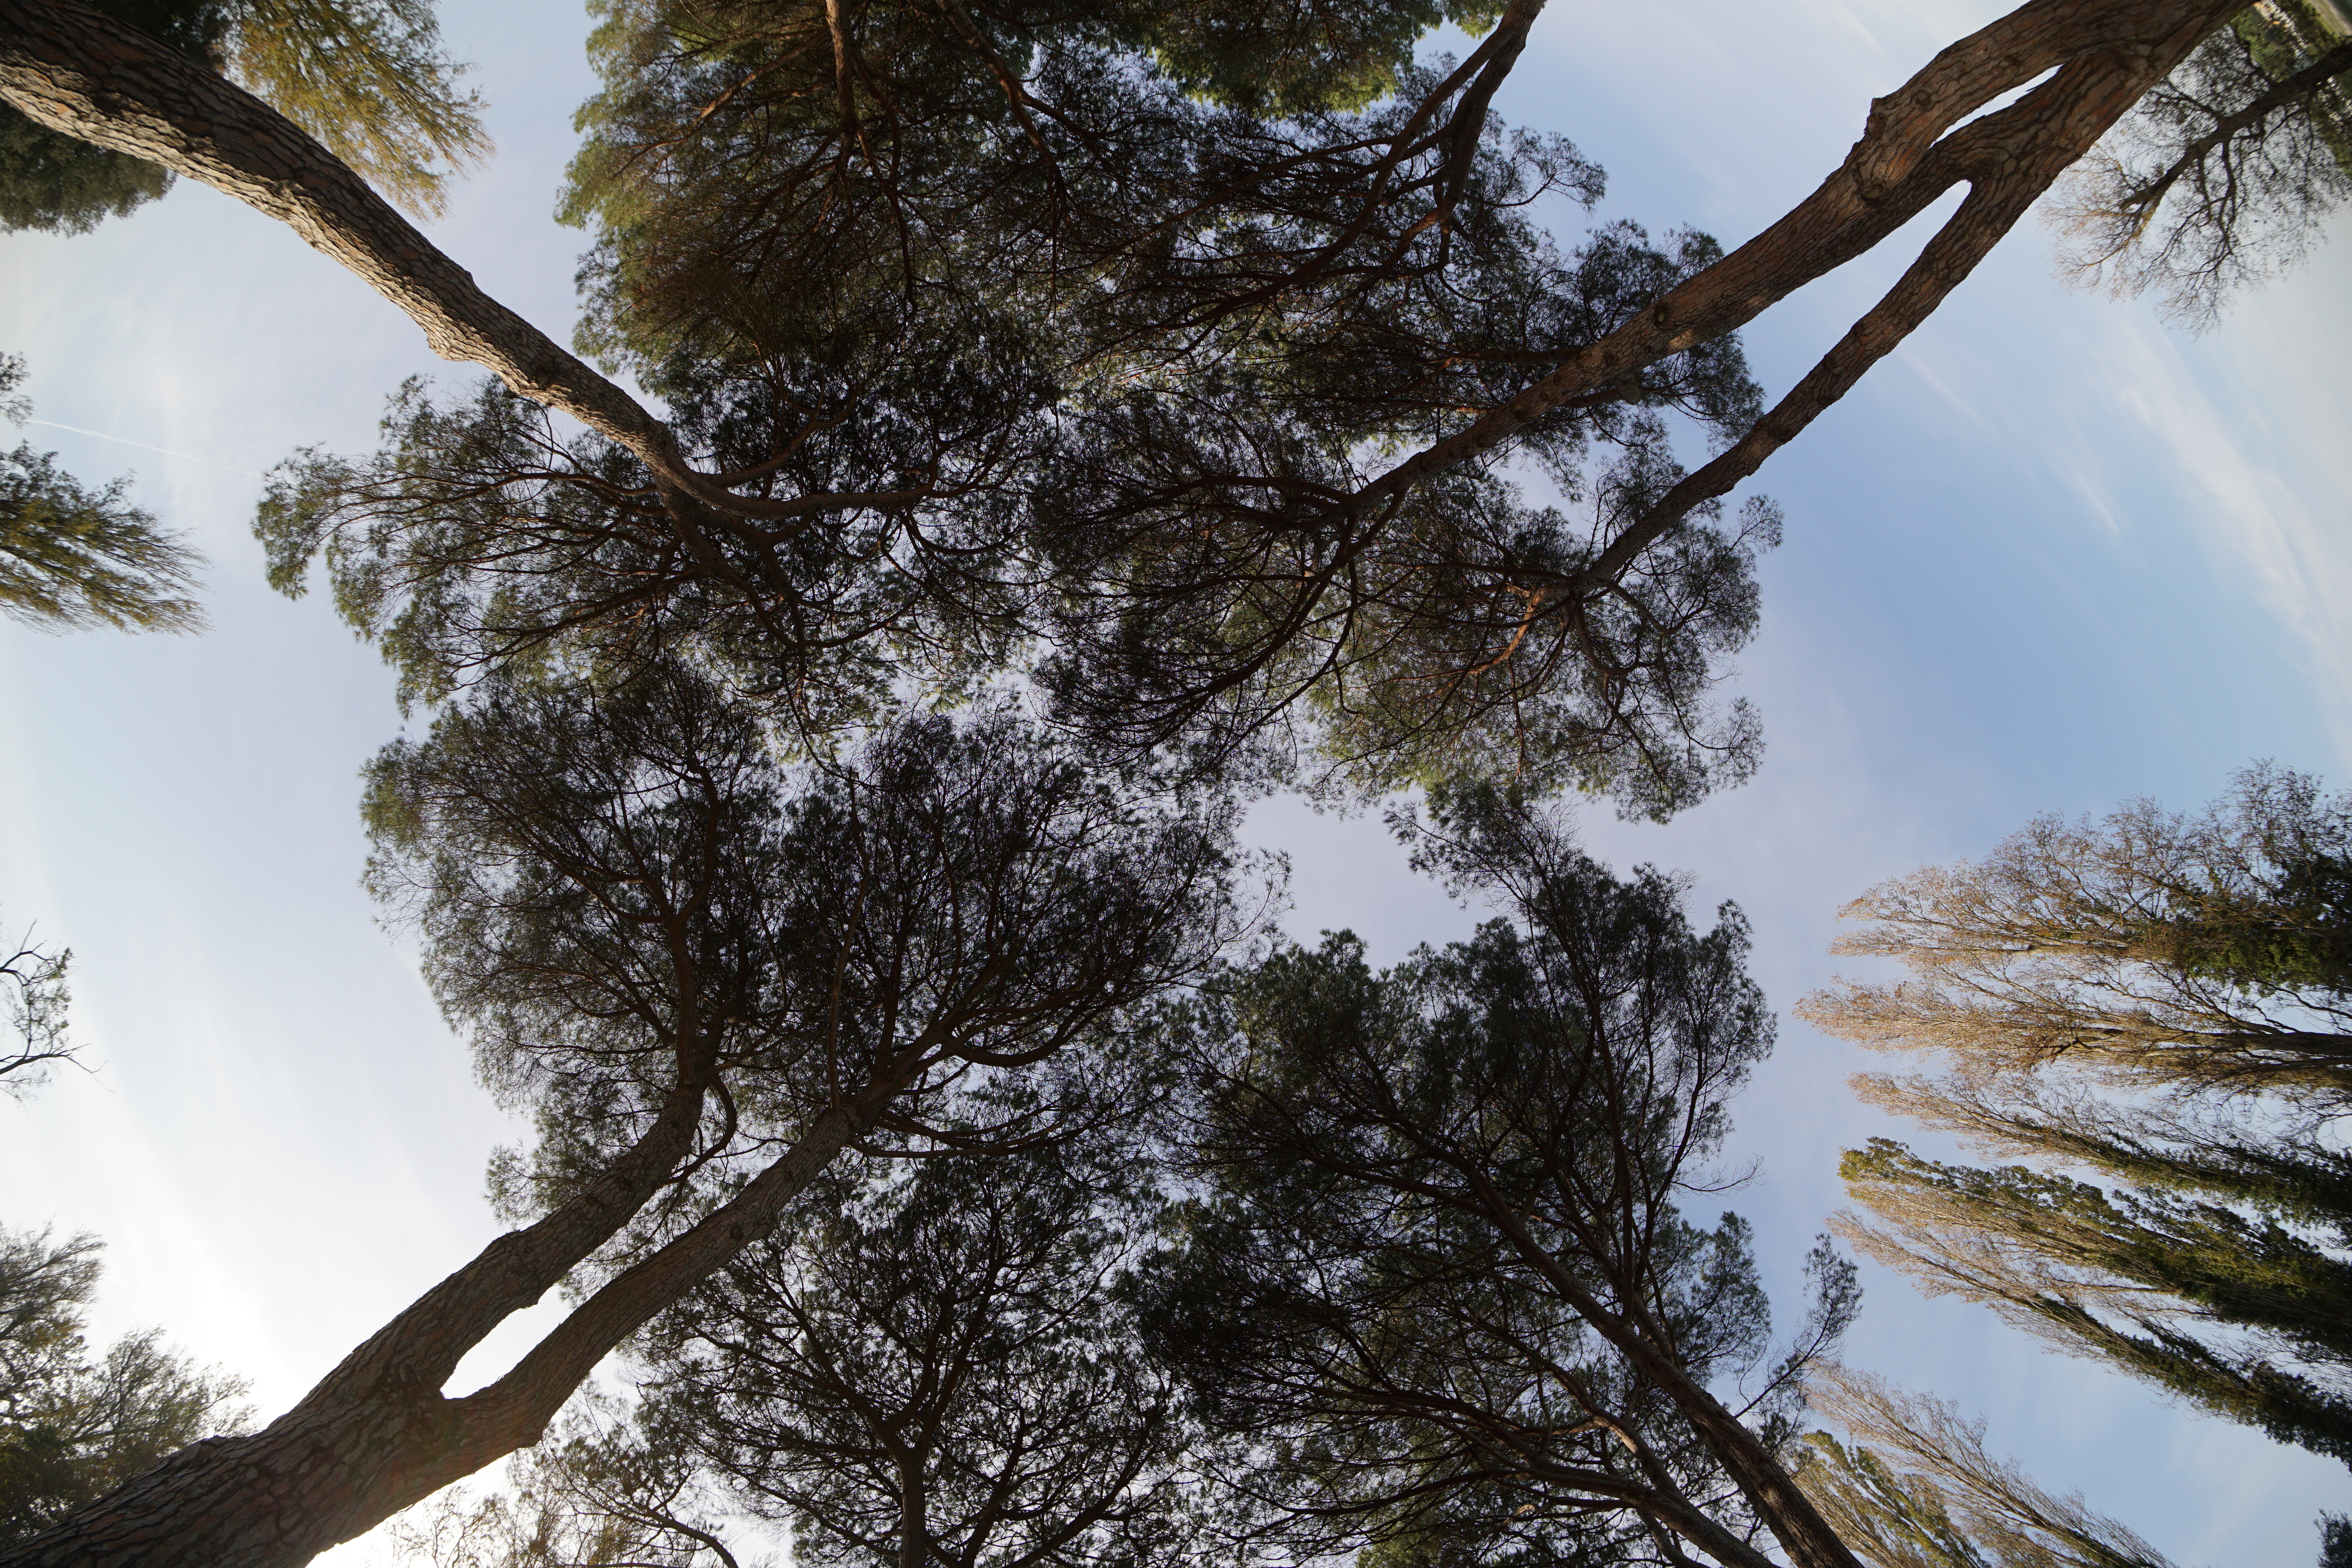
Next, I decided to try a circular distortion fish-eye effect, so I captured the top of some trees from a local forest and the lens performed surprisingly well, especially considering the price tag. The leaves are detailed enough even when they’re that far away and the sharpness again becomes more prominent in the center when the object of interest is farther away (the previous photo showed that the lens retains pretty much the same sharpness amount over the entire photo if the object is closer).
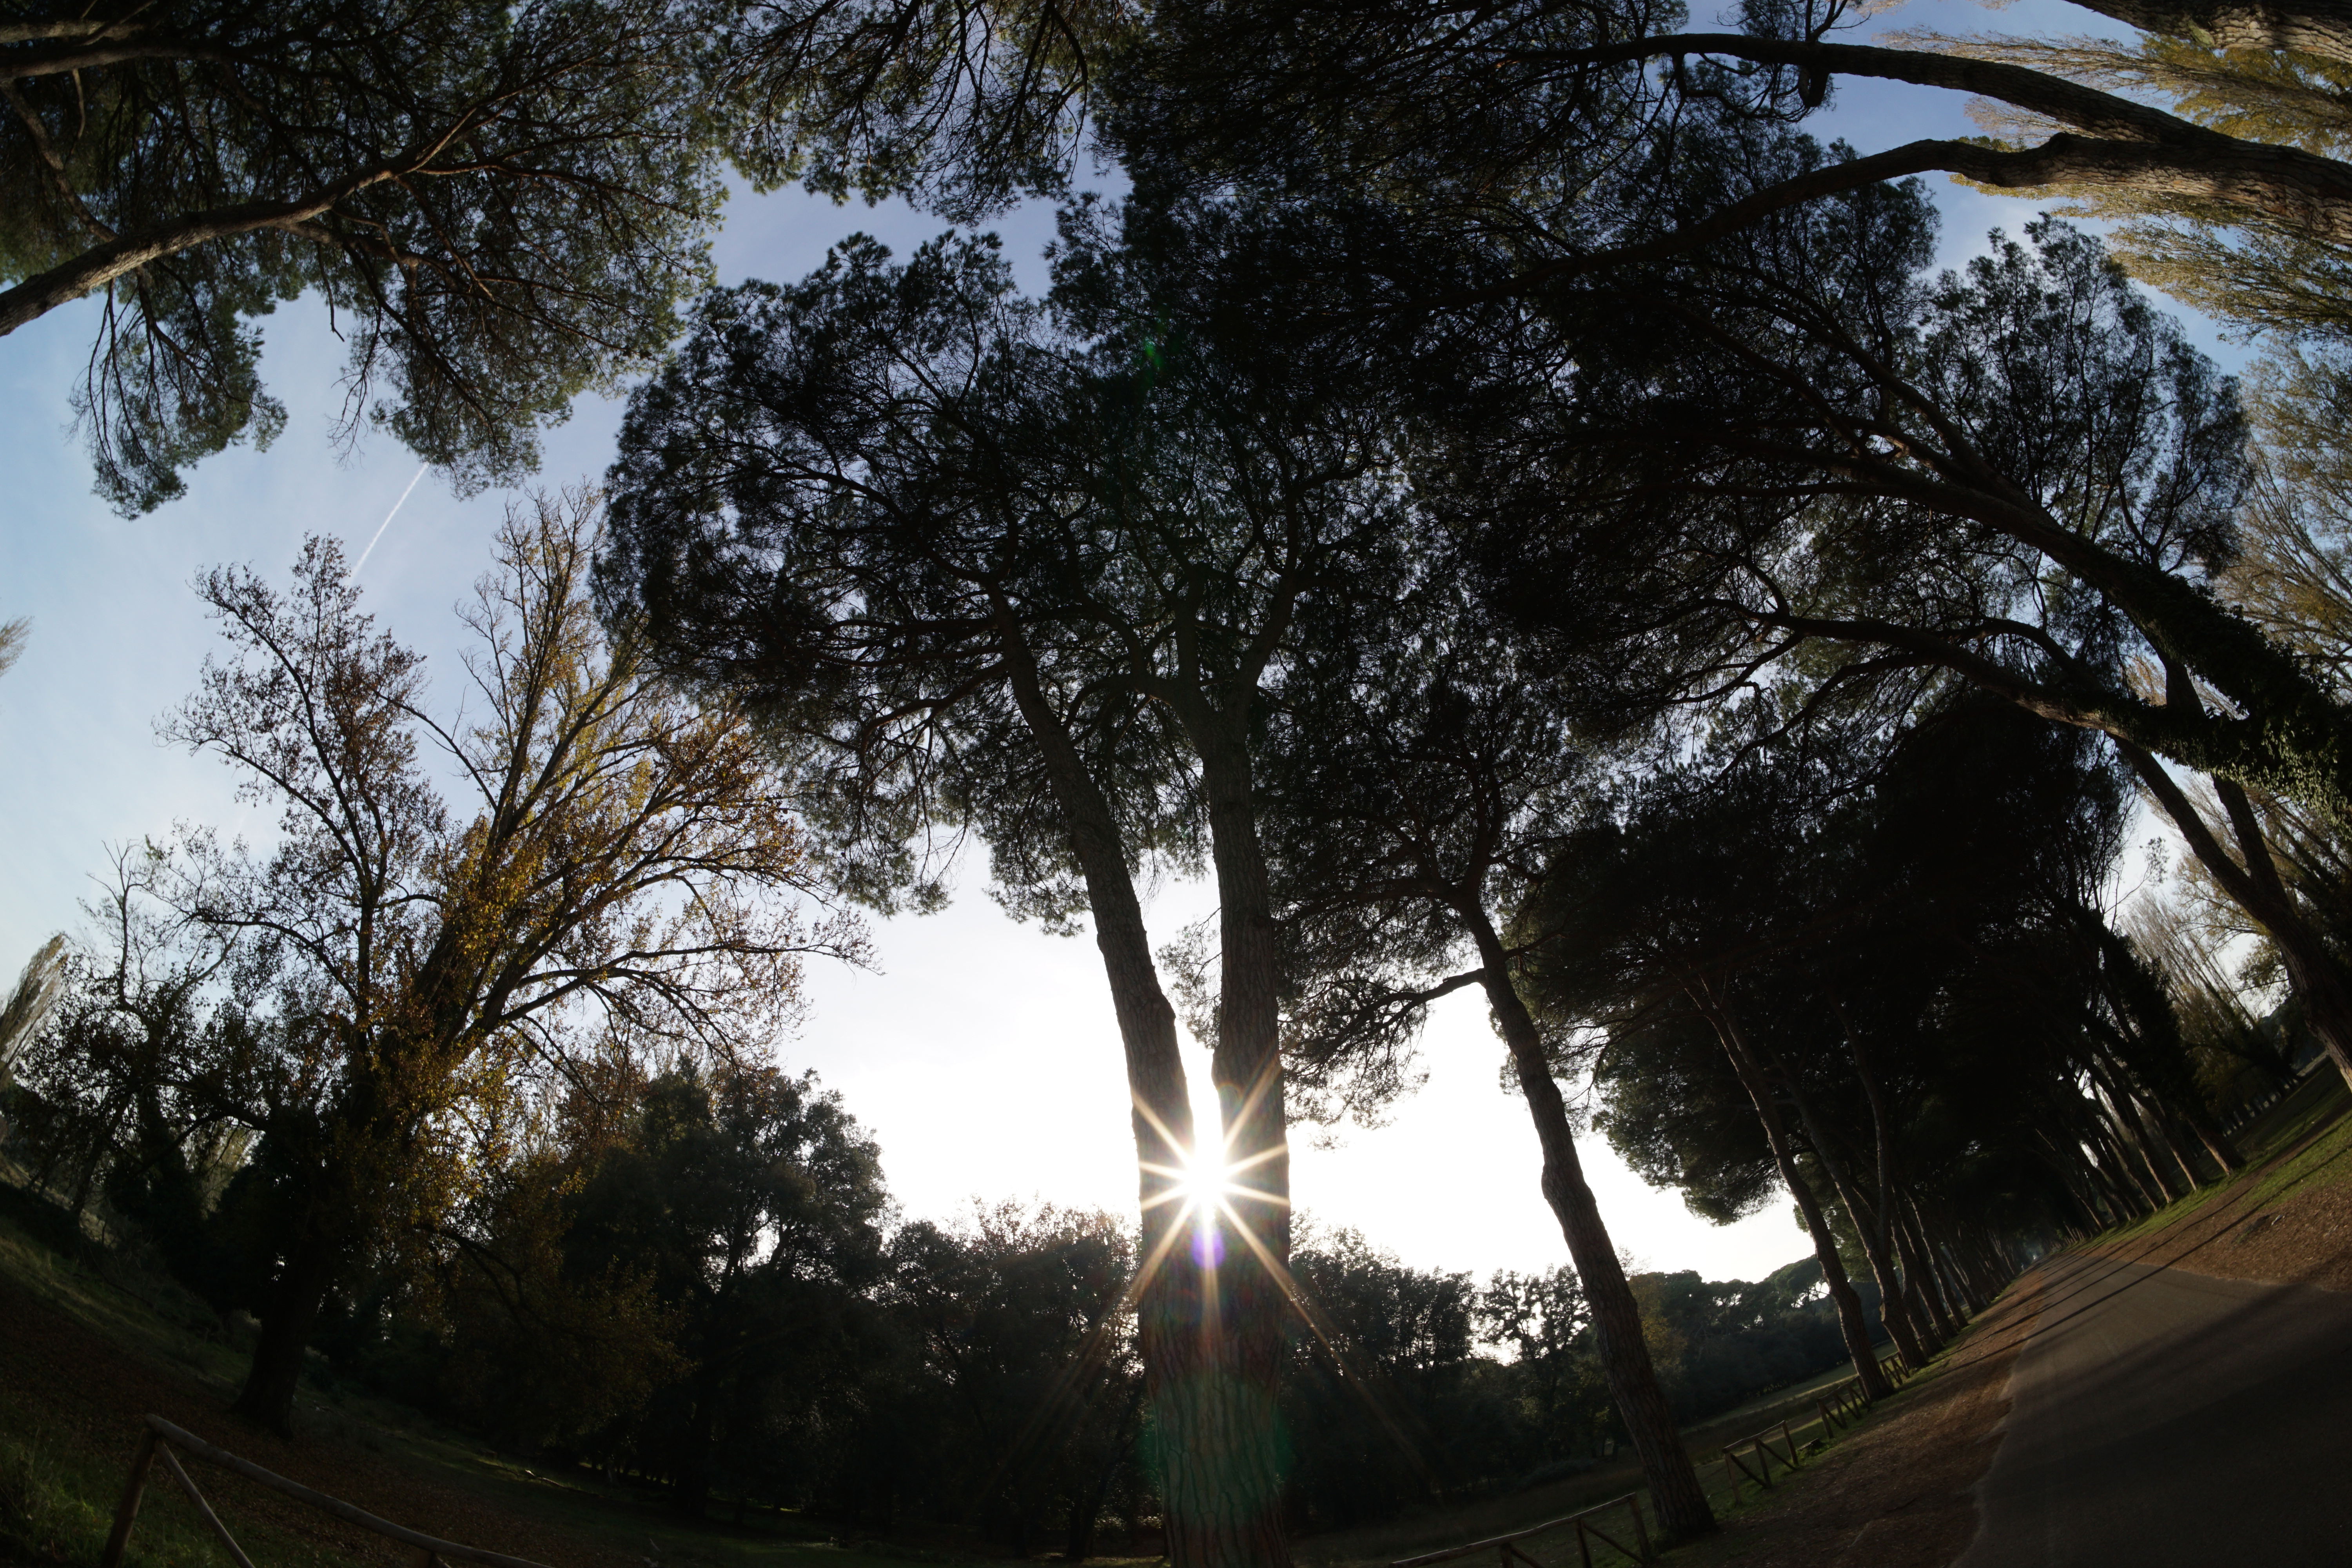
Lastly, I decided to have some fun with the lens flare and allowed the sun rays to creep through the branches and, as expected, the sun will darken up the photo a bit and it does seem like it slightly reduces the contrast of the image (although it can be corrected from the software up to a certain point).
Conclusion
Since this is the first 7.5mm FishEye lens that I tested so far, I have to say that I had a lot of fun and at no point did it feel like I was using cheap glass. The build quality is excellent, the performance was better than expected and overall, it definitely offers a lot of value for the money (of course, there will also be some noticeable weaknesses especially when you put it next to a more expensive wide-angle fish-eye lens). That being said, who is this lens for? The amateur photographers and people that are budget-constrained will have a blast using this lens, but even the intermediate users could definitely make use of it for their creative works.
Pergear 7.5mm FishEye Lens
-
Pros
- Solid build quality
- The aperture and focus rings are easy to operate
- The sharpness is not centered and instead, you get a uniform amount of sharpness in almost the entire photo
- Very fun to use - the applications are endless
Cons
- The lens cap can easily fall off, especially after prolonged use
- The manual focus can be considered a minus, but considering the price tag, this and every other possible minus can be overlooked
Mark is a graduate in Computer Science, having gathered valuable experience over the years working in IT as a programmer. Mark is also the main tech writer for MBReviews.com, covering not only his passion, the networking devices, but also other cool electronic gadgets that you may find useful for your every day life.