
I know that there may be better methods out there but this is the way I increased the size of a Raspberry Pi CM4 module since it would stubbornly prevent me from installing the Home Assistant image on an OpenWRT device. The method is fairly simple and it involves using GParted, but read on since you may learn a few things following my journey. Especially since I am not that prolific with Linux and I initially tried to use Windows OS with the Ubuntu app.
Why would you want to increase the size of a Raspberry Pi CM module?
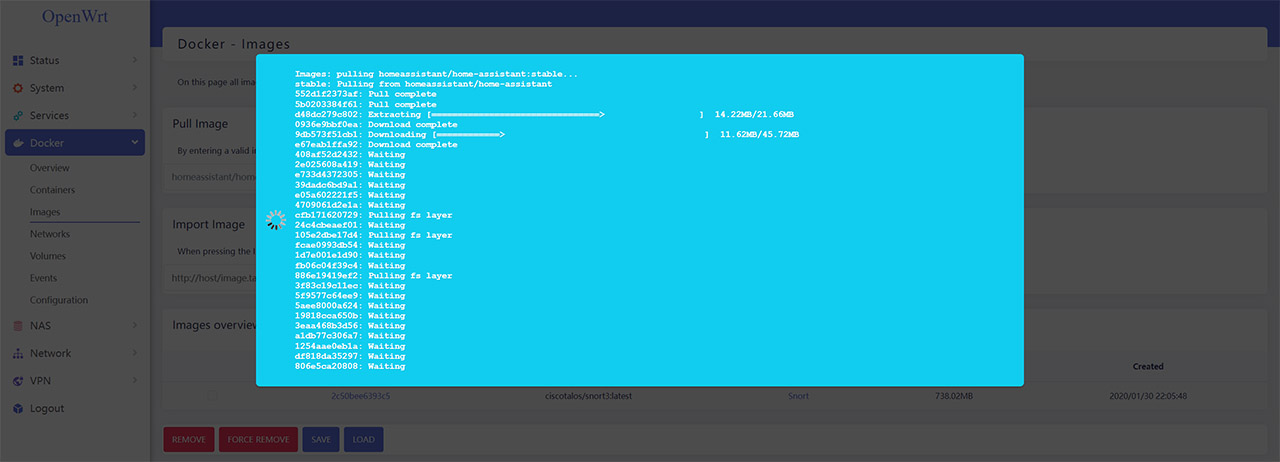
I have recently got my hands on a Seeed Mini Router which had pre-installed the OpenWRT software and yes, it can be a bit unstable at times, but it’s great for running various apps and for development purposes. And, while I could install various modules and apps, after trying to install the Home Assistant using the “homeassistant/home-assistant:stable” to pull the image (Docker > Images), I quickly realized that there was not enough space allocated, despite technically having available 32GB.
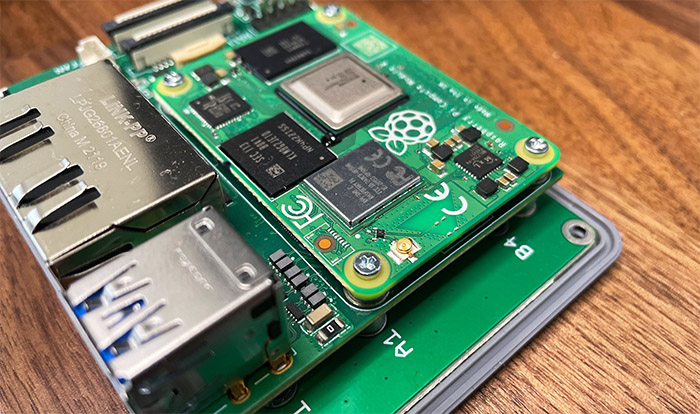
Since it’s eMMC, only the already built-in flash storage is available to the user, so I couldn’t rely on a separate microSD card, which is the usual route with Raspberry Pi devices. And it’s true that the Mini Router does have a card slot, but it can’t be used (Seeed simply didn’t bother to remove it). So, I needed to increase the allocated space to have more room for installing other types of software.
What I tried (but didn’t work)
I first checked for a way to increase the size from the OpenWRT GUI itself, perhaps there would be some setting available, but no, there was nothing. So, I entered the Raspberry Pi CM4 using Putty and searched for a way to increase the allocated space. After getting multiple weird errors, such as missing rootfs which eventually culminated with the complete shutdown of the Docker (and the inability to restart it), I gave up for a few days.
After returning, I also saw that firstboot would refuse to work, so I reinstalled everything fresh and started again (there are some instructions on the Seeed website, but I may do an article for this as well). This time, I was sure that it would work with the Ubuntu app for Windows. After installing GParted, I was unable to do anything else, so this implementation of Ubuntu is pretty much useless for my use-case – it’s not that useful in other cases either (a proper distro installation is always the better way).
What did work
After reinstalling OpenWRT on the RPi CM4, I decided to finally use a Linux machine. I had a small Raspberry Pi 4 that I use for creating a smart TV and I decided to connect it to the Mini Router. The RPi 4 had Raspbian installed (apparently now called Raspberry Pi OS) and it had the console access and pretty much all that was needed to allow me to increase the available space on the CM4. If you don’t have a Linux PC, even a cheap Pi Zero should do the trick, just be aware that it’s going to be a bit slow. But it will work.
1. Physically preparing the CM board.
The first problem was that I needed to put the RPi CM4 into Boot mode and this can be done by connecting the GND pin to the BOOT pin using a jumper wire. If you have a Seeed Mini Router, then you will have to open up the case.
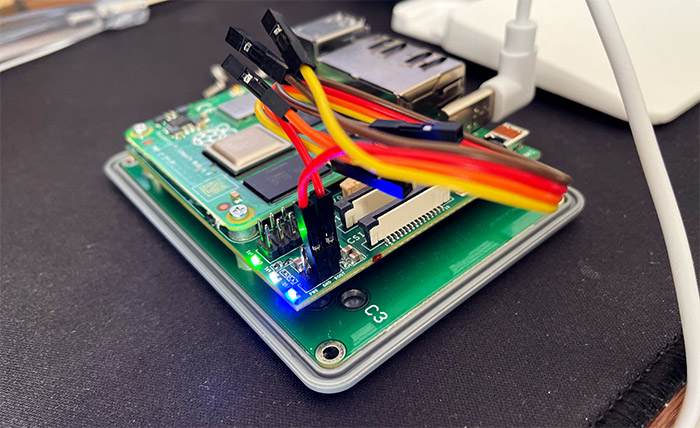
Also, you may need to purchase a jumper wire and they’re very cheap (I had a few lying around for a project that I’ve been postponing for more than 6 months). Then, connect the CM4 board to the computer (in my case, it was a second Raspberry Pi) using the USB-C port.
2. Prepare the CM board software-wise.
After you connect the board to your computer (or RPi), nothing is going to happen since you won’t have access to the storage and to remedy that, we need to install RPiboot. After opening the Terminal, enter the following commands (they’re the same as found on the official Seeed website):
sudo apt update
sudo apt install git
git clone –depth=1 https://github.com/raspberrypi/usbboot
#and then access usbboot
cd usbboot
#now, we need to install libusb and start RPiboot
sudo apt install libusb-1.0-0-dev
make
sudo ./rpiboot
At this point, if the CM board is connected to the computer, it should check for the BCM2835/6/7/2711 and, if successful, it should give you access to the storage from the CM4 board (in our case, the Seeed Mini Router).
3. Install GParted.
This can be done using the Terminal, so you can open a separate one and use the following commands:
sudo apt update
sudo apt install gparted
After that’s done, I could simply use the GUI and open it from the menu.
4. Use GParted to increase the size of the Raspberry Pi CM module.
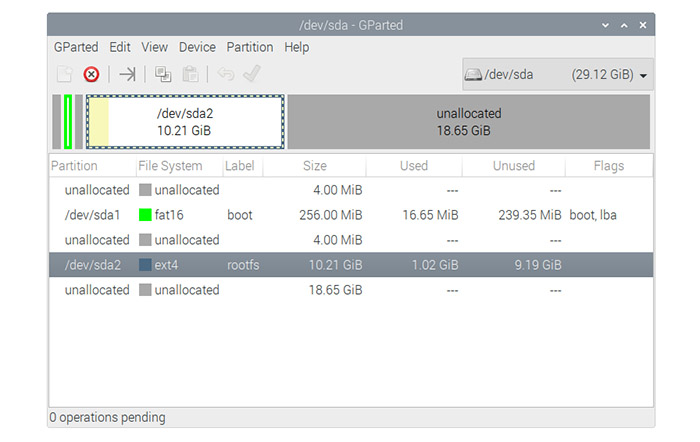
If everything worked as intended, you should be able to see the eMMC storage drive and, in my case, it was /dev/sda2.

As you can see from the image, it had allocated 2GB and I had about 1GB left for other apps, so it’s not wonder that I was unable to install the Home Assistant. The process of adding more space can be done in a very simple manner and that’s thanks to the awesome developers of GParted.
* Click on the drive that needs to be extended and then click on the Resize icon (should look something like this: >|).
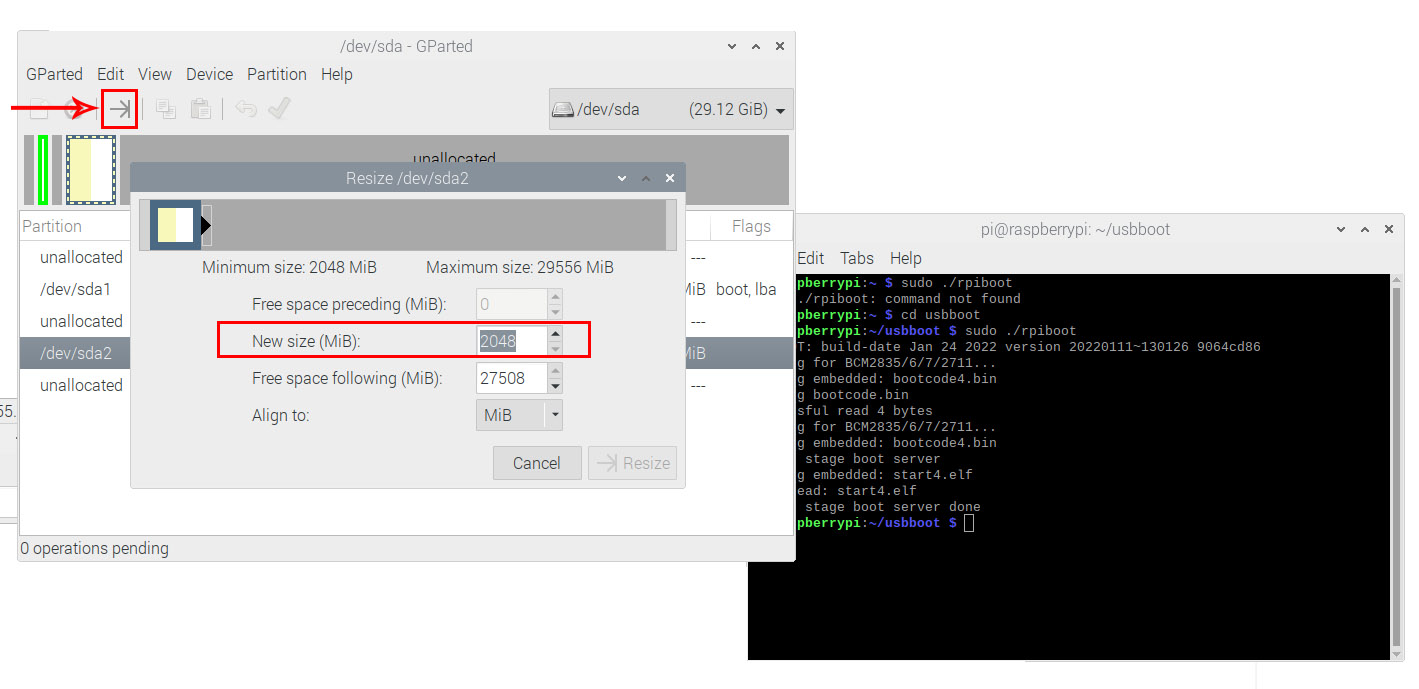
* Click on the upper arrow next to the New size (MiB) until you’re satisfied with the amount that you would now have available. Click Resize.
* You should now have more storage memory available, so disconnect the drive and install any app, software or utility that you may desire.
Problems with GParted
Not everything went that smoothly in my case (it never does), so I was actually left with more space, but not quite, since the additional space was still unallocated.
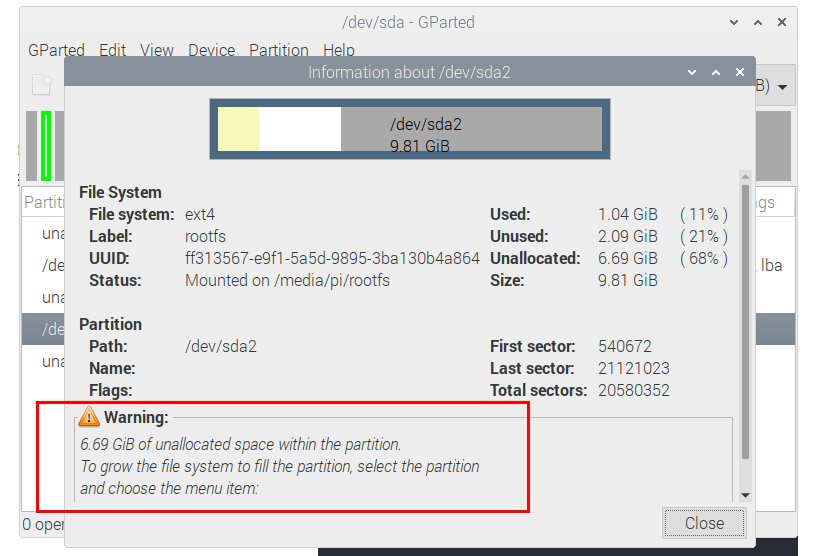
There is a simple fix to this: reboot everything. Yes, you will need to disconnect the CM and reboot the computer (Raspberry Pi) and then redo all the previous steps, but it should now work as intended.
Mark is a graduate in Computer Science, having gathered valuable experience over the years working in IT as a programmer. Mark is also the main tech writer for MBReviews.com, covering not only his passion, the networking devices, but also other cool electronic gadgets that you may find useful for your every day life.