
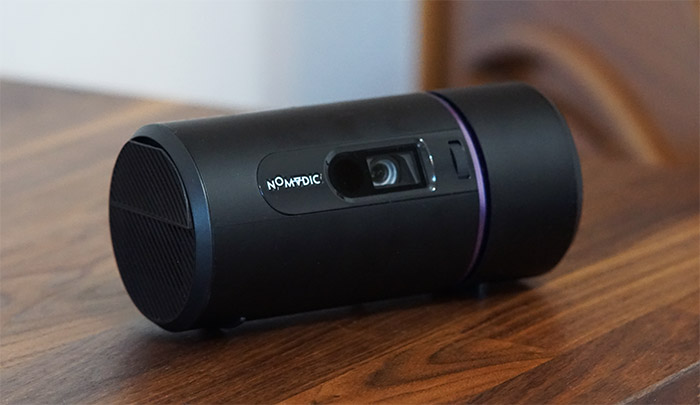
The NOMVDIC R150 challenges the way portable projectors should look by adopting a design similar to a Bluetooth speaker (both in size and shape) and the manufacturer has also added an additional twist. Quite literally, you can twist one side of the projector so that the lens is adjusted at the preferred angle – it’s adjustable up to 90 degrees, so it’s entirely possible to project the image on the ceiling.
| NOMVDIC R150 Projector | |
|---|---|
| NOMVDIC.io | Check Product |
| Amazon.com | Check Offer |
It’s not that you couldn’t do the same with the other projectors, but the advantage is that you don’t need to rely on a tripod to do so. But, the compact form factor does seem to have come at a cost. No, the price tag is very much in the affordable realm, the cost came at the resolution level.
This is not a 1080p projector, it has a 480p native resolution which is scaled up to cover a maximum of 100 inches of real estate – you can go higher, but then the details will be visibly impacted. Another potential shortcoming can be the 360 LED Lumen, so the NOMVDIC R150 is not really a very bright projector which means that it will require a darker room for a better image quality. Not all is doom and gloom because we do have auto keystone correction and it still blows my mind that this technology manages to be ported at such low price points.
I just hope it has a better implementation than the Formovie Dice. As for autofocus, you will need to do it manually using the front-facing wheel and there is a 4,800mAh battery inside the case to enhance the portability factor of the projector. Overall, it does seem that the NOMVDIC R150 is an honest projector considering its price, so let’s put it to the test and see how it performs.
The Design and Build Quality
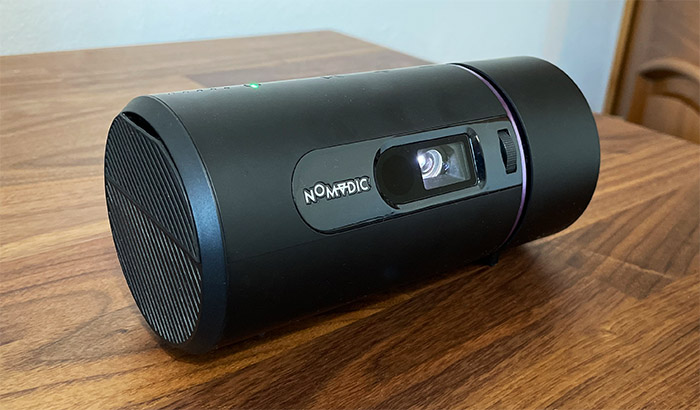
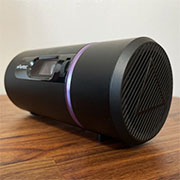
The NOMVDIC R150 is without a doubt one of the most portable projectors I have seen on the market so far (raises up to its name – the V is an A upside down, so it’s Nomadic R150). It measures 6.8 x 3.2 x 3.1 inches (17.3 x 8.1 x 8.0cm), so it’s just a short cylinder which will not occupy much space from your backpack.
Hell, the NOMVDIC R150 will most likely fit larger pockets. And it’s not really that heavy either – at 1.6 pounds 720g), the projector seems to be perfectly balanced to not be a burden while being carried around and not feel cheaply built (that premium feel that we think we get from heavier devices). I admit I was accustomed with the rectangular projector, so seeing the Bluetooth speaker-like design was a fairly unique approach, but there is a reason for it beyond just the ‘standing out’ factor. The manufacturer wanted to provide a means for adjusting the angle of the NOMVDIC R150 without having to rely on a stand or on a tripod, as it’s the case with pretty much all other projectors.
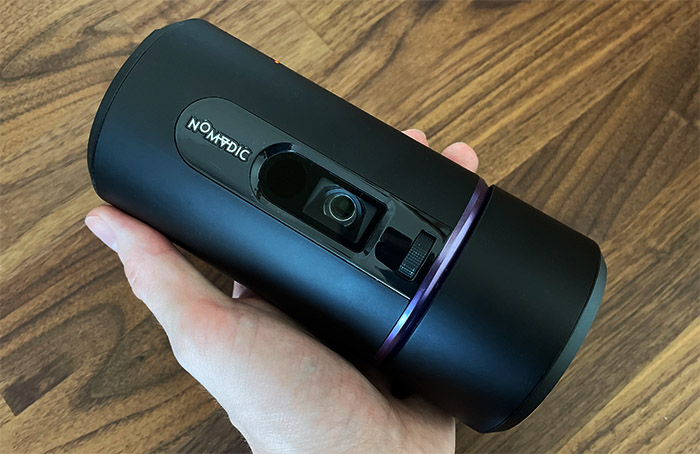
This was accomplished by allowing the user to rotate the lens side of the device up to 90 degrees. There is a plastic band that surrounds half the cylindrical case (the larger portion) and a silicone foot on the smaller portion which will make sure to keep it in place. When paired with the automatic keystone adjustment, this system should work really well (we will see in the testing section). If you still wish to use a tripod, there is a metallic mounting hole on the bottom for this reason alone.
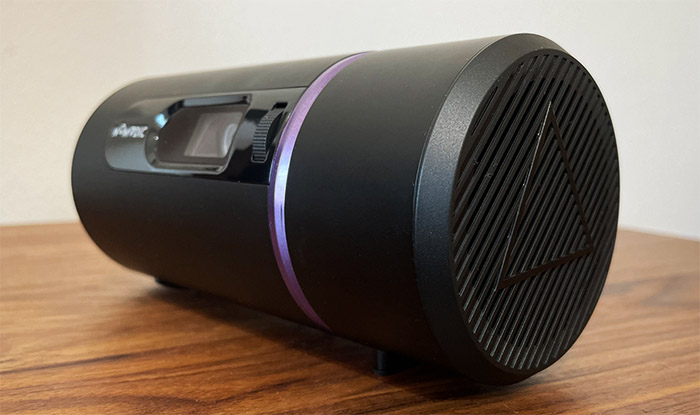
The entire case of the NOMVDIC R150 is made of plastic covered by a black matte finish, with the exception of the purple band that goes around the device where it meets the rotating section. The NOMVDIC R150 does have integrated speakers which are customized by Harman Kardon, so the sound quality should be similar to the XGIMI Halo Plus. After opening the device (as you will see in the next section), I noticed that there are two lateral tweeters and one larger speaker pointing upwards (subwoofer?), all on the right side of the projector.
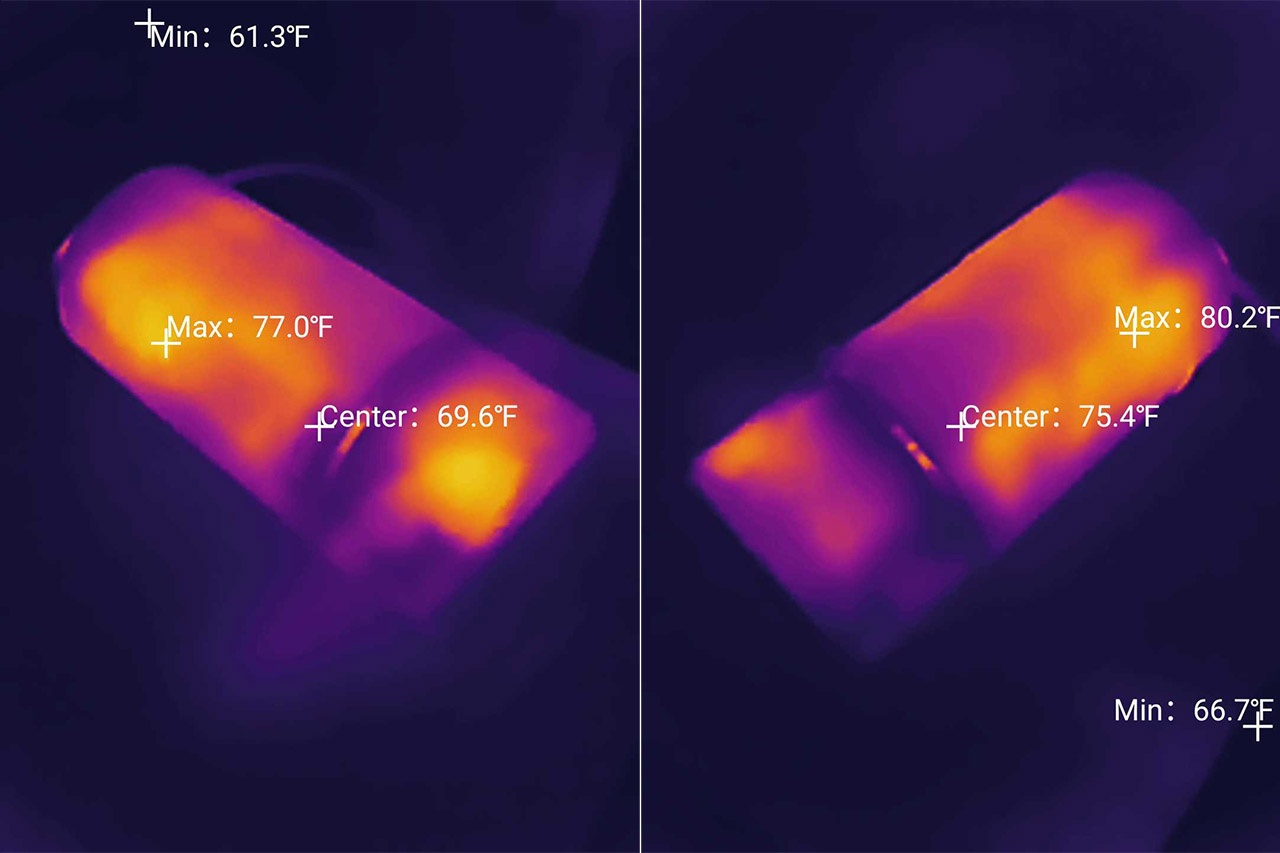
On the left side of the device, there’s the ventilation outlet section which pushes the air out from the inner fan. I didn’t see any other openings with the exception of speaker area, so is that enough to keep the NOMVDIC R150 at a suitable temperature? As all other compact projectors, it will heat up a bit, so I have attached a thermal photo so you get an idea how hot it actually gets.
Where are the ports? If you look closely, you will see that next to the ventilation outlet, there is a silicone cover that can be detached (while ruining your nails), thus exposing the ports area.
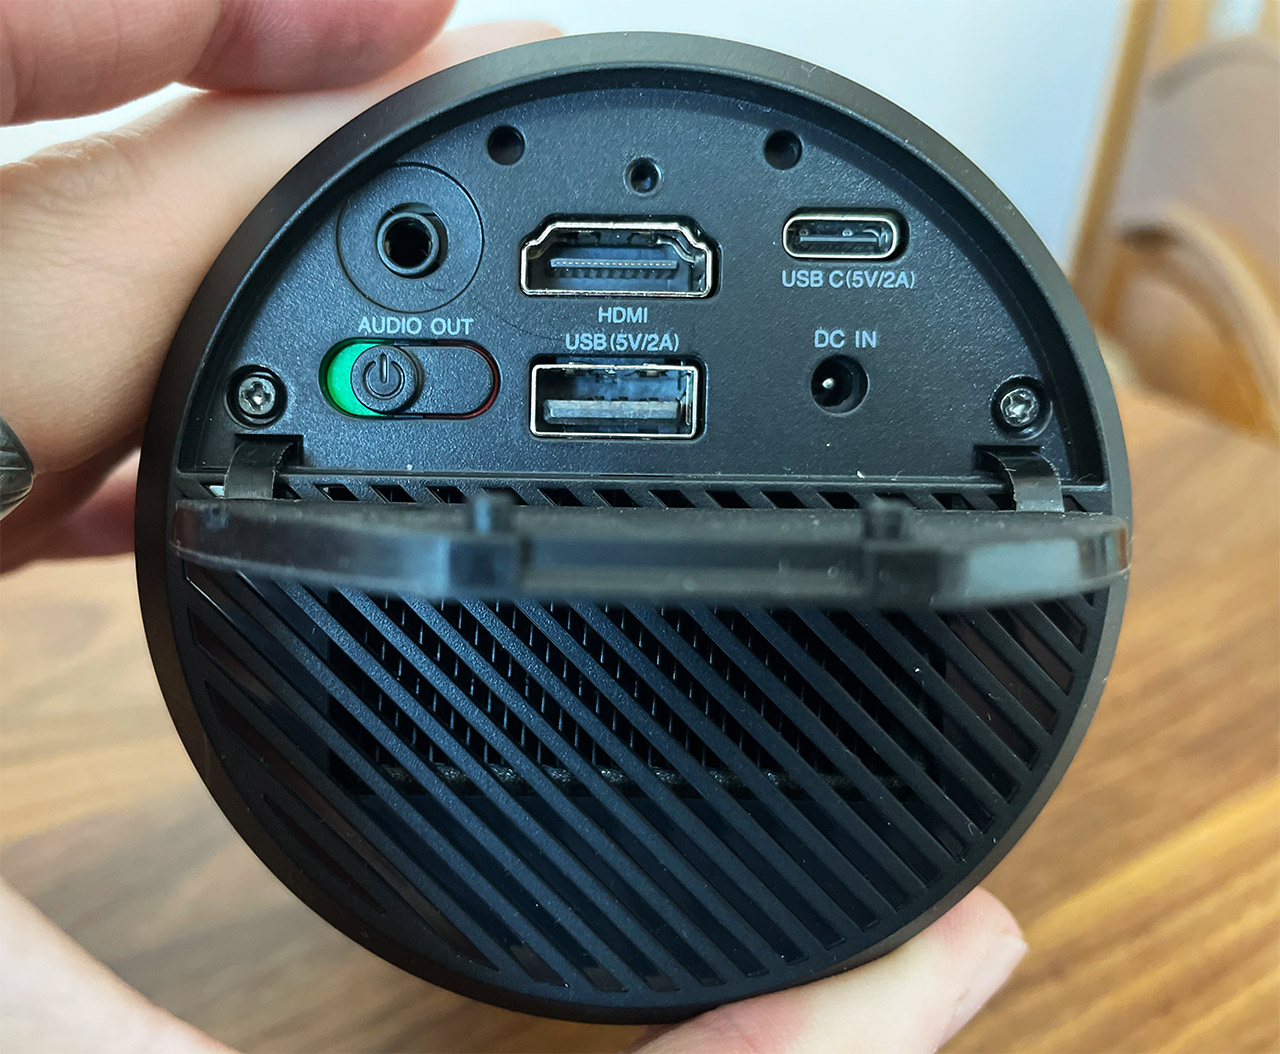
Here, you will see the Power switch (red for Off, green for ON) which sits next to the 3.5mm Audio Out jack followed by an HDMI port and a USB-A port as well (5V/2A). The NOMVDIC R150 also has a USB-C port that can be used for both powering the projector (recharging the battery) and for video input. Lastly, there’s a Power port and I have to say that I am impressed that the engineers were able to cram everything in such a small area.
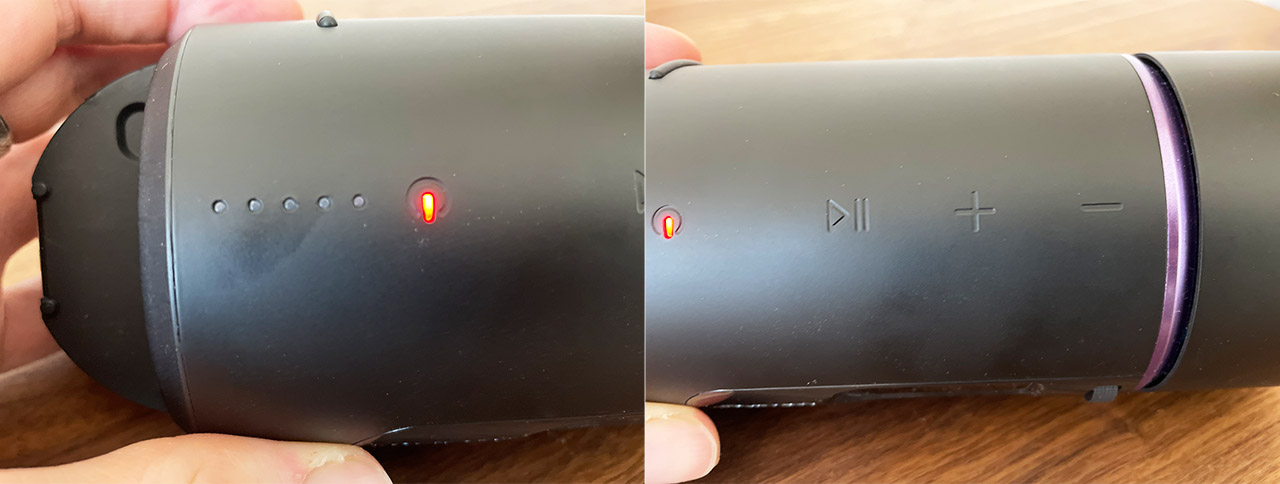
At the top if the device, there’s the controls section where there are three touch-sensitive buttons: two for volume control and one for Play/Pause. Next to them, there are five LEDs which light up to show the battery status of the projector (one for each 20%). I also need to mention the front-facing manual focus adjustment ring and next, to the lens, there’s a sensor to communicate with the remote control – the auto keystone correction doesn’t seem to use a ToF sensor or a dedicated camera, so I am even more curious to see it in action.
NOMVDIC R150 Teardown
I am not a fan of opening up projectors, as I said many times, but the NOMVDIC R150 did not have an FCC ID page with internal photos, so I had to take out the tools and see what makes the device tick. First, I had to detach the left and right side circular covers with a prying tool (there are two screws on the ports section that had to be removed), then I could simply slide the plastic shells from both sides. At this point it’s just a matter of removing the screws and then detaching a part of the inner plastic case to expose the main PCB.
But be very careful when doing so because there is a very fragile connector that needs to be detached immediately afterwards, before taking out the plastic piece – if you break it, you no longer can control the NOMVDIC R150 from the physical buttons. There is more and this is probably the most important thing to keep in mind. Before detaching the PCB, make sure to detach the connector that’s covered by a silver band – if you don’t it will easily detach itself from the slot, therefore losing the communication with the lens assembly.
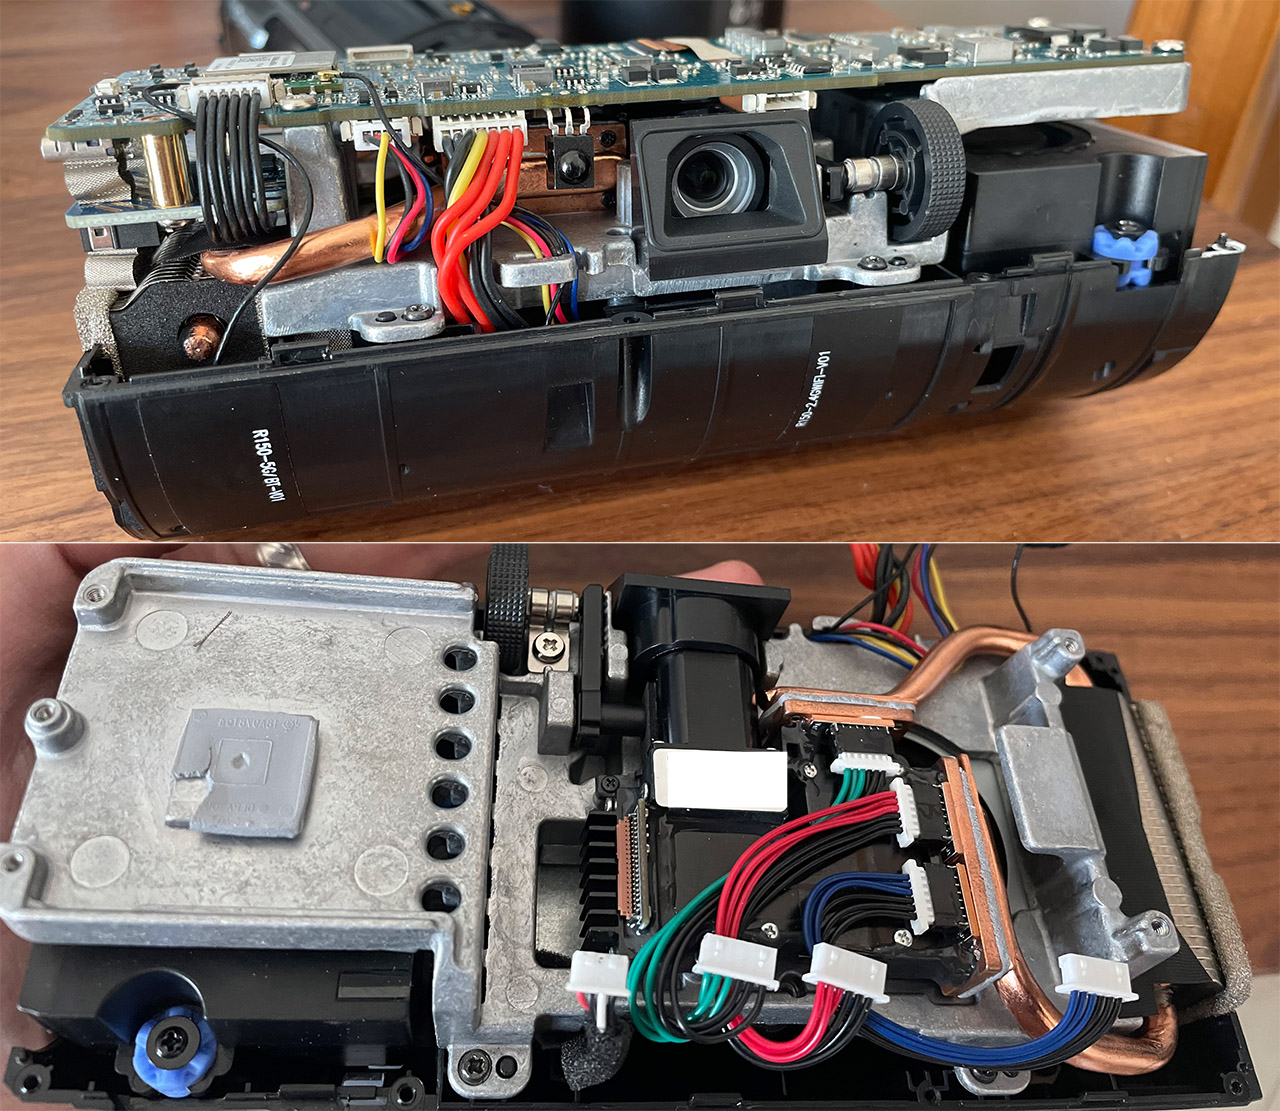
In case that happens don’t panic and just detach it from the top, take out the PCB, re-connect it to lens part (on the side) and then back at the top. I am not a fan of how the manufacturer decided to do things, but once I figured out all the ‘little traps’, it’s easy to fix. That being said, I have been able to identify a few components, from which there was the Texas Instruments DLPC3435 0.2″ controller which pushes the native resolution of 480p to a perceptible resolution of 720p or 1080p, the quad-core 1.5GHz Mediatek ARM MT9269EDATAA (A53) processor, the Chrontel CH7217A-8F low-power semiconductor for the USB-C port (translates the signal) and the 16GB of eMMC memory from Samsung (SEC 134 B041 KLMG1JETD).
How does the NOMVDIC R150 achieve 720p and 1080p?
I am familiar with the X300 which offers a native resolution of 1080p, but the NOMVDIC R150 has a native resolution of 480p which is then dithered to either 720p or 1080p. The concept is the same as on the XGIMI Halo Plus and the Formovie Dice, but these two aforementioned projectors used a native 720p resolution chip, so yes, you will have to keep the projected image quite a bit smaller if you don’t want to notice the loss of details.
The throw ratio is about 1.2 (100 inches / 2.6m), but I would go for a smaller projected area if you want to get a detailed image. The DLP technology developed by Texas Instruments and the idea is for the lens to shift half a pitch between pixels, effectively pushing the resolution to 1080p. Well, it’s more of what the human brain sees and it can be tricked into believing that there are more pixels being displayed.
Still, if you ever put the projected image next to a native 1080p image (the NOMVDIC X300 is a good example), you’re going to see the difference. Furthermore, be aware of the rainbow effect which is very common with DLP projectors.
The Remote Control
The remote control that’s provided in the package follows the same minimalist approach as I’ve seen with other projectors, so it should be easy to navigate the software. But be aware that it’s not Android TV. That being said, the remote does Bluetooth to communicate with the NOMVDIC R150 and there is also a bigger coverage for communicating with the projector. I should also mention that the manufacturer has made available the NOMVDIC Remote Control App, which allows users to control the projector using their smartphones. This app can be used as a remote control or a mouse to navigate in certain apps like Netflix.
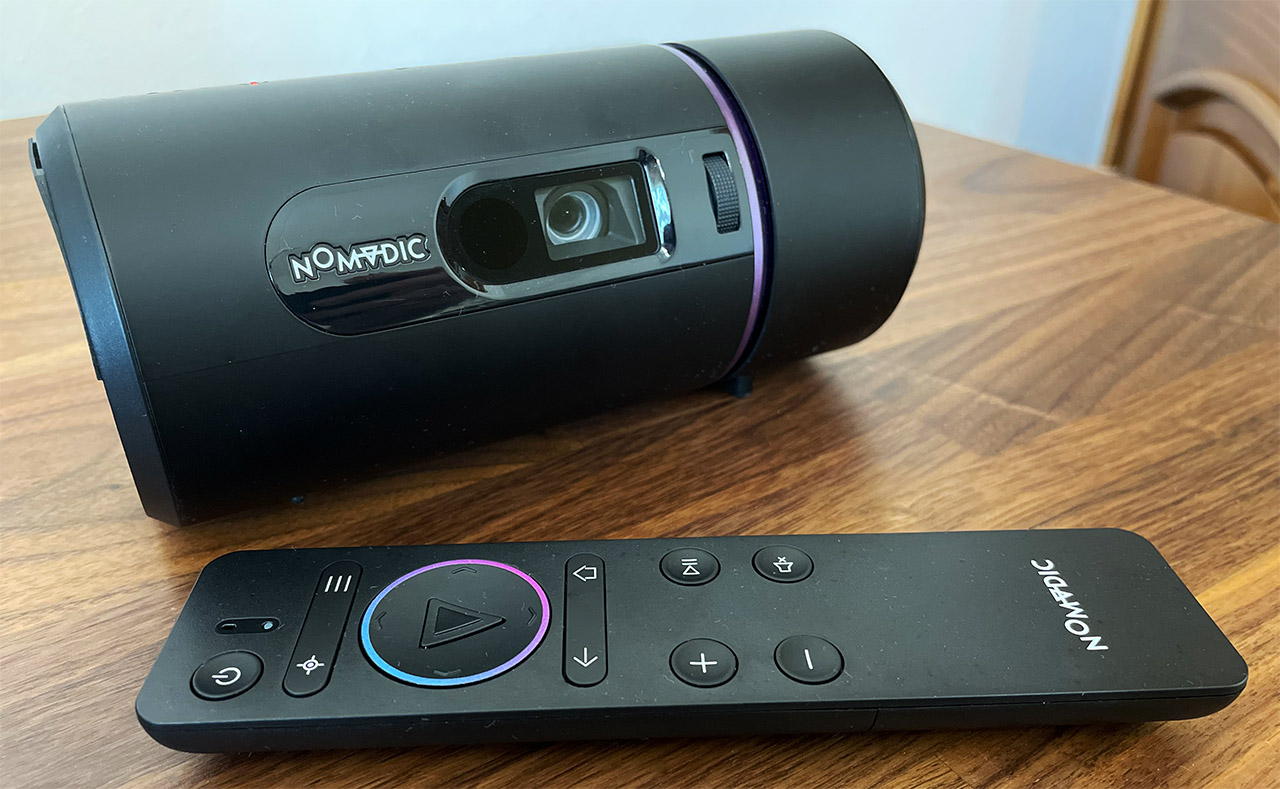
At the top, there’s the Power button and the status LED, while underneath, there’s the Settings and there’s also the Focus button which has its function disabled (the same remote is being used by the X300, where this function is enabled). Further down, there’s the D-Pad and it could have been a decent one if it wasn’t for the V in the middle. I get it, it’s your brand and all but the circular OK button is better to press and operate, not the V-shaped one (just add the logo and call it a day). Underneath the D-Pad, there’s the Return and Home pair of button, followed by the volume controls, as well as the Play and Mute buttons.
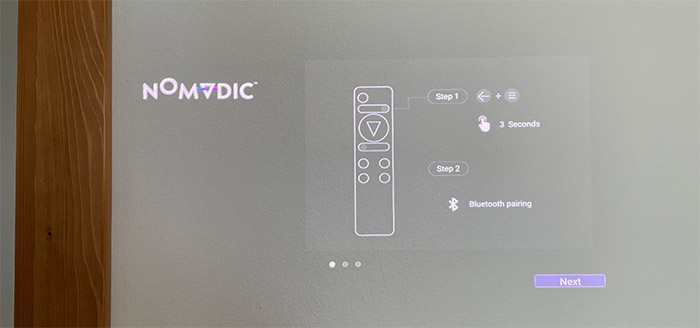
The Installation and Software Experience
I did like that the NOMVDIC has a power switch, so you don’t accidentally turn the projector on while it’s in your bag, and yes, you do need to flip the switch to On before anything else. Then, you can use the remote to start the installation wizard. It will require that you pair the remote to the projector using a preset combination of buttons, then the language and it will also ask to be connected to a WiFi network – it will work with 2.4GHz and 5GHz (802.11ac).
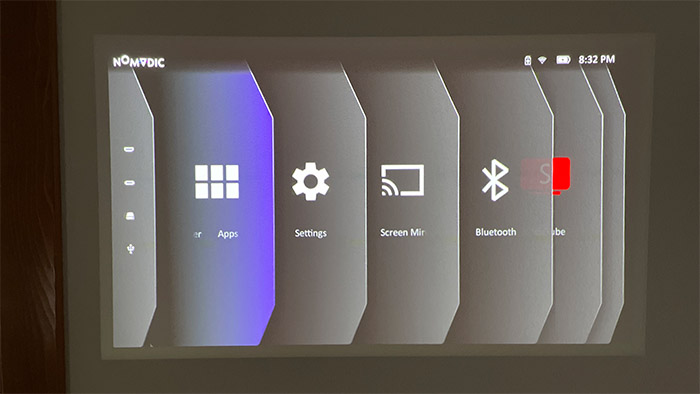
Afterwards, the OS let me know that there was a firmware available and, after the installation has been completed, I had to redo the previous steps (it only remembered the WiFi credentials). That’s about it, it doesn’t seem to collect any data or at least it doesn’t ask for permission to do so and yes, this is a proprietary OS, it’s not Android TV. It’s always nice to see a different approach, but is it just as good? It’s definitely different and doesn’t throw apps and movies in your face as Android does.
Instead, you get to choose from a horizontal menu between the video Source, the App Center, Settings, Mirroring and Bluetooth. There’s also a File Management where you can navigate the eMMC as you can when connecting an Android phone to your PC. You can also add as many apps as you want, besides the default ones. So let’s head over to the App Center. I suppose I expected the Play Store, but no, it’s a very curated list of compatible apps and while there are some important ones, a few are missing.
I could immediately see Netflix which seems to be a rarity (XGIMI and Formovie had issues adding it), there’s TED Talk, KODI, MXPlayer and YouTube TV. This last app take the place of the default YouTube app. These are from the Recommended list, but there are a few more such as Twitch, Disney and Nick Jr. There’s also Spotify and even Napster, and I also saw Chrome and VLC Media Player. But Prime was missing, which is a bit of a letdown. I also saw a bug (or weird feature, no idea) – if I moved too quickly between apps, it would automatically scroll the left menu instead.
Before moving forward, I do need to mention that the movement between apps is very smooth and I experienced no freezes or stutters skipping forward during a movie or a YouTube video, so the OS is well optimized.
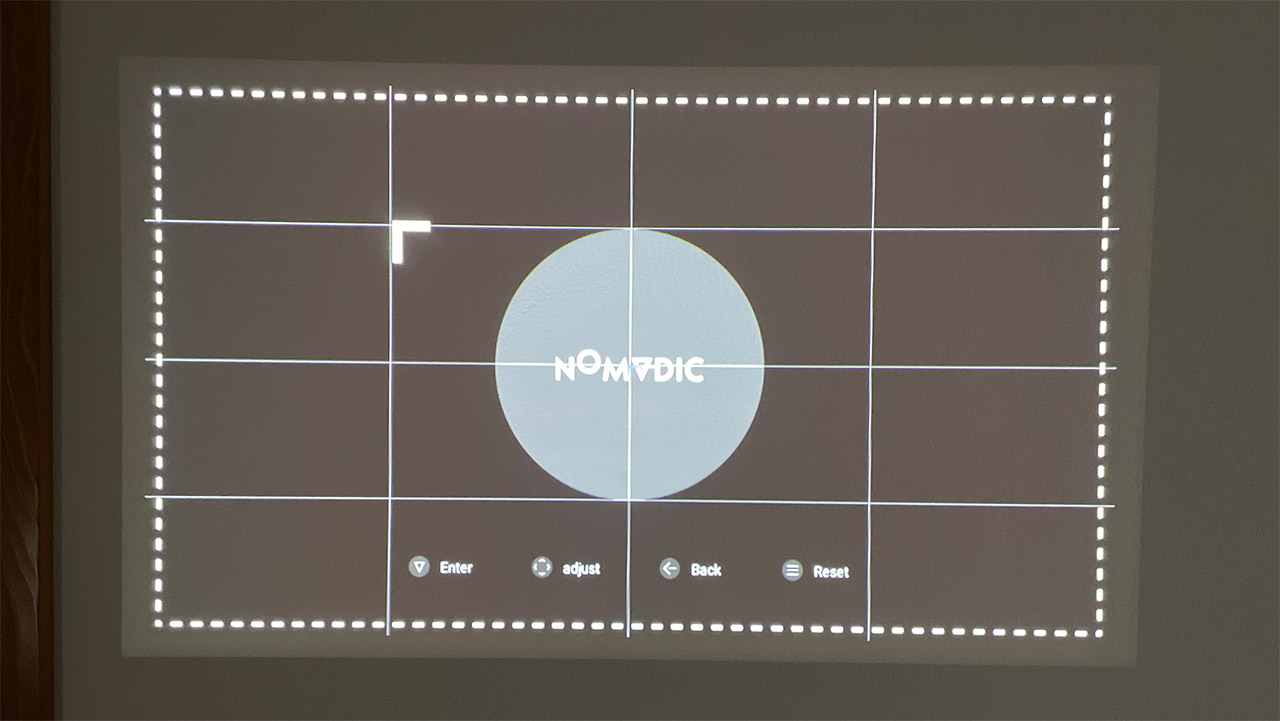
The Automatic Adjustments
The NOMVDIC R150 only offers one type of automatic adjustment and it’s about the keystone correction. So yes, there is no autofocus and you will have to use the wheel next to the lens to adjust it manually. It’s fairly smooth and easy to get right quickly, but you still need to do this every time the position of the projector changes. Which is often because it’s an ultra-portable device.
Now let’s talk about the auto keystone adjustments. In order to better understand where I am coming from, I first got to experience this feature on the XGIMI Horizon Pro and Halo Plus, and the way it worked was that it would micromanage every angle change ensuring that the projected image was always properly squared (as algorithmically possible). This is not at all the case with the NOMVDIC R150 and it has pretty much the same behavior as the Formovie Dice.
Some adjustments can be seen in action (I added a video to showcase how they work), but the projector is not able to produce a perfectly centered image, so you will have to adjust it manually probably 100% of cases. And I have the same complaint as with the Dice – just add a shortcut on the remote if the auto keystone correction behaves in this manner, it’s just easier for the user. I don’t know, at this point, I think that mild and full auto keystone correction should be terms to differentiate between what the device is actually able to do. The manufacturer has clarified that we are dealing with a vertical-only auto keystone correction, so I hope that they will make it more clear on their official website as well.
Manually adjusting the keystones is a bit weird if you use only the two-axis – weird because the background is black and I could not see what I was doing, but the four-axis adjustment is well done. Can the NOMVDIC R150 fine tune this feature from the software? I don’t think so because the hardware doesn’t seem to be there to allow it.
The Image Quality
As with the other projectors that I tested over the years, the first thing that I do is to check the color uniformity and to do so, I displayed some shades and colors from a USB drive. The first shade was white which, besides the uniformity, will also give us an idea about how bright the projected image can actually be. As you can see from the photos, the 360 LED Lumen seems to be enough for a dark room, but it’s noticeably less bright than on other projectors. Also know that LED lumen is not the same as ANSI lumen – I think that after the conversion, it should be roughly 150 ANSI lumen.
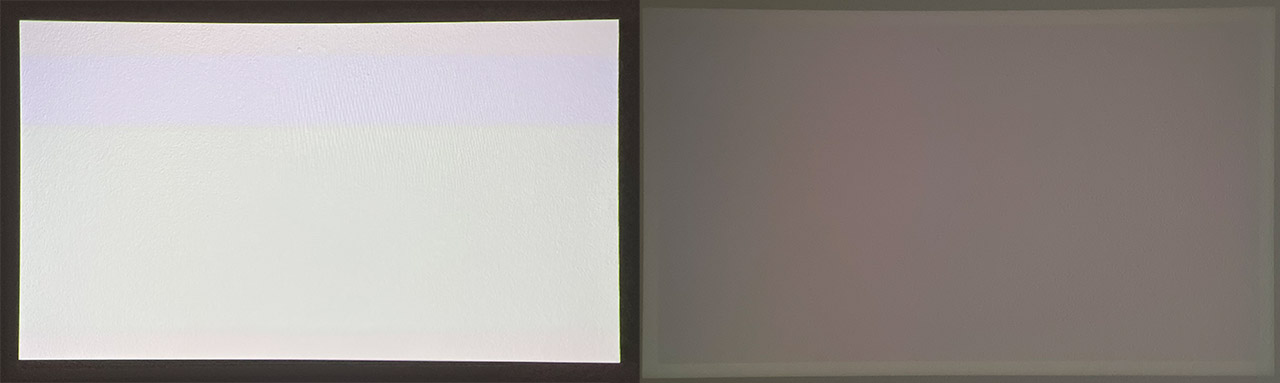
Still, the white was fairly uniform and perhaps it gets slightly bit darker at the corners. Next, I projected the black image and again, only on the corners (the left side), the image seems to be slightly darker, while the rest is fairly uniform. Furthermore, I projected the red, green and blue images, and they were very well reproduced – none of the aforementioned darker shades could be seen with these colors.

Next, I played a high-res video from YouTube (it’s this video) and I checked how detailed it looked and if the rainbow effect was visible. I could immediately tell that the image was less crisp than on other 1080p projectors, even the non-native ones, but which used a 0.33″ DLP chip. This was to be expected and fairly in line with the price range of the projector. Even so, it’s not a bad experience.
The colors remain vivid and the rainbow effect is barely there, but yes, if you get close to the projected image, you’re going to see it getting a bit blurry. To counteract it, you should keep a smaller projected view and stay a bit farther away – not ideal, but will help.
NOMVDIC R150
-
Pros
- Ultra-portable
- Decent audio quality
- Doesn't need a tripod for viewing angle adjustments
- You can watch a movie on a single charge (as long as it's not 2 hours or more)
Cons
- The D-Pad is not that comfortable to use
- The app list is limited
- The auto keystone correction is only vertical
Mark is a graduate in Computer Science, having gathered valuable experience over the years working in IT as a programmer. Mark is also the main tech writer for MBReviews.com, covering not only his passion, the networking devices, but also other cool electronic gadgets that you may find useful for your every day life.