
Besides that, the camera will have the Motion Sensor on by default and will capture videos as soon as the sensor detects movement, but you can adjust its sensitivity by going to the the main page (there’s a small arrow on the top left corner) and from the Devices list, identify the E1 Pro camera and click on the small gear icon. This will summon the Settings window, where you can change the Network and adjust the Display options which includes setting up the Quality (you can go very deep into configuring the Resolution, the Frame Rate and even the Max Bitrate), the refresh rate (Anti-flicker), the Day and Night (Color/Black and White), the Exposure, the White Balance, the Backlight and the 3D DNR (digital noise reduction), all contributing to an excellent image quality where you should be able to clearly see the faces of any people in the frame.
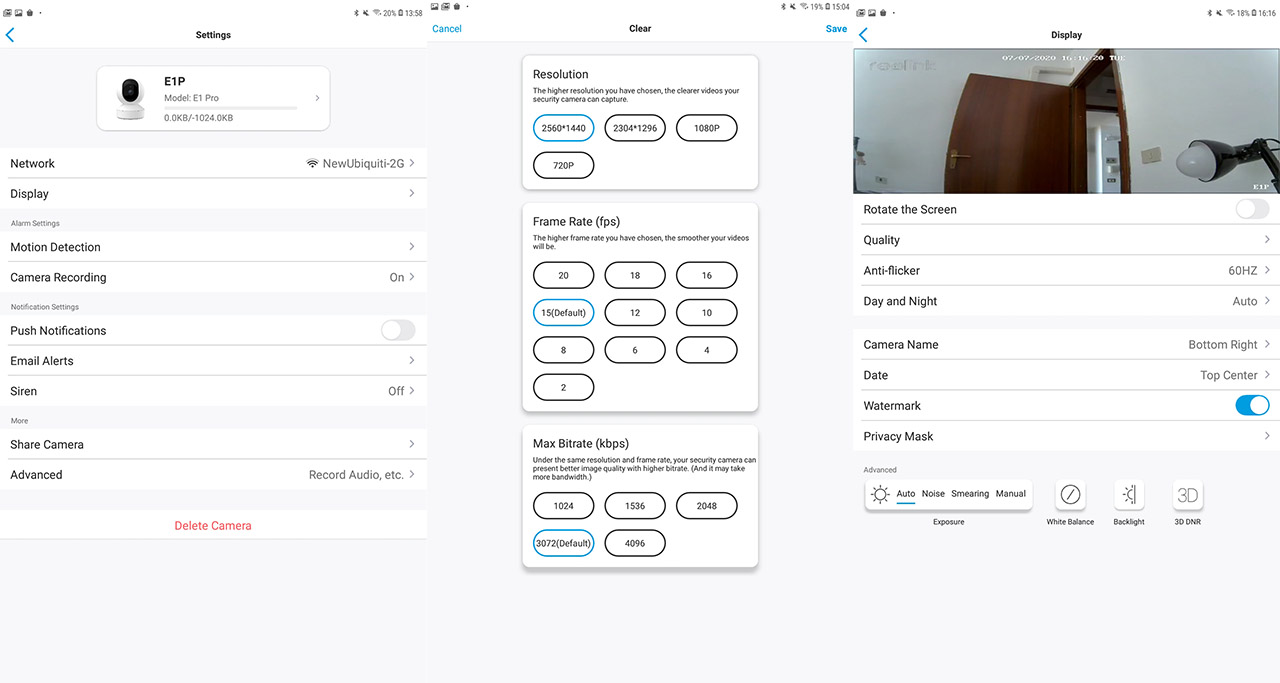
Under Display, you get to set the Motion Detection (the sensitivity can range from 0 to 50 – by default, it’s 41 – you can also set a sensitivity schedule), and you do get the option to select a specific motion zone that will trigger the alarm and the recording. Furthermore, the app will also allow you to schedule when the camera will record the footage (and whether it will override older videos when the card gets full), set up the notifications and the siren, turn on or off the IR LEDs, the Status LED and more. Returning to the Playback option from the live footage window, you will be able to check the videos that are captured by either a schedule or the motion sensor detection and yes, you can also choose a specific frame in the video, but I had a few ‘Playback failed’ errors where I had to restart the app to make it work (it still needs some polishing).
The Client Utility
If you don’t want to use the app, you can rely on the Reolink Client to view the footage on your PC which you can download from official website (Windows OS and MacOS variants available) and, after the utility is installed, if the camera was already set up in the app (and the PC is on the same network as the E1 Pro), it will automatically see the camera (it will require the app password).
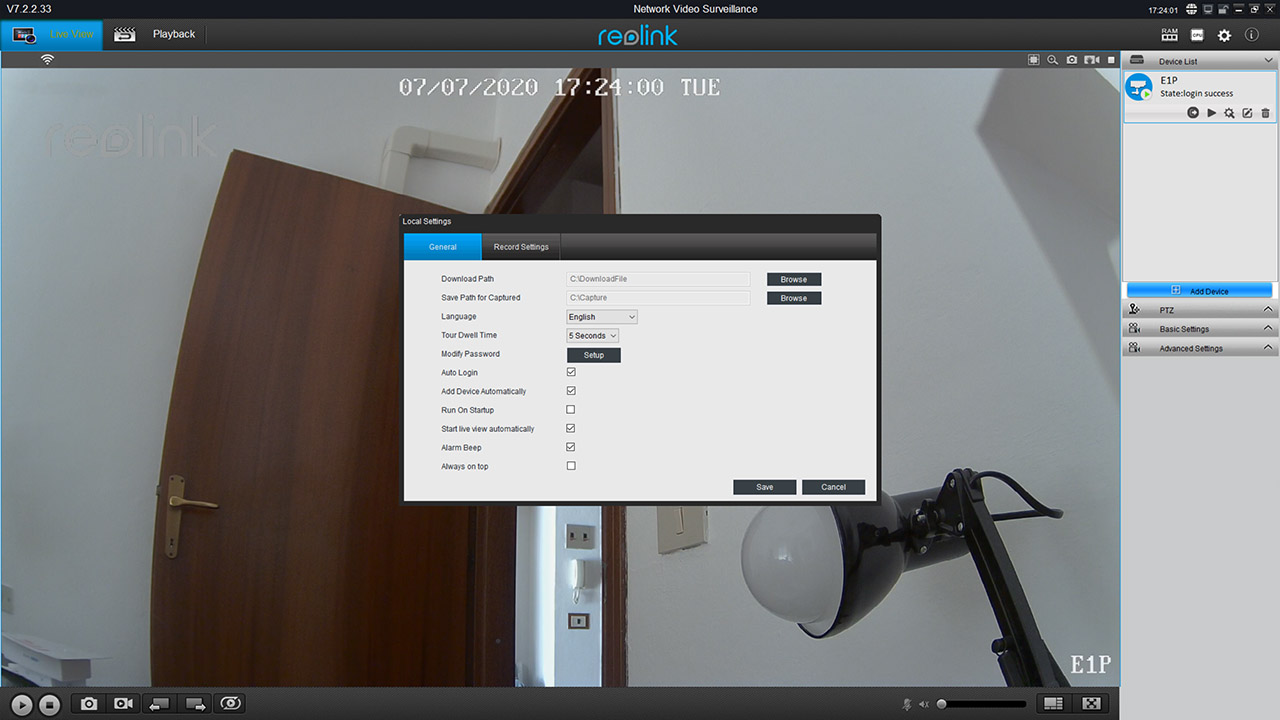
The user interface will also display the live footage with all the options that you were able to find on the app and a few more, such as the Local Settings (which include the path for where the videos will be stored on the computer) and there’s also the CPU and Memory utilization (which can be useful to diagnose whether some stutters are caused by the camera or the PC hardware). The interface is quite useful for when you have more than one camera available since it will give you that true DVR look and feel.
The Motion Detection and Night Vision
Like I said before, you can set the motion sensor sensitivity from 0 to 50 and you can draw on the display which area should trigger the alarm, but what sets this camera apart from the rest is the ability to record 5 seconds before the the trigger, as well as the post-recording. As for the distance, the farthest the point of interest will be, the higher you should set the sensitivity. For example, while the sensitivity was set at 41, it was fascinating to see that the E1 Pro detected some shadow movements at about 30 feet and alerted me that someone was in the frame even before the person actually stepped in front of the camera.
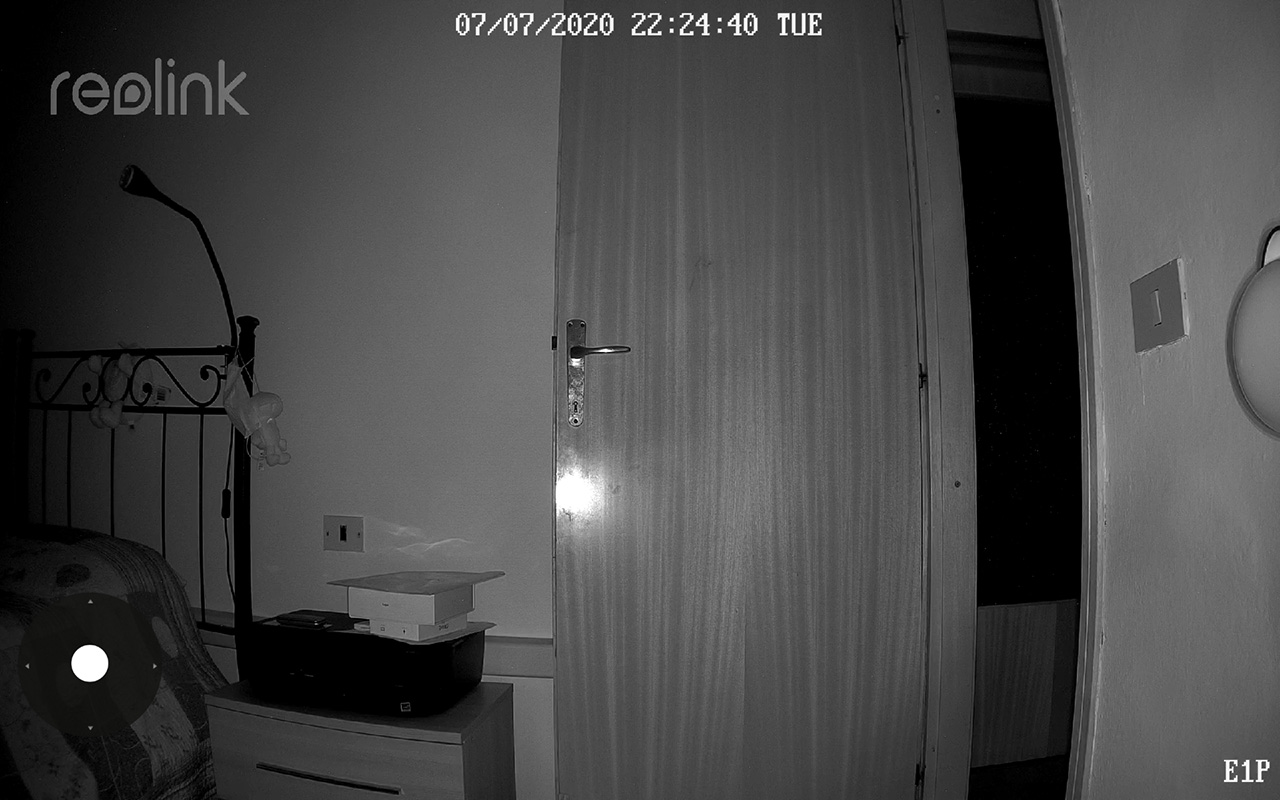

While set on the highest image quality, the image quality during the night was one of the best I’ve seen on an indoors camera. As can be seen from the image below, despite being fully dark and no direct light source (the moon and some far away light poles), you can clearly see all the details, so the noise level is very low, especially on a radius of 10-15 feet around the camera.
Security
The IP cameras have had their share of controversy due to major security breaches, but there are a few steps that you can take in order to ensure that no matter the brand, you will keep your footage private. First of all, make sure that the camera is constantly updated by the manufacturer (Reolink does keep its camera series up to date), use a strong password and ideally, change the default username: unfortunately, the E1 Pro only allows you to add new admins and users, but you cannot delete the default admin username; to add a new administrator, navigate to the camera Settings (the small gear) > Advanced > User Management > Add admins. Other important steps that you can take to secure your camera is to block its access to the Internet and keep it only in the local network (this can be done by going to Settings > Network > Advanced and disable UID, then going to NTP Setup and disable NTP Auto-Synchronize and lastly, disable Push notifications from the Basic info under Settings). I know that this step is going to be the most frowned upon, but it’s necessary for complete protection.
Additionally, you should not use Port Forwarding and, in case you need to access the E1 Pro remotely, you should set up a VPN connection (OpenVPN is one of the best for this endeavor). Of course, it goes without saying that the wireless router needs to be secure as well (the latest firmware, no default credentials).
Conclusion
As the technology progresses and gets more advanced, we also get access to some previously unattainable features at an acceptable price and Reolink E1 Pro has proven that you can get an excellent image quality both during the day and during the night without needing to break the bank. The motion sensor works great, the camera is easy to install and the app is reasonably intuitive. Not everything is perfect though because I noticed that sometimes the angle adjustments from the app would not always register and there is no Ethernet port, nor a USB one for the power cable. Of course, none of these will take away that much from the user experience, so, if you’re in the market for an indoors camera with excellent image quality, you need to check the Reolink E1 Pro.
Reolink E1 Pro
Pros
- Excellent image quality during the day and during the night
- Super HD
- The app is easy to use (there's also a PC utility)
- The motion sensor works really well
- Dual band WiFi
Cons
- The Pan/Tilt adjustments don't always register
- No Ethernet port
- No USB-C/microUSB connector
Mark is a graduate in Computer Science, having gathered valuable experience over the years working in IT as a programmer. Mark is also the main tech writer for MBReviews.com, covering not only his passion, the networking devices, but also other cool electronic gadgets that you may find useful for your every day life.