
The SwitchBot Curtain was designed to automate your curtains and, considering the successful Indiegogo campaign, lots of people wanted to have this part of their home ‘smartened up’ as well. Yes, we are dealing with a (somewhat) compact robot that’s connected wirelessly to your phone and it moves the curtains for you.
| SwitchBot Curtain U-Rail 2 | |
|---|---|
| Switch-bot.com | Check Offer |
| Amazon.com | Check Offer |
And you can use the dedicated app to either immediately open or close them or you can create schedules for when you want more light in the room (some people like being awakened by natural light). There is also support for IFTTT, Smarthings, it will work with Clova, Alexa, Siri Shortcuts and the Google Assistant – be aware that using most of these methods will essentially negate any digital privacy you think you may have.
Furthermore, the SwitchBot manufacturer has made available a remote to control the curtains without using the smartphone and there is also a Hub Mini that will work with multiple types of smart devices at the same time.
So there is a clear desire for expansion, which is a great thing to see for any new-comers in technological market – it usually means extended support for the existing products. The model that I got is compatible with U-rail curtain tracks, but SwitchBot is going to be compatible with rods as well, just make sure to select the right type when ordering the device, as they’re not inter-compatible. That being said, I am always excited to see new types of devices hitting the market, so let’s check out the SwitchBot Curtain and see whether it’s a worthy addition to any smart home.
Design and Build Quality
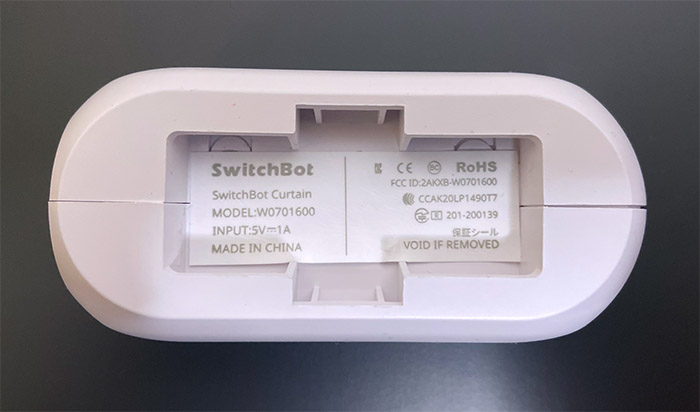
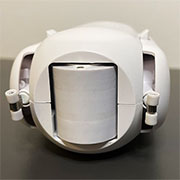
You can use one or two SwitchBot devices, depending on the surface that needs to be covered and the type of curtains that you have and yes, each unit is identical, but I do have to admit that I expected the robots to be a bit smaller. They’re still kind of compact (each unit measures 6.5 x 3.0 x 2.5 inches), but the photos on the web don’t really do a good job at showing the size of each SwitchBot Curtain U-Rail 2. I say that because I actually opened one of the devices and there really is no space left unused.
There is an AAA-sized battery that’s rechargeable, the motor, a Bluetooth antenna and somewhere underneath the antenna, I assume there’s the rest of the components. It’s a clean concept and seemingly easily fixable and upgradeable. Each device is made of plastic covered by a white matte finish as a means to better integrate with the room and, besides the LED, there is pretty much nothing else that would attract the attention towards the SwitchBot. And that’s the point with these device, they need to have a clean design and simply do their thing without being overly flashy. It’s clear that anyone will see the SwitchBots on the rail, but you can position them underneath the curtains.
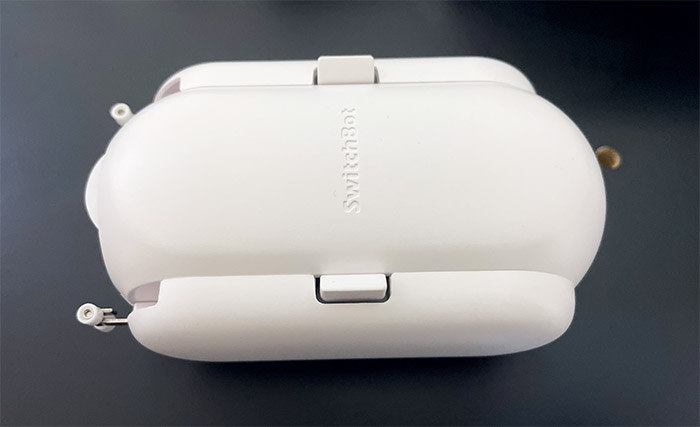
The device is divided into three parts. One is the main body (the middle part) which has the SwitchBot logo embedded into the plastic on one side, and the status LED, the USB-C port and the Reset button on the other side. Besides the Indicator LED light, there is also a light sensor built into the same area and it’s needed to be able to tell when the SwitchBot will have to adjust the location of the curtains – so it doesn’t simply rely on the clock data that it receives from the app. You can recharge the device using the cable provided into the package and, depending on how often you operate the SwitchBot, a single charge can last up to one year, so it’s hardly a problem to uninstall and recharge the device once in a while.
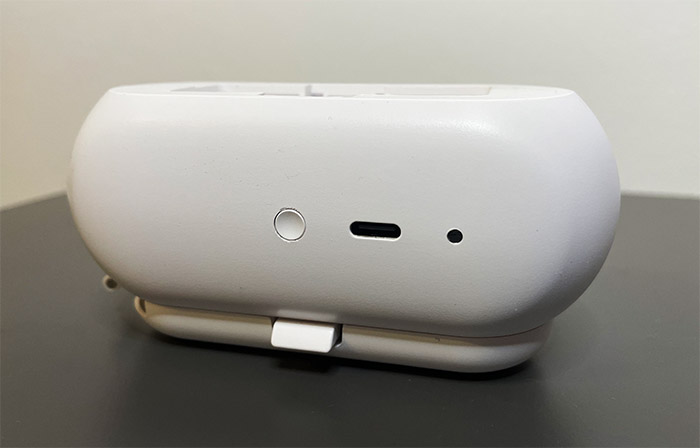
If you don’t want to deal with this and simply want the SwitchBot to stay connected to the rails forever, then you can purchase the optional solar panel (goes for about $25 at the moment of writing) and it’s not larger than a smartphone, but it warrants a dedicated section, since there are a few particular things that need to be addressed. Lastly, in case you need to return the device to its default settings, press and hold the Reset button for 15 seconds.
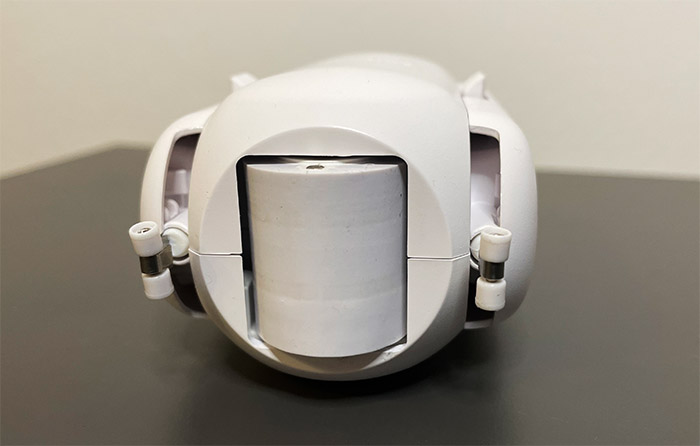
The other two parts that get attached to the middle section are identical and have a small spring-operated neck which can be pulled in order to either insert or replace the hook wheel. They do come with pre-installed hook wheels, but, in my case, they wouldn’t fit the rail that I had installed (it was something from Ikea), so I had to rely on the parts that were provided in the package. Indeed, the manufacturer had generously added eight large hook wheel attachments, two additional sets of smaller hook wheels (of various sizes), a clip and a hook. This way, you get covered on almost all types of rails there may be available out there. Every parts easily gets connected (or disconnected) and the hook wheels, as well as the motor wheel move smoothly.
The Solar Panel
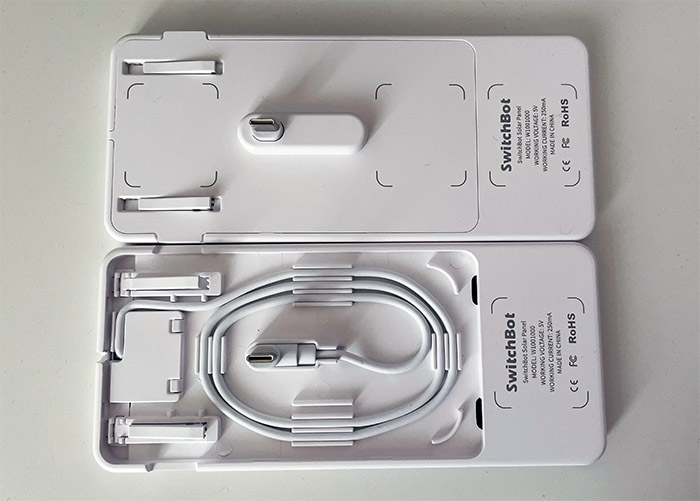
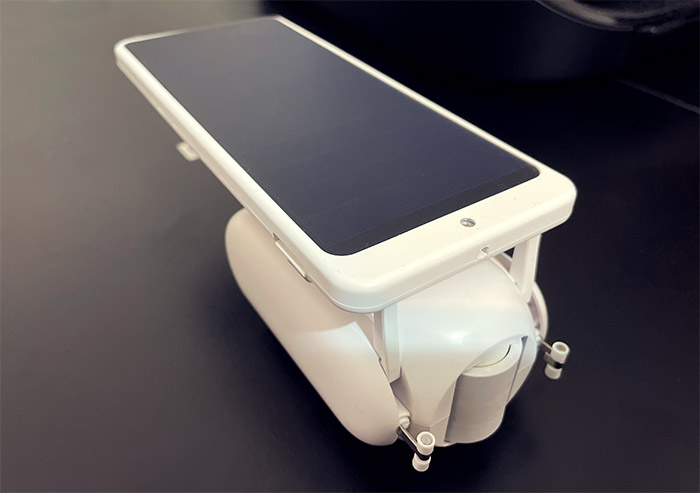
This is an optional part, but it’s interestingly designed, so I decided to have a closer look at SwitchBot Solar Panel. As I mentioned in the previous section, its size is about that of a smartphone (it measures 30.1 x 2.8 x 1.0 inches or 76.5 x 7.2 x 2.5cm) and the circular light sensor, as well as the white bezels surrounding the black panel do remind me of some earlier (and narrower) iPhone models. The working voltage is 5V and the working current is 250mA, so the solar panel can be used with other devices that don’t require that much power as well. After I took one unit from the package (I got two, one for each SwitchBot Curtain robot), I noticed that there is a protruded USB-C connector and two plastic hooks that allow the option to easily attach the solar panel to the SwitchBot.
This way, the solar panel receives the power from the sun and powers up the SwitchBot, but I think a lot of people (myself included) have the curtain rail quite a bit taller than the window (especially if you have high ceilings), so the solar panel can’t really be used since it won’t get direct sunlight. To fix this, the manufacturer allows you to attach the solar panel to the curtain itself.
To do so, you need to open the rear panel (use the small hole at the top to pry open the plastic piece) and you will see how the USB connector is attached to a cable. Disconnect it and slide the cable through the opening. Next, take the three Velcro hooks and attach them to the back of the solar panel (allows them some time to properly stick – it needs about 5 hours). Afterwards, take the larger Velcro piece, attach it to your curtains – again, leave it like this for about 5 hours. Lastly, put the solar panel to the Velcro hook and connect the USB-C cable to SwitchBot.
Installation and App
I am currently using the SwitchBot Curtain U-rail 2 model and, as I already mentioned, there are several hook wheels inside the package, so make sure that you use the most suitable ones. After inserting the hooks, take the SwitchBot with one lateral side already connected and insert the wheels into the rail. Then, take the other lateral side and insert its hook wheels into the rail as well. Afterwards, push this part slightly lower (the hook wheel portion is spring-operated, so don’t worry about breaking it) and then insert it into the main SwitchBot Curtain part. Ideally, you should attach it before the last curtain clip, so it both hides the device and it makes it possible to move the curtain back into the closed position. I had two SwitchBot Curtain units, so I positioned both, but not before making sure that they are returned to the factory default settings (press and hold the Reset button).
SwitchBot Curtain
-
Pros
- You gain the possibility to 'smarten' your curtains
- The battery lasts very long
- The app is fairly easy to use
- The accessories are very useful (they can be acquired separately)
- Multiple options to install on the rails
Cons
- You need additional devices to create Scenes
- The units are a bit bulky
Mark is a graduate in Computer Science, having gathered valuable experience over the years working in IT as a programmer. Mark is also the main tech writer for MBReviews.com, covering not only his passion, the networking devices, but also other cool electronic gadgets that you may find useful for your every day life.