
The SwitchBot Pan/Tilt Cam is a 1080p indoors-suitable camera that was developed to cover the security aspect of the SwitchBot smart home ecosystem. And it also includes smart light bulbs, temperature sensors, switch bots and the fairly unique approach to the smart curtains (that I tested not long ago).
| SwitchBot Pan/Tilt Cam | |
|---|---|
| Switch-bot.com | Check Offer | Amazon.com | Check Offer |
The SwitchBot Pan/Tilt camera seems to cover all the basics (borders between entry-level and essential) and it’s clear that the manufacturer took a conservative approach when they built it (pretty much obvious considering the price tag).
The design approach is minimalist which is expected for indoors cams and the 2-megapixel 1080p sensor can be enough if there’s a lot of light, but I am curious about its performance during the afternoon (or when it’s cloudy). You do get the option to pan and tilt the camera and there’s the option to see inverted footage in case you decide to mount the SwitchBot cam on the ceiling.
I did see that there was an emphasis on the privacy aspect, so I was curious whether it’s something similar to what we saw on the IoTeX Ucam, but it doesn’t seem to be the case. It’s a Privacy Mode that you can enable when you’re at home as to not store footage of your private life anywhere. Be aware that the camera lacks an internal battery, so it does need to always be connected to a power source. These are most of the highlights, so let’s check out the SwitchBot Pan/Tilt cam a bit more in-depth.
Camera Design and Build Quality
It’s been a while since I tested an indoors-suitable camera (the Tenvis was the last one) and, while the same concept is behind the outdoors cams as well, there are some major differences between the two types of devices. There is far more plastic and, as expected, no weatherproofing at all. Why would you need it indoors?
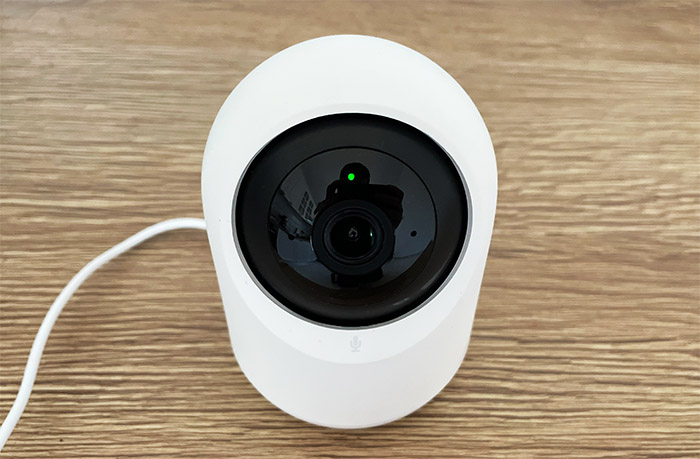
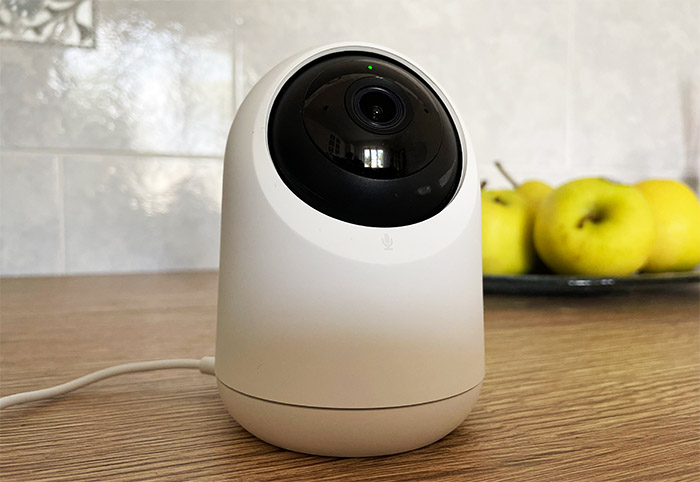
Indeed, the SwitchBot Pan/Tilt Cam is made of plastic and it’s covered by a white matte finish, with the exception of the lens area, which is black. The device doesn’t really occupy much space (it measures only 4.13 x 2.95 inches or 10.5 x 7.5 cm), so you can position it pretty much anywhere in the room, but you do need to make sure it’s near a power socket.
That’s because as I mentioned in the intro, it does not have any internal battery, so it needs a continuous connection to a power source. And inside the package, SwitchBot has added a USB cable and even a power brick (which is a rare, but welcomed addition), but what’s a bit disconcerting is that it’s a USB-A to microUSB cable.
Yes, the manufacturer went with the older standard which is very unfortunate and you can find the microUSB port on the rear of the camera, on the base. This base is very short (about 0.6in-tall) and it has four silicone feet to make sure that the SwitchBot Pan/Tilt Cam sits into place.
There is also a central hole with a pattern on the bottom which allows the user to insert the mounting bracket. As I already mentioned, you do get the option to mount the camera on the ceiling and you can flip the view accordingly. It’s also worth noting that next to the microUSB port, there is a recessed Reset button to help you return the SwitchBot Pan/Tilt Cam to its default settings, if needed (press and hold it for 5 seconds).
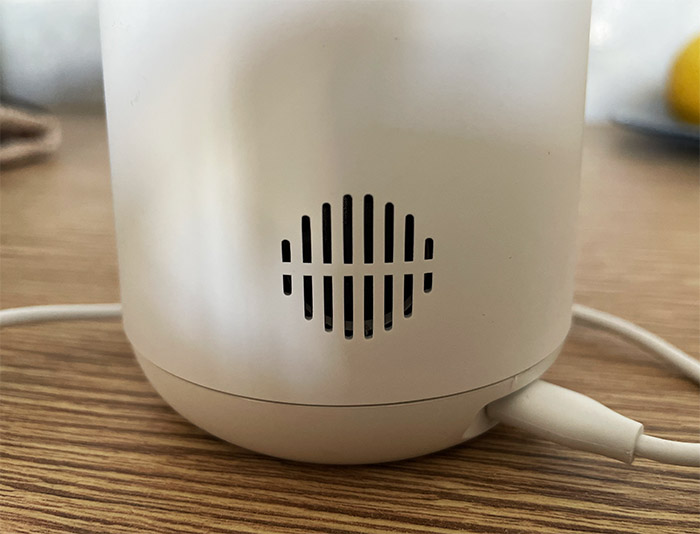
The upper portion of the camera rotates on the base (360 degrees) and if you check the rear side, you will see that there’s a speaker. There is also a microphone next to the lens which, along with the speaker, will allow for a two-way communication. And it can be useful if you’re away from home and need to communicate some instructions or to simply sing a lullaby to a baby.
The lens is embedded within the black circular section that’s partially hidden by the case and it moves up and down using an inner motor (the tilting can be done up to 115 degrees). After powering up the SwitchBot Pan/Tilt Cam, you will see a small LED that flashes red and it means that the device is ready to be paired. When it’s connected to the WiFi, the LED will flash green (it will become solid green when the camera is online) and if it alternates between red and green slowly, then, it failed to connect to the Internet.
Flashing red and green quickly suggests an error in the network connection. Besides the front facing lens, there are eight IR LEDs to help the camera ‘see’ during the night. And since there are so many, I do look forward to seeing a good night time footage.
Before moving forward, I need to mention the microSD card slot which is hidden on one side of the spherical section of the camera – you need to push the camera, same as you would do with most Reolink cameras.
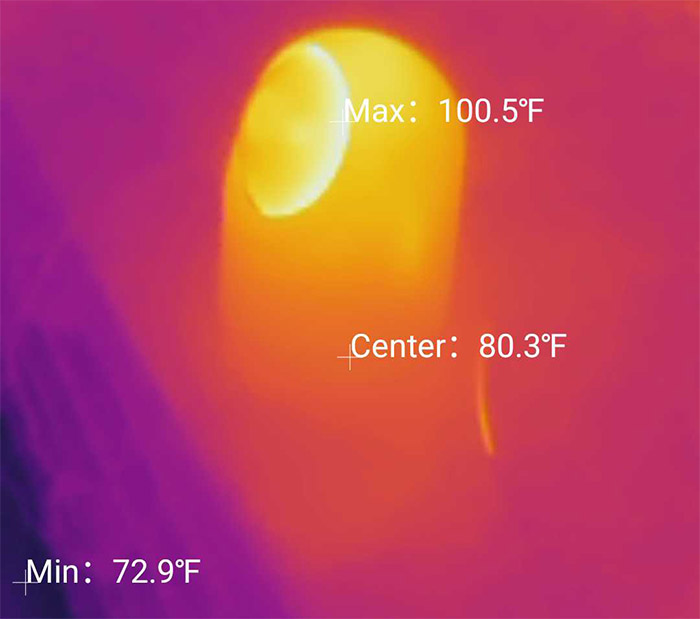
Note: In terms of heat management, the device does get a bit warm as you can see form the thermal camera (AGM Glory Pro).
What’s inside the SwitchBot Pan/Tilt Cam (Teardown)
To open up the case, you need to remove a portion of the label that’s applied to the bottom of the camera and then take out the single screw – which means that yes, you need to say goodbye to the warranty. Afterwards, use a prying tool, to carefully detach the base.
It’s interesting to see that the pan motor is inserted into a plastic section, but I suppose it’s hard enough to ensure lots of rotations (most people won’t rotate their cameras thousands of time). To move forward, you need to disconnect the microUSB port board and then remove the three screws from the white plastic case. This way, you’ll be able to see better both the pan and the tilt motors.
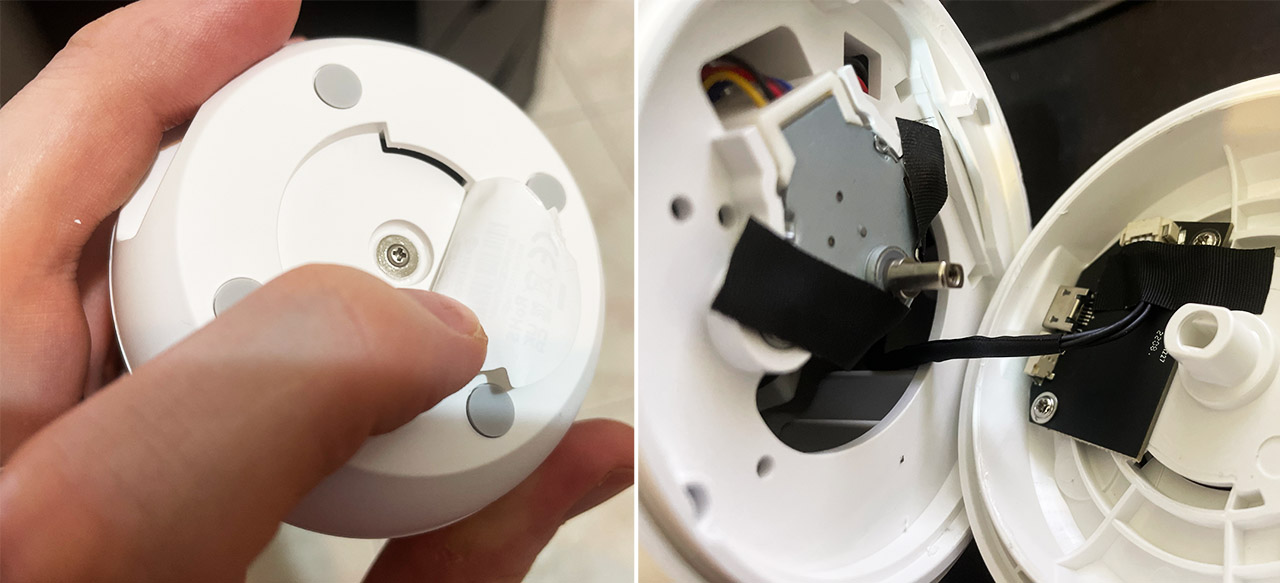
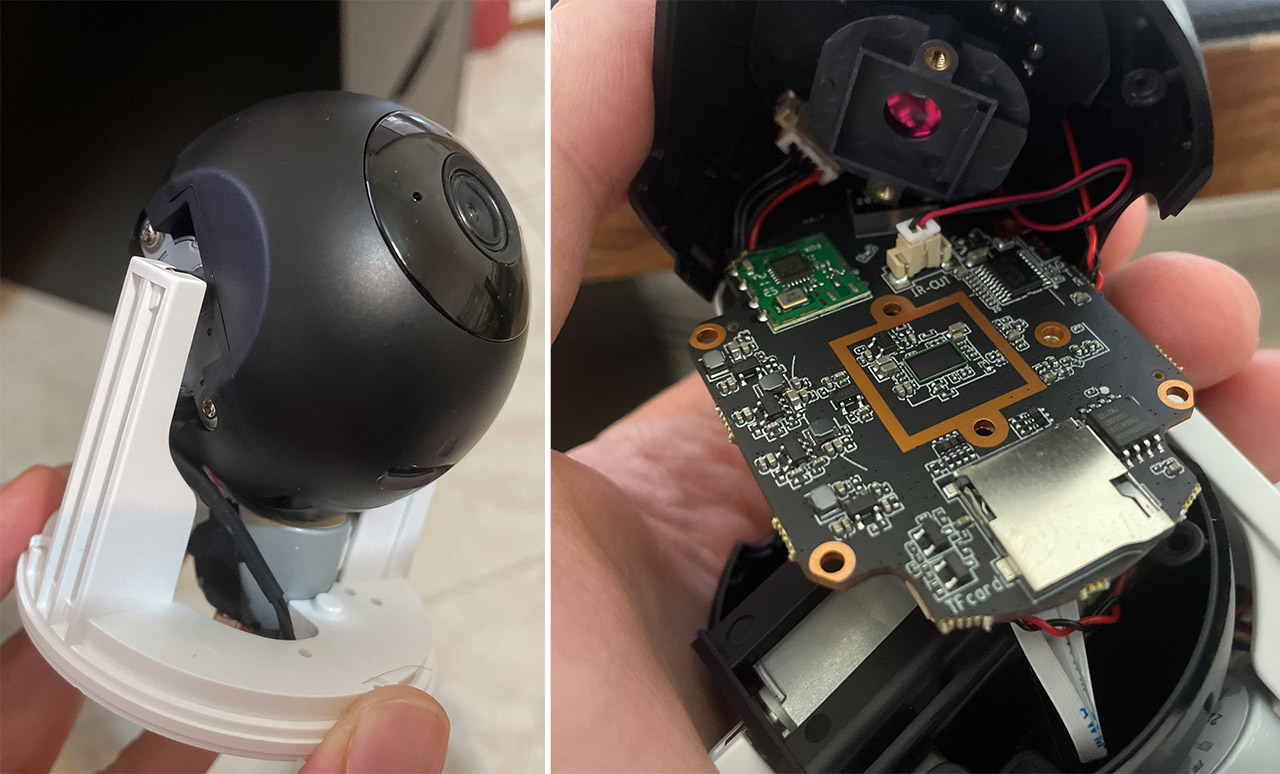
Here’s where things get a bit more complicated because you need to remove the two screws from the spherical section and then carefully detach it in the middle. There are lots of connectors, but, if you want to see the main board, then you will need to remove the six screws holding the lens in place.
At this point, it should be easy to identify the RTS3906N main chip, the 8MB of serial flash from GigaDevice (GD25Q64ESIG), the Realtek RTL8188FTV 802.11b/g/n 2.4GHz WiFi chip and an Unisonic Technology UTC OAT4 ULN2803G power transistor.
The Installation
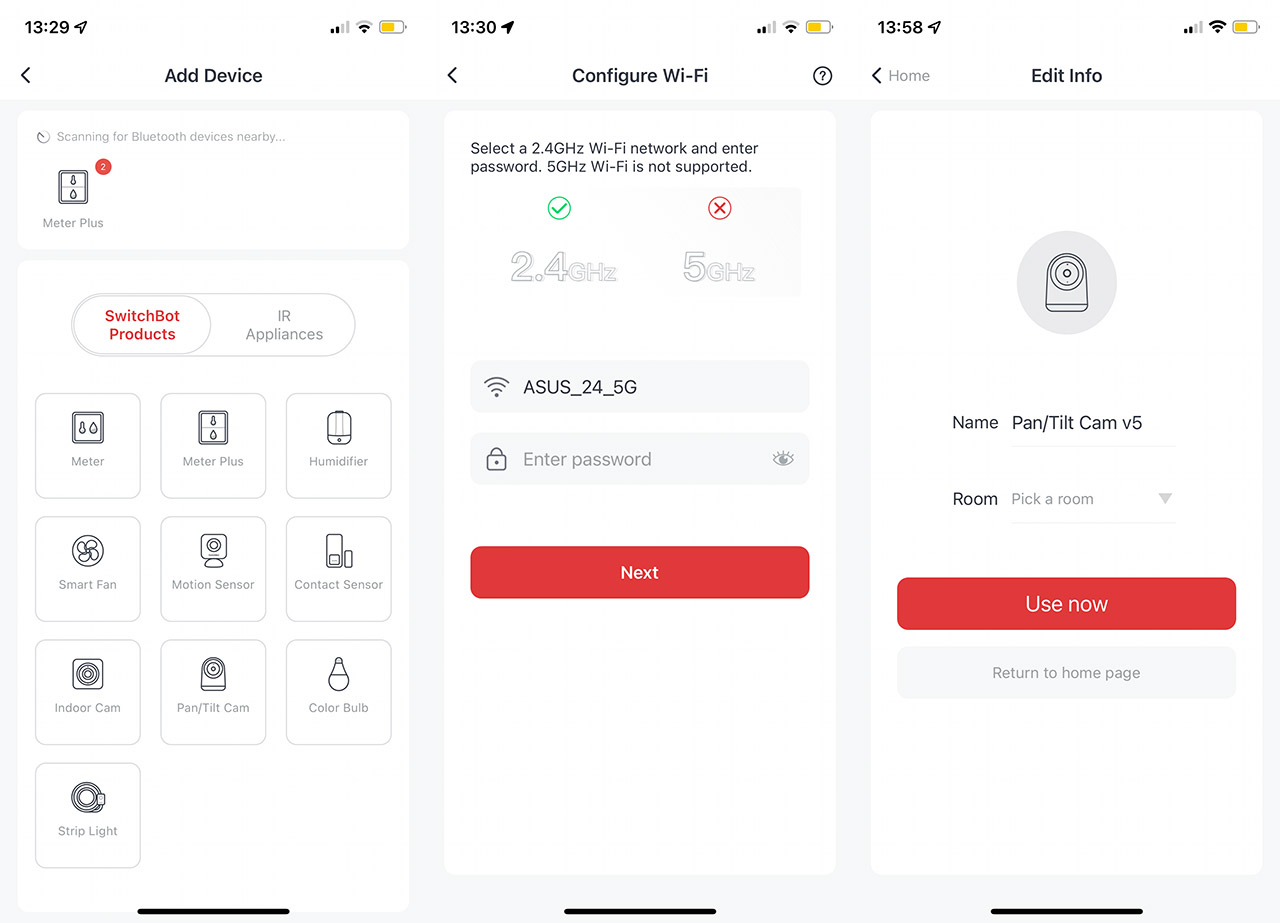
After powering up the SwitchBot Pan/Tilt Cam, wait until the LED starts flashing red and then you need to install the SwitchBot app. I already used it before when I tested the SwitchBot Curtains, but the idea is to create a new account (give permission to your location because why not..) and then to press the + button to start the pairing process.
After that, I saw a list of devices (which keeps on growing every time I test a new product) and I had to select the Pan/Tilt Cam. Then, the app will ask for the WiFi credentials (2.4GHz support-only). Afterwards, I had to point the camera at a QR code from the app and wait until the pairing process was concluded. The problem is that the pairing kept failing and I tried with both an iPhone and an Android device.
And then I realized that it’s the router that’s the problem – more exactly, my VPN. I do use a VPN and SwitchBot could not properly communicate home, so the installation process kept on failing. Even after turning the VPN off, it would still simply dislike the router now, so, after changing it to another model (too lazy to reset it), I could finally finish the process (oh yes, I forgot to mention that the app casually signed me off at some point as well).
The Mobile Application
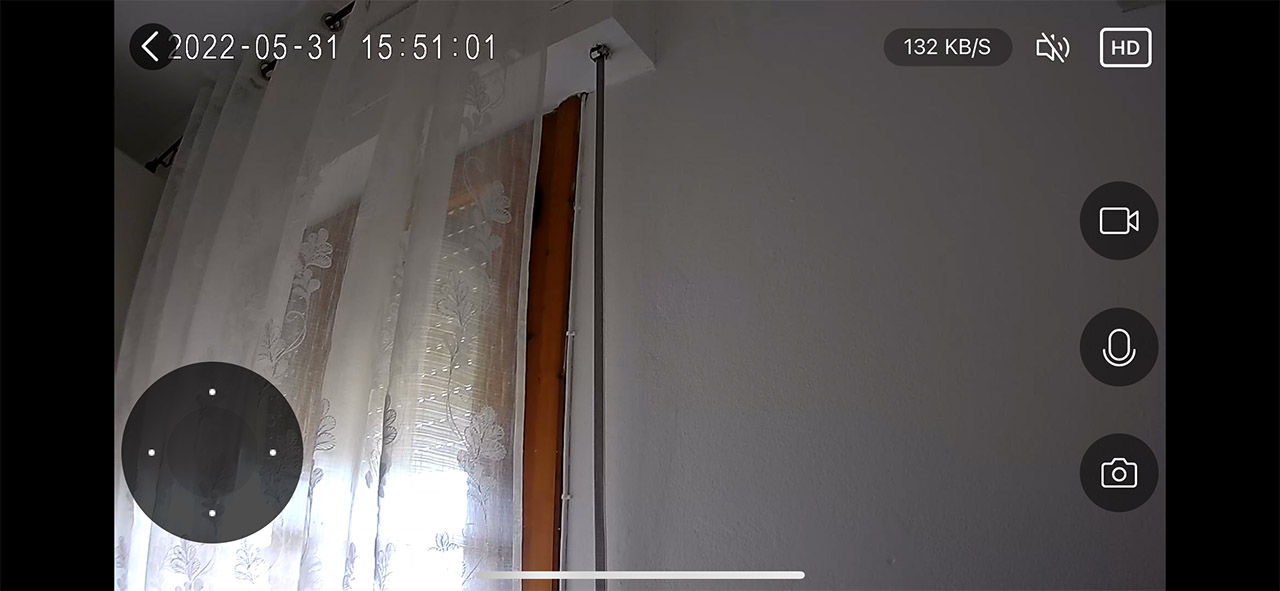
The interface will show the live view footage in the middle, with the image quality on the top left corner (SD or HD) and the current bitrate on the left. Also here, I noticed the Speaker icon and the possibility to enlarge a certain portion of the live footage (digital zoom).
If you wish to view the video in full screen, then you need to tap on the first icon on the bottom left corner which will also show a joystick on the left. That’s for controlling the pan and the tilt motions that the camera can do remotely. I also need to mention the three icons that let you enable the microphone, capture a photo of the live view or start recording.
There is another icon (two arrows up) that, when tapped, it will rise up a few new quick action icons. First, there’s the Playback, where you can see all the videos that are recorded and there are two ways to store them, either on a microSD card (max 128GB) or on the Cloud. I did use a microSD card and I could find no videos even if I did get the notification that the camera detected motion.
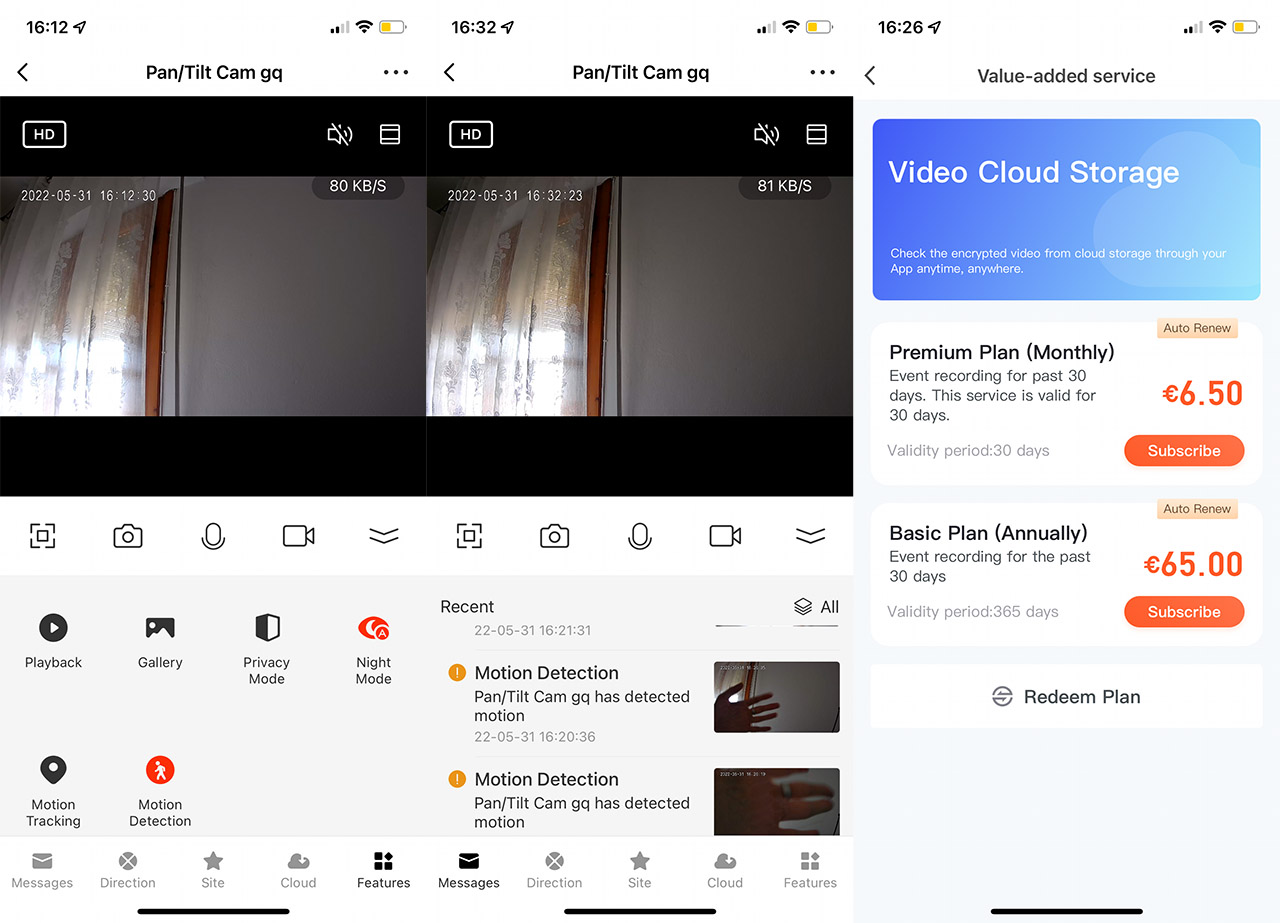
I have the feeling that this section is dedicated only for the Cloud service which, since we already mentioned it, is about 7 USD a month (at the moment of writing).And I did not see any free (yet slightly more limited) subscription plan available.
In any case, the next section is called Gallery and here is where you can see all the videos that you recorded (as well as the captured photos) and then, there’s the Privacy Mode. It’s not just that the camera seems to turn itself off, no, it’s actually going backwards covering the lens completely, which is excellent. You can also turn on the Night Mode (enables the black and white view), enable the Motion Tracking and the Motion Detection.
The Motion Tracking has the role of moving the lens around to continue seeing what triggered the sensor. Further down, there is another set of icons, the first showing the Messages which contained photos taken when the motion detection was triggered. The next icon is the Direction and it’s just the Joystick to let you control the camera angle. Then, there’s the Site which I think is the location of the camera (not really a polished feature since I couldn’t set it in the initial installation process).
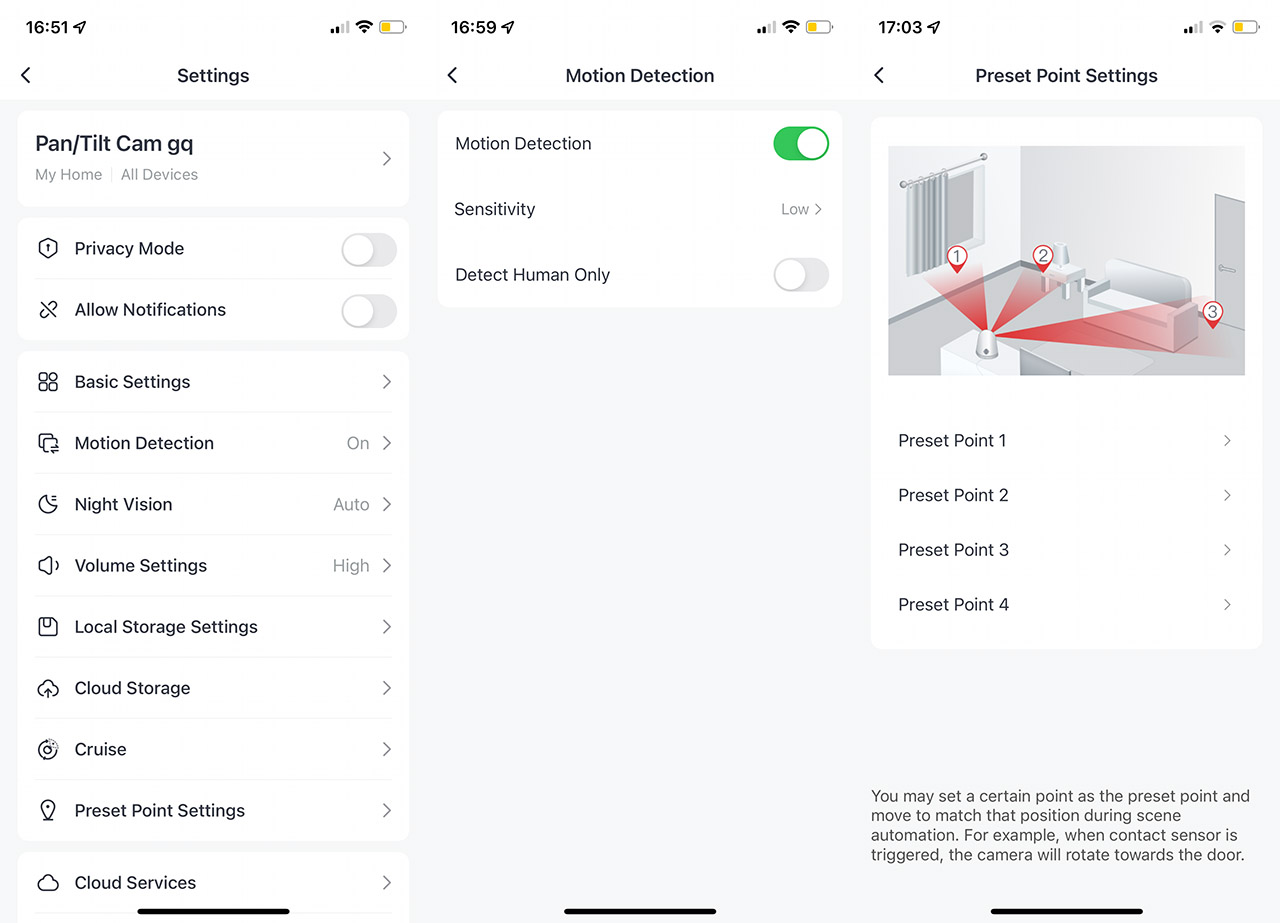
If you tap the three dots on the top right corner, you will be taken to the Settings section. Here, you can check some Basic Settings which include flipping the screen, disabling the Talk Mode and calibrating the Pan/Tilt motions. Or, you can adjust the Motion Detection settings (the Sensitivity and whether you want only people to trigger the sensor), the Volume level, buy a Cloud plan, check the Local Storage (microSD) and enable the Pan/Tilt Cam Cruise – motion tracking.
I really liked that there was the option to set Preset Points, so the SwitchBot Pan/Tilt Cam will work along with other sensors. And, in case another device detects motion, the camera will quickly move towards a preset point. I should also mention the NFC that allows the possibility to quickly pair the SwitchBot Tag with the camera and there’s also the possibility to update the firmware.
The Image Quality and Connectivity
The SwitchBot Pan/Tilt Cam has a 2-megapixel lens with an F2.0 aperture and it can film at 1080p. And it performs well in pretty much all conditions. If there’s a lot of light, most cameras will be able to deliver a good image quality, but, while the outdoor cameras do have this luxury, the indoors ones do not.
That’s because very often, you don’t get that abundant light from the sun and, especially in the afternoon, the image can get very noisy. In the case of the SwitchBot Pan/Tilt Cam, I saw that the image was relatively sharp, with a very good amount of detail and yes, there is some noise, but the overall quality remains good. Bear in mind that this footage was taken when the light didn’t shine as bright through the windows.
The black was deep, but it does seem to lose a bit of detail (it’s a tad contrasty), while the whites were a bit on the cool side. Checking the reds, I can definitely attest that the manufacturer has slightly ramped up the contrast which does make for a more exciting and vibrant footage, but not really that accurate. Then again, this isn’t a professional photography camera, so why not have a bit of fun? During the night, the eight IR LEDs seem to also do a good job.
Actually, the footage is almost crystal clear with far less noise than I expected. I have noticed that the more IR LEDs there are, the better the footage tends to be and it also seems to have a say on minimizing the impact of light sources shinning on the lens. As you can see in the video, the oven was on and the light did not affect the clarity of the footage.
So, I would consider a large number of LEDs an important factor when getting a new security camera. Now let’s talk about connectivity and how far the can you put the camera before impacting the image quality. Unfortunately the answer is dependent on your router, just as much as on the SwitchBot Pan/Tilt Cam. That’s because it relies on the 2.4GHz signal, so, if it’s strong, with little interference, you can put the camera very far – I had no issues even at 75 feet away.
And that’s also because it uses very little from the bandwidth, which is excellent. But, be aware that the reaction time will have an increased latency and the notifications will arrive slower if the camera is too far.
Motion Tracking and Motion Detection
The Motion Tracking is a very nifty feature since its purpose is to follow around anything that moves. But how well does it work? First of all, only the pan motor will move the camera, so if the angle is too high, then it won’t follow around a pet or a child. I do hope that they improve the algorithm to include the tilting movement since it would make this feature amazing.
Secondly, the camera will not follow you if you’re too fast. And I am not talking about running, but walking around at a slightly faster pace will make the camera lose sight of you pretty quickly. But that’s only if you’re near the SwitchBot Pan/Tilt Cam because if it’s slightly more backwards, then it can better track movement. So, the location is very important and positioning the camera on the ceiling or wall at the right angle can make a significant difference. The Motion Detection is good, but keep an eye on the sensitivity level.
That’s because it can be incredibly sensitive to even the smallest changes, like a far-away branch moving outside and bam, I got a notification! If you don’t have a very large room to cover, I would leave the Sensitivity to Low since it can ‘see’ movement at about 10 feet just fine.
The Conclusion
It’s clear that SwitchBot wants to expand its portfolio and properly enter the smart home security market. And the SwitchBot Pan/Tilt Cam is a good way to convince more people to give their ecosystem a shot. The footage quality is very good during the night and during the day, I liked the tracking motion and there is also support for local and Cloud storage. There are a few things that I would change, such as offering a free plan on their Cloud. Also, the app is not yet perfectly polished, but it’s getting there and I do look forward to the tilt movement for the motion tracking. Overall, it’s a good indoors camera, especially considering the price tag, so I would give the SwitchBot Pan/Tilt a chance.
SwitchBot Pan/Tilt Cam
-
Pros
- Clear image quality during the day and during the night
- Two way communication supported
- Support for microSD cards (128GB)
- Works with Alexa and Google Home
- Motion tracking
Cons
- MicroUSB port
- The app sometimes becomes unstable
- No free plan for the Cloud storage
Mark is a graduate in Computer Science, having gathered valuable experience over the years working in IT as a programmer. Mark is also the main tech writer for MBReviews.com, covering not only his passion, the networking devices, but also other cool electronic gadgets that you may find useful for your every day life.