
The TP-Link OC200 was developed to offer a quick and reliable means of connecting multiple devices to the Omada SDN, so, it’s essentially a small computer that has the Omada software pre-installed, nullifying the need to use your own equipment to always keep the program running.
| TP-Link OC200 | |
|---|---|
| TP-Link.com | Check Product |
There are, of course, a few additional aspects to make it an attractive options, such as the ability to be powered via PoE (so you can simply add it to your switch, keeping it clean) and there is an additional Ethernet port for connecting a wired client device. There is also a USB port, but that’s not for adding storage devices to the network. The OC200 is not the first network controller that I tested, since I also had a look at the EnGenius SkyKey and I do have to mention Ubiquiti’s controller (the Cloud Key), which was the first of its kind for the SMB market.
And all these have one thing in common, the ability to quickly scale up a network, allowing the user to add multiple access points, Ethernet switches and gateways to a network, and making it very easy to configure and monitor them. Both EnGenius and Ubiquiti offer a purely Cloud management platform as well, while TP-Link is still currently developing a similar platform and this tells us that Omada is still young. I have had the chance to check it about three years ago, in its early stage, when I tested the EAP245 access point and then it struggled with its identity. I have recently tested the EAP660 HD WiFi 6 access point and the TL-SG2210P Gigabit Ethernet switch and the Omada controller has gotten more mature, so I think it would be interesting to see whether it’s worth investing into the OC200 and in the Omada SDN as a whole.
Design and Build Quality
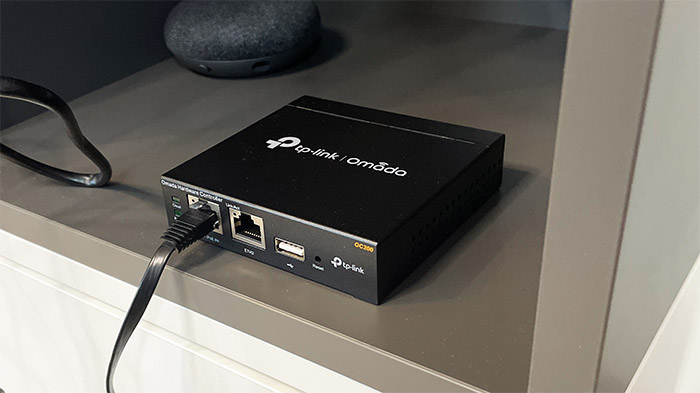
The idea behind every Cloud controller is to be as small as possible, to attach magnetically, if possible and to use PoE for staying alive, so it should be as stealthy as it can. The TP-Link OC200 measures 3.9 x 3.9 x 1.0 inches (10.0 x 9.8 x 2.5cm), so it’s quite compact, although a bit less than the Ubiquiti Cloud Key, but still only a bit larger than a Raspberry Pi. Unfortunately, the OC200 is not magnetic and neither is its bigger sibling, the OC300 and that’s something that I really appreciated with the SkyKey because I could simply attach it to the side of a rack or on a switch and not bother with it too much.
You do get four silicone feet in the package for the TP-Link OC200, so it will stay into place, but yes, it’s going to need a tray if you put it in a rack (it can go next to the TL-SG2210P which is a bit weirdly sized). The case is entirely metallic and it’s covered by a black matte finish and, for powering it, you don’t get a power cable inside the package.
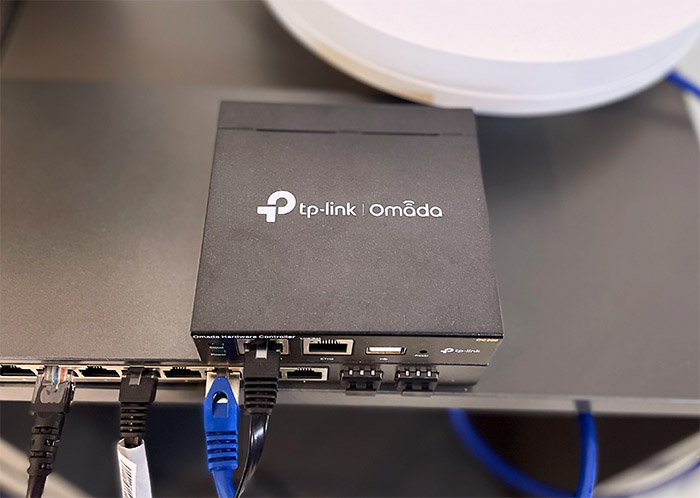
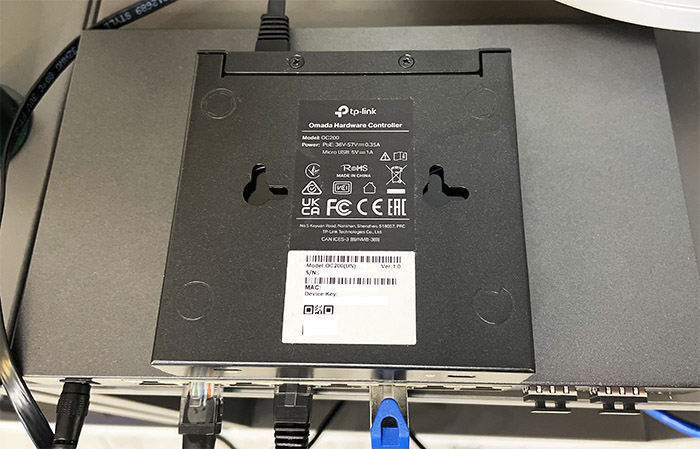
Instead, there’s a CAT 5E cable and you need to use PoE in order to power up the controller. That or a microUSB cable (which deepen the similarities with Raspberry Pi) since yes, there is such a port on the case of the TP-Link OC200. I would have preferred a USB-C considering that it’s far more common nowadays, but I bet most of you still have one microUSB cable around.
The microUSB port sits on the rear side of the case, along with the Kensington lock, so the rest of the ports are on the front. Surely, there are two Ethernet ports, the first allowing the aforementioned PoE connection (802.3af/at), while the second is just there to give you back the ‘stolen’ port from your PoE switch, so you can connect an additional wired client. On the left side of the LAN ports, there are two LEDs, the first will turn on and stay solid if the controller is bound to a TP-Link ID, it’s going to flash slowly if the controller is connected to the Cloud, but not bound to the ID and it will flash quickly if you return the controller to its factory settings.
The next LED should stay on if everything is working properly and, if there are some inner errors, then it will turn off. I saw that TP-Link has added a USB-A port which made me think that the controller may also work as some sort of storage server, but no, it’s there for backing up the config file and the database. Lastly, there’s the recessed Reset button.
I have opened the case as you will see in the next section and I saw that there is some space for a good airflow. There are also some ventilation holes on the sides for additional help – while functioning, the TP-Link OC200 will get warm especially at the bottom, but so far, no signs of overheating.
Internal Hardware
If you wish to run the Windows version of the SDN, then the hardware requirements are an Intel processor with 2 or more cores and four or more threads (TP-Link mentions i3-8100, i5-6500 and i7-4700) and 6GB of RAM or more. The TP-Link OC200 has less powerful components, but it still works just fine due to it being optimized fore the Omada SDN and because it runs the Linux version. I have opened the case of the OC200 by removing the two screws from the bottom and sliding the cover backwards which has revealed the PCB.
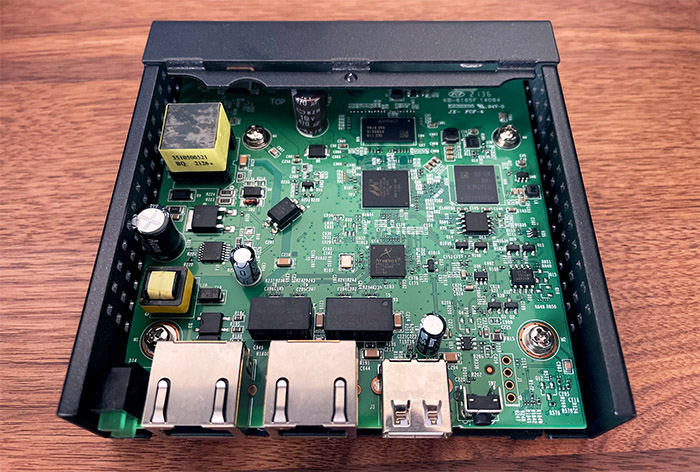
On the board, I was able to identify a dual-core 88F3-BVB2 88F3720 SoC from the Marvell Armada 3700 family and it’s clocked at 1GHz. There’s also what looks like 4GB of flash storage from eMMC (SEC 128 B041 KLM4GIFETE), 8Mb of NOR flash from GigaDevice (AH1827 25LQ80CSIG), 512MB of DDR3 RAM from Samsung (SEC 119 K484G16) and a Qualcomm Atheros AR8236-AL1A switch chip.
| TP-Link OC200 | |
| CPU | dual-core 88F3-BVB2 88F3720 |
| RAM | 512MB Samsung SEC 119 K484G16 |
| Storage | 4GB eMMC KLM4GIFETE/ 8Mb GigaDevice 25LQ80CSIG |
| Switch | Qualcomm Atheros AR8236-AL1A |
The Omada SDN
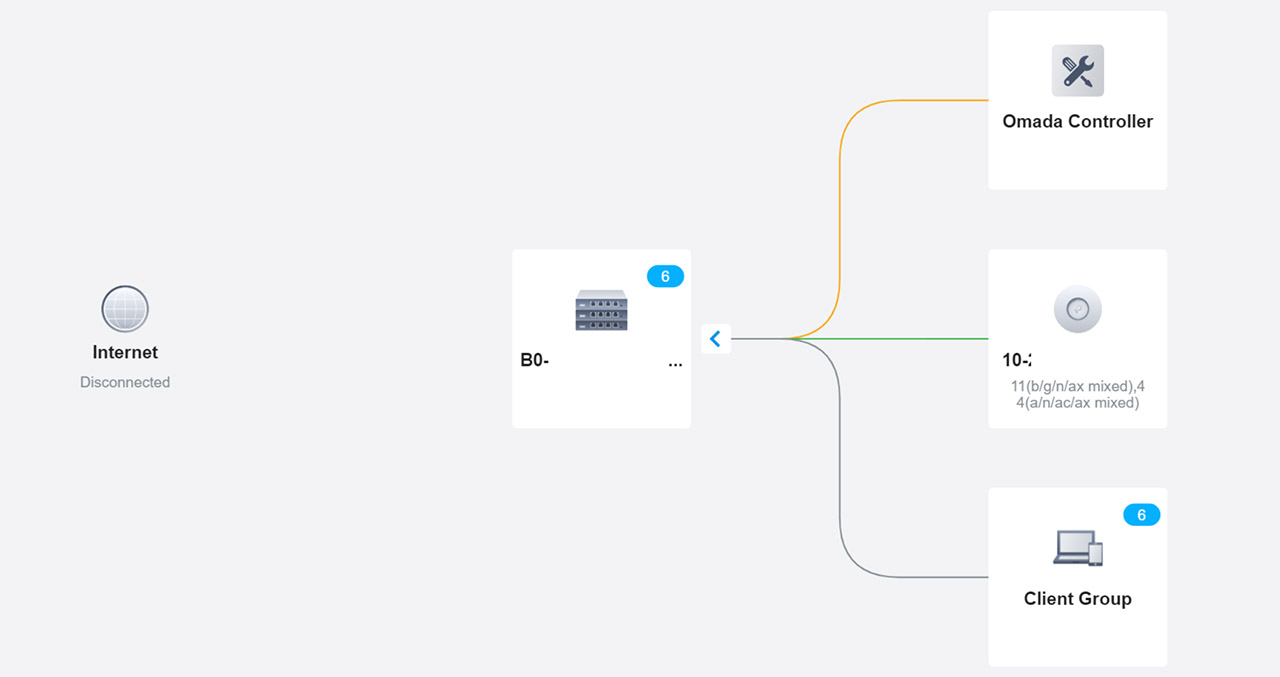
I have already went through the initial set up configuration when I tested the TL-SG2210P, so, in short, you need to go to http://omada.tplinkcloud.com/, create a new account and then add select the hardware controller option. Choose OC200 and follow the Setup Wizard: select the country, detect devices from the network, set the WiFi network and create an admin account. The Omada SDN was developed to work with access points, Ethernet switches and gateways, but, since I did not have the last type of devices, I only used the TP-Link OC200 along with the aforementioned TL-SG2210P and the TP-Link EAP660 HD WiFi 6 access point.
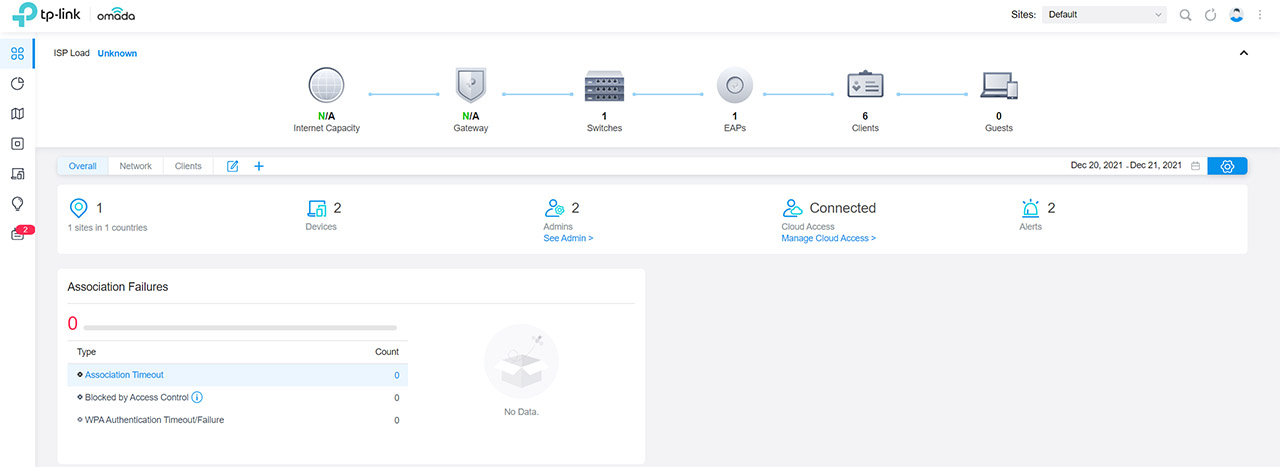
The interface approach is very similar to the UniFi, so I could see the main menu on the left positioned vertically and, for each type of device, it will open a small dedicated window on the right side. The Dashboard does show all type of devices that are adopted, as well as the Clients and the Guests.
But it’s still a bit weird that I can see all the clients that are connected to the router and not directly to the Omada itself and interestingly enough, I could take various actions towards them. So the SDN essentially wants to take control over the entire network which shows that you don’t really need only TP-Link devices to connect and monitor using the controller (my router was the RT-AX82U).
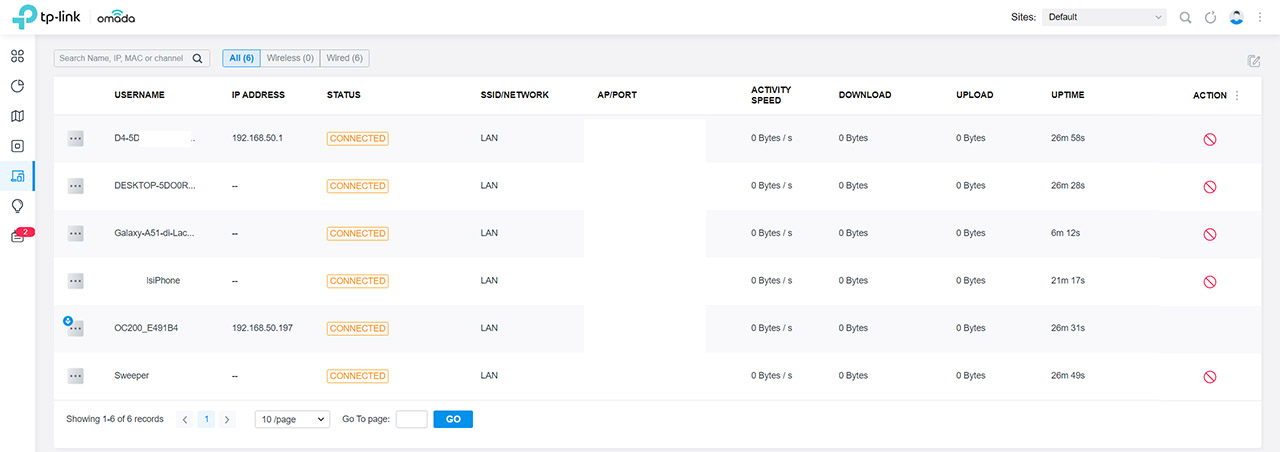
Its’ worth mentioning that all clients will appear as Wired, even if they connect to the router wirelessly. Before moving forward, I did like that I had the option to customize what is being displayed thanks to the widgets and you can access, as well as select them by clicking on the small cogwheel on the right side. There are even some similarities with UniFi in regards to the network Topology and I don’t mind it at all, it can actually be seen as an advantage for two separate brands to have similar approaches since it’s far easier for the user to move from one infrastructure to the other.
Then again, Ubiquiti has been in a kind of a rough spot for the last few years, so it was only natural that the competition would try and accommodate new users. Besides the Site Settings which are tailored for the connected devices (APs, switches, gateways), there are a few Controller Settings as well. Besides some general settings (that include the NTP Server, the Failback IP Address and the option to disable the Reset button), there is the option to enable the SMTP Server, set the duration for the Data Retention, add an SSL Certificate and set up the Access Config IP and port. Besides those settings, I could check the status of the Cloud Access, run some Maintenance tasks, enable and configure the Auto Backup and start the Site or Controller Migration process.
The Conclusion
I really liked what TP-Link has done so far with the Omada SDN and I see lots of improvements over the last three years. And the TP-Link OC200 seems to be a worthy addition to a larger network. It’s lightweight, it has two Ethernet ports and it does not overheat. It also runs the Omada SDN perfectly fine and yes, I would have liked to see a battery backup in case of a power outage (nothing a UPS can’t solve) and a magnetic case would have been a great addition as well. But you can’t have everything at this price point, so, if you don’t want to run a local instance of the Omada SDN on your own hardware, the dedicated TP-Link OC200 is one of the best options available.
TP-Link OC200
-
Pros
- Can be powered on via either PoE or using a microUSB port
- Fairly compact
- Two Ethernet ports
- Does not overheat
- Can be mounted on the wall
Cons
- No battery backup
- No microUSB cable
Mark is a graduate in Computer Science, having gathered valuable experience over the years working in IT as a programmer. Mark is also the main tech writer for MBReviews.com, covering not only his passion, the networking devices, but also other cool electronic gadgets that you may find useful for your every day life.