The TP-Link TL-SG2210P went through several significant changes over the years, starting from the almost six year old first version that was designed to power up multiple PoE devices, as well as provide some fairly basic management options up to the latest version which is v4.
| TP-Link TL-SG2210P | |
|---|---|
| TP-Link.com | Check Product |
| Amazon.com | Check Product |
I do not have the version 4, but the v3.20 which is identical to the v4 (bear with me) with the exception of a single aspect and that’s the power consumption. The TL-SG2210P v4 goes up to 76.5W with the 61W PD connected, while the v3.20 goes up to 74.4W.
The improvements from the version 3 are a bit more substantial because there is now a better PoE budget (from 58 to 61W), the power consumption is a bit lower and perhaps the most important feature is the support for the Omada SDN which brings a lot more software-related features. This includes L2 and L2+ features, better VLAN, far more security settings, centralized management (using either the software or the hardware controller), Cloud access and more. I have checked the early state of the Omada controller three years ago when I tested the TP-Link EAP245 access point, so I think it would be interesting to see how well the Omada SDN has matured over the years and how well it is being used with an Ethernet switch like the TP-Link TL-SG2210P JetStream.
Design and Build Quality
The TP-Link TL-SG2210P remained unchanged over the last generations, so we’re still dealing with a rectangular metallic case that’s very compact and I do need to put a bit more emphasis on just how small this Ethernet switch really is. At 8.2 x 4.9 x 1.0 inches (20.9 x 12.6 x 2.6 cm), this is the most compact switch I tested so far and it is a very strange size because it differs from the standard compact Ethernet switches (such as the Zyxel MG-108 or the TRENDnet TPE-LG80).
In any case, it’s not rack-mountable so it matters little whether it follows a standard or not – you can still put it in a rack though, just use a tray. Even so, it’s not that simple because the aforementioned standard size is designed in such a manner as to accommodate both the LEDs and the ports on the front of the device, but the TP-Link TL-SG2210P has the LEDs on one side and the ports on the other, so not really suitable for racks after all. That may not be great news, but the fact that you can mount it on the wall is. Indeed, there are mounting holes on the bottom and they support two positions. If you decide to keep the Ethernet switch on the desk, worry not because the manufacturer has added four silicone feet that you can add to the bottom of the case.
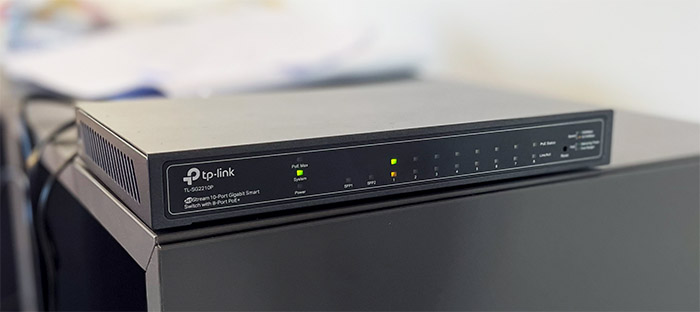
Besides that, the device is completely silent. As expected, there are no fans inside and yes, the 61W power delivery can be handled with passive cooling. It’s still going to get warm to hot in a few places, but the side cut-outs seem to be enough to keep the case well ventilated. As I said before, the case of the switch is entirely made of metal and even the front side is metallic, it’s just a plastic sheet glued on the aluminum shell. And this does give it a more rugged feel. That being said, the front side does have a small recessed Reset button which you need to press and hold for a few seconds to return the device to the factory settings.
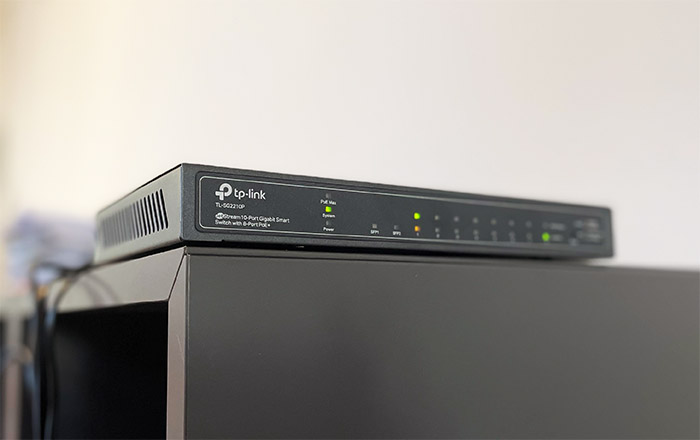
Besides the button, there are three LEDs on the left side of the panel, the first will show when the maximum PoE budget has been achieved (which is 61W), the next LED will let you know the status of the System (if it flashes, then everything is working properly – if it’s on or off, it means that it has encountered an error) and the third is the Power LED. Next to the three LEDs, there are a couple of LEDs for the SFP ports (if the LED is green, then the connection has been made at 1,000Mbps, otherwise, it has been made at 100Mbps).
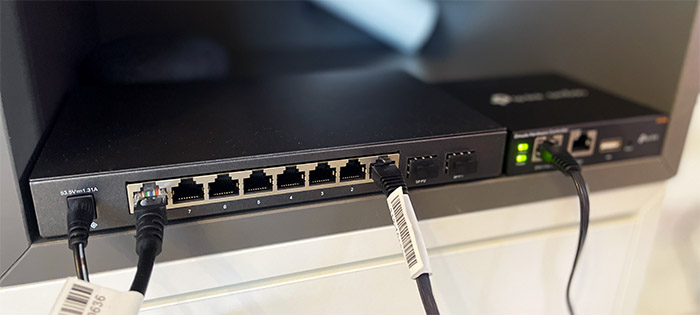
Lastly, there are two LEDs dedicated for each Ethernet port, the one at the top will become green when the connection is made at 1Gbps and yellow if it’s at 10/100Mbps, while the LED at the bottom is responsible for the PoE Status. To be more specific, the LED will start flashing in case there’s a short-circuit, a current overload or any other issue with the power delivery. If you turn the case around, you’ll see the Power port, the eight Ethernet LAN ports which support the PoE+ standard (802.3af/at and max 30W per port) and yes, all ports can go up to 1Gbps. I would have liked to see multi-Gigabit ports, but they’re expensive and only a few have dared to give it a try considering the cost (check the Zyxel MG-108). Next to the eight ports, there are two SFP ports that are protected by plastic covers and they also are Gigabit.
Internal Hardware
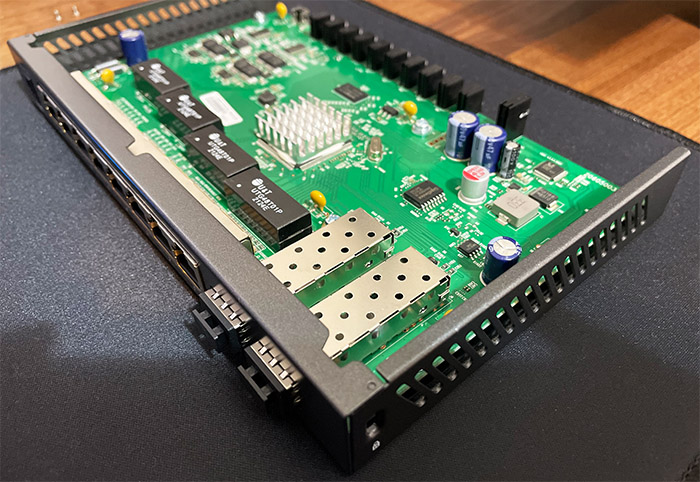
Just like with many other Ethernet switches, the teardown process is incredibly easy and in the case of the TP-Link TL-SG2210P, all I had to do was to remove two screws from the bottom side followed by simply sliding the top cover.
| TP-Link TL-SG2210P | |
| CPU | ? |
| RAM | 256MB Nanya NT5CC128M16JR-EK |
| Storage | 32MB GigaDevice 250256DFIR |
| Switch | ? |
This way, I could easily see the internal components from the PCB. I could identify 256MB of RAM from Nanya (NT5CC128M16JR-EK), 32MB of flash memory from GigaDevice (250256DFIR) and I also saw a Realtek RTL8231 IC. The main chipset was covered by an aluminum heatsink and I did my best at trying to remove it without breaking other components. Unfortunately, heating the area and trying to pry the heatsink didn’t work, so the type of chip that the TP-Link TL-SG2210P uses remains a mystery (no idea why some manufacturers use this glue-type thermal paste, but it’s effective at keeping away prying eyes). I assume that it can be done with more professional equipment which I currently do not own.
Note: The TP-Link TL-SG2210P features a 20Gbps bandwidth, a 14.99Mpps packet forwarding rate, 8K MAC address table, 4.1Mb packet buffer memory and support for Jumbo Frame up to 9KB.
Setup and the Local Management GUI
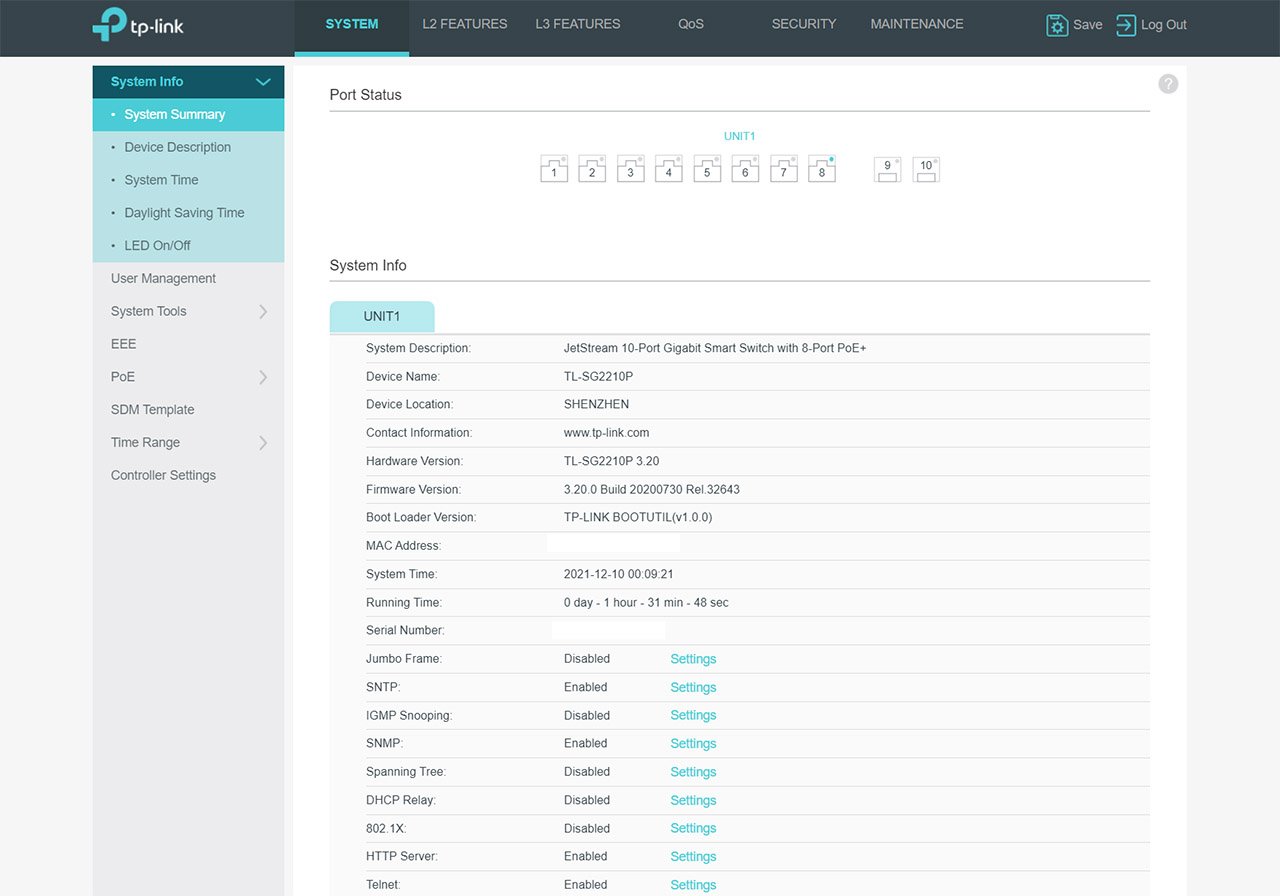
Since there is no console port, your main way to access the TP-Link TL-SG2210P is through the URL, so go ahead and enter the IP address of the device to access its web-based GUI (you’ll see it in the client list of your router). Being a JetStream Ethernet switch, it means that you do get a rich standalone-type of user interface, but, since it will also work with the Omada SDN, it does mean that the TP-Link TL-SG2210P is a sort of hybrid device (it reminds me of the likes of the EnGenius ECS1008P or the Zyxel XS1930-12HP). That being said, after changing the password to the web-based GUI, I could see that there is a main menu at the top and a secondary vertical menu on the left.
There is a plethora of options for each section and, under System, you get to see some info about the network and the ports, as well as turn the LEDs on or off. You also get the option to restore a bin image, upgrade the firmware, back-up and more; there’s the PoE configuration per unit or globally and I also saw the SDN Template config and table (there are two additional Enterprise templates besides the default one). Lastly, you can check the status of the Cloud-Based Controller Management.
Next to the System, there are quite a few L2 Features which includes some Switching options: Port configuration, isolation and loopback detection, as well as LAG (Static LAG and LACP) and MAC address. There’s also the mandatory VLAN (includes 802.1Q VLAN), Multicast, Spanning Tree and LLDP. There are some L3 features as well (which took me by surprise at this price point) and it includes the possibility to check the IPv4/IPv6 Routing Table, configuring the ARP, the Routing (IPv4 and IPv6), Static Routing and DHCP Service. Next, there’s the QoS which includes the Class of Service (port priority, 802.1p and DSCP priorities, as well as scheduler), Bandwidth Control Voice VLAN and Auto VoIP.

Mark is a graduate in Computer Science, having gathered valuable experience over the years working in IT as a programmer. Mark is also the main tech writer for MBReviews.com, covering not only his passion, the networking devices, but also other cool electronic gadgets that you may find useful for your every day life.

