
The Reolink RLC-842A can be considered the successor to the RLC-422 that was released more than four years ago and, besides sporting seemingly the same vandal-proof design, there are some significant improvements that will outshine not only any camera from past series, but also some security cameras from the competition.
| Reolink RLC-842A | |
|---|---|
| Reolink.com | Check Product |
| Amazon.com | Check Offer |
Indeed, Reolink has been working hard to perfect its person and vehicle detection which has found its way to the RLC-842A and it’s a system that works offline, inside the device itself, so no need for a Cloud connection. The storage has been upped to 256GB from the 64GB of its predecessor. And the optical zoom is still there, but instead of 4X, we now can zoom 5X. Furthermore, thanks to the up in resolution, the 3840 x 2160 pixels (4K as opposed to the 2K of the RLC-422) will make a difference in both normal view and while zooming. The vandal-proof IK10 build has been kept, but then again, why change something that works – also, the PoE support is still here, as before.
Reolink also seems to have wanted to pursue the integration with smart assistants, so it chose to support the Google Assistant and Alexa, so I suppose you can control the camera as an IoT device and the application will allow you to configure the camera remotely (this hasn’t changed from the RLC-422). As always, the price tag remains impressive for the amount of feature we get, so let’s put the Reolink RLC-842A to the test and see if it’s a worthy addition to the security layers of your home.
Design and Build Quality
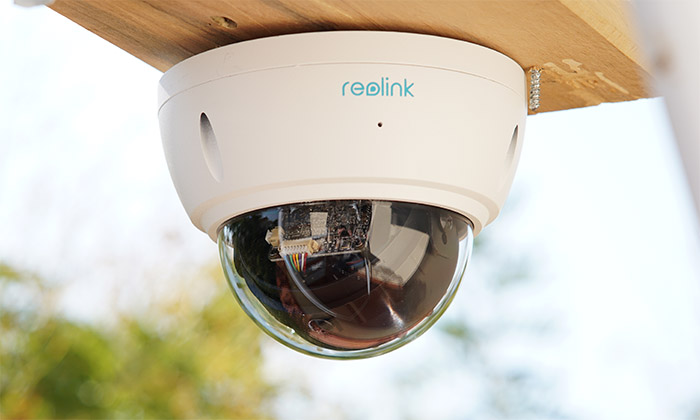
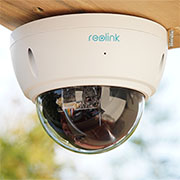
The Reolink RLC-842A is a proper dome-shaped camera, so it features a larger base made of a metallic alloy and a narrower top that’s made of a transparent plastic-like material, but it’s more than that. The housing seems to be designed as to resist being broken by vandals, so it should withstand a few hammer hits. The metallic body is also tough enough to nullify any attempts at breaking the camera lens. Not even the bracket is made of plastic, it’s all metal and it comes already attached to the body of the Reolink RLC-842A by three screws. This is another part of the vandal-proof system, since most other cameras, including those from Reolink can be removed from their bracket with ease. With the RLC-842A, it’s going to be a bit more difficult to detach it from the wall or ceiling.
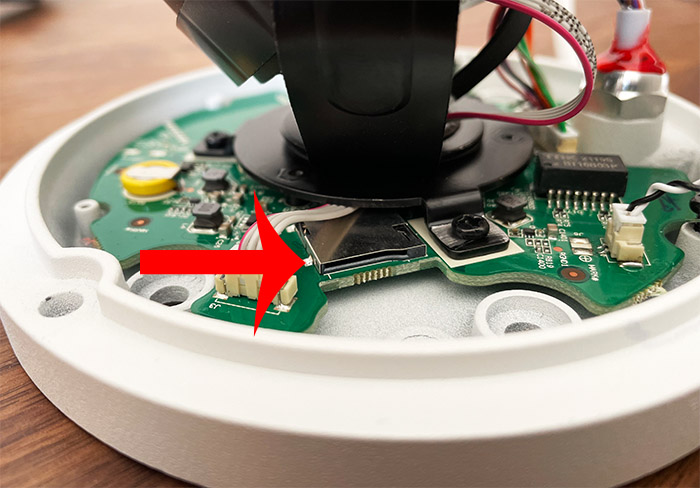
The downside is that the microSD card slot is inside the camera (only the microphone remains exposed), but it’s also an upside because again, it’s going to make it very difficult to be removed by any trespasser or passerby (they will need Allen keys!). The camera measures 5.23 x 3.4 inches (or 13.3 x 10.0 cm), so its footprint is going to occupy more space, but it still remains a very unobtrusive design, since it only sticks out a bit from its fortified body (unlike the bullet-type cameras). The Reolink RLC-842 also weighs 1.51lbs (686g), so it’s a bit heavy, but it doesn’t matter considering that it’s going to end up on the ceiling or wall.
After opening the case, I noticed that there was a silicone seal, so the device seems to have been designed to survive outdoor conditions. As expected, the camera is IP66-certified, same as the Reolink Duo and its predecessor, the RLC-422, so it should fully withstand dust ingress and it should also survive powerful jets of water. A storm should not harm the camera and the RLC-842A will remain operational if the temperature ranges between 14 degrees F and 131 degrees F (or between 10°C and 55°C). This means that the winters in most countries will pose no danger to the Reolink RLC-842A, but the harsher Canadian winters may be a bit more challenging.
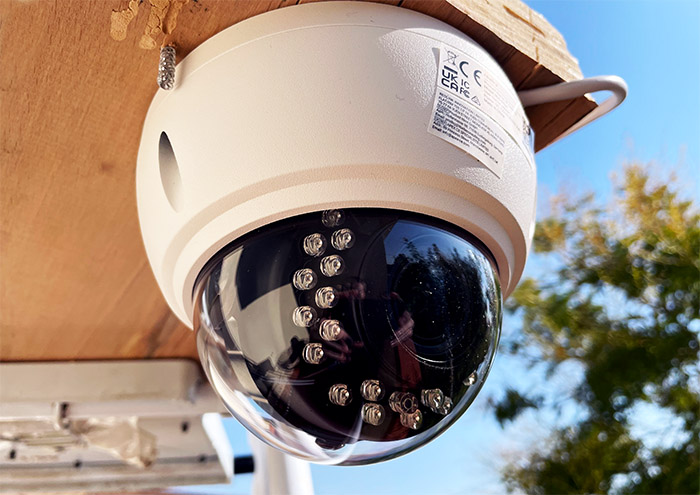
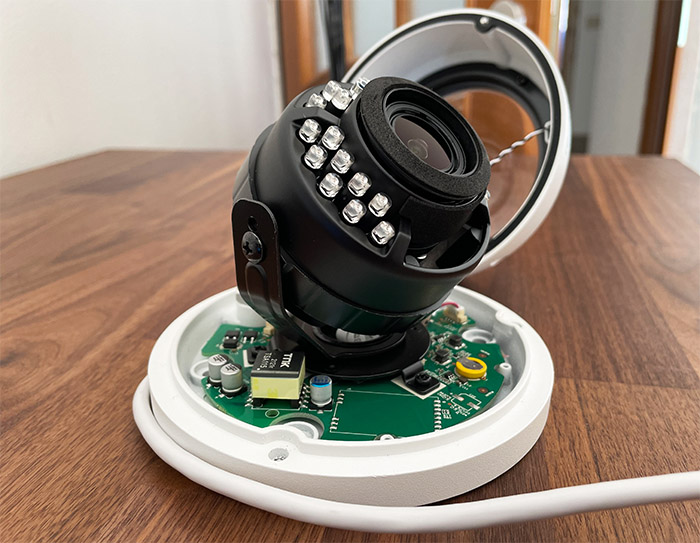
Inside the transparent dome, you can see the lens with its 24 IR LEDs, as well as other circuits. There doesn’t seem to be a spotlight, so no color night vision, but the amount of IR LEDs suggests that we will still get a very good black and white night vision. You’re just not going to be able to scare off trespassers with a light beam – there’s also no speaker, only the built-in microphone.
If you turn the Reolink RLC-842A upside down, you will see that there’s a cable which is permanently attached to the body of the camera and it ends with three smaller cables, the first being an Ethernet port. It’s 10/100Mbps and it makes sense since you don’t need more for a camera, so Gigabit would have been a waste.
The camera can be powered by a PoE adapter (IEEE 802.3af, 48V Active) or PoE Ethernet switch and Reolink has included a waterproof lid inside the package – there’s also a dedicated guide to its installation which is a nice touch. The second cable allows you to connect a power cable and there isn’t one in the package, so if you want to go this route, you’ll need to purchase a separate one. The last cable has a small button at its end and you can use it to return the Reolink RLC-842 to its factory default settings.
Internal Hardware
I think that the Reolink RLC-842A is the first device that I have tested which requires the user to open the case in order to both insert a microSD card and to mount the camera.
So, there is no risk for losing the warranty and they has added the protective silicone seal in a manner as to not get damaged when the device is opened. That being said, the tear down process requires the removal of the three screws from the top of the case and then to carefully detach the top side, while being careful not to detach the microphone cable and the ground wire. Now, you should be able to see the microSD card slot as well as the main components. First, I could see the Novatek NT98523MBG processor, same as the one that I saw on the RLC-511WA and the RLC-510A, then there were the 256MB of RAM from Samsung SEC125 K4B2G16, the MPSM38 M8007H fully integrated 802.3af PoE PD interface and the TNK 2119S BT16B03P IC. I then checked the smaller board that was attached to the lens assembly and I could identify a MS41929 lens driver IC.
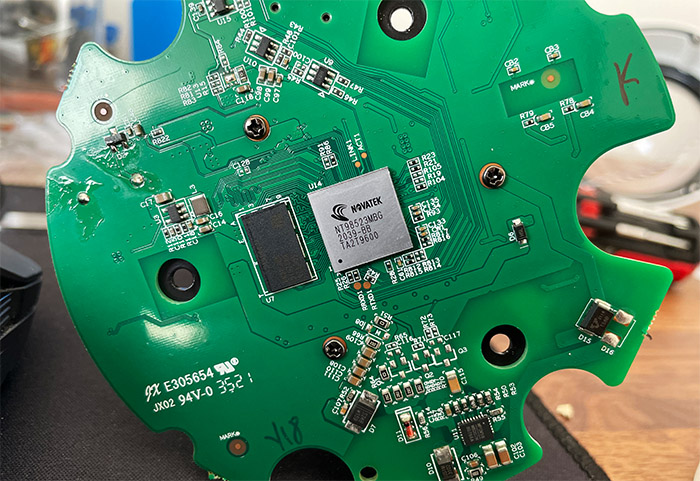
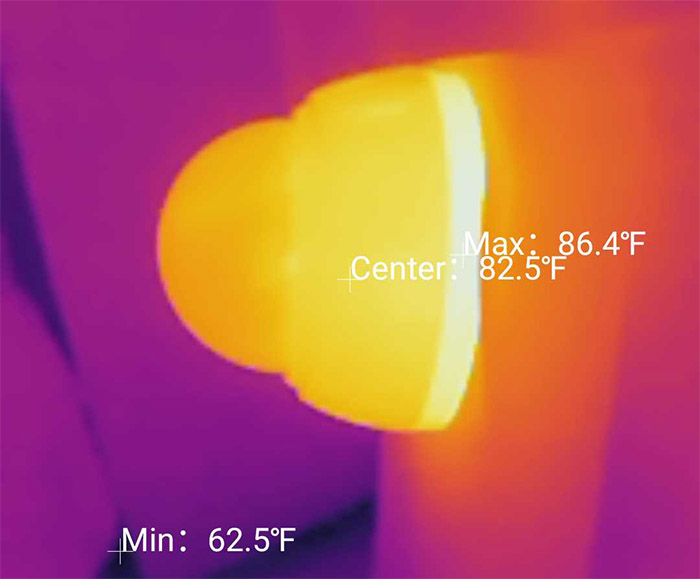
Note: The Novatek chip and the RAM have pads that transfer the heat towards the metallic bottom, so, as the thermal camera shows (AGM Glory Pro), that section has the temperature a bit elevated, although pretty much negligible.
The Installation of the Reolink RLC-842A
This section ties in with the previous section because you need to open up the Reolink RLC-842A to both mount it on the ceiling and to adjust its position. Unfortunately, there are no motors to adjust its position from the app, so you will have to take out the transparent dome and move the camera lens manually (you may also need to take out the screws from the metallic frame beforehand). This is especially important if you install the camera on the wall, since the angle will be vastly more different than when the RLC-842A sits on the ceiling.
I did like that the manufacturer has included a sticker that allows you to accurately drill the four holes and then to actually mount the camera (but the screws aren’t that tough and the head of one broke off). There isn’t much else to say about the hardware installation, except maybe to put some surge protectors in place as to avoid (as much as it’s possible) the device to be fried by lightning.
The Application
The app is called Reolink and it has the same layout as on the other Reolink cameras, with some additional options. After installing the app (on either iOS or Android devices), you can see all the cameras that you have paired (if it’s not the first device that you use from Reolink).
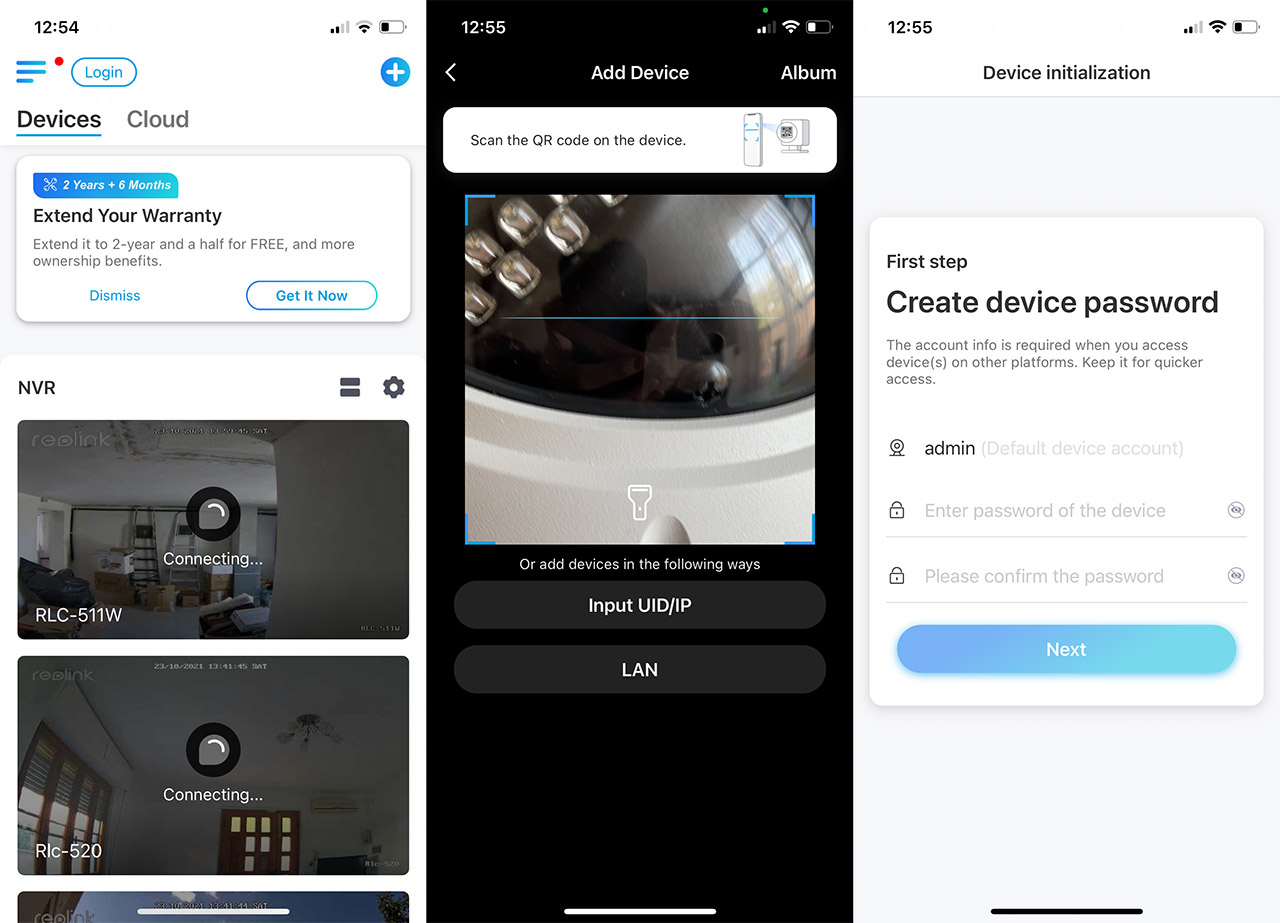
To add a new one simply tap on the Plus sign and scan the QR code from the label that’s glued to the side of the Reolink RLC-842A. Afterwards, the camera will appear as Uninitialized, so click on it to set up the user account (only admin available), name the device and that’s pretty much it, you can roam the app GUI. As I already mentioned, the layout is pretty much the same as on the other Reolink cameras, so you will see the current bitrate on the top left corner (it can go above 7Mbps at 4K) and underneath it, there’s the live view window. Immediately underneath, there are the quick access icons to pause the footage, to mute the audio (coming from the microphone), to capture a photo or start recording.
Furthermore, you get the option to change the image quality (Fluent, Balanced or 3840x2160p) and to view the footage in full screen. At the bottom of the window, there are three icons, the first will digitally zoom a portion of the image, while the second is called PTZ and it will open a dedicated set of options to allow you to Zoom and Focus.
The last icon is called Playback and here you can see all the stored footage and images, grouped by specific periods of time. If you tap on the cogwheel icon, you will be taken to the Settings section, where you can see some Display options (flip the view, adjust the Anti-flicker, enable the Watermark, the brightness setting and more), as well as adjust some Notification settings (including FTP Upload for NAS use).
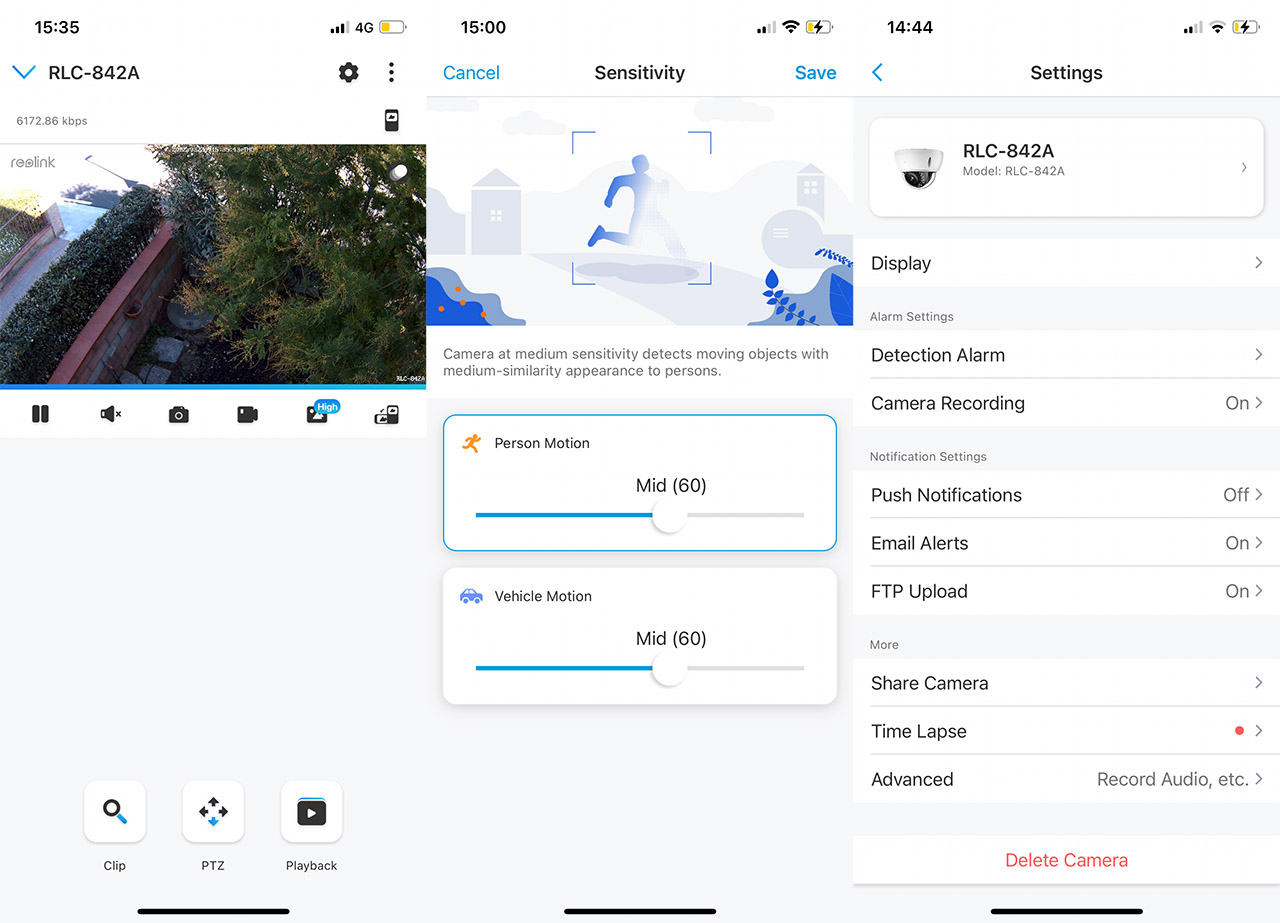
There is also the possibility to change the Detection settings, which include the Detection Zone (paint an area on the screen that will not trigger the sensor) and adjust the Sensitivity (including the Person and Vehicle Motion). There’s also the Object Size which allows you to set a Minimum and Maximum for the person and the vehicles that can trigger the motion sensor and start recording. Under Advanced, I noticed that you can turn off the Infrared Lights.
Note: As I mentioned in the intro, the Reolink RLC-842 does support integration with Amazon Alexa and Google Home which could prove useful (if you’re not really privacy-focused), but I was wondering if I could add the Reolink app to the open-source Home Assistant. And, for now, it seems to not be supported.
The Image Quality
The Reolink RLC-842A has an 8-megapixel camera which supports a resolution of 3840 x 2160 pixels (4K), so the image should be crispy clear regardless of the monitor or smartphone that you’re watching the video from. And, while the image quality was set to max, the live footage was indeed excellent. As you can see from the video, all the details are there and it does seem like Reolink has toned down a little bit the contrast, so the image has a more natural look.
At the same time, I noticed that farther out (more than 150 feet or about 45 meters), there are some very noticeable chromatic aberrations. I have the feeling that these chromatic aberrations are caused by the transparent dome which surrounds the lens and the light shine towards the lens at a weirder angle than usual, causing a bit of a shift. I also took a picture while a car was parking and, as you can see, the camera doesn’t handle that well car movement at that high distance (150 feet).
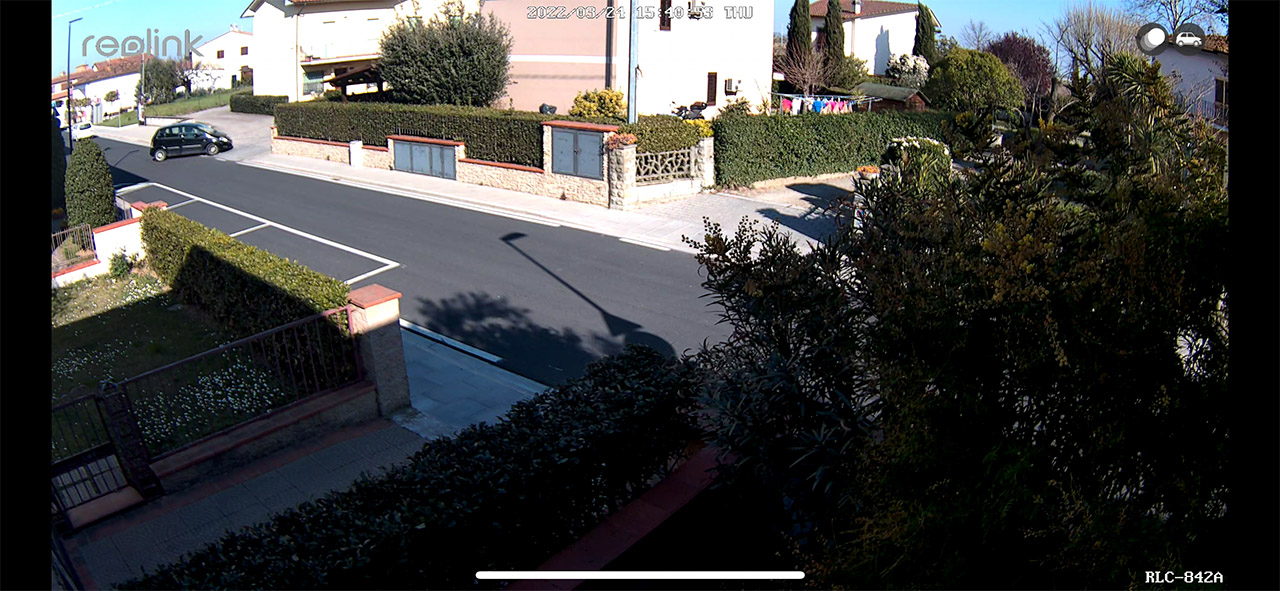
It is a bit better when the moving objects are closer to the camera at, let’s say no more than 100 feet. Still, if you check the icon on the right, you can see that the camera does see the object as a car. Another good news was that there were practically no distortions at the edges, so the entire video should remain clear from one end to the other.
Since the Reolink RLC-842A has support for Time Lapse videos, I decided to give it a try and I noticed a few things. First of all, I could definitely clearly see the plate number of a parked car (about 100 feet from the camera) and zooming in 5X meant that it was even more clear, so this is good news for people worrying that some cars may stop and observe their behavior (planning to break into their house when they’re away).
I also noticed that everything was crystal clear and there was a decent color reproduction, and that’s because the sun moved away a bit more, so the chromatic aberrations had less of an impact. Now let’s talk a bit about lag. Some early Reolink models did struggle with it, especially when zooming in, but that was improved with the newer models. So, I decided to see how well the RLC-842A performed in this regard. When I captured the first photo, the smartphone that I was using had a terrible signal where I located the camera (approximately -85dB, so it was ultimately useless), so it had to switch to 4G and the footage had a delay of about 5 seconds because of that. But, over the WiFi, things went far smoother and yes, there was a slight delay (between 1 to 2 seconds) – it wasn’t as severe as on the mobile Internet (5G would have been of great help).
Zooming in while I was within the local WiFi coverage was also quick and responsive and no, it wasn’t instantaneous, but it took a couple of second to both zoom in and auto-focus on the subject. During the night, make sure that you thoroughly clean the transparent dome, otherwise, the video quality is going to be impacted (mostly in regards to accuracy and detail). The 24pcs IR LEDs do a good job at keeping everything clear and, if you look behind the garden walls, even if there are shadows, a trespasser would remain visible. Because there is no floodlight, you don’t get colored night vision, but, as you can see from the video, the footage is really good enough.
Smart Motion Detection
I am pretty sure that Reolink has made some improvements on the smart detection technology since it was released, but even in its initial state, it worked really well. Seeing it in action on the Reolink RLC-842A has made me realize that it seems even more precise and it reaches farther than before, above the 100 feet limit. That is during the day, because during the night, it will still need some light sources to function properly. What’s interesting is that the night vision on the Reolink RLC-842A is good enough to take advantage of any anemic light source in the distance and light up any potential intruder. Again, walking in a straight line with your hands in your pocket will trigger the sensor and the only way ‘to trick it’ is to stay motionless, forever. As for the distinction between cars and people, the RLC-842A has done an excellent job and the extra filters for height could prove to be useful to reduce false triggers by children or pets (be aware that children and smaller people can still trespass).
The Conclusion
4K on a security camera is already an impressive feat, but the Reolink RLC-842A went a few more steps in the right direction, adding the smart motion detection technology, the integration with smart assistants and the vandal-proof casing. This additional focus towards vandal-proofing has made the Reolink RLC-842A a bit stranger than the other Reolink cameras in the sense that the user needs to open up the case, navigate through the exposed electronics to add a microSD card and then mount the device on the wall. But even with its quirks, the Reolink RLC-842A remains one of the best cameras in its category, especially considering the affordable price.
Reolink RLC-842A
-
Pros
- Vandal-proof case
- Excellent image quality - 3840x2160p (4K) resolution
- 5X Zoom
- Supports PoE
- Very good black and white night vision
Cons
- You need to open the case to mount the camera and to add a microSD card.
- If you want to adjust the viewing angle, you need to open the case.
- No colored night vision
Mark is a graduate in Computer Science, having gathered valuable experience over the years working in IT as a programmer. Mark is also the main tech writer for MBReviews.com, covering not only his passion, the networking devices, but also other cool electronic gadgets that you may find useful for your every day life.