
Software and Functionality
The app interface is quite simple, with the live footage in the center and immediately underneath, you get to choose how many simultaneous cameras can be shown (goes from 4 to 16!). Further down, you can select the image quality which can be Basic (will use the least amount of bandwidth), Standard or HD – I selected HD and I was surprised that there was very little lag (less than a second), while some other cameras from the competition did struggle when the resolution was very high (some having a lag of more than 2 seconds). The HD quality will make use of the same SuperHD feature that I saw on the Reolink cameras and it’s basically a better compressed video, keeping more details and delivering better colors (the term was first use by Netflix to show that you can get various types of image quality at the same resolution). And indeed, during a sunny day, the colors look great, all the details are there even if I was filming in the distance (more than 300 feet). I also noticed that there’s a bit more contrast than on other cameras which will make the footage look better (the colors pop out a lot more).
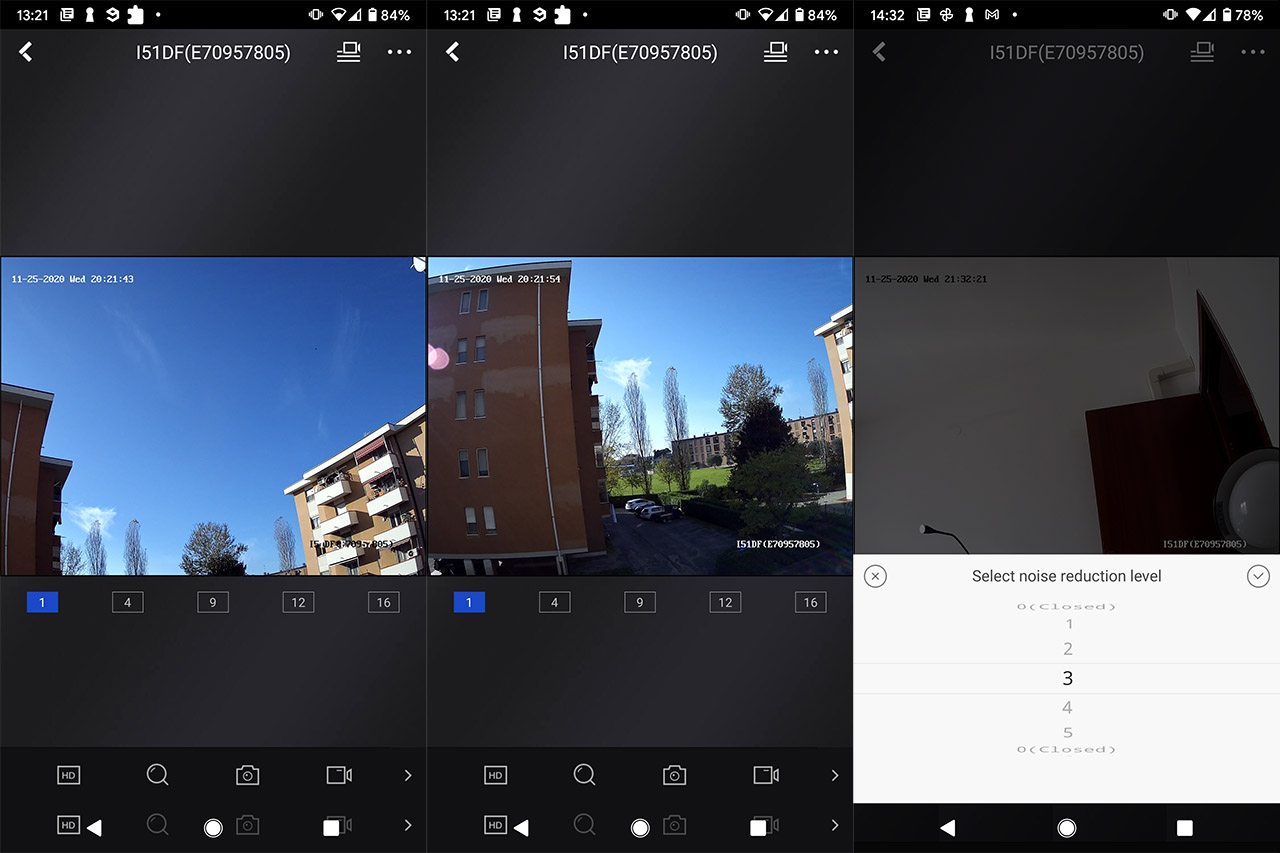
During the night, things weren’t as impressive. It’s fairly decent when I filmed inside a room (about 10 feet away), but the 30 feet limitation for the IR performance seems to be very accurate since long range, some details get lost and there’s a noticeable amount of noise. Furthermore, I noticed that it doesn’t like any light source to shine directly at it since if it does, the image gets even more unclear. Again, it will work fine if you’re point of interest is very near (such as a small backyard), but for seeing in the distance during the night, you may need something different. Returning to the app interface, next to the image quality, you can also tap on the magnifying glass icon to zoom into the video up to 8x (it’s digital), while further to the right, you can quickly capture a photo of the live footage or start recording a video. Slide left to show additional options and the first one is Pause, followed by an icon that I’m not entirely sure what it does since it would always give me Operation Failed (102009); the last two icons are for flipping the view and for ‘Selecting the noise reduction level’ (to improve the image quality).
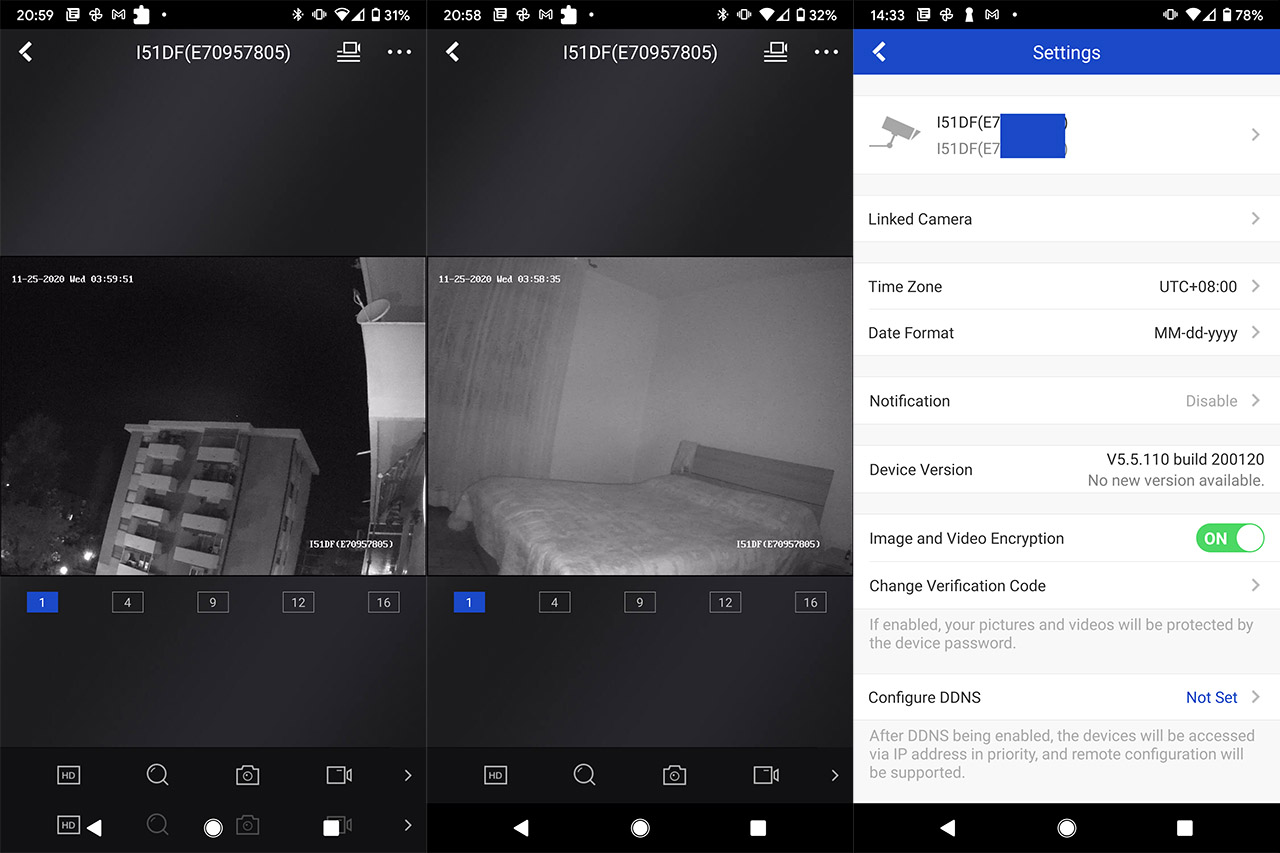
To adjust other options, tap on the three dots from top right corner (where you can also select the Playback option to view saved videos) and select Settings. Here, you will be able to see some statistics about the camera, enable the Notifications, upgrade the firmware, enable the image/video encryption, configure DDNS or set the Remote Configuration (to access the footage from outside the local network). I did not see any config options for the motion detection, so I decided to check out the web-based client tool. To access it, you need to enter the IP address into the URL (check it from the router interface) and, when prompted, enter admin as the username and the password that you previously set in the app for the camera.
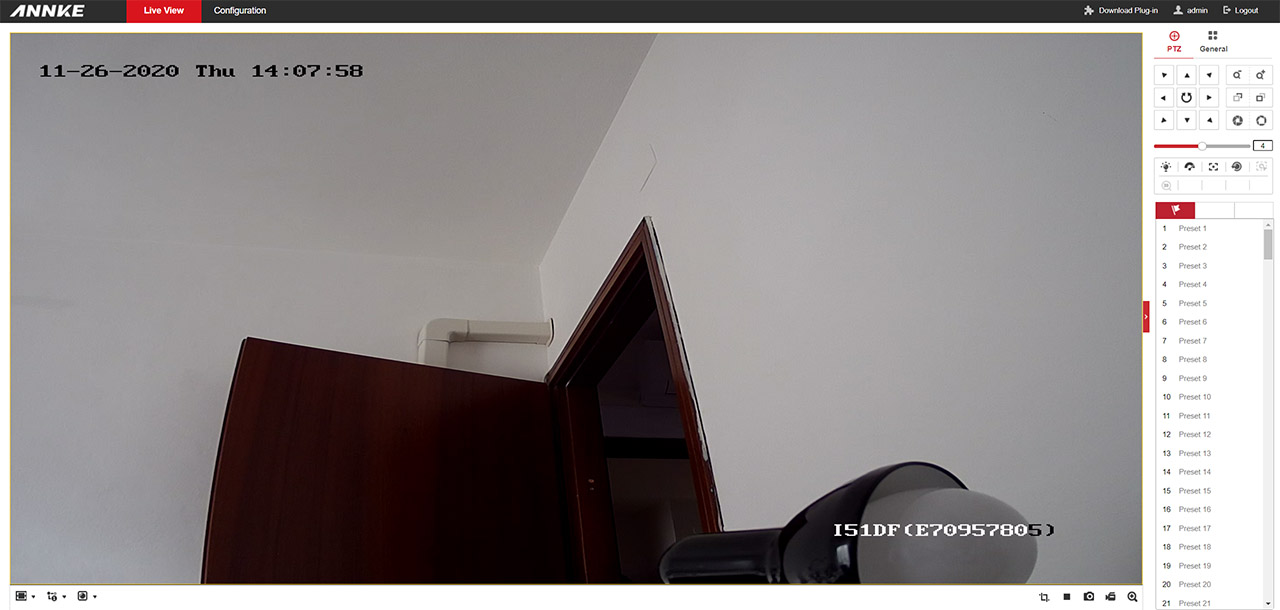
It’s important to know that you will have to download a Plug-in in order to see the streaming video. After that’s done, you will be greeted by the Live View window with the footage stretched across your display and, on the right, there is the PTZ section (which does not apply to this camera) and the General Settings, where you can adjust the way the image looks and the OSD settings. Besides the Live View, there’s also the Configuration and, as I anticipated, there are far more options here than you could find on the app.
First, there’s the Local settings, where you can configure the Protocol, the video performance, the Image Format, as well as where the recorded footage and the captured images will be stored. Next, there’s the System, where you can adjust some camera info (again, not everything can be applied to the C500), reboot/restore or return the device to its factory settings, export or import a config file, adjust the Security aspect of the camera (includes setting up the Authentication type and Algorithm, set an IP Address filter and enable the Illegal Login Lock) and lastly, there’s the User Management section where you can create additional users that can access the camera UI. The Network section also goes far more in-depth than the app and yes, you get some Basic Settings available (includes DDNS, Port and NAT), as well as some Advanced Settings (includes QoS, 802.1x, HTTPS and more). In order to change the live footage settings, go to Video/Audio where you can adjust the Resolution, the Bitrate Type, the Video Quality, the Encoding and more; there’s also the ROI section (Region of Interest), where you can set an area of interest (can be drawn), while the rest of the image will be of lower quality, saving up on the bandwidth.
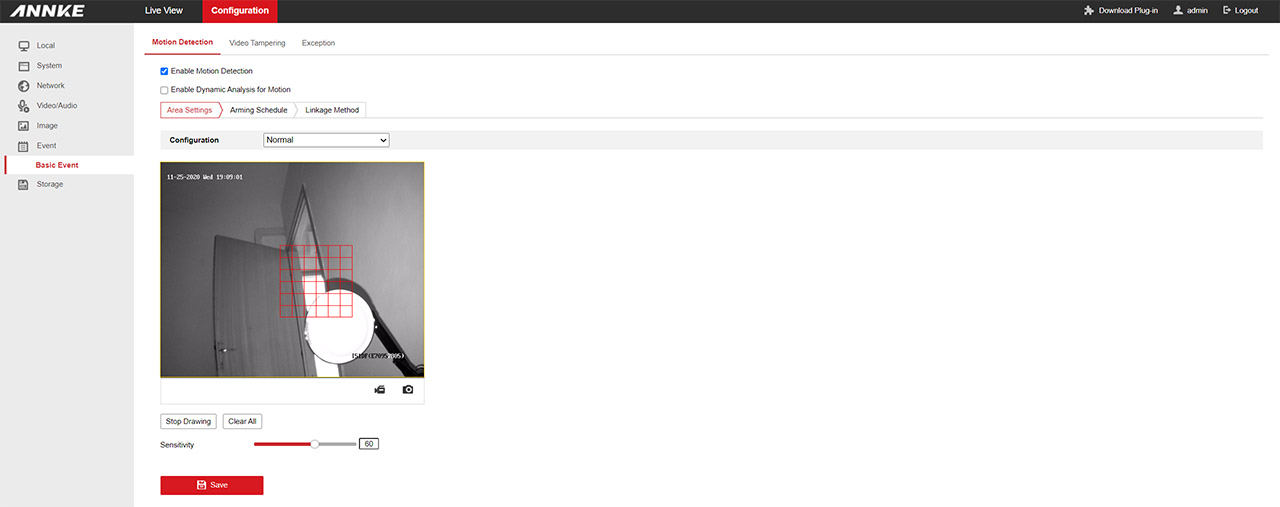
Under Image, you get to change the brightness, the exposure, the contrast, the white balance and more, as well as set a Privacy Mask area in case you are required (or need) to respect the privacy of a person or censor a place’s logo/name. The Event section is what I was searching for in the app (but it was missing) since it’s the place where you can find the Motion Detection settings and yes, it works very similarly to other cameras. You draw an area over the footage and set the Sensitivity to the preferred level – the closer the subject, the lower the sensitivity should be. You also get a few additional options which allow you to set the type of notification and how the footage will be stored when an event triggers the recording. Still under Event, I found that you can set an alarm when the lens is covered which is a fantastic security option considering that’s the first thing that a trespassers will try to do. Lastly, you get to set the Storage Schedule Settings.
Conclusion
As you may have noticed, the Annke C500 camera series does not have any Cloud subscription or an SD card slot available (not a bad thing security-wise) which means that they’re built to be used along with either an NVR or with a third party solution (a NAS, Blue Iris), so, ideally, you would purchase multiple such units and create a proper surveillance system. And it’s a good option from the price-to-performance ratio point of view, considering that you get an excellent image quality during the day (during the night, things were a bit lacking), there is a huge amount of customization available on the browser client (there’s also a decently comprehensive app available), the camera is weather-proof and you get the option to use PoE for both the connection to the router and for powering up the camera.
Annke C500 I51DF
-
Pros
- Excellent video quality during the day
- Supports PoE
- Full ONVIF compatibility
- Feature-rich browser client + mobile app
- Motion Detection
Cons
- No SD/microSD card slot
- No Cloud storage available
- The Night Vision is a bit mediocre
Mark is a graduate in Computer Science, having gathered valuable experience over the years working in IT as a programmer. Mark is also the main tech writer for MBReviews.com, covering not only his passion, the networking devices, but also other cool electronic gadgets that you may find useful for your every day life.
I have multiple C500 Camera’s. Many are I51DF which don’t have microphone or SD slot but I also have a C500 I51DM which does have the SD slot and microphone.
Below are all the variations of Annke C500 Camera’s
AK-I51DE01 = Bullet
AK-I51DF01 = Turret
AK-I51DK01 = Dome
AK-I51DL01 = Bullet – Mic & SD
AK-I51DM01 = Turret – Mic & SD
AK-I51DN01 = Dome – Mic & SD
“Cons
No SD/microSD card slot”
Amazon has the Annke C500 turret camera listed with a 256gb SD card slot
Interesting. The model that I tested is the I51DF and was referred to me as C500 and I can assure you, there is no microSD card slot (I even did a proper teardown which didn’t reveal any hidden slot). I also re-checked the official website for the specs (https://cdn.shopifycdn.net/s/files/1/0110/6385/3156/files/C500-Series-Specifications.pdf) and I don’t see any mentions of a microSD card slot on any of the available models. So, as a conclusion, I have no idea what the seller on Amazon is talking about. Maybe there’s a new model… I will have to check with Annke to clarify things.