
The ANNKE NCPT500 is the newest member of the Night Chroma series and, while not sporting the biggest sensor from the bunch, it is currently the only camera to support the Pan/Tilt duo automatic movements. Don’t get me wrong, we’re still dealing with a 5-megapixel sensor and 3K resolution, so it should be a bit sharper than the ANNKE NC400 which I have been using as a reference on how to do night vision right for the past two and a half years.
| ANNKE NCPT500 | |
|---|---|
| ANNKE.com | Check Product |
| Amazon.com | Check Offer |
I am familiar with the Night Chroma tech from when it came out and, while the F/1.0 aperture, the active alignment tech and the 100 feet supplemental light remained unchanged, there are a few improvements that are worth mentioning. First, we get a bigger BSI sensor (1/1.8 vs 1/2.7) and the most significant upgrade has been at the algorithm level, so the ANNKE NCPT500 should be better at detecting movement and be faster at sending you alarm notifications.
I have tested other ANNKE cameras and the detection processing is done locally, although we will see if the notifications need to pass through their servers, as it happens with Reolink cameras. Of course, one of the most important features is the ability to remotely pan and tilt the camera, and ANNKE has made sure that it is possible to do so at a very wide angle (340 degrees horizontally). There is also available the two-way communication option and the camera can be powered via PoE or regular adapter, but it cannot communicate using WiFi. So, let’s power up the ANNKE NCPT500 and see how well it performs.
Design and Build Quality
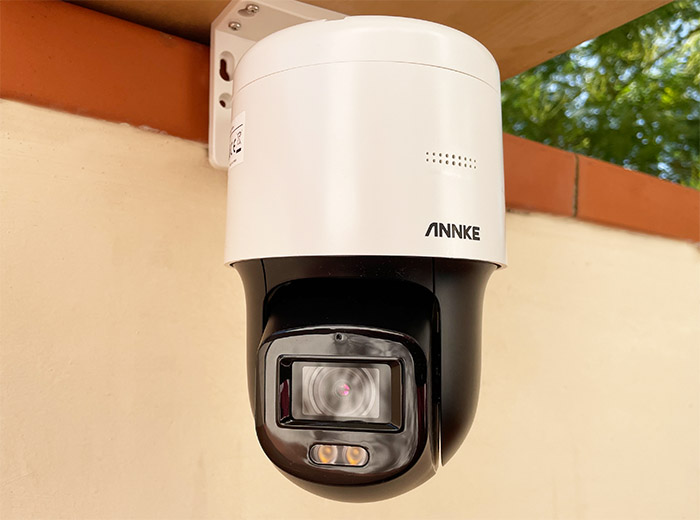
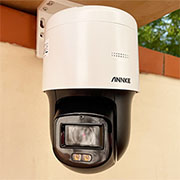
Outdoor-suitable cameras are usually much larger than the regular IP cams and they’re also a bit more strangely designed. More so than the regular bullet-type camera. The ANNKE NCPT500 does measure 6.4 x 4.7 x 9.2 inches (23.4 x 16.2 x 12.0cm) so it’s going to be very much noticeable regardless of the place you mount it.
And I have seen that there is a built-in support which allows both wall and ceiling mounting, but looking at its shape, I tend to believe that ANNKE wanted this camera to be installed on a ceiling. The stand is L-shaped and, if you mount it on the wall, a piece of plastic will hang above it (not really the most aesthetic-pleasing approach). Furthermore, the camera is IP66-rated which makes it pretty much completely dust-proof and it will also survive sprays of water directed towards the enclosure.
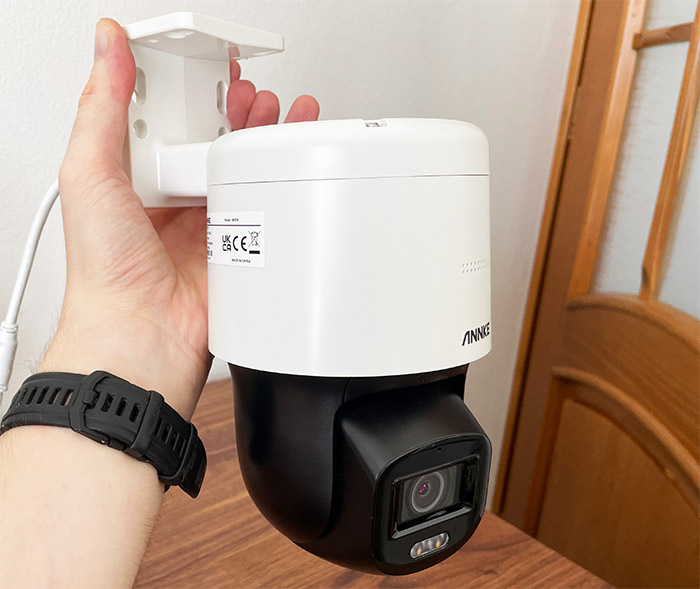
Rain should not harm the ANNKE NCPT500, but it’s still better to keep it covered as much as possible (why ceiling mounting is better in this case). The NCPT500 will remain operational as long as the temperature ranges between -22° to 122°F (-30° to 50°C), so it’s suitable for most parts of the Earth, for now. The camera is entirely made of plastic, the top part which holds the panoramic movement motor being covered by a white matte finish, while the bottom section (with the lens) is matte black.
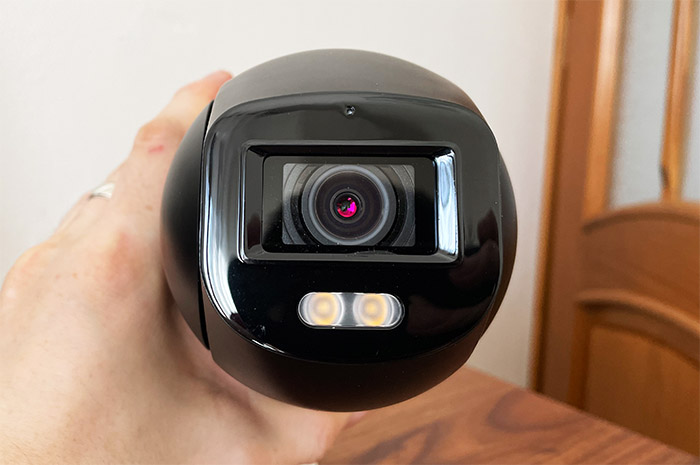
We can see the speaker above the ANNKE logo immediately above the lens area and there is also a microphone next to the camera lens, while underneath it, there are two LED supplement lights. The concept is the same as on the ANNKE NC400 and the newer Reolink CX410: if there are enough light sources, then the color night vision will work just fine, otherwise, to cover a very dark area, these two LEDs will shine a soft light to help the camera “see” better.
I have already mentioned that the pan movement is 340 degrees (almost full circle), but the tilting movement is a bit more limited, going between -5° to 105°. Still plenty enough to see up and down, so there are very few unreachable blind spots. If you move the lens section down, you will be able to see that there is a piece of plastic held by a couple of screws and inside it, there’s a lot going on. First, there’s the microSD card slot which supports an addition of up to 256GB of storage memory.
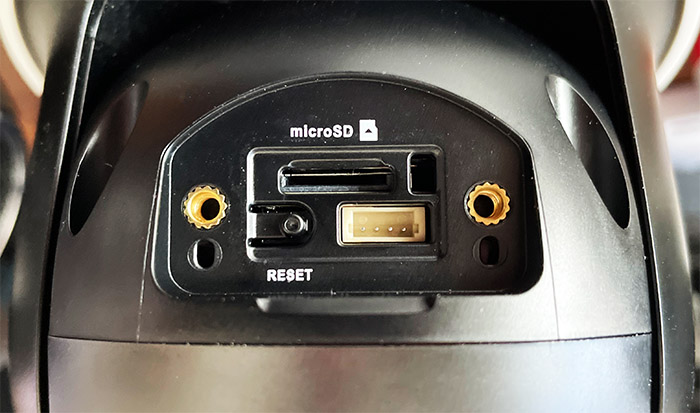
Then, we can see the Reset button and lastly, there’s what I assume to be a Console connector that most likely can be used for programming and maintenance. Lastly, I need to mention the cable that’s attached to the camera through the stand and which gets divided into the Ethernet PoE cable (10/100Mbps, so it’s Fast Ethernet) and the 12V Power adapter connector (which is protected by a silicone cover). Also, know that there is no Power cable in the package.
ANNKE NCPT500 Teardown
The ANNKE NCPT500 is very easy to open since all you need to do is remove the four screws at the top (using the Allen key provided in the package) and, after disconnecting the small cable (for the power), I could identify the H16111CE high PoE+ (700mA) chip on the small board. Moving forward, we can see the Pan motor and the silicone seal which prevents water from entering the enclosure.
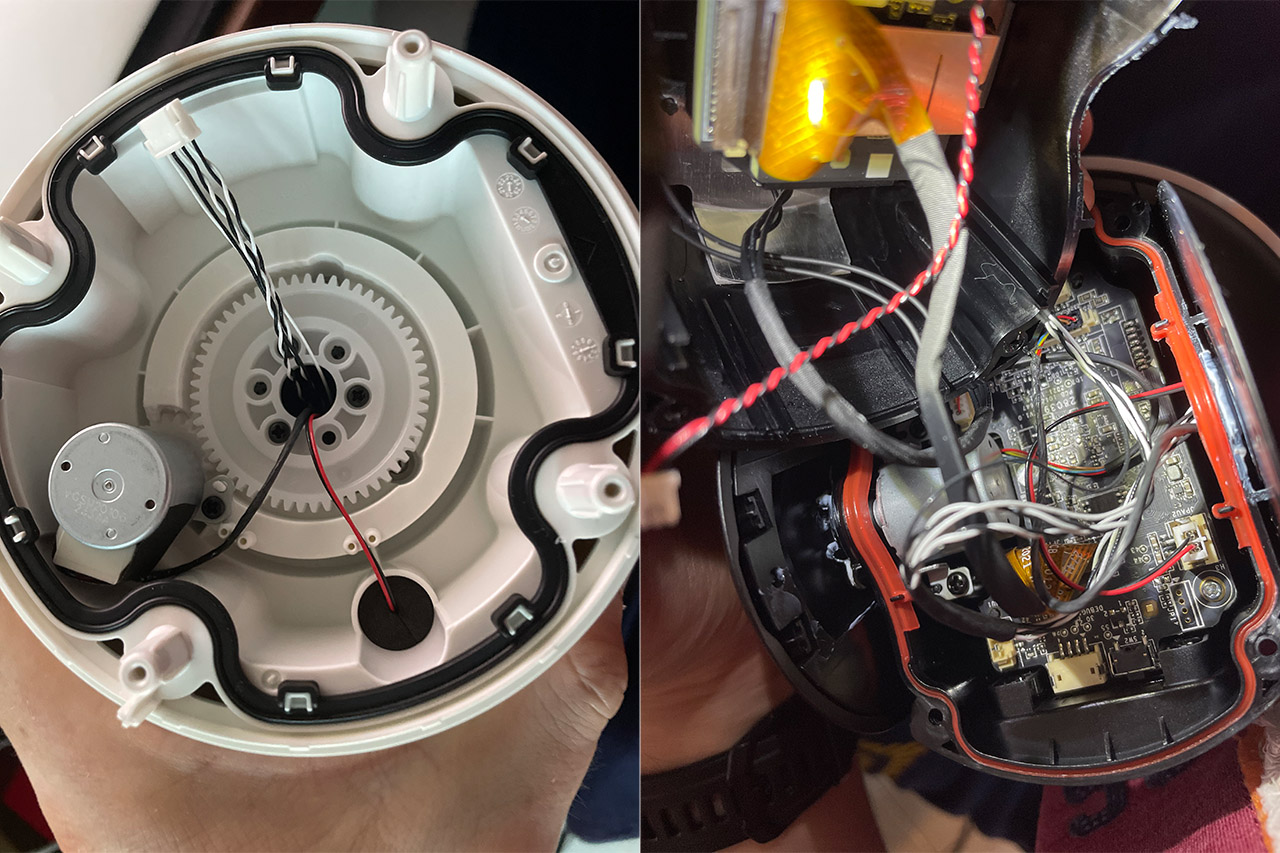
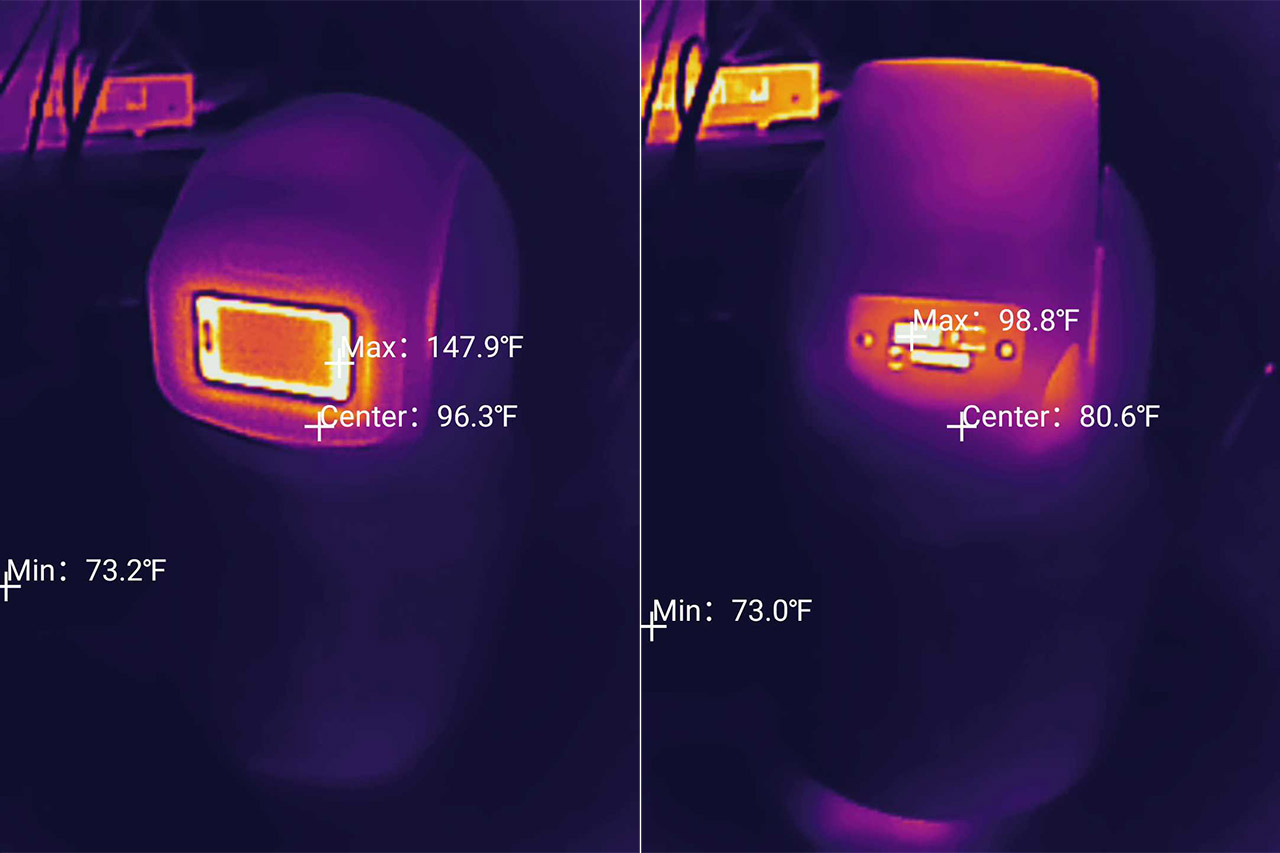
I could not go further than that this way since I would have had to detach the speaker and other parts that I just did not feel comfortable to do so. Instead, I removed the four screws from the spherical part (with the lens) and this way, I got access to the two PCBs. I could identify the 16MB of flash storage (GigaDevice 25Q128ESIG) and that’s about as far as I went. Now let’s talk about the thermal management – I have attached a photo to show just how hot the ANNKE NCPT500 can get.
Installation and App
The hardware installation of the ANNKE NCPT500 camera is pretty straight-forward, all you need to do is insert the four screws from within the bracket, but it’s worth mentioning that there is a waterproof gasket which will prevent any short from happening due to water ingress (I would still use a small plastic box to keep this cable connection safe). After that, download and install the ANNKE Vision app, and then, after having to accept the Terms, as well as the Privacy Policy (the data that goes through the app will be collected, as well as some info from the device, so make sure to read the terms before accepting them), you can create an account.
It needed an email and after logging in, I was asked whether I wanted to give it access to the precise location (it does not need it). Next, it asked whether I allowed it to show notifications which are necessary if you want to know when the camera detects movement. After that, I made sure that the camera was connected to the router and the app immediately saw it and asked if I wanted to activate it.
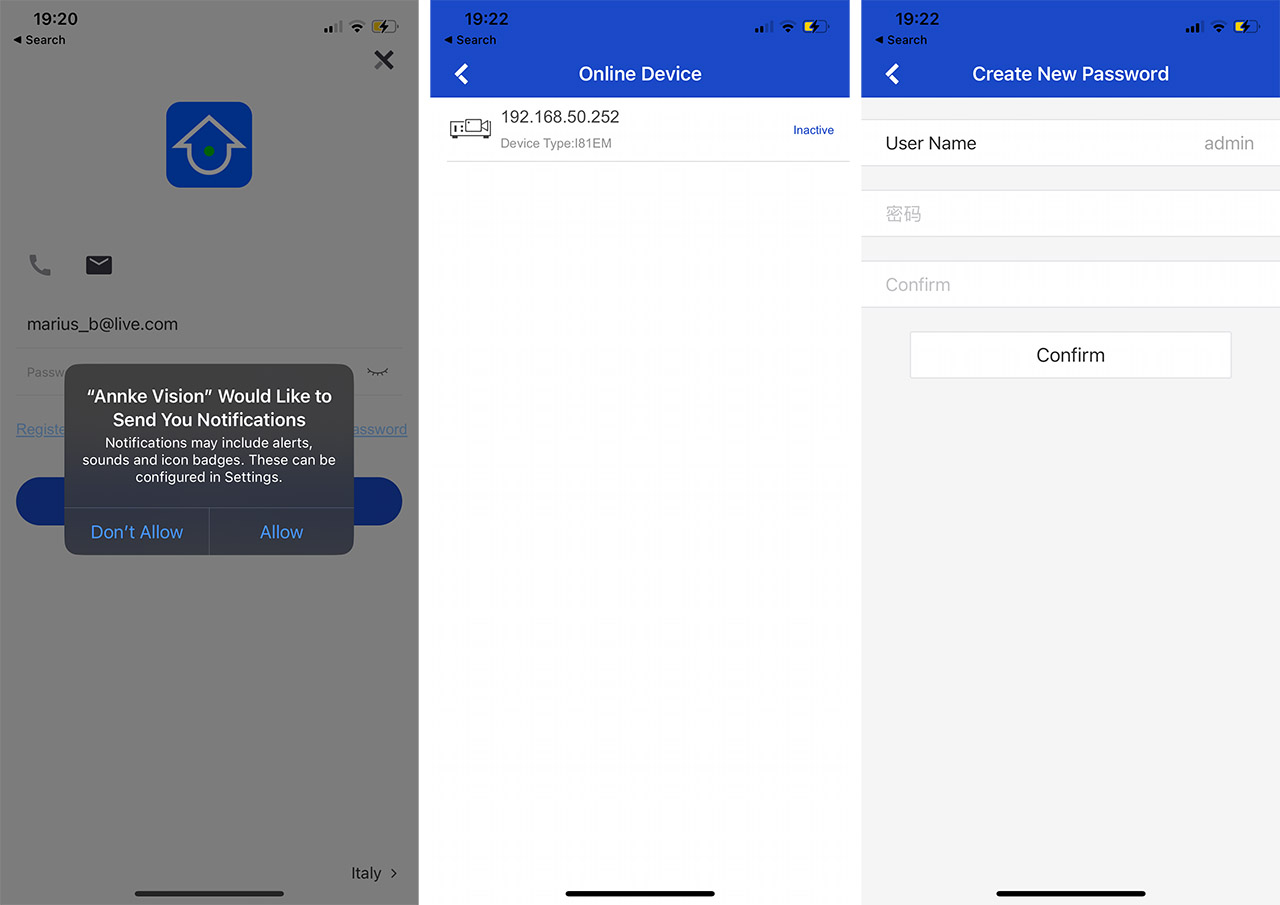
Next, I could enter the password, while the user name remained hardcoded (admin), but what was interesting was that I was asked whether I wanted to Add the Device to Annke Vision Server or if I wanted to Add the Device to View in LAN. Of course, I chose the latter (it’s nice to have multiple options and not be forced to go through the manufacturer’s servers).
Lastly, I gained access to the app and we can see the live view covering the top part of the screen, while below, there’s a suite of options, although about half of them are grayed out. You can change the image quality (Clear, Fluent and Custom), choose the Noise reduction level, start recording or capture a photo, as well as trigger the audible alarm. Tapping on the three dots on the top right will give you access to the Settings and, initially, I thought that these are the available options, but no, tap on the three dots on the bottom right to summon the Remote Configuration / Remote Controller, and choose the first one.
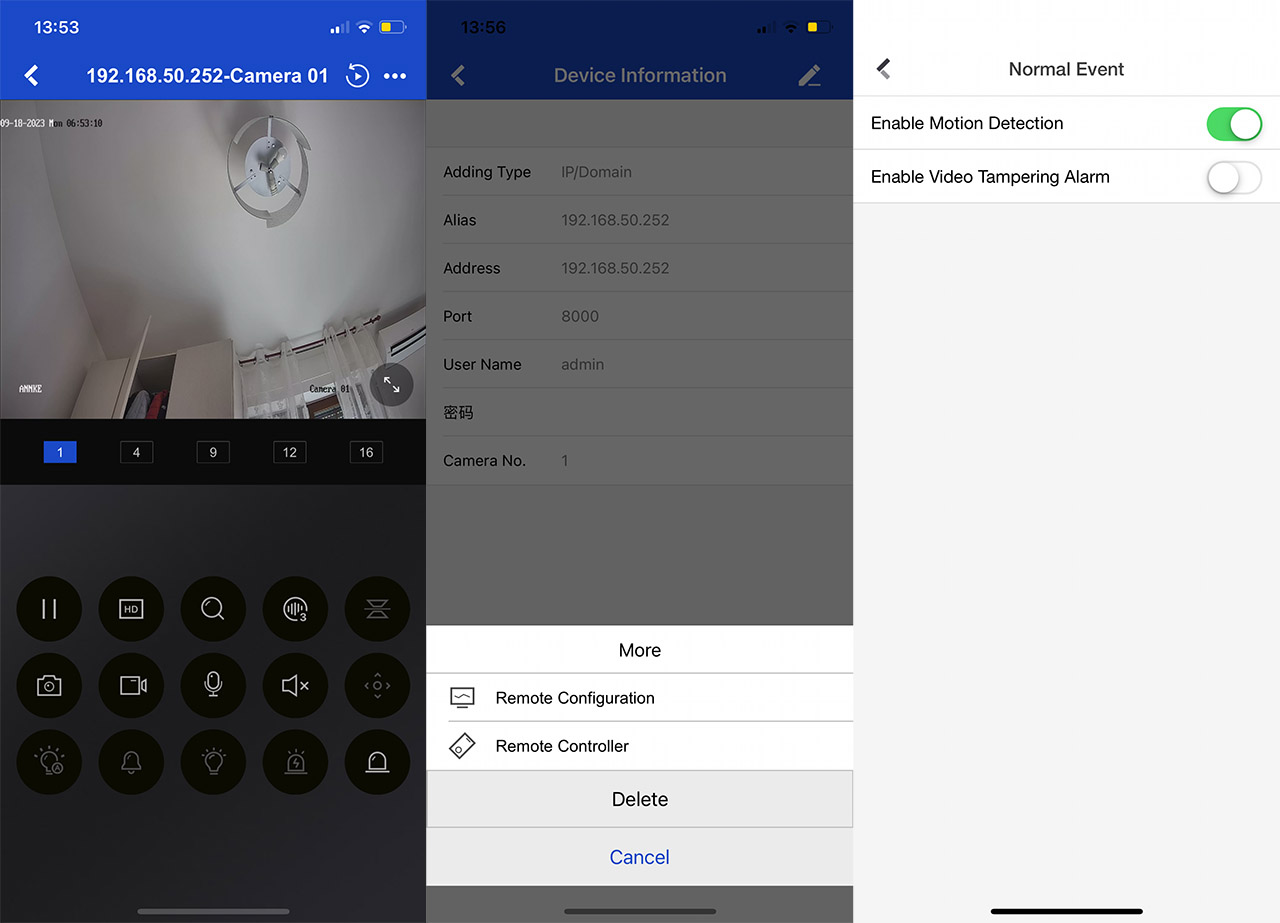
Here, the most important sections are the Recording Schedule to set when the camera will record, and the Normal Event which will let you enable the Motion Detection and the Video Tampering Alarm. It does feel a bit of a maze, but this is how the app was built. The good news is that the web-based interface has a better layout and more options.
The Web-based interface
The ANNKE cameras usually offer more options when using the web-based interface, more so than the app, so, using the local network, I accessed the local GUI. I had to check what the IP address of the ANNKE NCPT500 was (from the router’s interface) and then I just entered the password that was previously set (the user remains admin). You may need to install a plugin (check the upper right corner) and then the Live View window should show the footage.
On the right side, you should see the PTZ arrows which will allow the movements of the camera and next to it, there’s the General settings to adjust the image (brightness, contrast, saturation and sharpness). Additionally, you can change the OSD and the Video/Audio settings. The next main section is the Playback where you can filter by date and by hour, and scroll through the hour to see stored videos. Under Picture, you can download any videos and the there’s the Configuration window where you can adjust pretty much any aspect you may want.
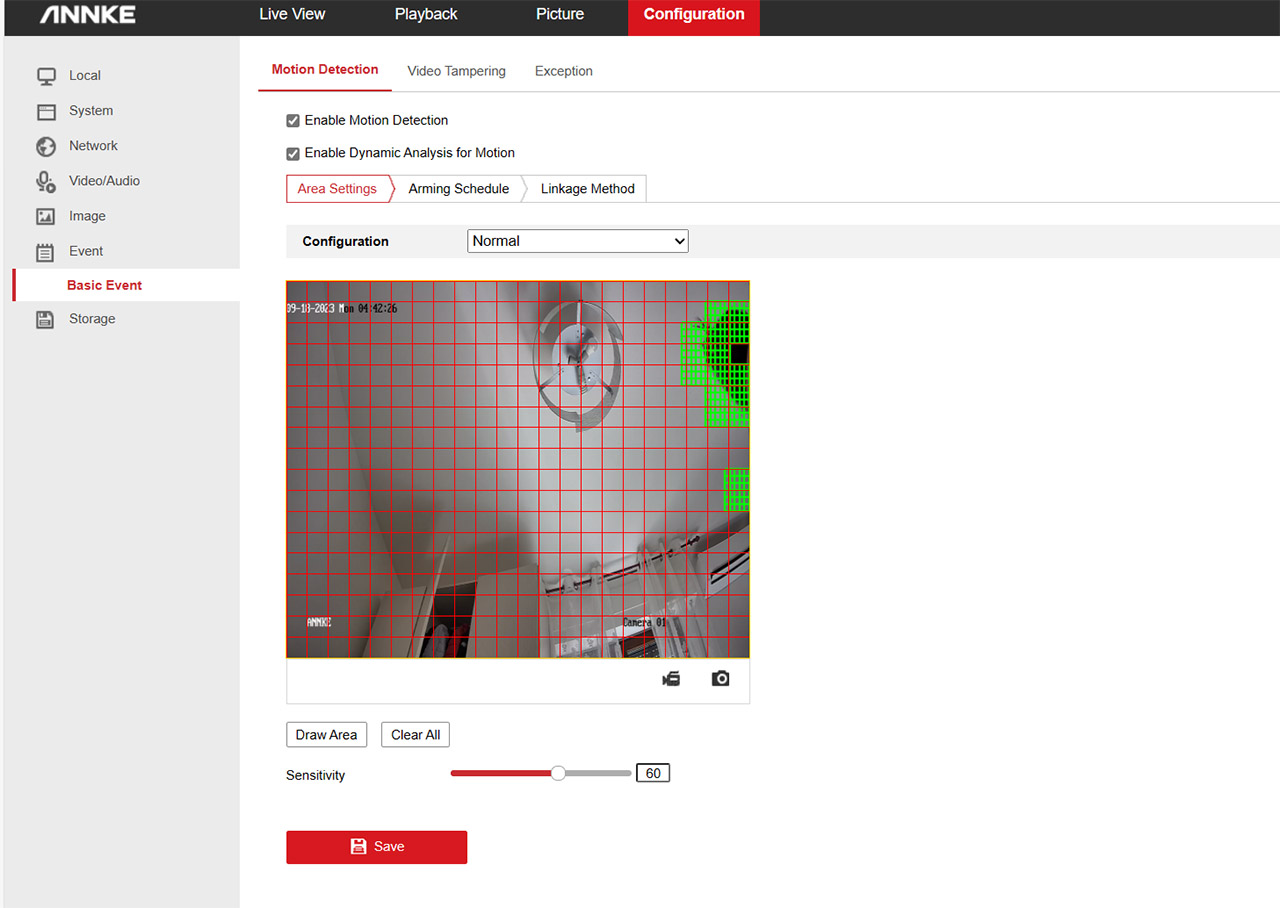
The main area of interest remain the Events (Basic Events) where you can change three suite of settings: Motion Detection, Video Tampering and Exception. It’s possible to draw the area of detection and you should be able to see the detection happening in real-time, which is excellent. Lastly, you should visit the Storage area to configure the way the videos will be stored (based on the trigger) and choose which storage devices will be used.
Using an NVR
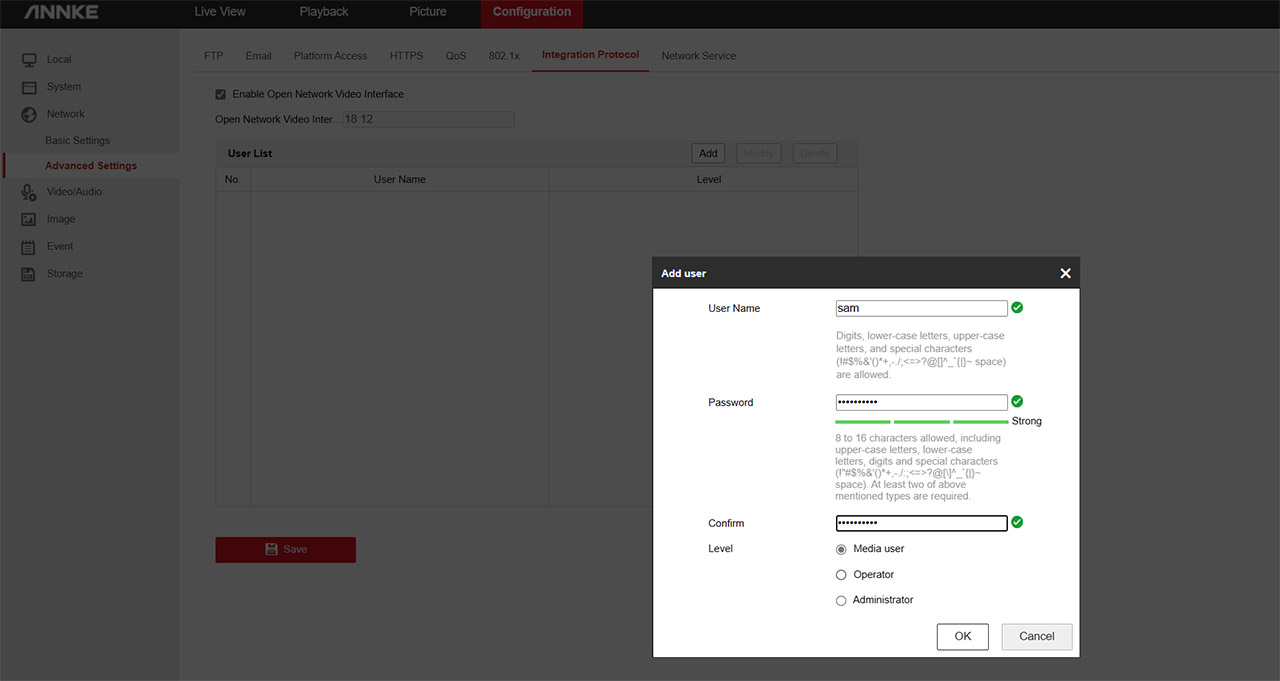
The experience of using a third-party NVR was very similar to when I tested the ANNKE FCD600. I also used the Reolink RLN8-410 v2 NVR since I don’t have an ANNKE NVR available and, while the process was simple, the end result has been a bit weird. What you need to do is first go to the ANNKE NCPT500 interface and from the Network > Advanced Settings > Integration Protocol and Enable Open Network Video Interface. I also added a new user for simplicity sake.
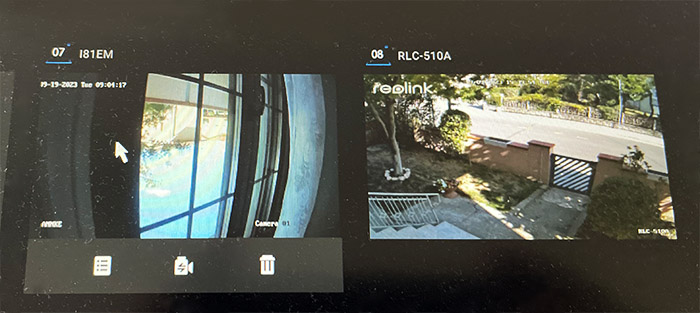
Then, I connected the camera to the Reolink NVR and I added a new camera with the correct options: the IP, the port, the user name, password and don’t forget to select ONVIF since it won’t detect it as IP. For whatever reason, it didn’t work, but what did end up working was connecting the camera directly to the router (also possible to use a PoE switch in between). This way, the live footage appeared from the NVR.
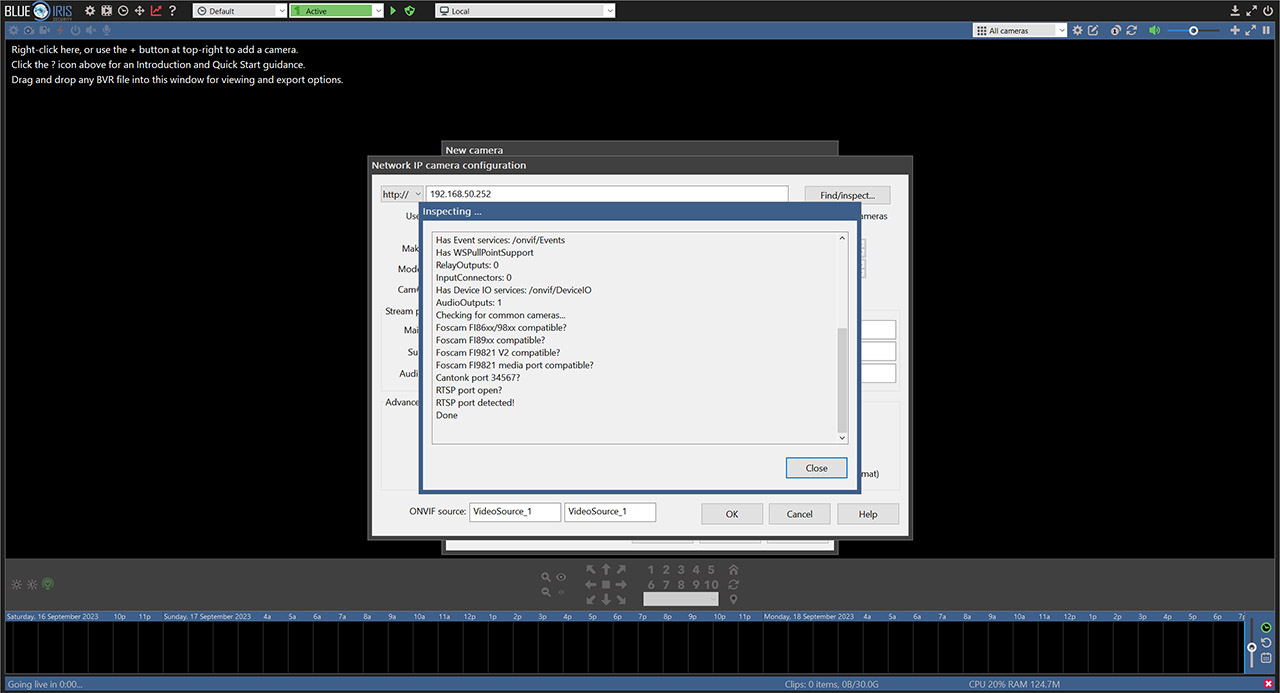
But, since it has to go through multiple ‘hops’, there is a very noticeable delay. So, I think that most of you will prefer just relying on Blue Iris and yes, the process is somewhat similar since, after allowing the software to detect the camera, I entered the credentials and I got access to the camera live footage – the delay is not as bad, but it’s still there. At the end of day, there is a clear bias towards ANNKE NVRs, so the third-party experience is not as good.
The Image Quality
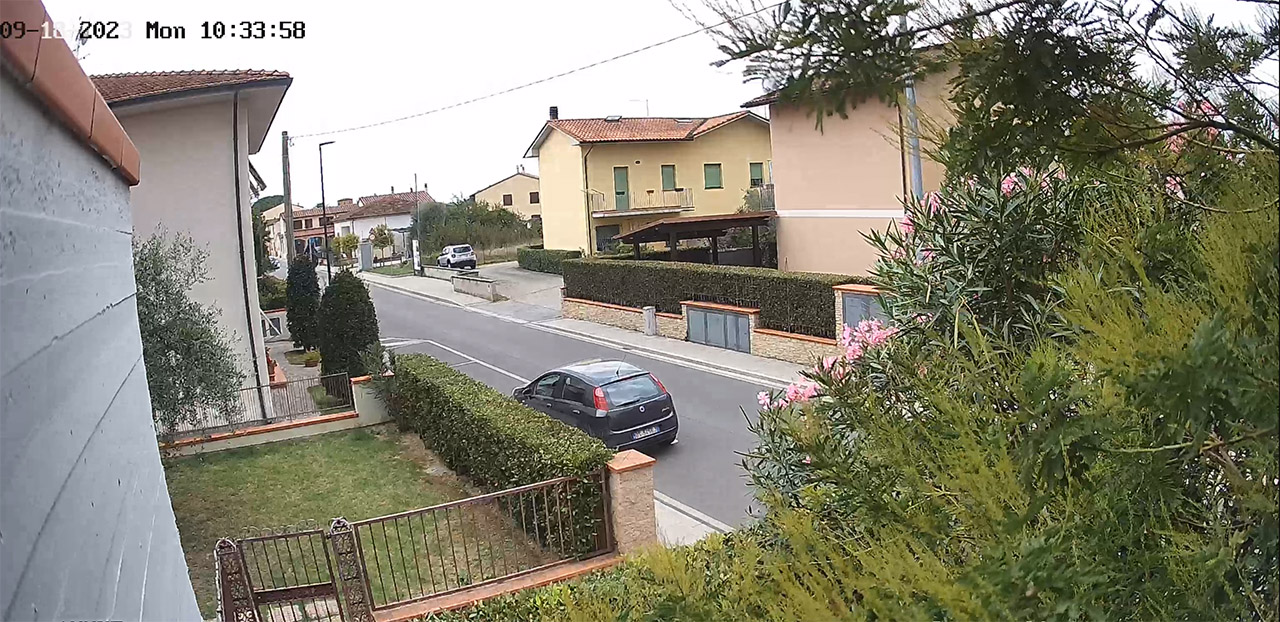
The ANNKE NCPT500 uses a 5-megapixel sensor with 1/1.8″ progressive scan CMOS and the resolution is 3K (3072 x 1728 pixels) which should be more than enough for home surveillance. And, to see the image quality during the day, this time I managed to get a cloudy day (no more of that bright streets) and, as you can see form the footage, everything in the camera’s vicinity is visible and clear.
It’s very much possible to see people from hundreds of feet away, but just their silhouettes and, while I have managed to see the plate number with other cameras, I could not get a clear view of the plate number of the parked car you see in the video. The colors seem to be more accurate than on the slightly over-saturated Reolink cameras and the focus is on point when I moved the camera around (it’s fast!). I also noticed that near the left and right side of the video, the image does curve enough to be noticeable, but it doesn’t seem to take away anything in terms of clarity.
Furthermore, viewing angle is approximately 106 degrees horizontally and about 57 vertically. But we can see far more than that moving the camera around. Now let’s talk a bit about how fast the motors are. Since the ANNKE FCD600 relies on a cabled connection, it’s somewhat free from WiFi-related issues and every time I gave a command from either the app or the web-based interface, the camera would immediately start to move.
I say somewhat because you’re still at the mercy of the WiFi network to which your phone or your computer is connected. As you can see from the video, the motors are powerful enough to quickly move the camera and the footage fairly quickly becomes clear after the change in position. Moving on to the night vision footage, you will notice that I have not included a black and white video and that’s because the ANNKE NCPT500 seems to only record colored night-time videos.
Additionally, the warm light is always turned on or at least I did not find a way to turn it off from either app or the web interface. In any case, I saw that some of the light sources are slightly overblown which may have been alleviated by a more powerful light source, so I suggest you position the camera in an area where there is little or no external light since that’s where you will get the best image quality. It’s worth mentioning that the shadows weren’t too dark, so people can’t hide there and pretty much all was visible as during the day, although a bit less detailed.
The Smart Motion Detection
The ANNKE NCPT500 does have smart motion detection and it’s a capable system, but I do have the same complaints that I had when I tested the ANNKE FCD600. And it’s not about the functionality or the performance, it’s about the configuration. ANNKE insists on burying these features deep into the app and they’re not even enabled by default. If you read the previous sections, you know that most of them can be found under the Event (or Basic Event) but you do need to go several layers deep to access these features. That being said, the motion detection works really well and I mean it.
It is surprisingly accurate and it can detect movement from very far away. In my tests, during the day, the camera ‘saw’ a person from about a quarter of a mile away, which is impressive. I could also see the way the algorithms work and I added a video so you can see as well. When I moved the camera, almost everything will trigger the alarm, as expected and it seems to persist for a good few minutes before the ANNKE NCPT500 decided that a certain area is no longer worthy of interest.
I was unable to find a way to switch between human, vehicle or pet detection, but the general detection system seems to work really well. What about the notifications? Reolink decided to pass the notifications through their servers which has added a very much noticeable delay. Depending on the type of control (remotely or LAN), you can get an instant notification or with a very slight delay (better than on Reolink camera), depending on your WiFi connection.
The Conclusion
The ANNKE NCPT500 was designed to be suitable for very dark environments, where the soft light LEDs will ensure that everything is visible. Furthermore, the NCPT500 is also the only camera from the series to support pan and tilt movements, both working smoothly and fast. All that at a surprisingly budget-friendly cost. The main weakness remains the software which is still complicated for casual users, but I did enjoy the huge amount of options that are available. That being said, if you need a pan/tilt night vision camera, the ANNKE NCPT500 will not disappoint.
ANNKE NCPT500
-
Pros
- Good image quality
- The pan and tilt movements are smooth and fluid
- Colored night vision
- The camera is lightweight despite its size
- Weatherproof
Cons
- Can't turn off the LEDs during the night
- Some important settings are hidden under multiple layers in the app
Mark is a graduate in Computer Science, having gathered valuable experience over the years working in IT as a programmer. Mark is also the main tech writer for MBReviews.com, covering not only his passion, the networking devices, but also other cool electronic gadgets that you may find useful for your every day life.