
The SwitchBot Curtain 3 is part of the third generation of retrofit-friendly smart curtains and, while the original concept remains untouched, there are a few notable improvements to make the user experience better.
| SwitchBot Curtain 3 | |
|---|---|
| Switch-bot.com | Check Offer |
| Use code MQ10MBRV for a 10% discount | Amazon.com | Check Offer | Solar panel (Amazon.com) | Check Offer |
The original Curtain Rod could move a large variety of shades and that hasn’t changed that much – keep an eye on the weight because the stepper motors can handle a similar load on the newer device as on the second gen. But, the movement is smoother and apparently much quieter as well, and there has been a very heavy emphasis on compatibility.
The SwitchBot Curtain 3tries to be suitable for multiple sizes of rods and, while the device is mostly made of plastic, I noticed that the arms that go around the rod are made of metal (they’re fairly thick pieces). Another highlighted improvement is the installation process which seems to have been significantly simplified on the newer Rod generation. SwitchBot once again includes the small solar panel but the manufacturer has definitely heard the user complaints considering that it’s now designed in a manner in which actually makes sense.
Before, the solar panel would reach the sun rays only in very specific situations, but now, SwitchBot has added an extendable arm which ensures that the sun shines onto the panel, powering up the Curtain 3 pretty much indefinitely. Considering all the improvements that have been made, let’s put the SwitchBot Curtain 3 to the test and see if it’s going to find its place into a smart home.
Design and Build Quality
I have tested the SwitchBot Curtain U-Rail a couple of years ago and after putting it next to the SwitchBot Curtain 3, the newer unit is pretty much double in size. This is also true for the second generation as well.
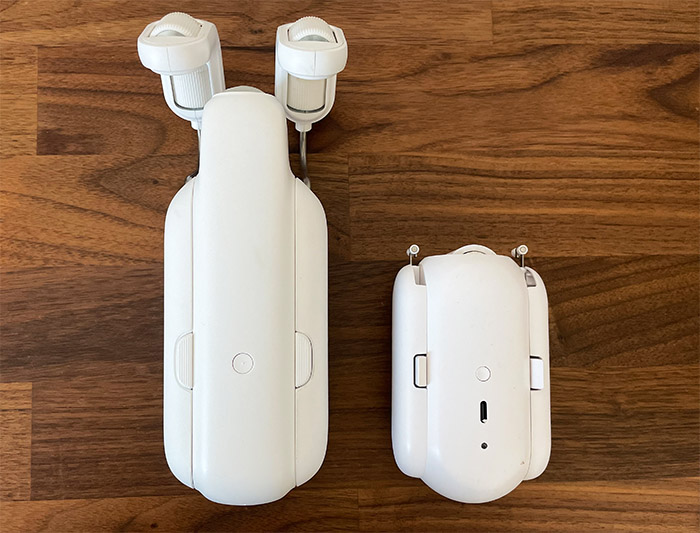
The device measures 5.6 x 3.3 x 3.0 inches (14.3 8.4 x 7.6cm), so it’s about twice as tall and, of course, it’s also heavier not only due to its size, but because it seems that more metal has been used when building the device. Will this have an impact on the unit’s functionality? Not really since as we will soon see, the movement is actually very smooth.
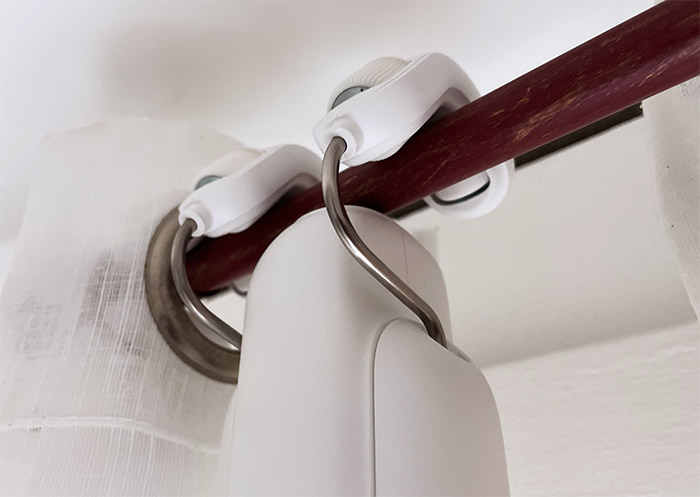
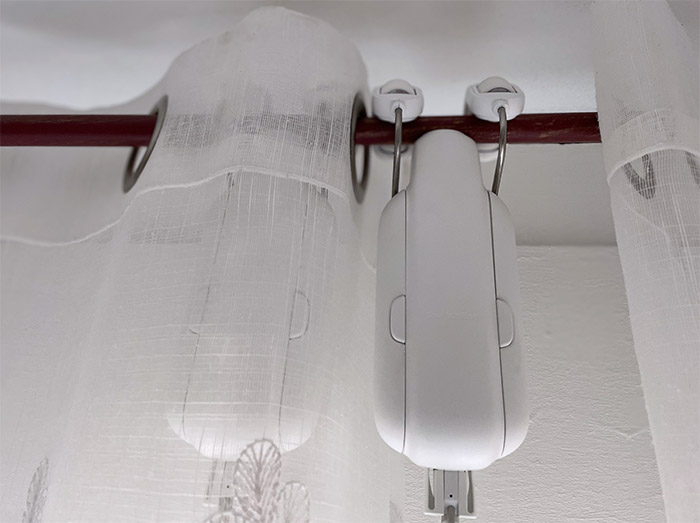
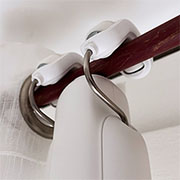
The motors are fairly powerful, but there are a few changes in the design from the first gen, such as the addition of two extra wheels on each arm, while the larger rubber wheel remained mostly the same. It’s worth mentioning that the metallic arms are retractable (accommodating even the thickest curtain rods) and the spring that operates them is powerful, so you do need to put a bit of force to retract the arms. The design of the SwitchBot Curtain 3 remains very similar to the second gen, so the unit is covered by a white matte finish and the two arms do connect to the sides using a couple of side buttons, just like before.
The USB-C charging port has been moved to the bottom and there is an important reason for this. While the solar panel for the previous gen Curtain could be attached to the side of the unit, the solar panel for the SwitchBot Curtain 3 is a bit different and needs to be attached from the bottom (the extendable arm pushes the solar panel lower). What I do like is that the manufacturer could have made the USB-C canal narrower, but they didn’t in order to allow third-party solar panels or any other USB-C cable to charge up the device.
Then again, the inner battery will last for a very long time in normal conditions (it’s advertised at about 8 months on a single charge), so the solar panel is a nice addition, but far from mandatory. The status LED has been moved to the bottom as well and it will start flashing quickly if the unit is in pairing mode, afterwards becoming solid.
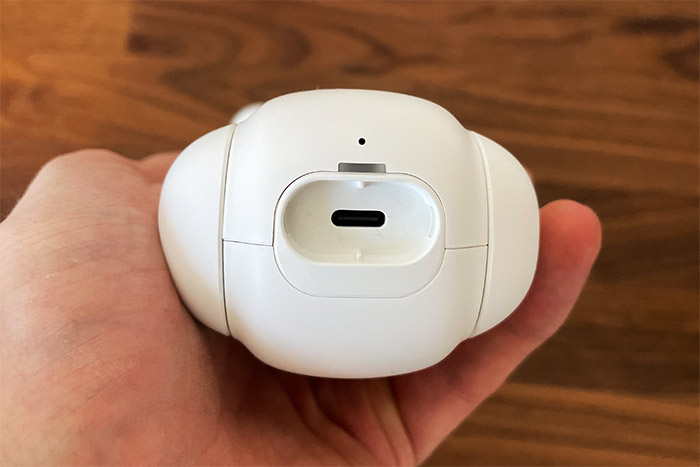
When the Curtain 3 is charging, the LED will slowly flash white – the LEDs will behave the same whether we’re dealing with one or two units. The recessed Reset button is next to the LED and USB-C port, so you can’t miss it. To return the SwitchBot Curtain 3 to its factory settings, you need to hold the button for 15 seconds.
The Solar Panel
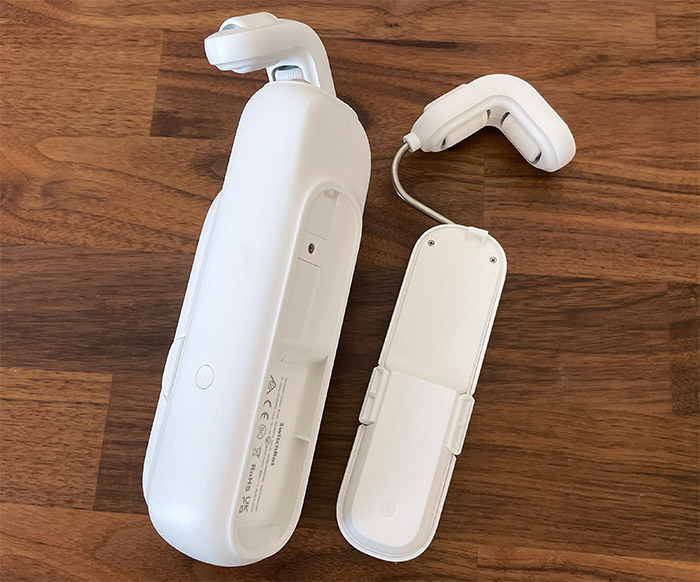
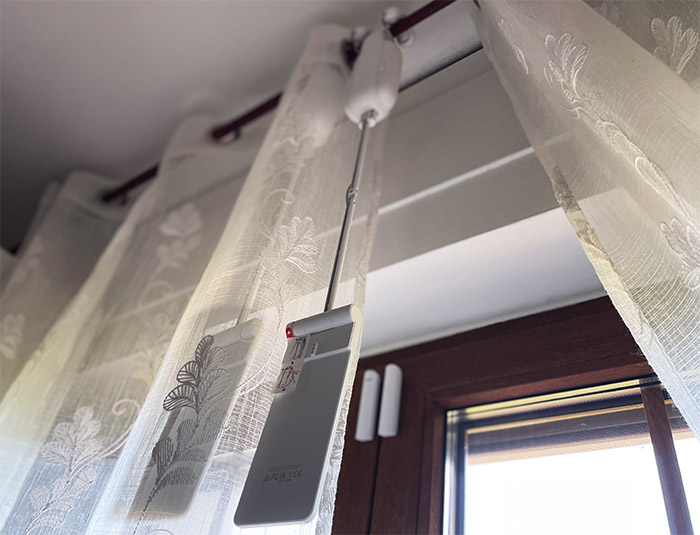
Just like on the first and second gen SwitchBot Curtain, the solar panel remains an optional device that can be purchased separately. And, while before it was positioned in an odd manner where the sun rays were unable to reach it, the developers thought of a clever trick. Instead of being attached to the side of the SwitchBot Curtain 3, the solar panel hangs from the USB-C cable and, with the help of an extendable arm, it can reach down to about 12 inches and a half.
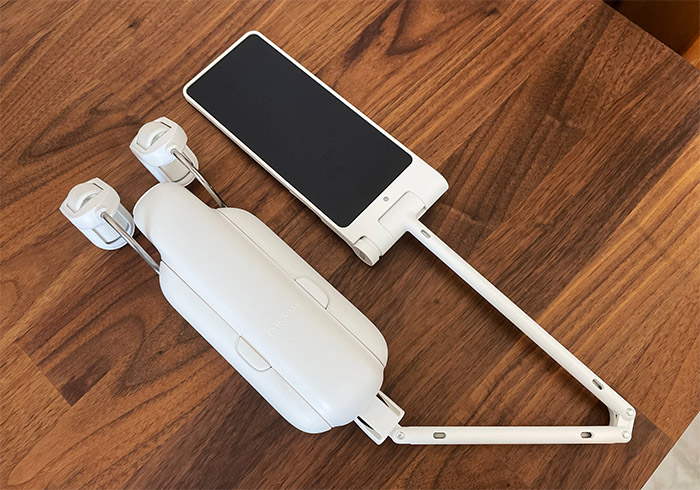
It should be plenty even if the curtain is installed very near the ceiling. The main part of the solar panel is about as large as the average smartphone and besides the black portion (with the cells), the entire device is covered by a white matte finish. If you look a bit closely, you should be able to see that there is a sort of LED installed within a circular hole and that’s actually the brightness sensor. It doesn’t seem to really serve a purpose for the functionality of the solar panel, so I guess it’s an additional way to expand the functions of the SwitchBot Curtain 3 for better automation.
Now let’s talk a bit about the extendable arm. There are two portions, one moving sideways, while at the end there is a USB-C connector. And yes, there is a locking mechanism that’s strong enough to hold the solar panel into place. The way you can rotate the arm down or to the side is by clicking on the side button which will allow an almost complete rotation.
Again, it’s clearly a much better approach to adding solar power to a smart curtain system than before where the user had to rely on Velcro strips when the unit would not be low enough to reach the sunlight.
The Hardware Installation
This section is going to be brief simply because it’s very easy to install the SwitchBot Curtain 3. Take the main unit from the package and the two arms, put the arms on the rod and then simply extend them to attach the main unit in the middle. That’s about it. I do need to mention that it’s advisable to attach the device before the last ring of the curtain.

If the curtain is grommet-type, then you may need to also add the beads fixer (which is in the package), but in my case, I didn’t really need it, so it’s up to you. There is an extra step which again is optional, but can help make the SwitchBot Curtain 3 more precise – you can add the provided magnet attachments in the middle, exactly where you want the units to stop moving.
The strips need to be glued to the bottom of the rod. If you have a solar panel, simply extend the arm, attach it to the SwitchBot Curtain 3 and then put the panel at a slight angle for the sun rays to reach it better. Ideally, you would use two of the same units, one going to the right, the other to the left to get a better experience, but it’s entirely possible to use a single SwitchBot Curtain 3 if the curtains are not that wide.
The Software Installation
The mobile application accompanying the SwitchBot Curtain 3 is the same SwitchBot app available for both Android and iOS. I also need to mention that SwitchBot has made serious progress in the smart home market and it has released a hub which supports Matter. If you intend to build a smart home where Matter will be at its core, then the SwitchBot hub will be a must. Otherwise, if you’re not afraid to troubleshoot a bit, then the Home Assistant remains the best option for a unified smart home system which is also open-source.
That being said, I opened the SwitchBot app and logged into my existing account to access the GUI. Be aware that using this app will require data collection which can include precise location, data about your smartphone and network, and pretty much anything that’s collected by the SwitchBot device’s sensors. As you can see, even after creating the account, the app still asks for access to precise location (not mandatory, so I suggest against it).
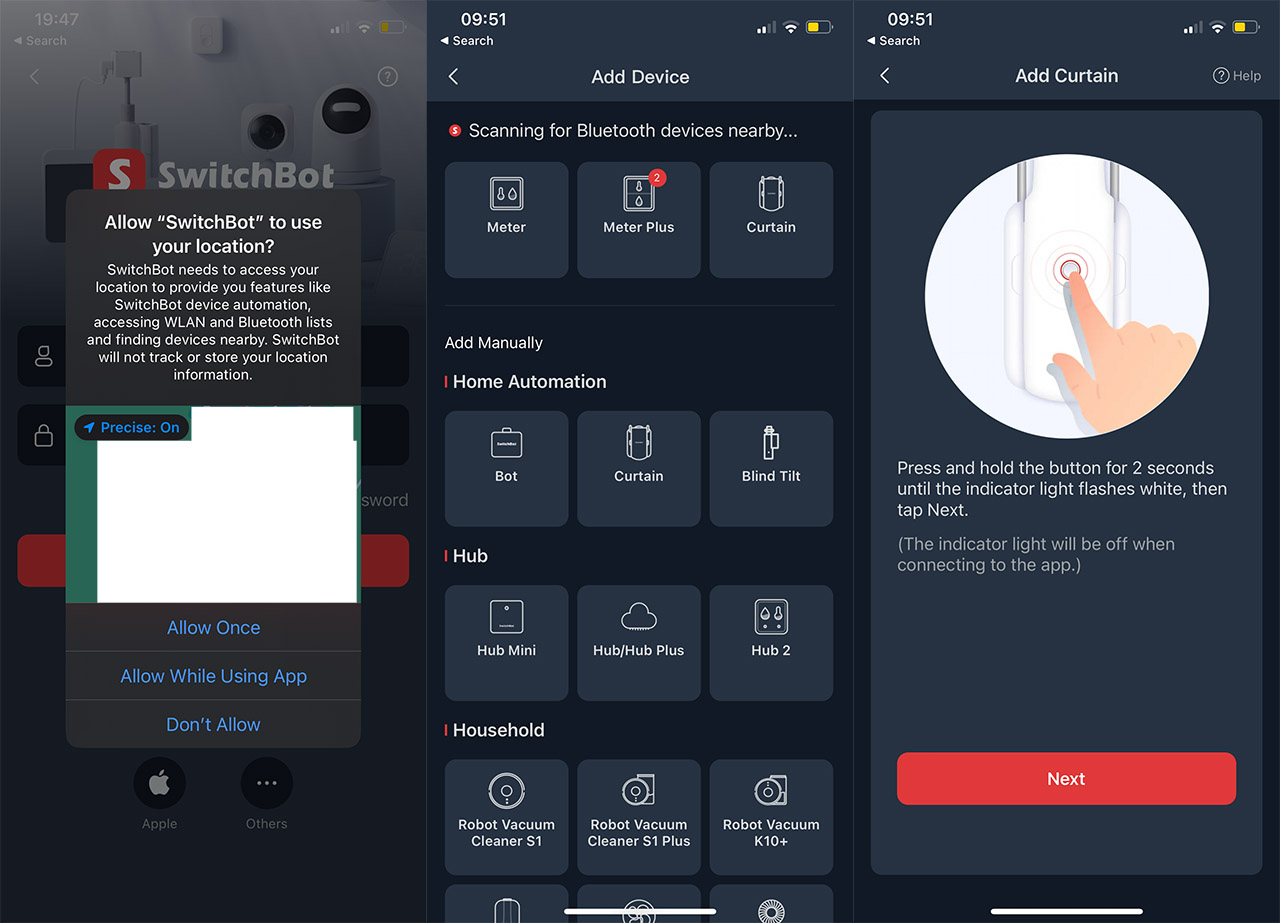
To add the SwitchBot Curtain 3, click on the Plus icon, select Add Device and you can either add the device manually or automatically, via Bluetooth. For the latter to happen, you need to press and hold the button on the Curtain 3 until the LED light starts flashing white. Then, following the guide, you can add the second unit as well (again, press the button until the LED flashes). After that, you can create a Room for the smart curtains and the app will give you access to the Pictorial and the Video Guide for installing the device suitable for Ring Top, Grommet and Tab Top / Back Tab type of curtains.
You can now follow the steps to properly install the device (you can skip it) and then we get to the Calibration section. I noticed that there are two ways to run the calibrating process: automatically (Smart Calibration) or manually (Custom Calibration). I had to try out the first to see how well it functions and it’s what you would expect: the units start from the closed curtains point and then slide until they encounter resistance signaling that they reached the end of the rod.
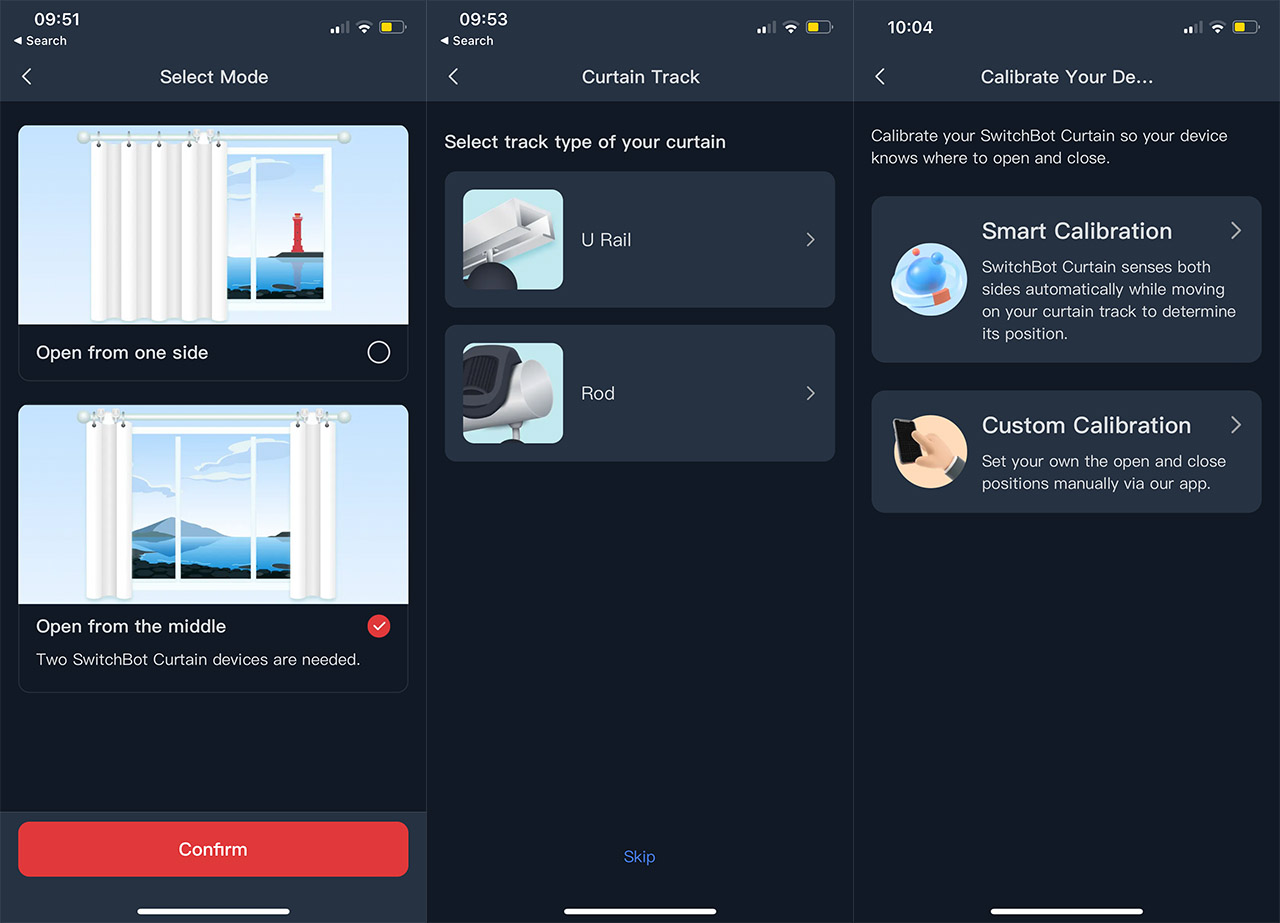
Afterwards, the SwitchBot Curtain 3 unit/s will just return to the starting position memorizing the path for future use. To get a perfectly accurate closing position, you can use the magnets. And that’s about it, you now gain access to the extra functions on the app.
The App
You will be able to see the smart curtains in the Dashboard under the room you’ve set for them and a quick tap will summon a small window at the bottom. Here, you can Open or Close the curtains, as well as partially opening them (by percentage) without having to go layers-deep into the app, which is a nice touch. Tapping More will show a better animated display of the state of the SwitchBot Curtain 3 units (including the battery life) and tapping the arrow at the bottom will summon a few new settings. The first one is the Sync Control which when disabled, will allow you to control each side separately.
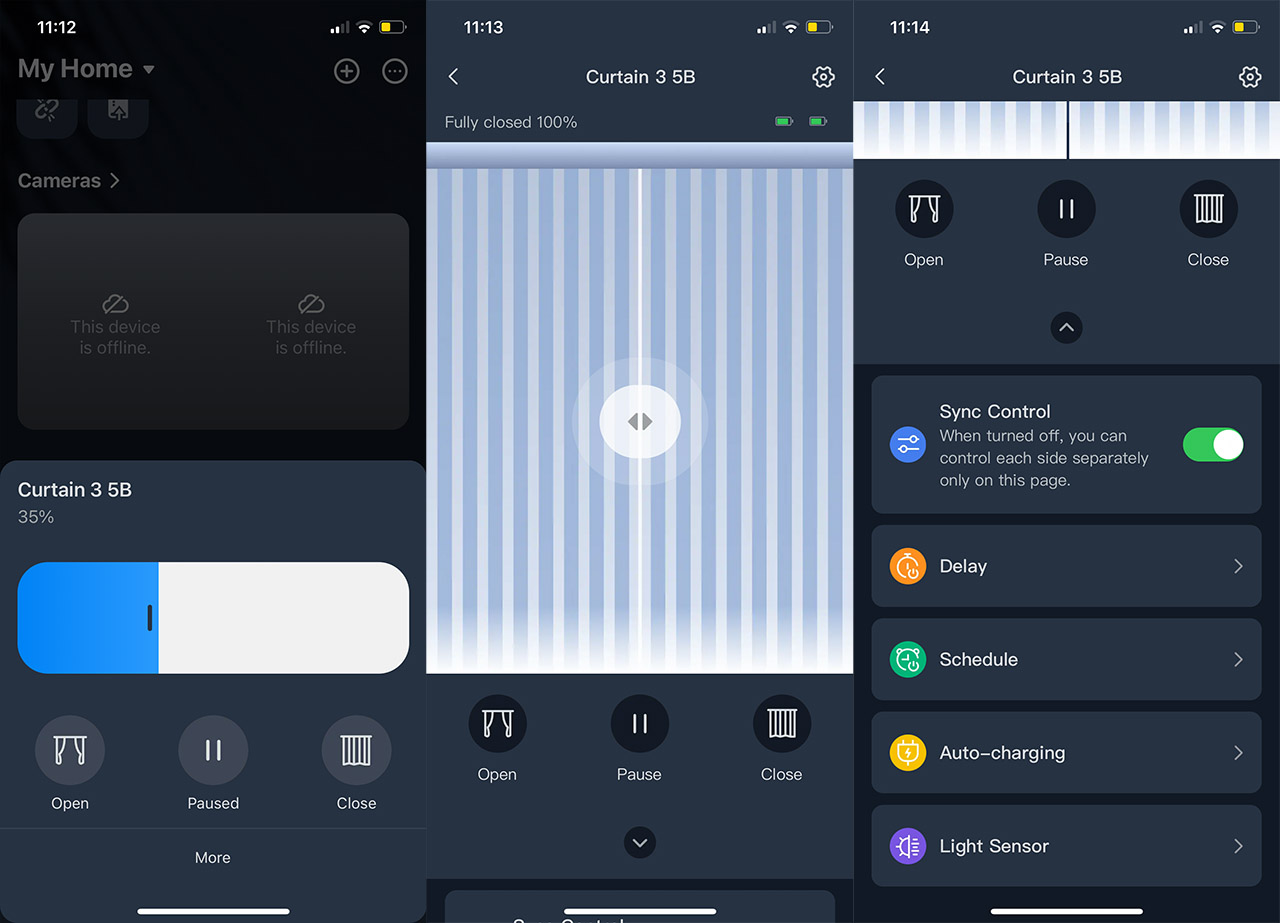
Then, there’s the Delay section which allows you to choose when the QuietDrift feature will be enabled – basically, you can set a schedule for when the SwitchBot Curtain 3 will run very quietly. There is also a dedicated Schedule section and there are two extra options which are only usable if you use a solar panel. I do have a couple of them, so I connected the solar panels to the 3 units. The app detected them pretty much immediately and I do have a hunch that the brightness sensor is used for detection (I guess that third-party panels will not enable these extra functions).
Now we gain access to the Auto-charging section where you can set schedules for when the units will move to find the best place to charge themselves using the solar panels. Lastly, we get the Light Sensor section which will simply show how much power was generated by the solar panels over a set period of time (from 24 hours to 7 days). You thought we were done, but there is more. If you tap on the cogwheel on the right side, it will take you to the Settings section and here, it’s possible to run the calibration again, enable Cloud Services, pair a remote and some other options.
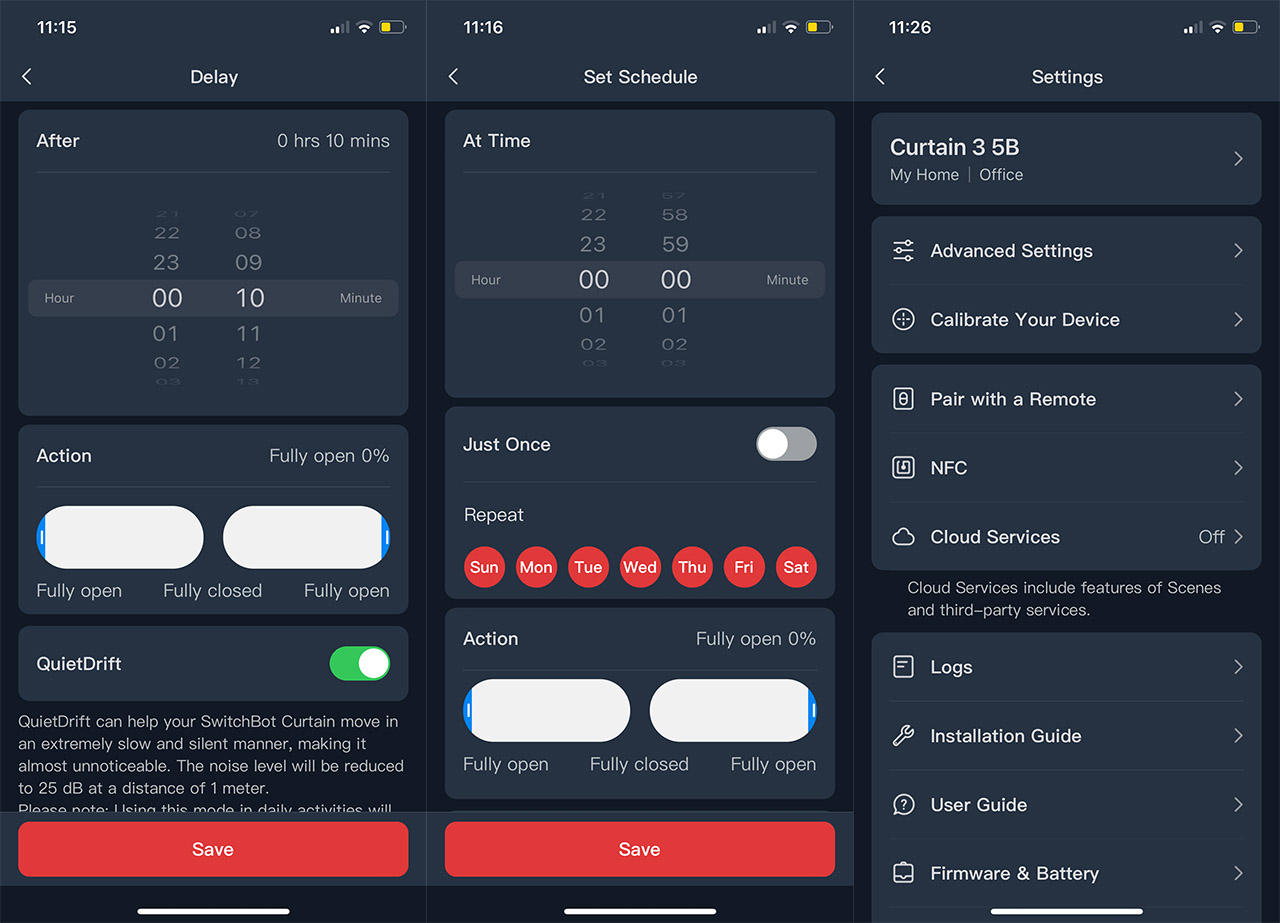
The interesting thing about the Cloud Services is that you won’t be able to use Google Assistant, Alexa, Siri or IFTTT without this feature being enabled. And yes, you do need a hub to use the Internet services properly. The remote also requires the use of a hub, so it’s not an offline option (I have tested the Hub 2 and the Hub Mini if you’re interested in them). There is an Advanced Settings section available and here, there’s only the Touch & Go option which basically tells the device to open or close the curtains if you push it for more than 5cm.
The SwitchBot Curtain 3 in Action
After installing the two SwitchBot Curtain 3 units, let’s see how well they perform. The first thing that I noticed is that the units have a bit of force and could move even some heavier curtains – the advertised maximum weight is 33 lbs (or 15kg) which covers a very wide range of possible curtains. The Touch & Go function worked really well and, by default, the movement is fast, but a bit noisy. It could easily reach close to 50dB which is not loud per se, but could wake up a person that’s sleeping (for example, a newborn and you don’t want that).
The good news is that the SwitchBot Curtain 3 can move very slowly and make a negligible amount of noise, something in the range of 30-35dB, so pretty much close to no perceptible sound. The control from the app is simple and intuitive, plus you get to adjust the position for one or two units down to mere inches. As expected, you do need to have a good WiFi connection, but it doesn’t have to be anything fancy since everything will happen on the 2.4GHz (which is now pretty much left for IoT and smart devices). If you don’t want to deal with the app, then you can use the remote and you can map the keys on the app however you want.
But I do admit an offline means of using the SwitchBot Curtain 3 would have been nice, and I had hoped that the remote would offer this experience. Unfortunately it does not. As for the solar panels, I have ridiculously high ceilings and the curtain is positioned very high, but even in these conditions, the arms extended down enough as to reach the sun rays. There isn’t much else to say as so far everything works as intended and once again, SwitchBot is better than most of its competitors at ‘smartening up’ normal objects (I mean just look at how well they did with the SwitchBot Lock).
The Conclusion
The SwitchBot Curtain 3 is without a doubt the best solution to retrofit your existing curtains to make them smart. Are they an essential part of a smart home? Not really, but it’s nice to have most of the stuff automated – at a certain hour, the curtains open or close, working together with other smart objects. Additionally, the people that have disabilities will appreciate the higher degree of independence that comes from using smart devices. If you need another reason, I suppose it could also be seen as a security measure when you’re not home – to give the impression that someone is always at home. That being said, the SwitchBot Curtain 3 is easy to install, easy to use and versatile enough for most people.
SwitchBot Curtain 3
-
Pros
- The ability to make existing curtains smart
- Good construction quality and easy to install
- Very easy to use
- The solar panel has been redesigned and it's now an almost necessary part of the SwitchBot Curtain
- Silent mode
Cons
- It's a bit large and bulky
Mark is a graduate in Computer Science, having gathered valuable experience over the years working in IT as a programmer. Mark is also the main tech writer for MBReviews.com, covering not only his passion, the networking devices, but also other cool electronic gadgets that you may find useful for your every day life.