
The Reolink RLN8-410 is the 8-channel NVR model that’s designed to handle both wired and wireless Reolink cameras (with the exception of the battery-powered ones), so you don’t have to bother using SD cards or rely on the monthly payments for the Cloud storage. Everything is stored locally, on a built-in HDD which, in our case, it has a capacity of 2TB (it’s expandable).
| Reolink RLN8-410v2 | |
|---|---|
| Reolink.com | Check Product |
| Amazon.com | Check Product |
Despite carrying the same name as the five-year-old NVR, the newer version has a different type of hardware to include the support for the smart AI motion sensing technology. And this has led to some confusion since some users were unaware that the old version would not work with the smart motion sensing Reolink cameras. So it would have been better if Reolink would have completely changed the name to showcase the new generation of NVRs, especially since there is another relevant improvement as well. The additional storage went up to 12TB (from 4TB), but everything else seems to be the same as with the first RLN8-410 NVR version.
The case has the same design (just as compact), the same number of ports can be found on the rear side of the NVR and there’s still support for PoE, but I did notice that the software has been updated to a more modern UI. I have tested quite a few Reolink cameras over the last year and they’re clearly offering great value for the money, so I think it would be interesting to see how well was Reolink able to design the RLN8-410 and if it will work seamlessly with various types of cameras (up to 4K).
Design and Build Quality
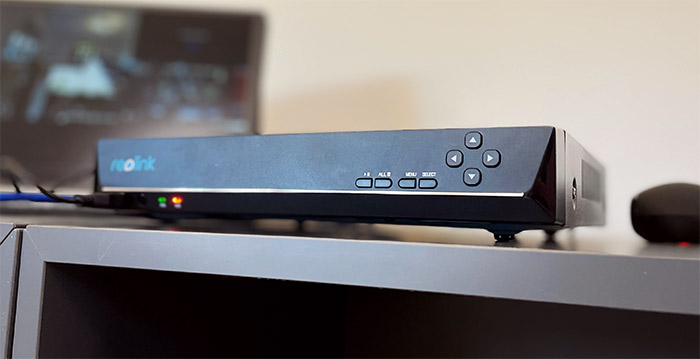
In terms of design, the Reolink RLN8-410 v2 looks the same as the first version, so there’s still the rectangular metallic case that’s compact enough to fit pretty much any shelf (it will sit fine even in those Ikea cubicles). Indeed, at only 10.2 x 9.1 x 1.6 inches, it’s not going to occupy that much space, but be aware that it does need to be in a well served place because you will have to add lots of Ethernet cables on its rear panel. The device is covered by a black matte finish and, overall, it does have a slight industrial design, save for the plastic front panel which helps distance the NVR from the looks of a regular Ethernet switch.
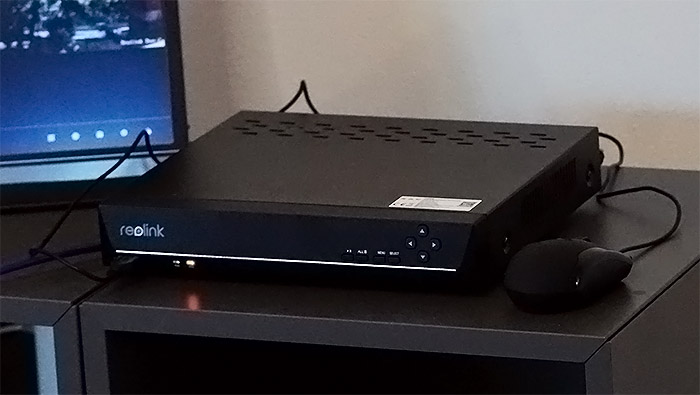
But then again, this isn’t a device that you want to attract too much attention, mostly for security reasons, so a small cabinet, along with your other networking devices is probably the best place to place the Reolink RLN8-410. It’s worth mentioning the four silicone feet that can be added to the bottom of the NVR which will help keep it into place (it’s already fairly heavy, so it’s going to stay put after you connect eight or more cables). The manufacturer did take seriously the heat management (considering that we’re dealing with a PoE device), so all around the case, there are various ventilation cut-outs. I saw some ventilation holes at the top, as well as some on the right side and on the bottom.
There are also a few cut-outs for a fan, but there isn’t one installed, the NVR relying solely on passive cooling. So it’s going to run silently and the good news is that the RLN8-410 maintains a proper temperature (sure, it does get warm when you connect more than a couple of PoE cameras, but the NVR does not overheat). On the front panel, Reolink has added all the controls and a USB port – it seems that the manufacturer was generous enough to add a secondary USB port on the rear panel as well (the front is useful for adding the provided mouse, while the secondary USB can be used to add external storage). That being said, next to the IR receiver, there’s the Power LED and the HDD LED (solid red means that the HDD is not recording, but flashing red indicates that the cameras are storing data to the HDD).
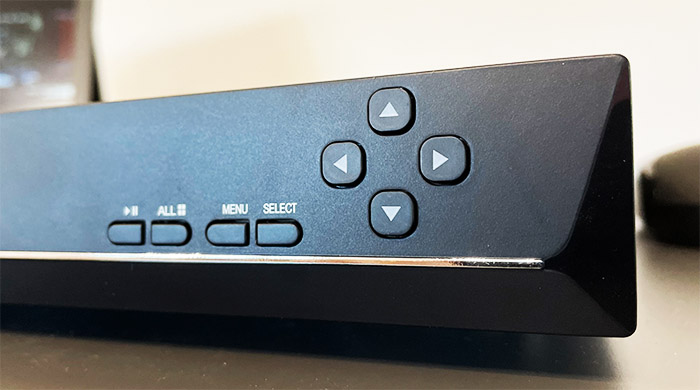
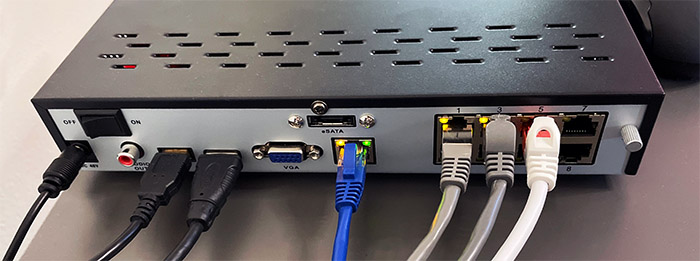
Moving to the right, there’s the Play/Pause button which is useful while checking out a video and next to it, there’s the view mode button which helps change the number of simultaneous cameras that you can see in real time. Next, there’s the Menu and the Select button, followed by four directional buttons to help you navigate the menu. Switch the NVR on the other side and here is where you can see all the remaining ports and connectors. First, there’s the DC (48V) power port and the On/Off switch which are followed by an Audio Out socket that can help you hear what’s going on in the footage (if the camera has an incorporated microphone). Next to it, there’s the aforementioned USB port and the mandatory HDMI port (there is indeed an HDMI cable inside the box). Further to the right, there is the good ol’VGA port, as well as an eSATA port (an alternative to the USB ports to add compatible storage devices).
Lastly, there’s the Ethernet LAN port, as well as the block of eight PoE ports which, just like the LAN port, are limited only to 100Mbps. But, considering the nature of the Reolink RLN8-410, Gigabit ports would have been overkill, so Fast Ethernet should work just as well (and keep the price tag a bit lower).
Internal Hardware
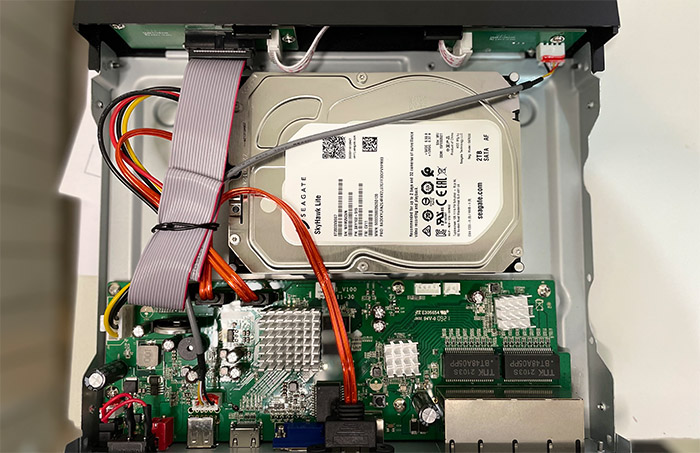
All this talk about new hardware has raised my interest on what components can be found in the Reolink RLN8-410 v2, so I decided to open up my unit. After switching the NVR upside down, I could see that there are quite a few screws (two separate types) and we’ll going to focus on the darker screws since the lighter ones keep the HDD in place and we don’t need it moving around inside the case. There are two screws on the bottom, one on the rear and two on each side that I had to remove and then I just slid the top panel towards the rear side. This way, I got the full view of the internal components and the PCB – I could also see the two additional screws that I needed to remove in order to detach the front panel (there is one screw on each side).
I could identify the 2TB Seagate SkyHawk Lite ST2000VX007 HDD, as well as two TNK 2103S BT48A05PP RJ45 transformers, a FPE G24102MK 10/100/1000Mbps PCI RJ45 NIC and two 256MB DD3 RAM chips from Samsung (SEC 043 K4B2G1646F-BCNB). Unfortunately, the rest of main components are ‘glued’ to the aluminum heatsinks using what looks like thermal paste and, since I was afraid that I may break the chip while trying to detach it (yes, it was that glued in), I decided to go to the FCC ID website. That didn’t show any results, so that’s as far as I could go without risking damaging the components.
How to install the NVR
The installation process is far easier than when dealing with the cameras themselves, but it does take a bit of planning to have everything set up in order. In my case, I moved to a different office, so I had to hook up a few new cameras, so I took the chance to use four different types of cameras and see how the Reolink RLN8-410 will handle them. The cameras are the following: a Reolink RLC-811A which does have the new smart motion detection technology built-in and a Reolink RLC-520 which is from the previous gen cameras, so there is no AI involved here. Furthermore, I used the newer Reolink Duo to see how the NVR works with a two-in-one camera and lastly, I chose the Reolink RLC-511WA, a wireless camera that does not rely on a battery.
I say this because the Argus 3 and 3 Pro (as well as any other previous model from the same series) can not be connected to the NVR, so the only way to store footage locally is by using the microSD card slot. This is a bit unfortunate, so I do hope that Reolink will add support for the Argus series as well.
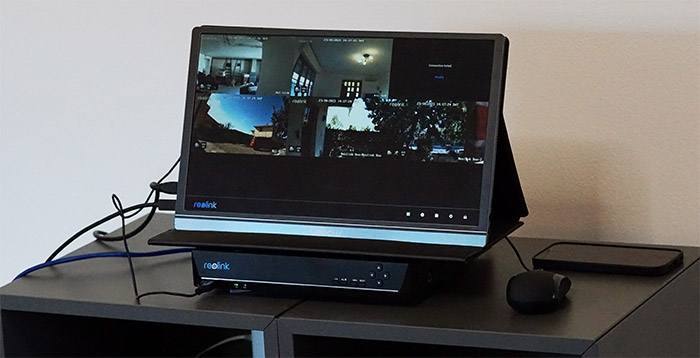
That being said, I hooked up the Reolink RLN8-410 to a power source and to my router (it was an Asus RT-AX82U), and then I checked out the Reolink app which, of course, immediately detected the NVR. But, that’s not really the way to do things and it was more like a ‘rookie mistake’ from my part considering that this was the first NVR that I tested. The way to do it is to hook up a monitor to the Reolink RLN8-410 and the small mouse that’s provided into the package.
This way, you get to actually run the initial configuration wizard and this is also the only means to add a wireless Reolink camera, such as the RLC-511WA that I mounted in the basement. So, I used a portable monitor, a 1080p Lepow which worked really well with the NVR. This way, I could set some general settings (such as the language or the time format and the resolution), the Login credentials, view the available storage, adjust the Network connection settings and set up an email client to receive notifications.

How to add a wireless camera
The easiest way to add a wireless Reolink camera (non-battery-powered) is to first set it up in the app. The reason for this is because the NVR will see it immediately if the camera is already on the local network. So, I reset the RLC-511WA, connected it to my router using a cable and followed the instructions from the app (scan the QR code, select the SSID, add the passkey and add a password for the camera). Afterwards, I disconnected the Ethernet cable and the RLC-511WA continued to show the live footage. I then checked the NVR and sure enough, it did detect the camera, so, after inserting the password, I could see the live footage, as well as some additional dedicated settings to adjust the way the camera captures the videos.
Reolink RLN8-410
-
Pros
- Can connect to both wired and wireless Reolink cameras
- Can connect to third-party cameras as well
- Easy to set up and use
- Can be paired to the mobile app and the Desktop PC utility
- Supports PoE cameras
Cons
- Doesn't support the Argus series
Mark is a graduate in Computer Science, having gathered valuable experience over the years working in IT as a programmer. Mark is also the main tech writer for MBReviews.com, covering not only his passion, the networking devices, but also other cool electronic gadgets that you may find useful for your every day life.