
Apple has recently released its new line-up of iPhones and a few months ago, we got to see the new MacBook Pro series, as well as the MacBook Air 2019, but, while the hardware is definitely improved and the professionals will love the retina display (and possibly the touchbar), the manufacturer still indulged itself in the sins of the past. It’s true that Apple was never known for its love for the modular approach, but to find yourself unable to upgrade your 256GB or even the 128GB SSD drive is not a pleasant realization, especially after paying a premium price for your new daily-use computer. But that’s not where the story ends because a new iMac is also on the market and you are going to hate its Fusion Drive: 1TB, 2TB or 3TB, it’s still going to be behind a fast NVMe SSD.
Of course, an external drive, such as the Samsung T5, the SanDisk Extreme or the WD My Passport can be a game changer, especially since the portable SSD market has seen a significant reduction in price, so you can get some more storage available. But, as expected, the USB type-C portable SSDs are not going to be as fast as the internal SSD of your MacBook, but, for most applications it doesn’t have to be except for when you want to install MacOS on an external drive. In that case, you do need to rely on the Thunderbolt 3 connection and on a fast external drive, so, considering that Samsung has recently released its first Thunderbolt 3 portable SSD, it was worth checking if the Samsung X5 can be a reliable bootable macOS drive.
Note: Since Thunderbolt 3 is not backwards compatible with the Thunderbolt 2 or 1, you won’t be able to make use of this solution if you have a MacBook from 2015 or older.
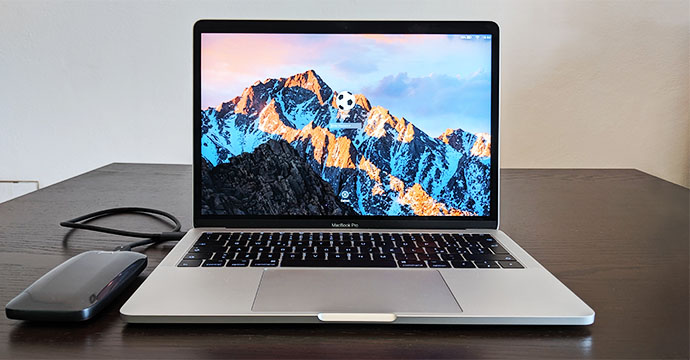
I don’t currently own an iMac (which may be the ideal candidate for this application), but I do have a 2017 MacBook Pro which is equipped with a 128GB (soldered) SSD and considering that the iMacs and the MacBook Pro laptops (as well as the Air series) come with the same type of Thunderbolt 3 ports, there shouldn’t be any difference between them for this specific application. Furthermore, I decided to use the lower-end Samsung X5, specifically, the 500GB model which is a bit slower than the 1TB+ variants, but it is also significantly cheaper – in some cases, it could also be cheaper than if you would upgrade to a better configuration directly from Apple.
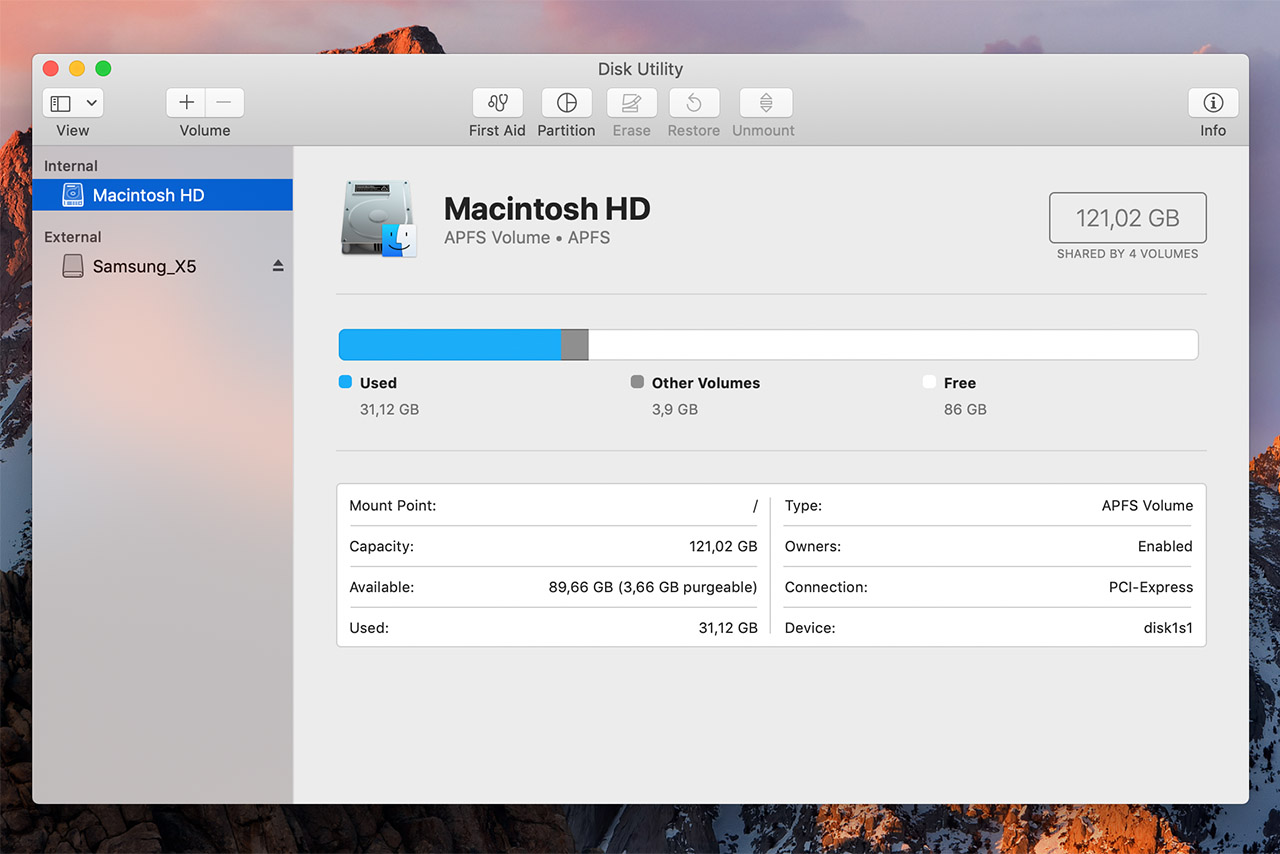
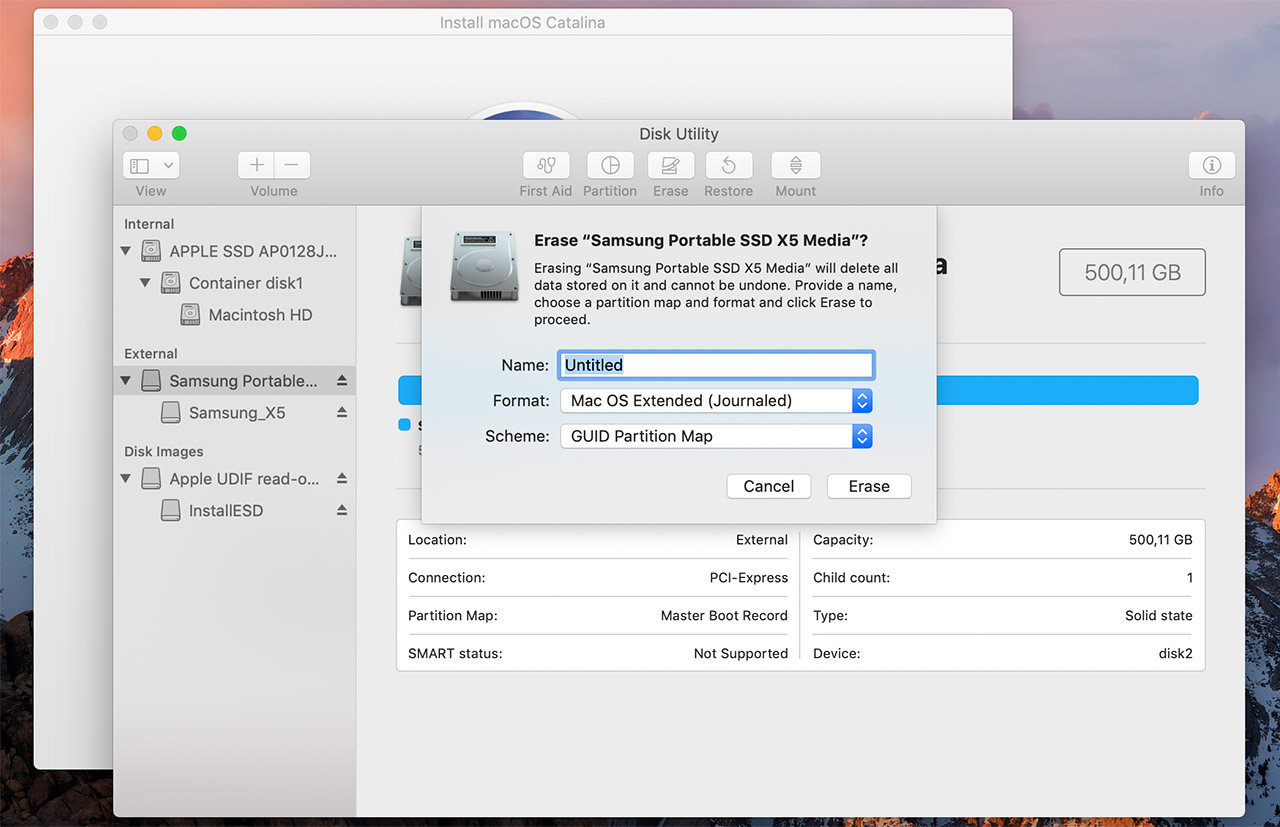
That being said, the first thing that we need to do is prepare the SSD for the newest MacOS available (which, at the moment of writing is Catalina) and to do so, you need to connect the SSD to your MacBook (or iMac), then open the Disk Utility (you’ll find it by clicking on the Launchpad and then on Other) and you should see the Macintosh HD default drive and the Samsung X5 under the External section. Before moving forward, make sure to click on View and if it’s set to ‘Show Only Volumes’, change it to ‘Show All Devices’ – this way, you’ll be able to change the partition map. Now, click on Samsung Portable drive, select Erase and you should be able to change the Name of the drive, the Format (choose Mac OS Extended (Journaled)) and the Scheme (choose GUID Partition Map); next, click Erase and wait until the process is done.
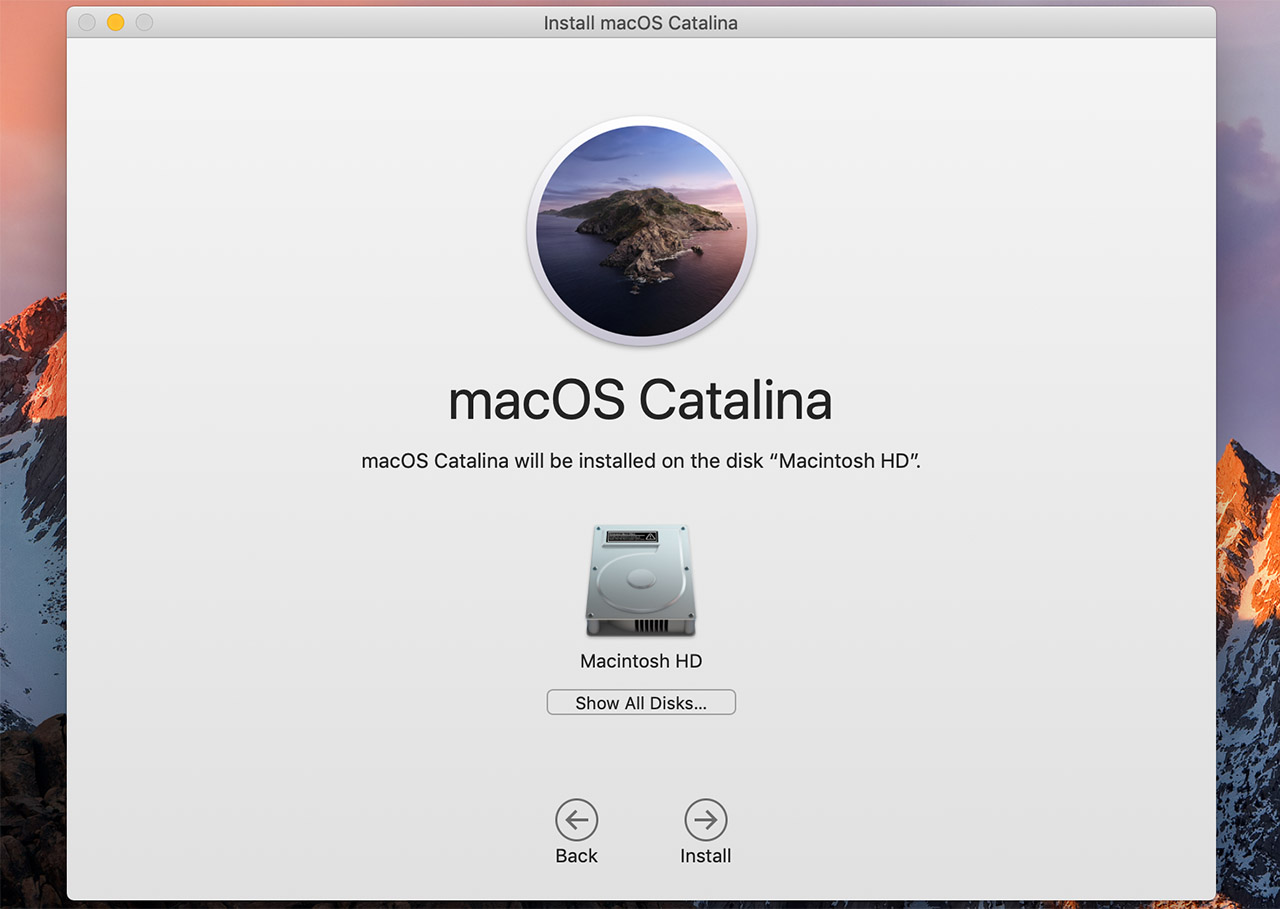
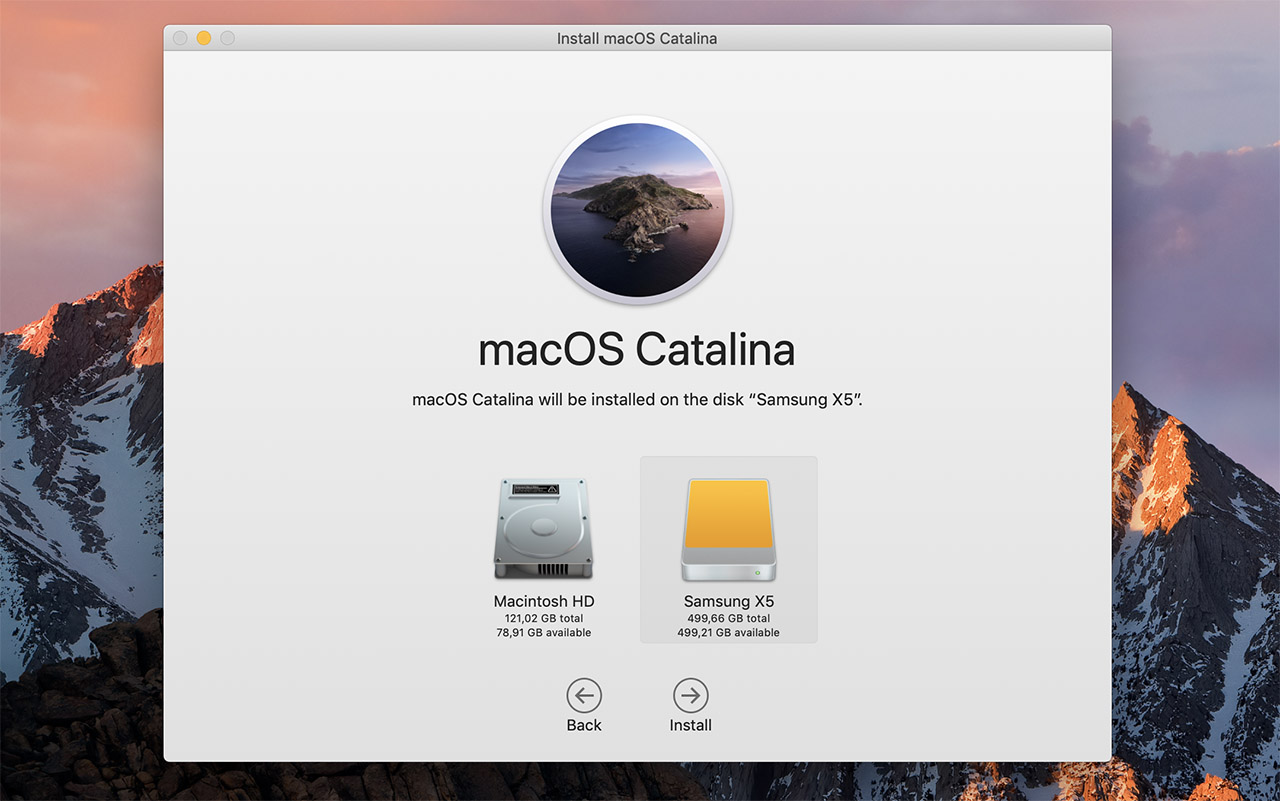
You will now need to download the macOS Catalina to your MacBook: go to System Preferences and click on Software Update or you could go to the App Store and manually download the macOS Catalina. After you have finished downloading the installer (it can take some time, depending on the server load and your Internet connection), run it and you should be greeted by the ‘Install macOS Catalina’ initial page. Press Continue, read the software license agreement and if everything seems alright, click on Agree which will take you to the next window, where you will see the Macintosh HD as the main disk to install the new software. Since we want to install it on an external Thunderbolt 3 SSD, click on the ‘Show All Disks’ which will summon the Samsung X5 as an option: click on it and press Install (you will have to insert the password to your account – if you have set up one before).
Afterwards, simply follow the instructions to personalize your macOS experience and it should successfully boot into the secondary drive. To switch from the Macintosh HD to the Samsung X5 and vice versa for the preferred boot drive, there are two main ways to do it: either restart the MacBook (or iMac) and immediately press and hold the Option key until a window will appear, where you will be able to choose the boot drive or, while the macOS is running, go to System Preferences (by clicking on the Apple logo), select Startup Disk, click the lock icon to unlock the section and select the SSD that you prefer which will ask you to restart the computer (this option allows you to select the startup disk for every startup).
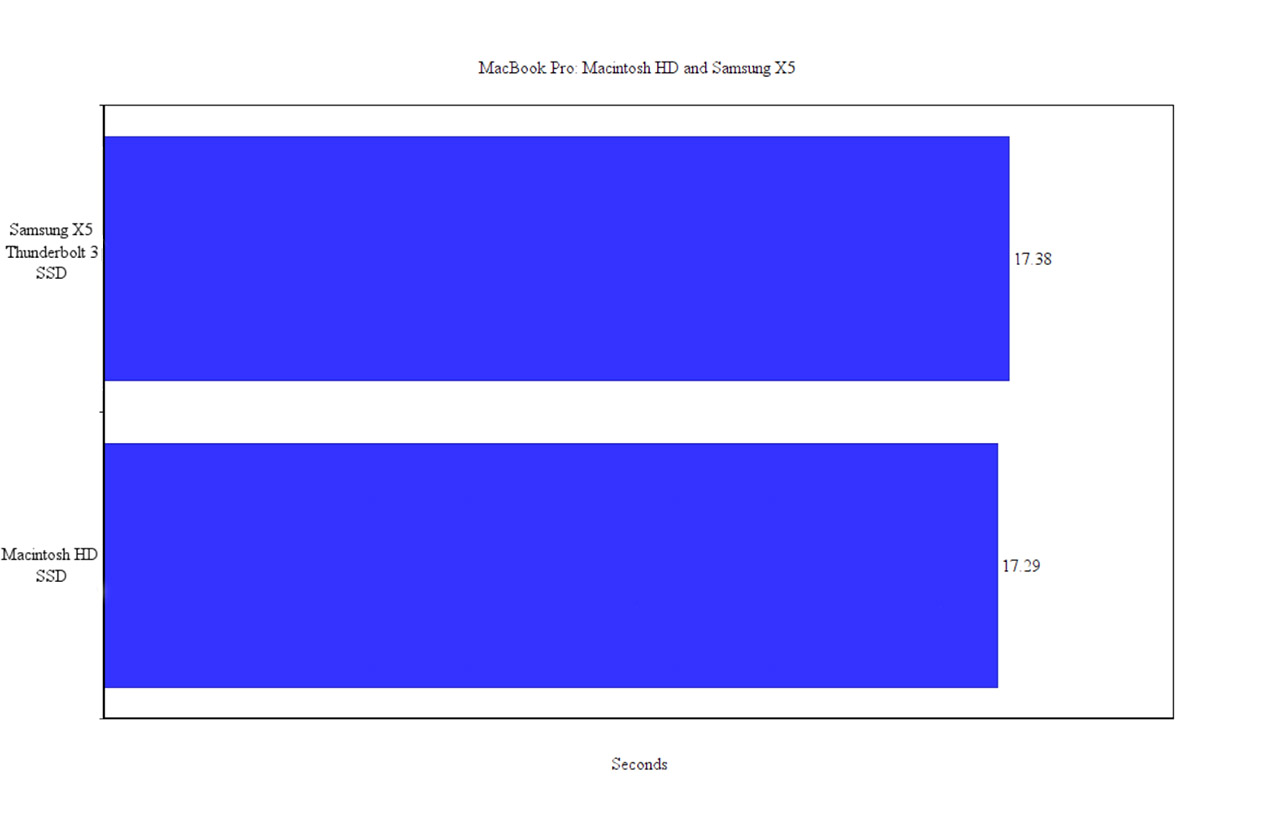
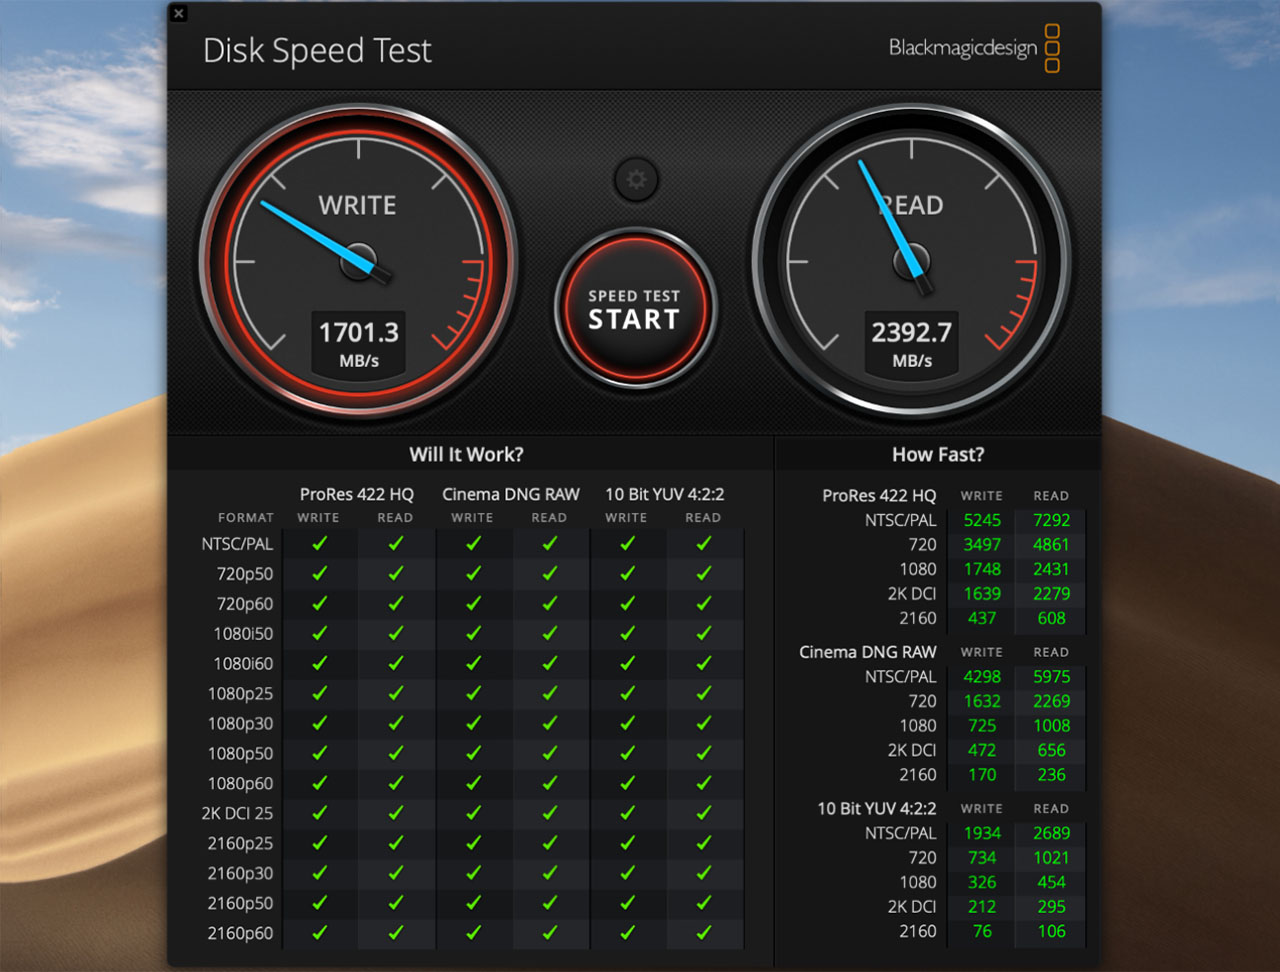
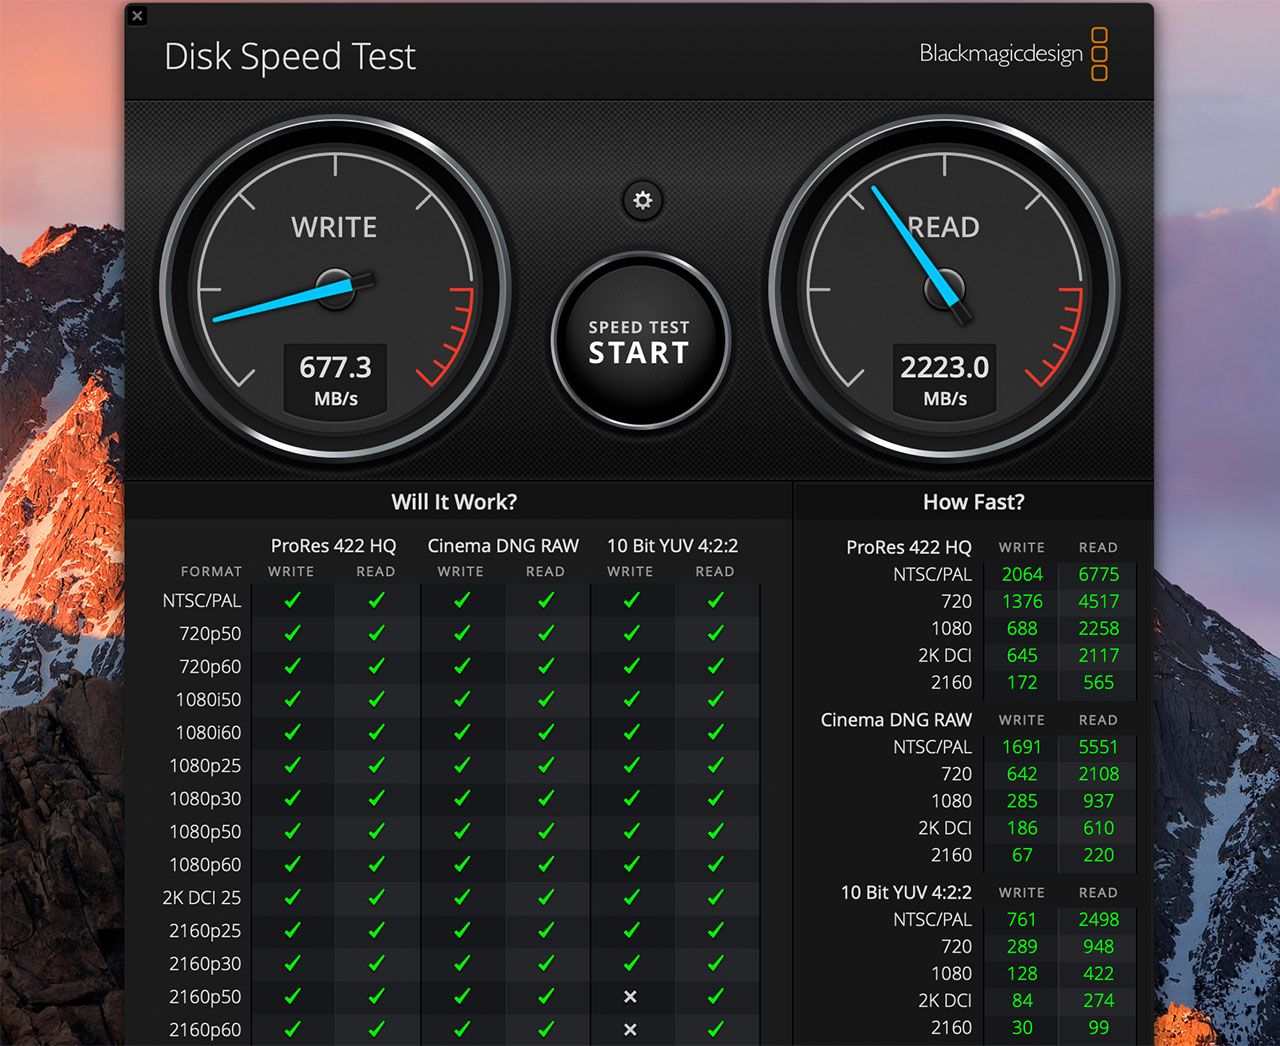
In order to see if running MacOS Catalina on a Samsung X5 drive is different than on the default SSD, I decided to see how long does it take until the software boots up, so I measured it a few times and the average has been around 17.38 seconds (from being turned off to the Password section) which is not a bad score by any means considering that using the Macintosh HD SSD, I got an average of 17.29 from when I pushed the Start button until I could enter the password. It’s also worth noting that the Samsung X5 Thunderbolt 3 SSD is a lot faster than the default 128GB SSD that I got installed in my MacBook Pro as suggested by the BlackMagicDesign synthetic benchmark, but overall, I felt no difference between the two SSDs when roaming through the macOS (everything was fast and responsive), so, if you do need a dual-boot system or simply want to substitute the Fusion Drive from your iMac, then the Samsung X5 portable SSD is definitely one of the best solutions available.
Mark is a graduate in Computer Science, having gathered valuable experience over the years working in IT as a programmer. Mark is also the main tech writer for MBReviews.com, covering not only his passion, the networking devices, but also other cool electronic gadgets that you may find useful for your every day life.
Hi,
Thanks for the write up. How did the X5 hold up after an extended usage? Did it get extremely hot? Did you have any performance issues after a while?
Hi, the Samsung X5 gets hot when the data is transferred, but it’s not going to melt or anything of the sorts. I used it for a few weeks and when it got to a high temperature, there was some throttling to allow the chip to cool down a bit.
Hello,
Very interesting! I have a new imac but it is quite slow so I have purchased the X5 to install MacOS and my applications on the X5. I will do so tonight following your tutorial.
Question: what will happen of the system installed on the internal hard drive? Do I have to “partition” anything? I am just a little bit of confused of what will happen when MacOS will be on the external SSD, will I also be able tu run MacOS on the internal hard drive?
Thank you 🙂
Ben
Hi,
“What will happen of the system installed on the internal hard drive?”
You can choose which drive will act as the boot drive, so you can either keep both drives with MacOS or, if you want to use only the X5, then you can erase the internal SSD/HDD and use it as storage.
“Do I have to “partition” anything?”
Not necessarily, it depends on whether you need some dedicated space for storage or not.
“Will I also be able tu run MacOS on the internal hard drive?”
Yes, you can easily switch between the two boot drives and one way to do it is by restarting the iMac and immediately pressing and hold the Option key until a window will appear, where you will be able to choose the boot drive.