
The Tenvis IP camera is an indoor-suitable surveillance device built to offer both daylight and low-light live footage of your home directly to your computer or mobile device. Of course, it isn’t intended to be a replacement to a more mature security system which can be installed at the office, but to simply add a security layer to your home (and to provide an easy way to check on your kids or pets).
The problem is that the market is filled with various types of security cameras and it can be difficult for a new device to make its way through the existing ones, but Tenvis does have a healthy variety features implemented into its TH661 IP camera, such as motion detection (including alerts), 1080p video resolution, pan and tilt angle (355/120 degrees) and three functioning modes (wires, wireless and access point).
That being said, let’s have a closer look at the Tenvis TH661 IP camera and see if its features, as well as the app implementation are good enough to make the device stand above its competitors.
Design
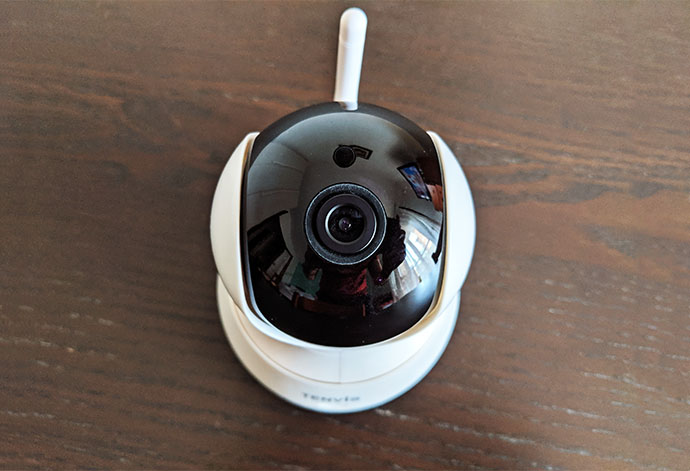
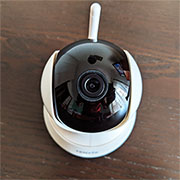
Since they’re meant to either be positioned on a shelf or mounted on the wall (or ceiling), the indoor IP cameras are designed to be as unobtrusive as possible in order to attract as little attention towards themselves as possible, so there’s rarely any flashy design element and the most commonly adopted shapes are the bullet, the dome or the pear. The Tenvis TH661 IP camera adopted the regular pear-like case, featuring a spherical upper part (where resides the camera sensors and it can be tilted 120 degrees) embedded within a plastic enclosure (which can be panned 355 degrees) and from the middle down, the device has a fairly large circular base. Except for the upper black sphere, the entire case is covered by a white glossy finish which does retain fingerprints (especially on the black surface) – the device is also available with a glossy black coating.
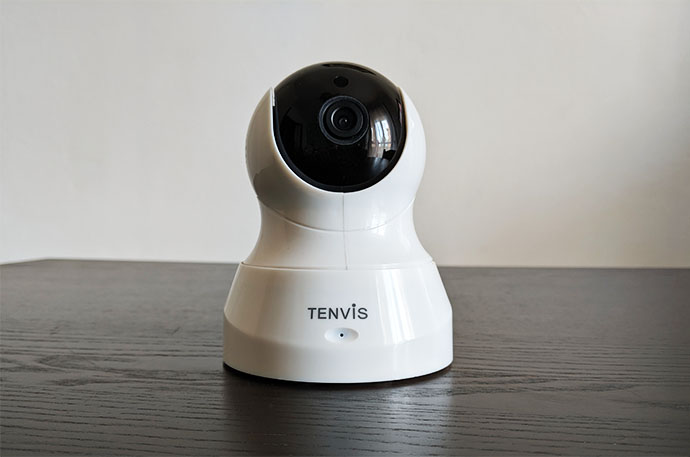
I can’t really consider the Tenvis TH661 the smallest IP camera around, but it is somewhat compact, measuring 5.1 x 4.1 x 4.1 inches, so it won’t occupy too much space from your desk (if you decide against mounting it on a wall), but you do need to take into consideration the external 180 degree directional antenna which may require a few inches more. If you don’t want to keep it on your desk, the manufacturer has added a mounting kit inside the package (it contains a plastic support along with a couple of screws) to help you easily mount the device to a wall or ceiling: after attaching the support, simply position the camera with the base down onto the circular piece and use the large screw to firmly connect the two pieces together.
One thing that you will immediately notice is just how lightweight the entire camera is (it weighs no more than 7.7 ounces) and that may be a bit disconcerting about the stability of the camera, but thankfully, the base is large enough and the four silicone feet on the bottom do help at keeping the device in place (especially if you’re going for the wired connection).

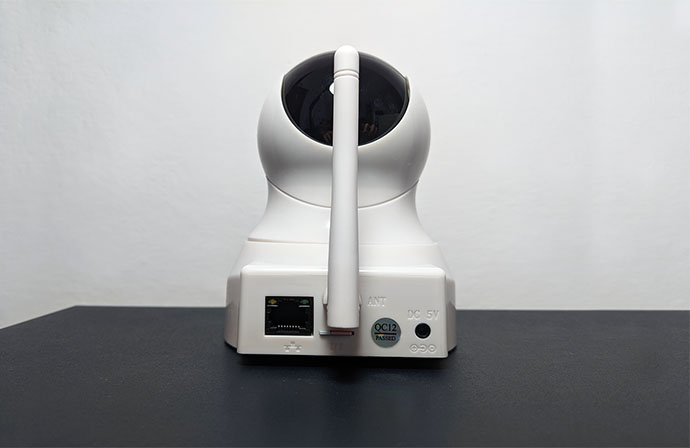
Besides the silicone feet, on the bottom of the device you can also find the mounting area in the center and a small recessed Reset button (Tenvis added a small pin to access the button – press and hold it for about one minute before the camera will return to factory default settings). On the rear side of the camera, on the area where the antenna is attached to the case (it is not detachable), there’s a Fast Ethernet port (it supports a connection of 10 or 100 Mbps – Gigabit wasn’t necessary since the video is going to have a max resolution of 1080p) with two LEDs, one showing you that you have a link and the other will flash when data is being transmitted. Underneath the antenna, there is an SD card slot (supports up to 128GB) which is the only available way of storing the footage (it doesn’t have any Cloud storage available) and further to the right, there’s a 5V/1A DC-In power connector (the power consumption is about 5W).
The main part of the Tenvis camera is the black sphere which contains the HD Color CMOS Sensor which supports a display resolution of 720p (1 megapixel) and 1080p (2 megapixel); additionally, the focal length is 3.6mm and the aperture is f/2.0.
The camera also has 11pcs built-in IR LEDs (which light up red when the sensor detects that it’s dark) and the infrared illumination distance is about 32 feet (which is double than what the D-Link DCS-8300 can offer). On the front of the camera, underneath the printed Tenvis logo, the manufacturer has added a microphone and, on the upper section, on the left and right side, there are two audio speakers.
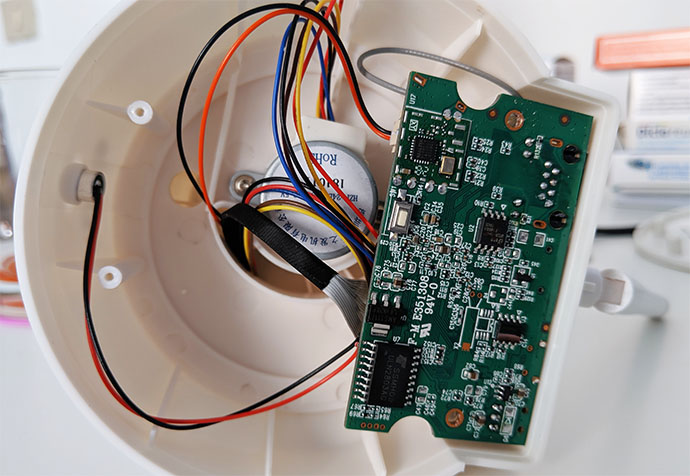
Note: After opening the bottom part of the case, I could see a Realtek RTL8188FTV 411SG1 802.11b/g/n 2.4GHz single-chip, a SSMH09 ULN2803AG Toshiba semiconductor and an AMS1117 1.8 H820LP linear voltage regulator.
Setup and Features
The hardware installation of the Tenvis TH661 is simple and straight forward, requiring nothing more than to connect the power cable to the back of the camera and to a power source and, using an Ethernet cable, connect the TH661 to your router. When the camera boots up, it will make a tilt and pan rotation test (this will happen every time you connect the camera to a power socket) and, while the Tenvis TH661 can connect to the router’s WiFi network, the first time you configure it, it needs to be connected via an Ethernet cable. Next, you can download the mobile application (available on both iOS and Android OS) and, after you install it, it will ask you for some permissions (to access the media files on your device, to record audio, to take pictures and record video, which makes sense to a certain degree but it will also ask for the device’s location for whatever reason) and, on the main page, you will be greeted by a Setup Guiding video and a Plus sign to let you add a new camera.
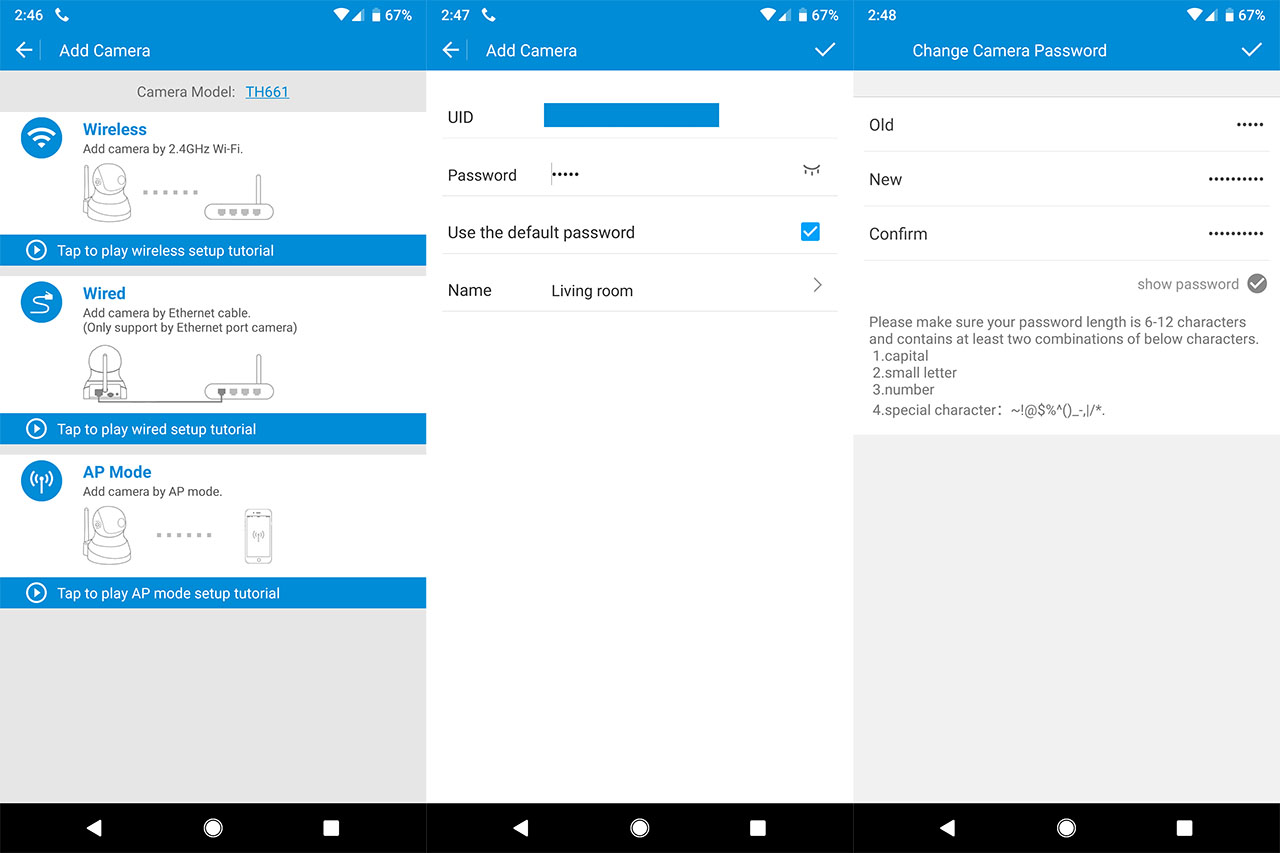
Tap on the Plus sign and you’ll be asked to choose the connection mode, which can be Wireless, Wired or AP Mode (each will give you a small video tutorial to help you properly set up things). For now, I chose Wired and, after the camera was detected, I was asked to enter the old password and select the Name (which is really the location in the house); immediately after, the camera detected that I use the default password and asked me to change it to something more secure (it’s a good move since most tend to forget about this important step).
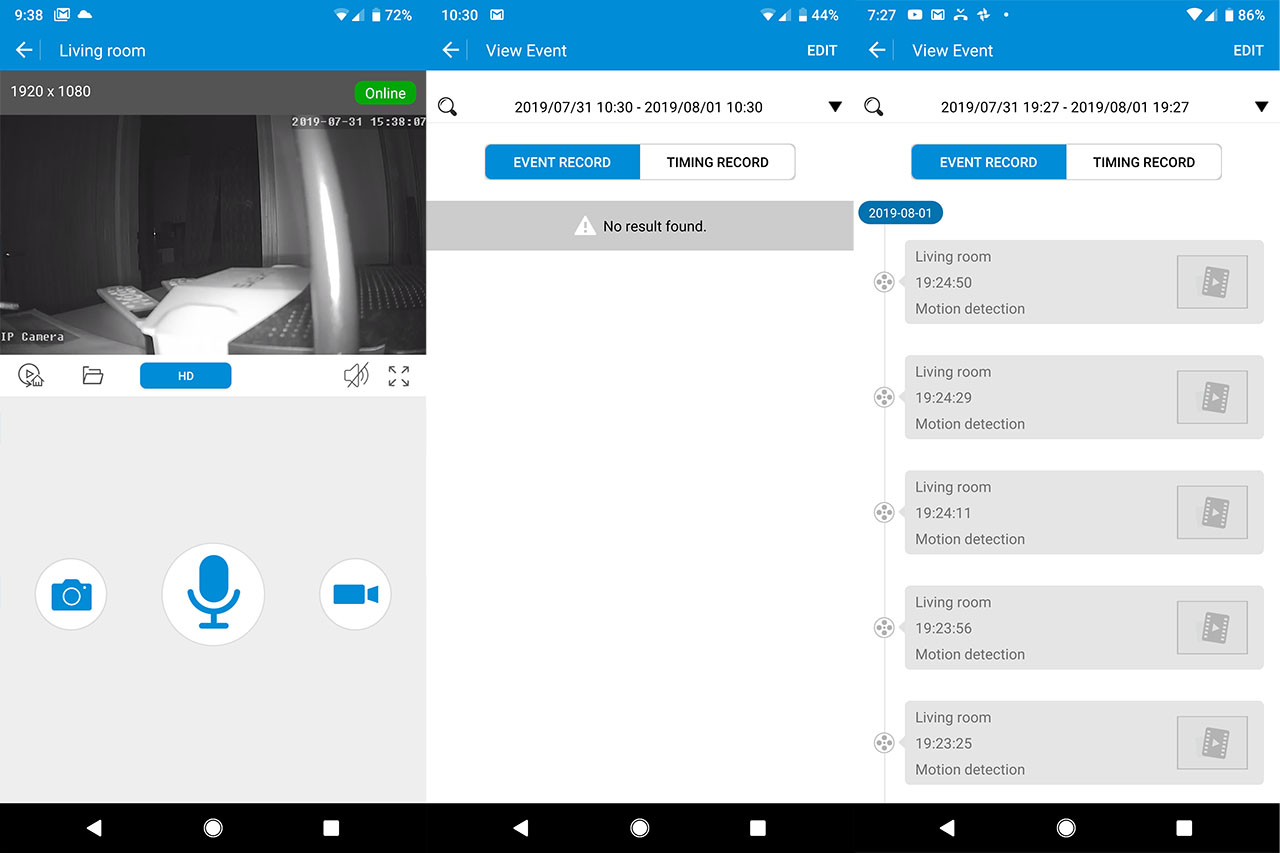
After that, I could enter the app’s UI, where, by pressing on the ‘tap to live view’, you can immediately go see the live footage which will also display the date and hour, the status of the camera, the resolution and, underneath it, you can access several options. First, there’s the View Event area, where you can check the Event Record or the Timing Record within an hour, half a day, a day, week or custom (the Event Record will show nothing unless you activate the Motion Alerts from the Camera Setting section).
Next to the View Event area, there’s the Photos/Videos section (shows any video or photos you have captured), the option to switch from HD (High Definition) to SD (Standard Definition), the Speaker On/Off button and an icon to enlarge the video to the whole screen. Further down, there are three large icons, one allowing you to capture photos of the live footage, the other to speak from the mobile device to the camera’s speakers (useful if you want to discourage potential trespassers) and lastly, there’s an icon that, when tapped, it will record the live footage. While streaming the live footage, you can also adjust the camera’s angle by sliding up / down / left / right on the screen – after you slide, you need to wait a bit until it gets registered by the camera (and, sometimes, it doesn’t register at all, so you have to insist). To configure the main aspects of the camera, you need to return to the Camera List window (the main page that you get when you start the app) and, underneath the ‘type to live view’, next to the View Event, there’s the Camera Setting section.

Here, you can change the Camera Name (again, it’s actually the location in the house) and you can also Change the Password. Furthermore, you can set the WiFi connection (the Tenvis TH661 supports the IEEE 802.11b/g/n wireless standard and the supported wireless security is WPA and WPA2), so, even if you chose to use the Wired connection, after you disconnected the Ethernet cable, the camera will lose the connection to the router for a few seconds, but will switch to the wireless mode automatically (if this doesn’t happen, there may be a problem with the router – I have encountered it with a Linksys WRT3200ACM, but it completely went away with an ASUS RT-AC86U). It’s worth noting that the camera movements remained as responsive as when I was connected via an Ethernet cable. Furthermore, regardless of the chosen method, the live feed never disconnected (the stream remained continuous).
Underneath the WiFi setting, you can configure the Event Setting and Notification: first of all, you need to enable the Motion Alerts to be able to access the other options, which include the possibility to Receive App or Email Notifications when motion is detected (you will have to enter your email and, if you want, you can also set up the Receiver, the SMRT Server Host, the Port, the Encryption type and more); you can also enable the option to start Recording to the SD card (when it detects motion) and directly to an FTP server (you will have to configure the Server FTP address, the port, username, password and path), as well as Snapshoting to an FTP server.
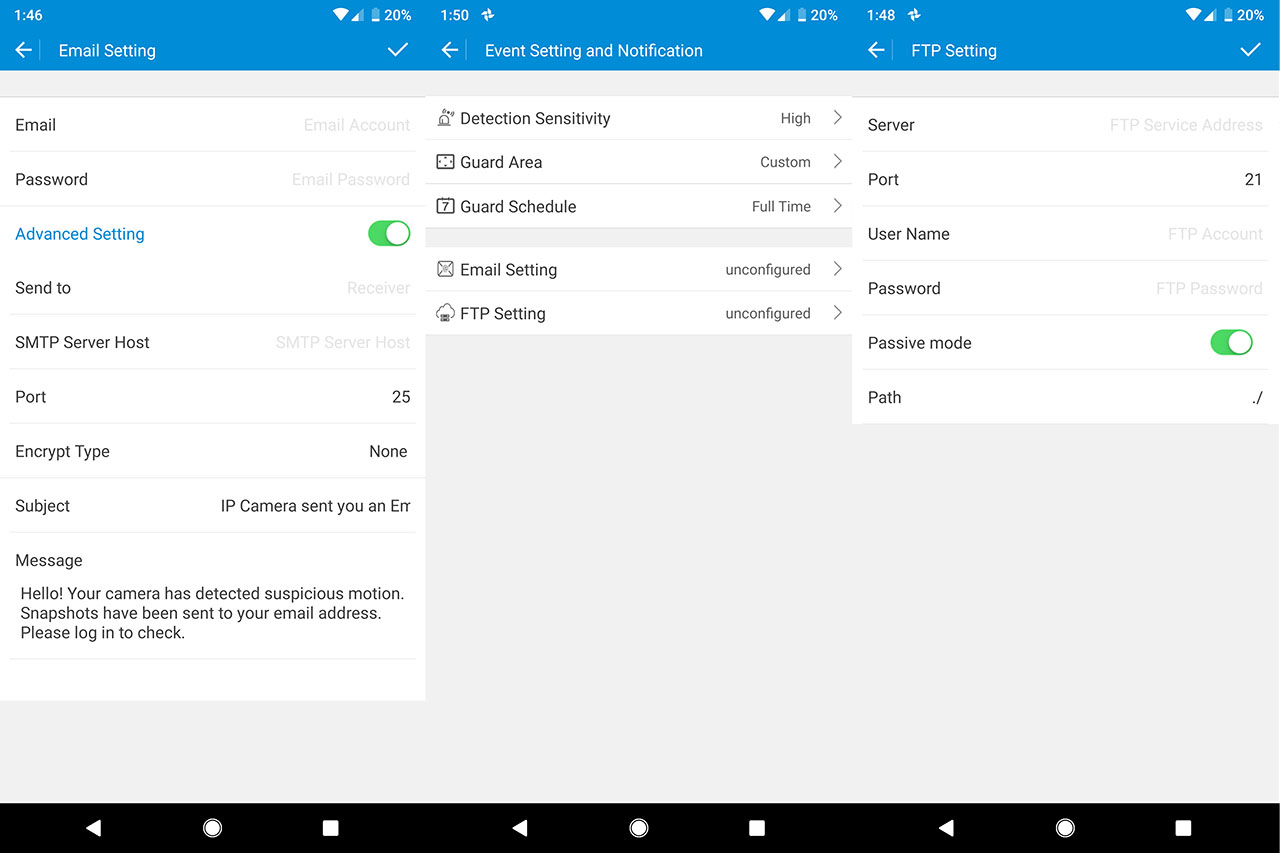
Additionally, under Advanced Setting, you can select the Detection Sensitivity (can be Highest, High, General or Low), the Guard Area (Custom area, Middle Half or All Area – select the area which will trigger the alarm in case the sensor detects motion), the Guard Schedule (which can be Full Time or Custom – select the hour and days of the week); further down, you can set up the Email and the FTP server.
Returning to the Camera Setting, underneath the Event Setting and Notification, there’s the Timing Record (where you can set the quality and the duration of the recorded footage) and Other Setting, which includes the Time Setting (to adjust the correct Timezone – after any change has been done, the camera will reboot itself), the Audio Setting (here, you can adjust the Input and Output Volume), you can Mirror and Flip the live stream, view info about the SD card (you can also format it) or view Camera information.
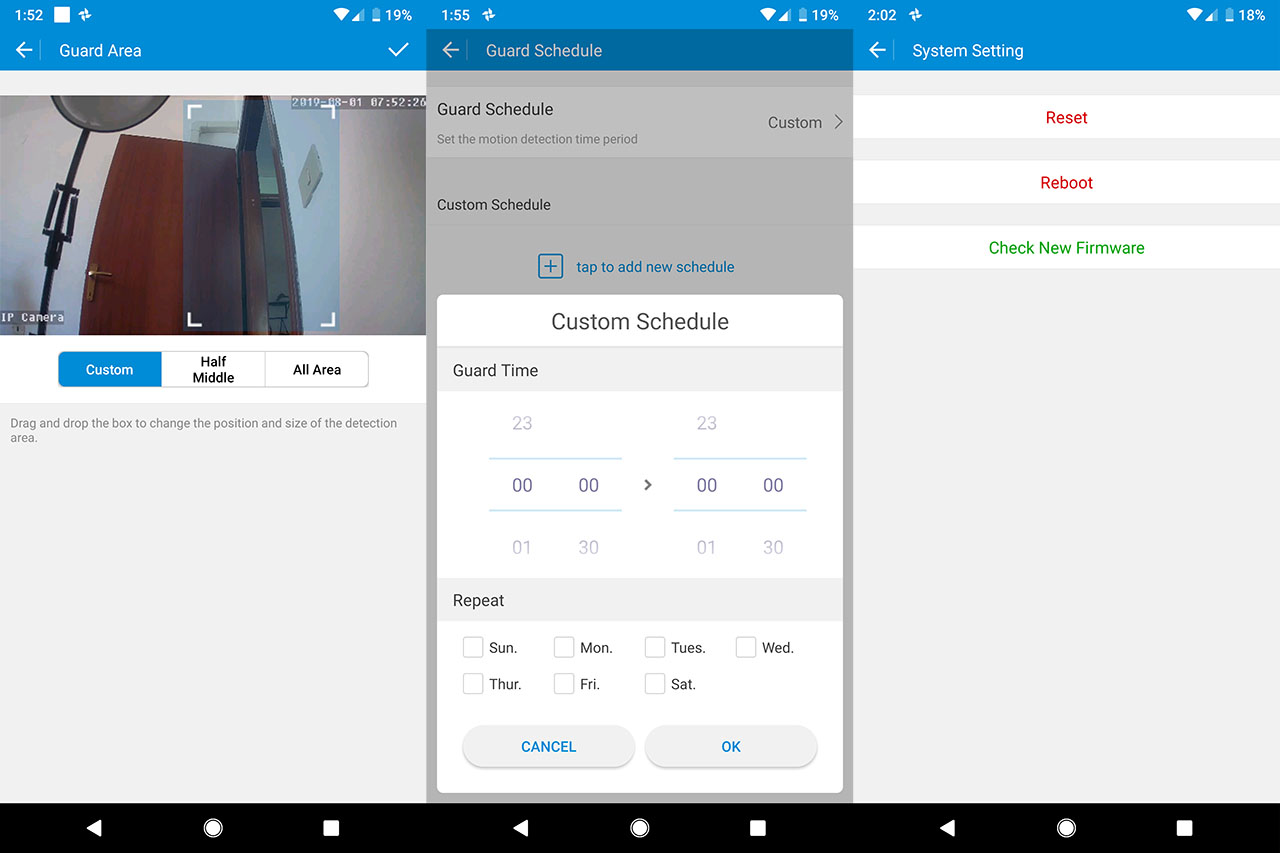
Lastly, there’s the System Setting, where you can Reset or Reboot the camera or Check for a New Firmware. Besides the Wireless and Wired mode, the Tenvis TH661 can also be run in AP mode, which means that you can connect to the camera directly from the phone without relying on a router (which also means no remote control). The problem was that while using the app, I couldn’t configure the camera to enter this mode because, after I connected to the Tenvis TH661’s WiFi SSID, the app insists that I must have an Internet connection (which makes absolutely no sense in this case).
Note: You can view the live footage even when you’re not connected to the home network using the app.
Besides the app, the Tenvis IP camera can also be monitored and configured using a computer (macOS or Windows OS) and, to get access to the camera’s interface, you first should install the Tenvis Search Tool utility which will help identify the IP address of the IP camera and allow you to make any necessary modifications to the network (it’s not a necessary step if you can identify the IP address from your router’s software). After that, you need to open any web browser and enter the IP address of the camera in the URL area which will summon the Tenvis dashboard (you will have to insert the username and password first which, by default are admin/admin).
Specifically, you can enter the PC view or run the Setup software which will install a Client utility on your computer for easier access. If you click on the PC view, it will open a new window with the video covering most of the page (you will have to run flash to see the stream) and, on the left, there are two sections, one for Monitoring the device (you can choose between two streams, adjust the angle of the camera), while the other is for the Settings where you can configure some additional features than what is offered by the app.
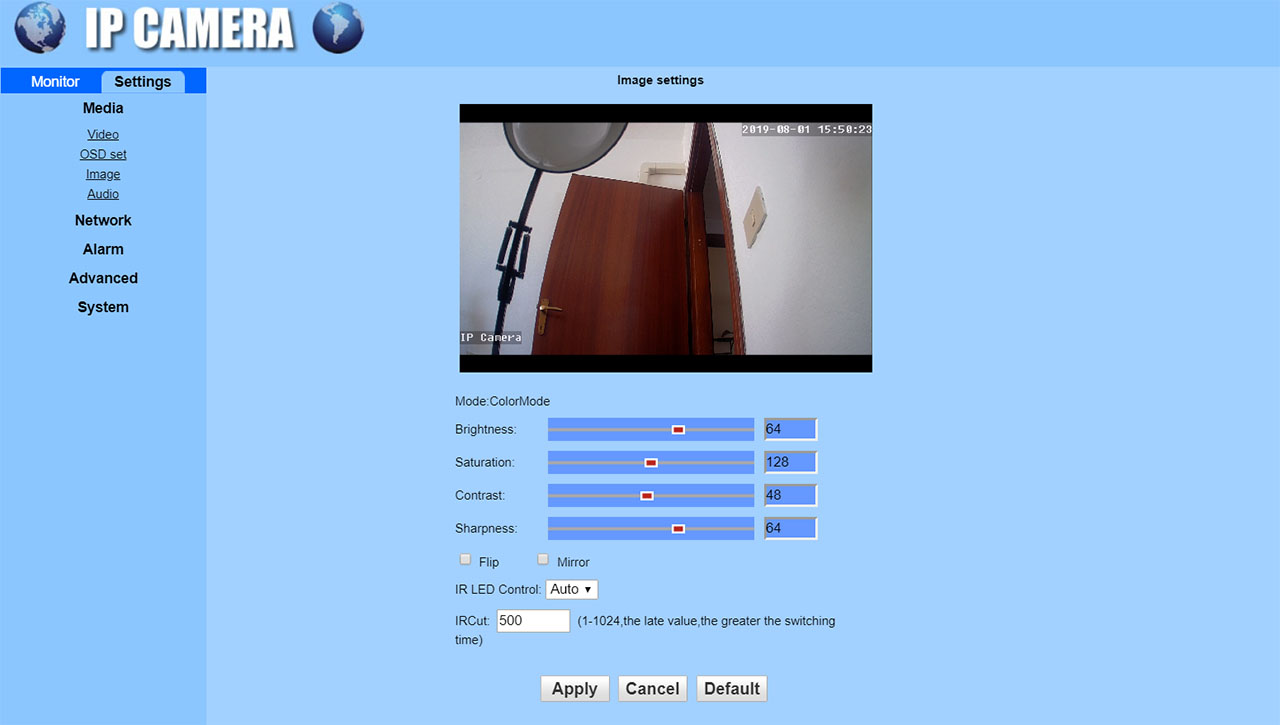
Under Media, you can configure the Video settings, such as the format (50 or 60Hz), the coding, the bit rate, the frame rate (up to 30fps), the image quality and more; you can also configure the OSD set, adjust the Image quality (Brightness, Saturation, Contrast and Sharpness) and modify the Audio settings (such as the type – at the moment, it supports the G711 compression). Under Network, you can configure the LAN Settings and the HTTP & RTSP, the Wireless parameters (including the security mode and algorithm), the DDNS options (includes enabling UPnP port forwarding) and the ONVIF parameters (such as the Server Port and NVC Type). Under Alarm, you get pretty much the same options as on the app, while under Advanced, you can set a Timer Record (for both supported streams), configure the email and FTP settings, as well as the Terminal options (includes the pan/tilt speed and the Cruise laps).

Lastly, there’s the System settings which contains pretty much the same set of options as the mobile application. While using the Monitor controls for the pan and tilt, I noticed that the camera was moving immediately, but the footage arrived much slower than on the mobile application (the delay was significant – almost 5 seconds).
Note: As with all IoT devices, you should take all the precautions to ensure that your network won’t be compromised by keeping all your devices up to date (if a device hasn’t received updates in a while, it may be wise to replace it) and, if your router or switch supports it, it would be better if you can put the smart devices on a separate VLAN.
Conclusion
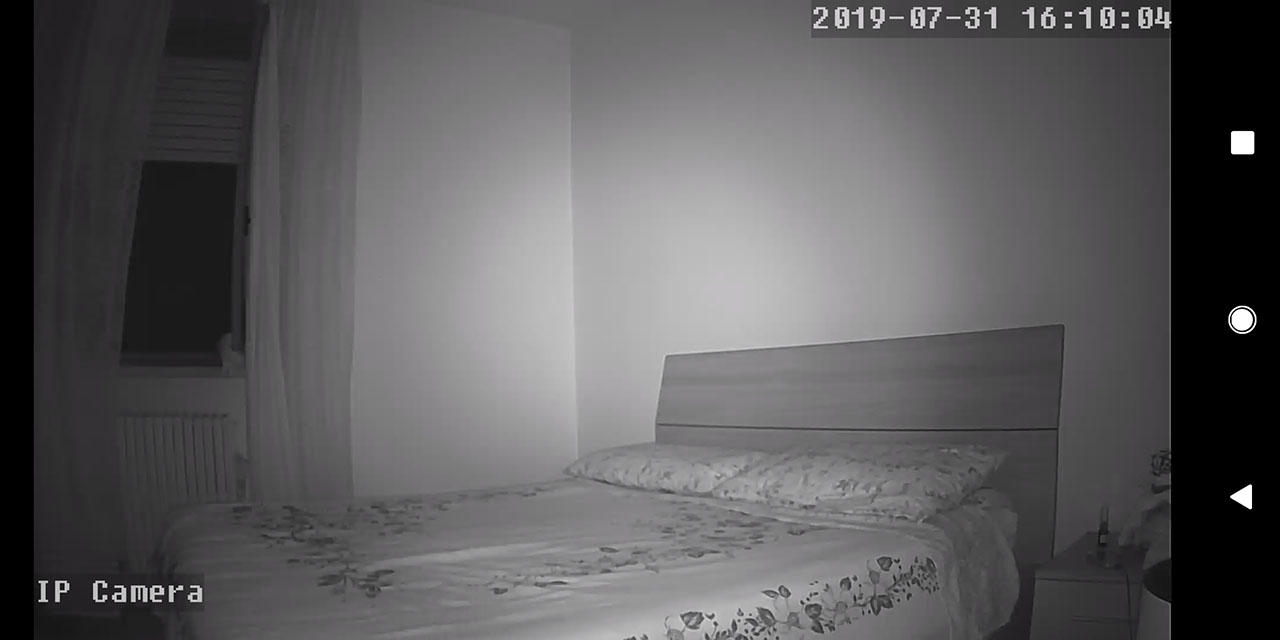
New IoT devices are released everyday and, while the hardware is rarely unique, the application is almost always the backbone of this type of devices and Tenvis has managed to develop a solid app capable of offering a decent user experience (you can almost immediately view the live stream from the IP camera), but there are some shortcomings, such as the strange implementation of the AP mode. Furthermore, the Tenvis TH661 does manage to offer most of the expected features, such as the 1080p video, motion sensing and, thanks to the excellent IR sensor, it offers really good low light footage. The problem is that there are some expected features that are missing, such as the face recognition and no Cloud storage (as well as no integration with the smart home assistants).
I know that some people may find this as something positive, since putting footage of your home on the Cloud may pose some security issues, but I do like to have multiple options (still, using a 128GB SD card can give you about two months of continuous footage). So, is the Tenvis TH661 better than its competitors? It offers a similar package as its direct competitors, but I really liked the application and the low-light/daylight footage is really good (the motion sensor alerts were also quick), so it’s definitely worth taking into consideration if you want a small IP camera to monitor parts of your home.
Tenvis TH661
Pros
- 720p / 1080p resolution
- IR sensor (32feet vision range) + motion detection
- Wired + wireless connection (and remote access)
- Intuitive app
- Can be tilted and panned mechanically
Cons
- No Cloud storage available
- Can't be integrated within a smart home environment (doesn't support Alexa, Google Home or IFTTT integration)
- The AP mode doesn't work