
It’s been four years since TerraMaster released the F2-210 and, since the competition at the budget-friendly level has heated up, the TerraMaster F2-212 has been released as its successor.
| TerraMaster F2-212 | |
|---|---|
| Terra-Master.com | Check Product |
And what made the F2-210 an attractive option is still there, such as the compactness, the tool-less 2-Bay drive installation and the TOS software. Obviously, almost everything else has either been changed or upgraded, including the OS which has now reached the version 5, offering far more apps now than what the F2-210 OS was able many years ago.
The internal hardware needed an upgrade, so we get a better processor, 4K video encoding and for some reason the same amount of RAM. It’s not like RAM is expensive, so no idea why they didn’t just add more. The max capacity has also increased from 32TB to 44TB, allowing for more data to be stored and streamed. And, while it’s not going to be anywhere near enough even for smaller businesses, the TerraMaster F2-212 aims to be the perfect NAS for home use.
It does support PLEX and it will work with most smart TVs, as well as smart boxes (including Apple TV, Amazon Fire and Chromecast) and for those that are deep in the open-source smart homes, then there should be support for Home Assistant as well. The question is whether the TerraMaster F2-212 is actually worth it or if its competitors can offer a more compelling set of features and performance. Let’s find out.
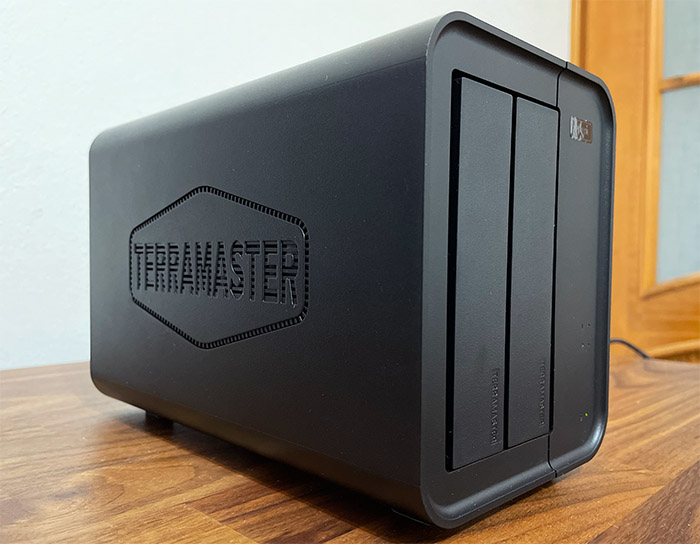
The Design and Build Quality
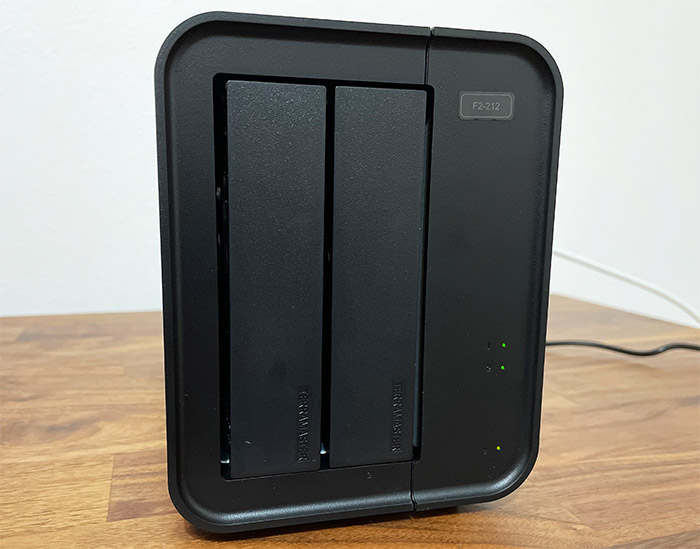
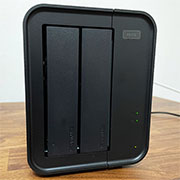
I put the TerraMaster F2-212 next to the F2-210 and it’s interesting to see how the brand evolved, the cut corners as well as what has been improved. In terms of size, the two differ only a bit, the TerraMaster F2-212 being taller, but the footprint is pretty much the same (the NAS measures 8.74 x 6.06 x 4.68 inches or 22.2 x 15.4 x 11.9cm).
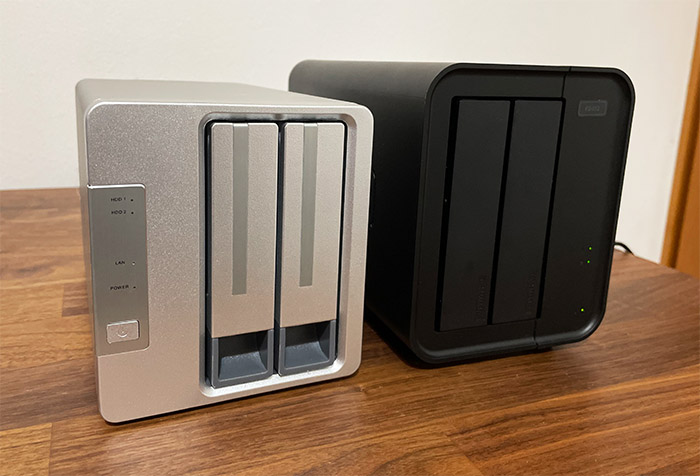
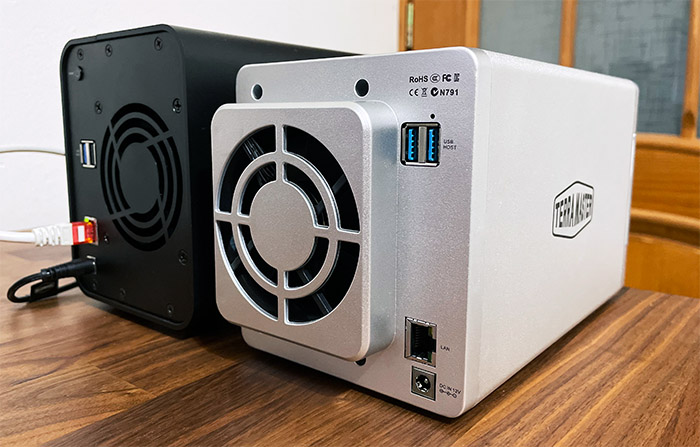
Construction-wise, things couldn’t be more different, the common elements being that both are 2-bay NASes and the rear-placed fan. The TerraMaster F2-212 is completely made of plastic and, until you add two HDDs, it doesn’t really feel that solid. At the same time, the F2-210 felt like it was built like a brick, being heavier and having a metallic shell. The rear-placed fan seems to be the same size, being completely integrated within the case of the TerraMaster F2-212, while it sit in a protruded area on the F2-210.
The main ports continue to sit on the rear side, next to the aforementioned fan. We get a couple of USB ports, one USB 3.0, the other USB 2.0 and it’s a curious choice considering that the four-year-old F2-212 came with two USB 3.0 ports. Next, we see the Ethernet LAN port which Gigabit and the 12V Power port, same as on its predecessor. The only new element can be considered the Power button which has been moved to the back from the front, as it was on the F2-210.
Returning to the front side, we see that TerraMaster removed the LED panel and decided to go for the camouflaged small icons and LEDs (the icons are very difficult to see). The topmost LED will light up and become solid after inserting an HDD in the first bay, the second for the next HDD, while the lower LED will light up and become solid after powering up the NAS. When any of the two HDDs has data written or removed, the LEDs will start flashing. It’s a very simple, yet effective status-showing system.
Now let’s talk a bit about the trays. On the F2-210, they were a bit clunky since you had to operate a sort of switch to open the tray and, if it was not aligned properly, it would not close. On the TerraMaster F2-212 it’s better designed, so it’s a much smoother process. Push on the upper side of the bay door and, after it inclines, just take the tray out. The holes for the screws are fairly precise and even if they don’t align perfectly with the HDD, there are silicone washers to help adjust the HDD into the tray.
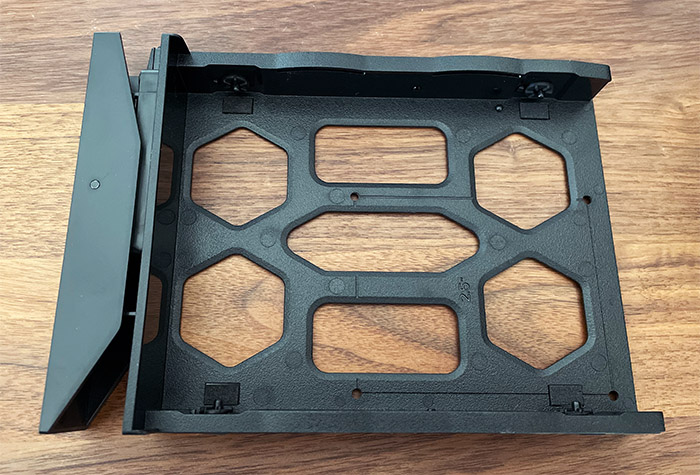
I would say that pushing the hard drives into the slot needed a bit more force on the TerraMaster F2-212 than on the F2-210, but overall it’s a much smoother experience. Of course, you can install 2.5 or 3.5-inch HDDs, as well as SSDs. It’s worth mentioning that the fan speed changes depending on the temperature of the NAS and, in idle mode, it’s still quiet enough to not disturb your sleep. Also, a good factor to keep the temperature low is the four tall silicone feet which allow the air to go through the bottom-placed inlets.
I have added some photos to see the heat management of the NAS. Lastly, I need to talk about the power adapter because I have noticed a dangerous trend among consumer electronics. The adapter that came into the box with the TerraMaster F2-212 has an output of 12.0V, 4.0A, 48W which is perfect for the small NAS, but don’t use it for any other device thinking that the output will adjust itself depending on the product.
Usually, it does but not with this adapter and powering up the wrong device will fry it – it’s actually better to just use a different adapter from the getgo, keeping this one in the box forever. I have seen the same type of approach on the ZimaBlade and it seems that TerraMaster went this route as well.
The TerraMaster F2-212 Teardown
While the silver metallic NASes follow the same build principle, the TerraMaster F2-212 is a bit different. The first thing I had to do was to detach the screws from the rear panel, including those that held the fan and this revealed that we’re dealing with a 12V SnowFan YY8025L12S.
It can be replaced if you want to go for a very quiet one, but this is alright as well. Moving forward, I got fairly confused about what part to detach next. I probed around to see if the plastic shell detaches somewhere, but no, all I managed to do was create ugly dents into the plastic. That’s when I remembered that TerraMaster really likes to use sliding panels and indeed, after putting a bit of force on the smaller side of the shell, it did detach and I could slide it out.
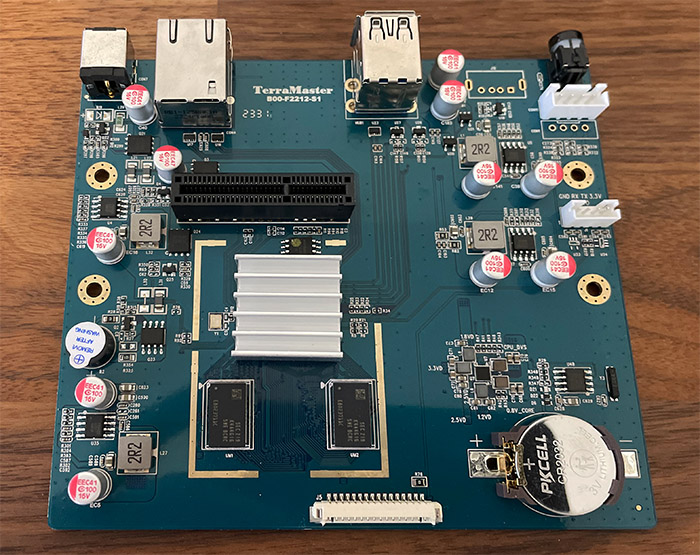
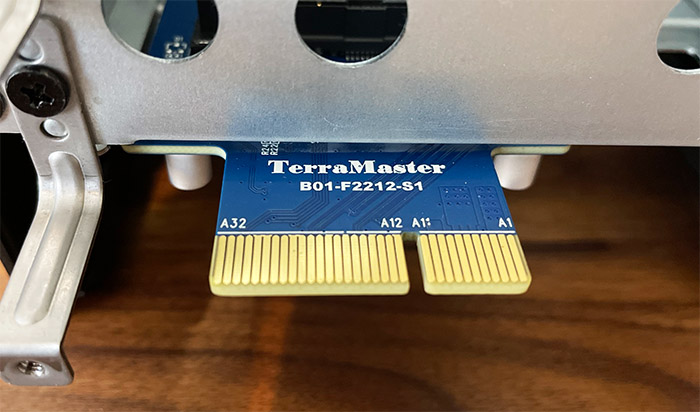
This gave me a good look at the rear side of the main PCB and, after removing the screws, I could take it out completely – be careful with the PCI connection on the side to the HDDs slots module. This way, I got a good look at some of the exposed components and I could identify the 1GB of DDR4 non-EEC RAM from Samsung (2x SEC 219 K4A4G165WE), but the processor had a heatsink glued on top of it, so it’s difficult to remove it safely without some special heat gun.
Why not use the good ol’ heat paste? In any case, TerraMaster did disclose what type of processor it uses and it’s a quad-core Realtek 1619B clocked at 1.7GHz (uses the 64-bit ARM V8.2 Cortex-A55 architecture).
The TOS 5 Installation
The first thing that I had to do is install the TOS software and it doesn’t seem like there is any local storage which means that I either had to give the NAS access to the Internet or download a copy of the latest version on my PC. So, I installed the HDDs, powered on the NAS and, using an Ethernet cable, I connected it to the router. At this point, I checked which IP address it received from the wireless router (by going to the router GUI) and, after pasting it into the URL, it indeed confirmed that there is no locally-stored TOS version.
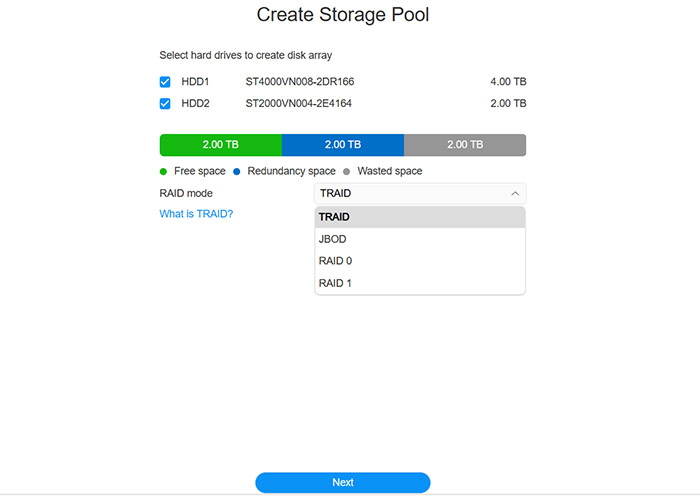
Then, the NAS asked to check that the HDDs are compatible and, since I use a 2TB Seagate Ironwolf and a 4TB Seagate Ironwolf HDD, all is good. Then, it asked whether I wanted to go the easy, Default way or the Custom path. I had to see the latter, so Custom it is.
The TerraMaster F2-212 confirmed that both HDDs were healthy and after about 10 minutes, the TOS was installed and ready to go. Well, there are still a few steps, the first being the creation of a superuser (root) and it’s also advisable to create a secondary user for daily use.
Afterwards, I had to choose the RAID mode and I could choose between JBOD, RAID 0, RAID 1 or the proprietary TRAID. I was curious about what TerraMaster managed to accomplish so I went with TRAID for now. We’re not done yet because I was asked about the type of file system and the options are between BTRFS and EXT4.
Apparently EXT4 is faster so it’s better if you intend to use the TerraMaster F2-212 as an NVR, but since I don’t intend to, I used BTRFS. Lastly, I got to the EULA part and I could finally access the NAS GUI.
The TOS 5
After installing the TOS, it’s best to check the advice given by the Security Advisor, the first being the Isolation Mode which blocks access from outside the local network, followed by File System Snapshot which helps against ransomware, enabling the Firewall, as well as changing the default HTTP/HTTPS port. Be aware that enabling the Security Isolation Mode will effectively cut you out of the Internet, so you can’t run apps that require outside communication, nor can you use the App Center.
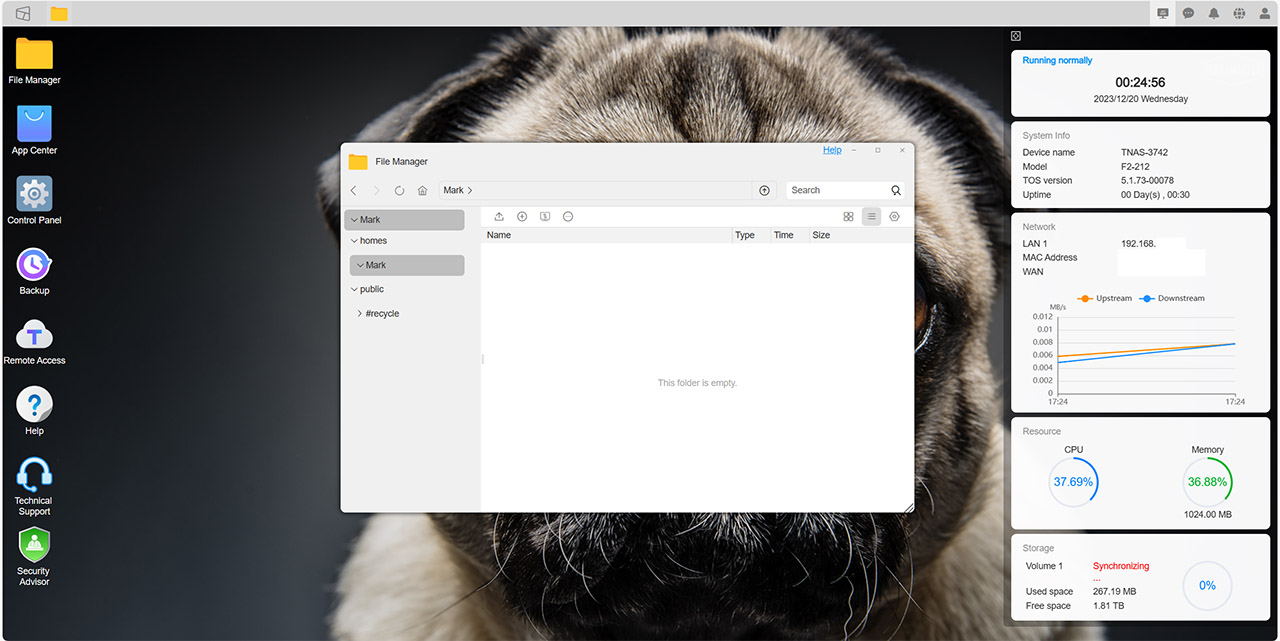
That being said, TerraMaster has maintained that Microsoft Windows OS-type of feeling, where you can open multiple windows at the same time and it does have a set of icons on the Desktop already, while the taskbar sits at the top. Some of the main apps are the File Manager where you can check what’s into any of the attached storage devices – and that includes the USB drives as well. Then, there’s the App Center which has grown a bit, although not as much as expected. There’s a twist though, as we will see in a minute.
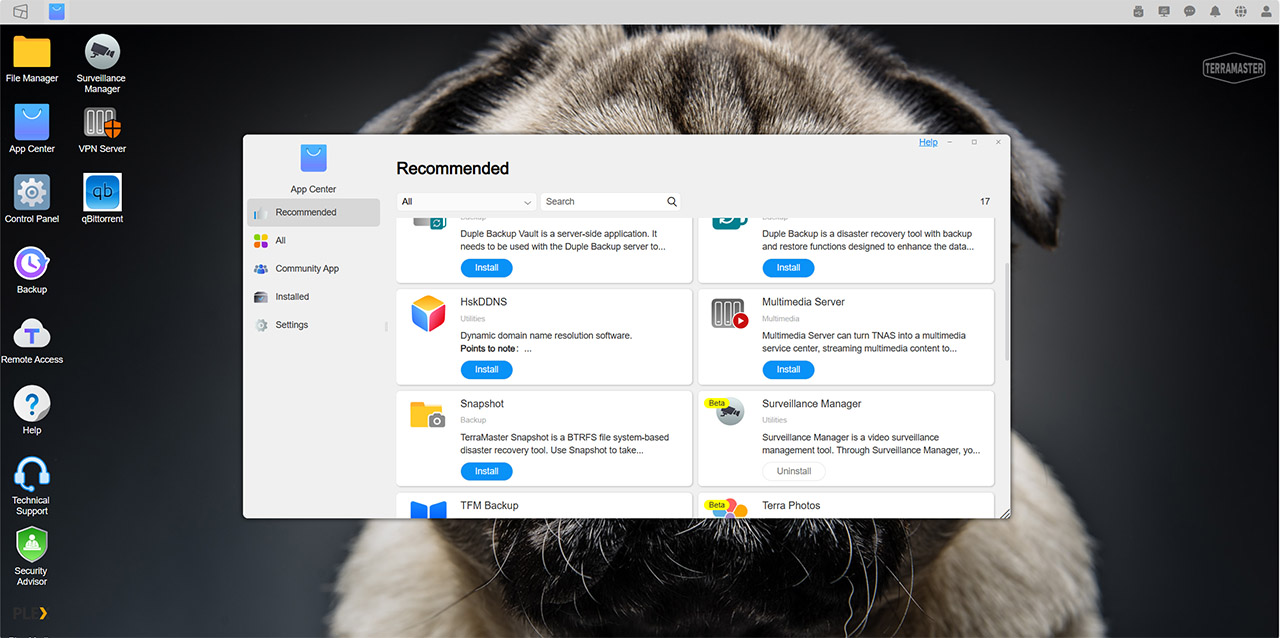
There are 17 Recommended apps, but I decided to go directly to the All tab to have a look at all the 42 available apps. There’s PLEX which is mandatory, Duple Backup, Multimedia Server, Web Server and VPN Server, Docker Manager, WordPress, CloudSync and a lot more. I also saw that TerraMaster has added a Surveillance Manager app which, although in Beta stage at the moment, is still unexpectedly comprehensive.
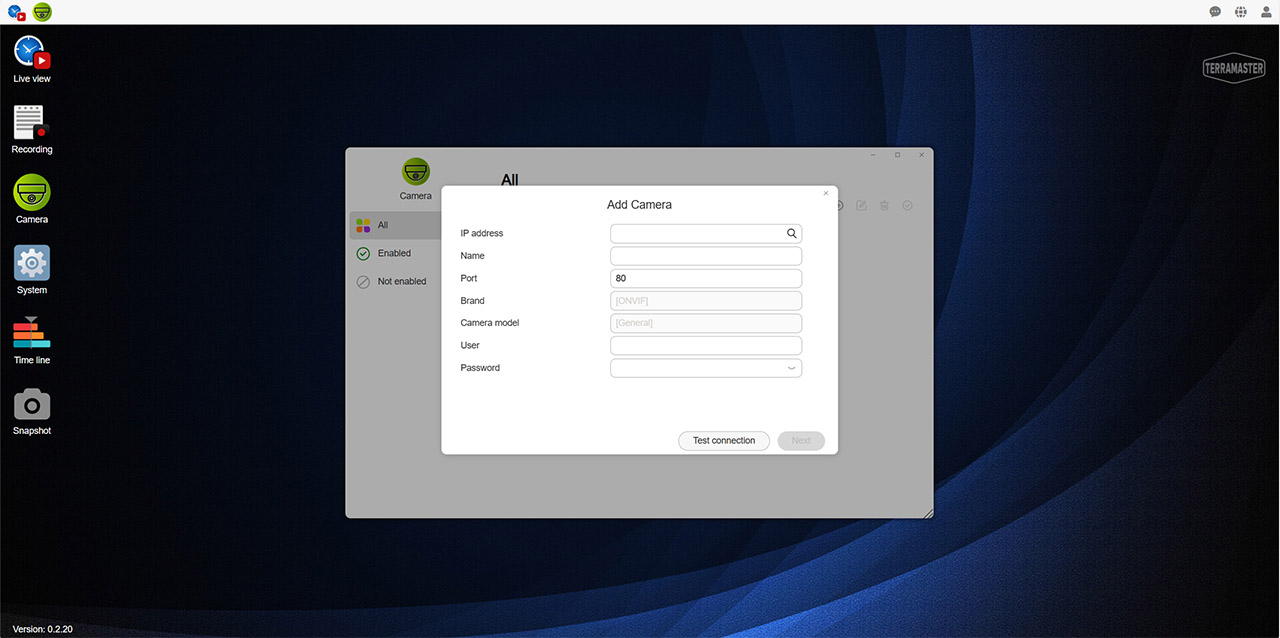
Any camera that you add needs to support ONVIF and the TerraMaster F2-212 will let you get a look at the Live view of the cameras, check what has been recorded so far and there’s also a Time line window. The layout is great and if it will detect cameras as quickly as Blue Iris, I don’t see a reason why I won’t use the NAS as my new NVR.
Not all is sunshine and rainbows because I tried enabling PLEX and the Operation failed. I reinstalled the app, tried again and it worked this time. This shows some cracks in the software stability, so no bueno. I did mention a twist previously and it’s about the Community apps. Here, you can find a far larger amount of apps, from which the Home Assistant which is fantastic as a local server for smart devices without having to use the limited variant under Docker.
I didn’t see qBittorrent anywhere, so what’s going on? Apparently TerraMaster removed it from the officially supported apps, but it is still available on the TNAS Community, so it needs to be installed manually. That’s how I found out that the Home Assistant is not yet supported by the TerraMaster F2-212 at the moment – the file needs to be aarch64, not x86_64.

There’s 4K transcoding?
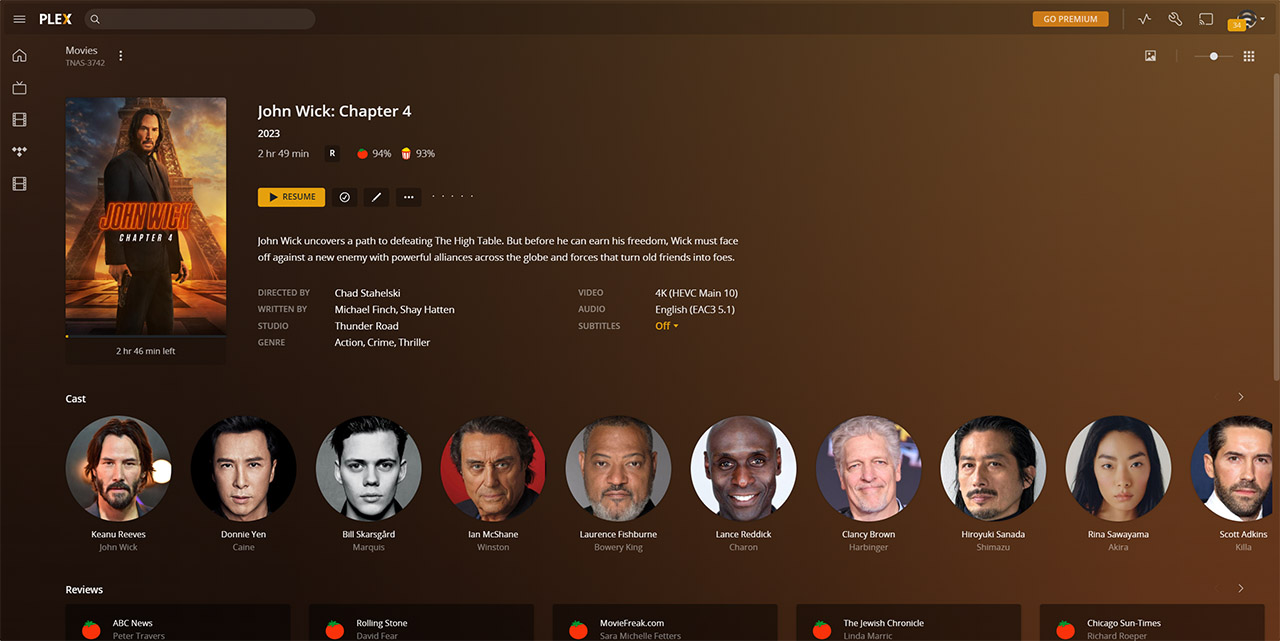
The manufacturer said that the TerraMaster F2-212 does support 4K transcoding, so I had to check if the NAS can actually handle 4K video streaming in a proper manner. That’s why I opened up Plex, made sure I have a 4K movie ready to play and press Start.
The first few seconds, the movie would play, but stop to buffer. It took maybe a couple of minutes to start getting smooth, but checking the CPU on the TerraMaster F2-212, it rose above 80% initially, then slowly got down to 60%. This means that the NAS will handle 4K streaming, but make sure you’re not running some other heavier apps in the background, otherwise, the buffering will be insufferable.
Some Benchmarks
When I tested the F2-210, I used a single 1TB WD Caviar Black HDD, but a lot of things happened since then and I now have a couple of Ironwolf drives which should perform better. It’s worth mentioning that the TerraMaster F2-212 does support a maximum raw capacity of 44TB (2x 22TB) and it seems that there is support for drive hot swap as well, which is great. That being said, I did move a 3GB multimedia folder and the performance was a bit less than expected.
Moving it from the NAS to my PC via the router, the average speed was 33.8MBps. The other way around, it was a bit lower, averaging 32.2MBps. I know that there is a lot of overhead, but I suppose I expected a bit more. Let’s remove the overhead and connect the NAS directly to the PC. Doing so, the average throughput got much better: 112MBps from the NAS to the PC and 71.6MBps the other way around.
Anyway, I also decided to connect a 256GB Samsung T5 external SSD to the USB 3.0 port and things didn’t get better at all. Moving the same folder from the SSD to the HDD happened at an average of 34.7MBps, while the other way around, it was a tiny bit faster, averaging at 36.1MBps, nowhere near what the SSD is actually capable of.
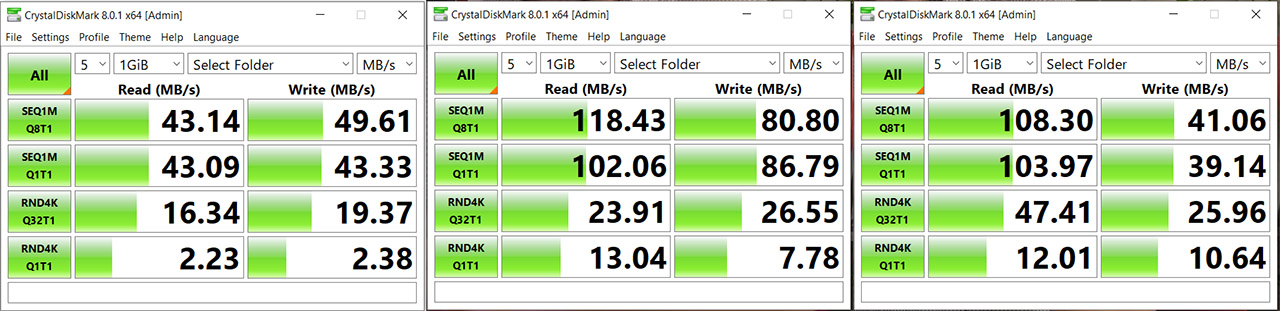
Well, it is what it is, so I moved to a synthetic benchmark, namely CrystalDiskMark 8. As you can see from the graphs that I attached, it’s very similar to the numbers I saw when I moved the folder around – the benchmark was used on the HDDs. The first reflects a connection between the PC and the NAS through a router, the other is a direct connection, removing the overhead. Then again, you will most likely use the first method, so expect a slightly slower performance than with the direct connection.
I suppose using EXT3 may help a bit if you need the NAS to be faster. The curious spike in performance came from the USB 3.0-connected SSD drive which showed better values on the synthetic tests.
The Conclusion
The TerraMaster F2-212 intends to replace the F2-210, but it doesn’t feel like such a huge improvement as I expected. The processor is better and the bay locking mechanism is smoother, but that’s about it. I actually missed the metallic shell of the F2-210 and I don’t know why do we now get USB 2.0 instead of USB 3.0 on the second port.
One would argue that the TOS 5 is the major reason to upgrade to the TerraMaster F2-212 if you’re on the F2-210 and I think this is its main reason of existence to be honest. Apparently, the F2-210 will not get TOS 5, so, if you want a small and fairly inexpensive 2-bay NAS for home use, then the TerraMaster F2-212 is the option to get. Just be aware that ARM-based TerraMaster NASes get software updates less often and are a bit behind in the community-based apps compatibility as well.
TerraMaster F2-212
Pros
- Smooth HDD installation
- 4K encoding
- TOS 5 with all its features and apps
- Supports RAID
- Supports hot swapping
Cons
- Be careful not to use the power adapter with other devices (it can fry them).
- Home Assistant not currently supported.
- USB 2.0 port
- Can't expand the RAM
Mark is a graduate in Computer Science, having gathered valuable experience over the years working in IT as a programmer. Mark is also the main tech writer for MBReviews.com, covering not only his passion, the networking devices, but also other cool electronic gadgets that you may find useful for your every day life.