The Chinese Company, TP-Link, is one of the most successful manufacturer of networking devices in the world, its reach expanding continuously, covering a large array of products: wireless routers, DSL modems, IP cameras, powerline adapters, WiFi adapters and many more. For quite some time, TP-Link has been a nightmare for its competitors, considering the fact that what it couldn’t conquer with features and design, it did with aggressive prices and heavy marketing campaigns.
Over the years, I had the opportunity to test some of TP-Link routers (from the more affordable TL-WR841N to the better Archer C7, C9 and the more high-end TP-Link Archer C2600), the powerline adapters (the TP-LINK TL-PA8030P AV1200), some wireless access points (TP-LINK TL-WA901ND) and lastly, a popular DSL modem, the Archer D7. The common trait that all these devices had was the affordable price tag, which sometimes meant that some corners had to be cut (not as many as you’d expect though, TP-Link usually strove to implement the better technology available, while still trying to maintain a low price tag).
Quite some time ago, I had a look at the TP-Link Archer C9, a reliable AC1900 router, that featured a surprisingly good WiFi speed performance. Following the success of the C9, TP-Link released the DSL version of the C9, called the TP-Link Archer D9, a dual-band, ADSL2+ modem router which is the successor to the rather modest TP-Link Archer D7. Let’s see how it performs.
Design
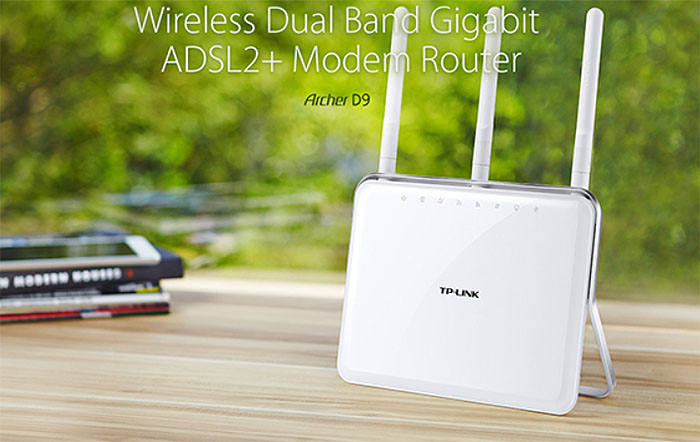
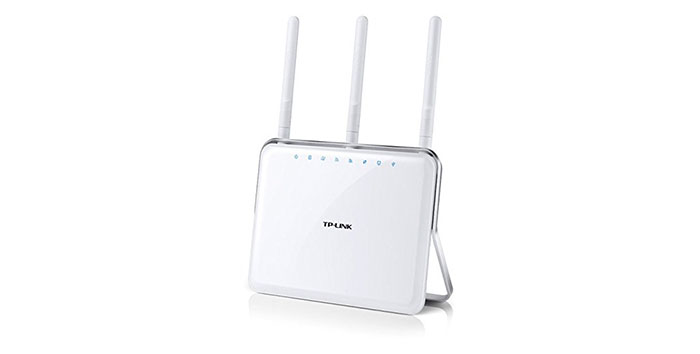
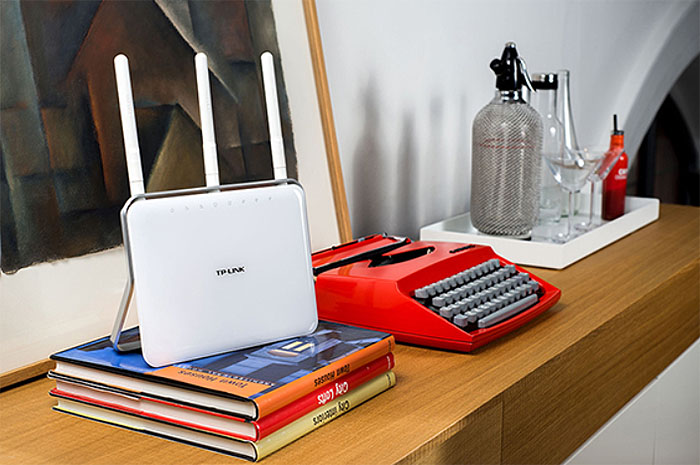
The TP-Link Archer D9 has the same design as the C9. There’s the white plastic case with a glossy finish (retains fingerprints) and soft, rounded corners, there’s the same silver band that surrounds the modem router on the middle top edge and then it detaches from the body and acts as a sturdy support for the D9. On the top, the silver band has three round holes that reveal the three golden connectors for the antennas (the antennas point upwards by default, but you can change their direction).
Since the stand is non-detachable, the D9 can only be positioned upwards, which means that you get more room on your desk. But, if you value every inch of your space (usually the case with offices), unfortunately there is no wall-mounting option. This seems to have been the TP-Link’s intention from the beginning, because the ports point towards the back and there’s a non-removable stand, so it’s clear that this is more of a living-room type device and not necessarily suitable for offices.
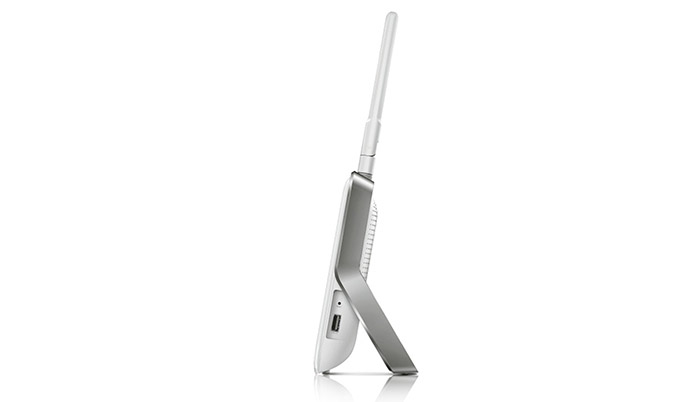
Considering the fact that the D9 measures 8.7 x 3.4 x 6.6 inches and weighs 48 ounces, it will be able to handle a lot of connected cables without budging an inch. The stability is further enhanced by the two feet on the bottom of the device.
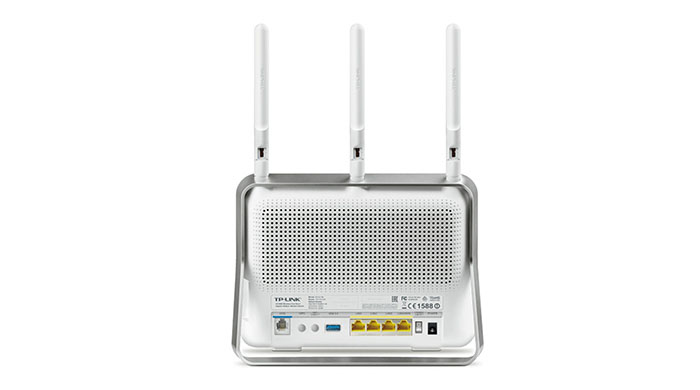
The back of the D9 is full of small round holes for air ventilation, but, since TP-Link has never excelled at creating a proper airflow, the modem router can become hot, so be careful not to obstruct the vents at all. Underneath the vent holes, there’s a long label with info about the modem router (including the default access address, the user name and password, as well as the MAC address, the wireless password/PIN and the S/N).
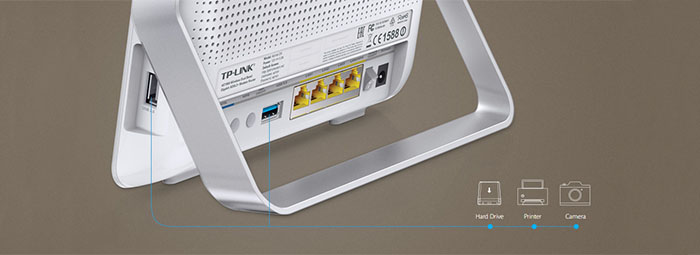
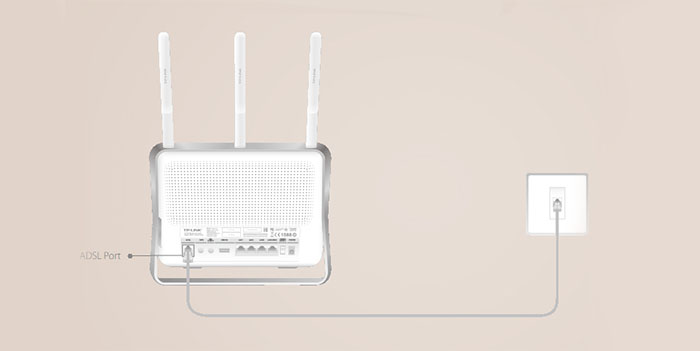
Underneath the label, you can find a series of ports: the ADSL port (you can connect it directly to the phone jack using a phone cable or connect it to a splitter), the WPS button, the WiFi ON/OFF button, a USB 3.0 port, the LAN 1, the LAN 2, the LAN 3, the LAN 4/WAN, a Power ON/OFF switch and a Power port. On the right side of the D9, you can find a USB 2.0 port and a recessed RESET button, accessible with a paper clip (hold the button for at least 8-10 seconds to return the modem router to the default settings).
On the front of the modem router, there’s the TP-Link logo and immediately under the antennas, there are the status LED lights responsible for Power, ADSL (if it’s ON, then the ADSL line is synchronized, else, if the LED is flashing, then the ADSL negotiation is in progress), Internet (if it’s OFF, it means that there is no Internet connection or that the D9 is working in Bridge mode), the Wireless 2.4GHz radio band, the Wireless 5GHz radio band, WPS (if the LED is slowly flashing, it means that there is a wireless device that attempts to connect to the network using the WPS – the process could take up to 2 minutes), LAN and USB.
Overall, the TP-Link Archer D9 is attractive and although it doesn’t really have a practical design (it wants to be treated more like a piece of jewelry), it does have all the features one would expect from an AC1900 modem router.
Note: Inside the package you can expect the Archer D9 unit, the three antennas, an ADSL splitter, an Ethernet cable, an ADSL cable, a Power adapter and a Quick Start Guide.
Hardware
On the inside, the TP-Link Archer D9 is equipped with a dual core 1GHz Broadcom BCM4709A0 chipset (CPU, Switch and wireless), backed by 128MB of RAM (SK Hynix H5TQ1G63EFR-PBC) and 16 MB of flash storage (Spansion S25FL128SAIF00).
The modem side of the Archer D9 is equipped with a Broadcom BCM6318 chipset, clocked at 333 MHz, backed by 16MB of RAM (EtronTech EM639165TS-6G) and 2MB of flash storage (Winbond 25Q160VSIG). The 2.4GHz wireless capabilities are delivered by a Broadcom BCM4360 3×3:3 MIMO chipset and the 5GHz wireless capabilities are delivered by the same Broadcom BCM4360 3×3:3 chipset.
The maximum theoretical speed of the D9 is 600Mbps using the 802.11n WiFi standard and 1300 Mbps using the 802.11ac WiFi standard (1900Mbps if combined). The Archer D9 is compatible with the ADSL2+ technology, which means that there is a maximum theoretical speed of 24 Mbps.
Sure, it may not seem much, especially since there are better performing DOCSIS 2.0 modems out there, but, if the DSL technology is the only one that is available in your area, then the D9 is a good choice (if you want the better VDSL technology, then you can also check out the Netgear Nighthawk D7000).
YOU CAN ALSO HAVE A LOOK AT THE BEST DOCSIS 3.0 CABLE MODEMS
Performance and Connectivity
When I tested the TP-Link Archer C9, I saw that it had a solid WiFi performance, especially using the 5GHz frequency, being able to keep up with better priced, more high-end AC1900 routers like Netgear Nighthawk R7000, Linksys WRT1900ACS or Asus RT-AC68U. So, I have high expectancies regrading the Archer D9.
The Archer D9 is equipped with the Beamforming technology, which is a highly efficient way to serve the wireless connected clients. This means that instead of broadcasting the WiFi signal everywhere and hope to properly reach your clients, you get a specific focus of the signal directly at all your connected devices, highly improving your network connection.
Furthermore, the D9 features the SU-MIMO technology which uses the round-robin technique, so one client is served at a time. If you have been following some tech news, you may have noticed that almost all newly released routers have a new type of technology called MU-MIMO (multiple-input and multiple-output). This way, instead of serving one client at a time, multiple simultaneous clients are being served at the same time. Surely, in order to make use of the MU-MIMO technology, you need compatible devices and a more expensive router (like the TP-Link Archer C2600).
In order to test the D9’s wireless performance, I have connected it to an Archer C9 in bridge mode and, as expected, the speed was quite similar to that of C9. So, using the 5GHz frequency and the 802.11ac standard, the D9 managed to deliver a maximum of 332Mbps at close range (no more than 5 feet). After increasing the distance between the two devices to around 30 feet, the speed decreased to 218Mbps. After I put 100 feet between the C9 and the D9, I measured 366Mbps.
Afterwards, I switched to the 802.11n standard, but maintained the 5GHz radio band. At close range, the D9 delivered up to 232Mbps and at 30 feet, I measured 167Mbps. At a longer range (100 feet), the modem router went up to 110 Mbps. In the end, I switched to the 2.4GHz radio band (802.11n) and, at no more than 5 feet, I measured an average of 170Mbps. After increasing the distance to 30 feet, the Archer D9 delivered a maximum of 148Mbps. Furthermore, I increased the distance to 100 feet and the speed decreased to 102Mbps.
Next, since the Archer D9 features a USB 3.0 (while the D7 did not), I connected an external HDD in order to test the modem router’s NAS capabilities. I took a 1GB folder that contained different multimedia files and I tested the reading and the writing speed. So, the Archer D9 delivered 21MBps while writing the folder and 35MBps while reading it.
Setup
In order to connect your modem router, you have to connect the Power Adapter to the D9 and the ADSL cable (you can either connect it directly to the Phone Jack or use the ADSL Splitter, so you can use one port to connect to your phone). Afterwards, you have to launch a web browser of your choice and navigate to https://tplinkmodem.net (or to https://192.168.1.1). Here, you’ll be asked to set a password and then you can Log into the web-based utility.
From here on, it is advisable to click on the Quick Setup, where you’ll be asked to select your ISP and you can also change the SSID and wireless password (if it doesn’t automatically detect your ISP, you can manually setup the connection by going to Basic – Internet and select your ISP from the list, which should automatically insert the VPI and VCI values). After the modem router is configured and there’s an Internet connection, you can log into the interface by inserting the default user name and password (admin for both).
The interface has three main sections: the Quick Setup, which we have already discussed and then there’s the Basic tab and the Advanced tab. The Basic tab features a series of sub-tabs: the Network Map (here you can see the wireless and wired clients that are connected to the network, as well as the connected printers, USB disks and the status of the Internet), the Internet, the Wireless settings (here you can enable either of the wireless networks, change the SSIDs and passwords or hide the SSIDs), the Guest Network (enable the 2.4GHz and the 5GHz wireless networks, allows the guests to see each other and let them access your local network and your USB storage), the USB Settings (Sharing Access and Print Server) and the Parental Controls (allows you to block any inappropriate or malicious websites and you can control the access to some specific websites at a given time; you can also add keywords to the whitelist or blacklist).
The Advanced tab also consists of several sub-tabs: Status (status of the Internet and the LAN connection – IPv4 and IPv6; the status of Wireless network and the guest network – 2.4GHz and 5GHz), Operation Mode (you can choose between the DSL Modem Router Mode and the Wireless Router Mode), Network (Internet, LAN Settings, Interface Grouping, Dynamic DNS, Advanced Routing, IPSec VPN and IPv6 Tunnel), Wireless (Wireless Settings, WPS, MAC Filtering, Wireless Schedule, Statistics and Advanced Settings), NAT Forwarding (add Virtual Servers), USB Settings (Device Settings, Sharing Access and Print Server), Parental Controls, Bandwidth Controls (QoS functions – you can add controlling rules by priority and by min/max upload and download speed), Security (Access Control, IP&MAC Binding) and System Tools (Time Settings, Diagnostics, Firmware Upgrade, Backup and Restore, Administration, System Log, CWMP Settings and SNMP Settings).
Conclusion
Overall, the TP-Link Archer D9 is a complete modem router, featuring a solid WiFi performance and a good coverage, all into an elegantly designed case. The modem side is a bit disappointing because I expected the VDSL technology to be implemented, not the ADSL2+. Also, a surprising thing is that in the US, the price is not as competitive as on the rest of the world (and its availability is also lacking), meaning that there won’t be a major difference between the D7000 and the D9.

Mark is a graduate in Computer Science, having gathered valuable experience over the years working in IT as a programmer. Mark is also the main tech writer for MBReviews.com, covering not only his passion, the networking devices, but also other cool electronic gadgets that you may find useful for your every day life.

