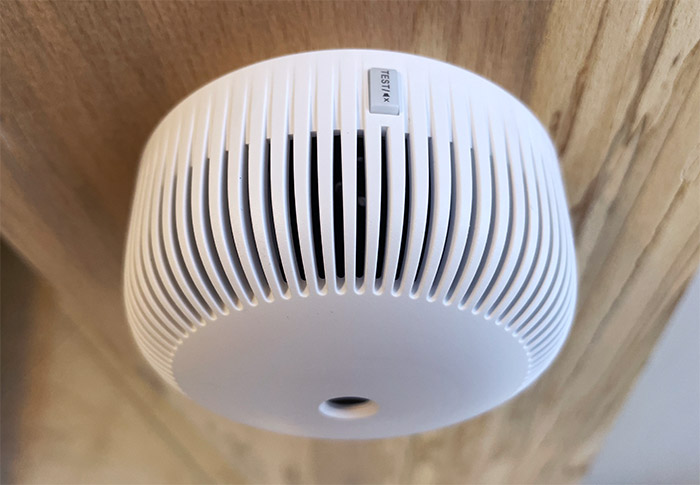
The X-Sense XS03-WX is the WiFi version of the XS03, so should you expect the same experience with the addition of the app control? Not really, because even though these two devices look the same, there are some fundamental differences.
The most important one is the battery. While the XS03 used a non-removable battery that could last for 10 years, the XS03-WX allows the user to change the batteries and it seems that the smoke alarms comply to different standards. The XS03 complied to the UL 217 standards, while the WiFi variant complies to the EN 14604 standard.
Besides that, the X-Sense XS03-WX also highlights the insect-proof design (do other smoke detectors allow insects to get in?), the loud horn and, of course the mobile application. Despite the growing popularity of the IoT devices, most people still prefer to use no-frills smoke detectors, so, while the app is a nice addition, the performance for detecting smoke is the only thing that truly matters.
I have tested quite a few X-Sense smoke detectors and I found the SC01 to be particularly reactive to smoke, almost on par with the Nest Protect. This means that there are high expectations from the X-Sense SX03 as well and yes, even if you’re skeptical about the smart functions, just know that you can get notifications if the device detects smoke, even when you’re not at home. If that sounds interesting stick around for the test as well.
IMPORTANT: DO NOT TEST YOUR SMOKE ALARM WITH REAL FIRE!
Note: Also, to other testers that write articles about smoke detectors, stop testing your devices with fire, just stop it. It gives the impression that it’s the right thing to do, so people may follow your wrong advice.
Design and Build Quality
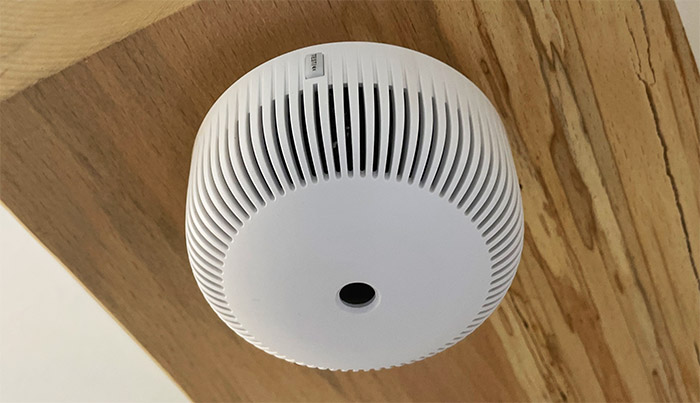
I have tested some of the most popular models on the market, including the First Alert SCO501CN, the Kidde DC and the Nest Protect second gen, as well as the newer SC06-W and all of these smoke detectors are way bigger than the X-Sense XS03-W. I was already impressed by how compact the XS01-WT was, but the X-Sense XS03-W looks even smaller. And, at 3.1 x 1.9 inches, it’s not really smaller than the XS01, but the way it’s designed does give that impression.
There is a hole at the top, in the center to let the smoke enter the sensing chamber, while on the sides, the manufacturer went with a ribbed pattern. It kind of looks like those retro doorbells. The case is made of plastic and is covered by a white matte finish, as they all do. And it’s for a good reason because most people prefer the smoke detector to blend in with the ceiling or the wall.
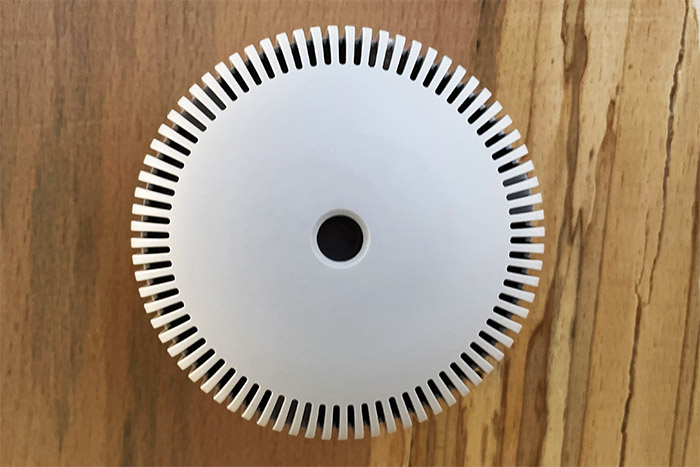
So yes, the X-Sense XS03-W definitely has a minimalist design and you’ll barely notice the small Test/Silence button on the side. If it triggers false alarms, it’s going to be fun to try and silence the X-Sense XS03 – I am all for the cool design, but a larger button is going to be more convenient for the user.
Turn the device upside down and, after removing the mounting bracket (comes already attached), you’ll see that there is a slot with a battery inside it. The battery is CR123A and, if it’s not obvious, you can change it after some time has passed – it should last for about a year. Within the enclosure, there is also an LED which seems to be a lot brighter than on other models.
And its role is to show the status of the smoke detector. When everything is fine (no alarms) and the device is connected to the WiFi, the LED will flash red once every minute and, after it’s connected to the WiFi, the LED will flash blue.
If the X-Sense XS03-WX detects smoke, then the LED will start flashing red once every second. Of course, the horn will also enable and blast the 85dB sound; the app will send you a notification as well.
Inside the X-Sense XS03-WX
Before you decide to open up the X-Sense XS03-WX, be aware that by doing so, you not only risk voiding the warranty, but also risk damaging the device, thus either limiting its performance or bricking it entirely.
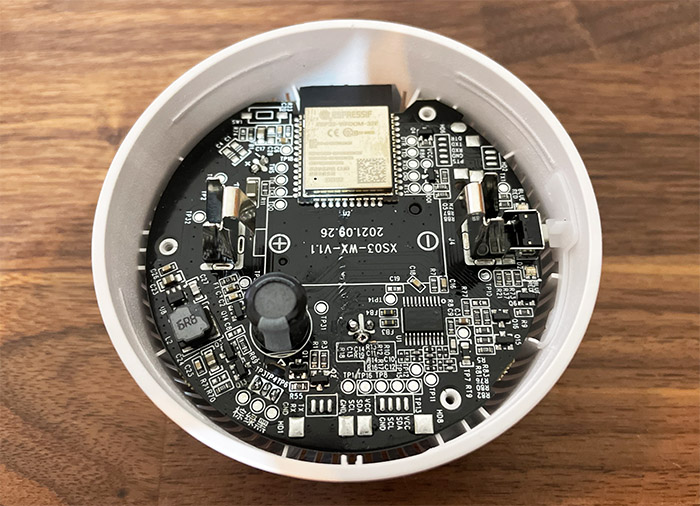
That being said, I was curious what type of WiFi antenna the X-Sense XS03-WX uses, so I removed the three screws from the bottom. And I could immediately identify the Espressif ESP32-WRooM-32E 2.4GHz WiFi module that also supports Bluetooth and Bluetooth LE. There was also an ABOV 960L416FRN semiconductor.
Installation Process
The hardware installation is ridiculously simple since all you have to do is to attach the mounting bracket to the ceiling or wall (use the two screws from the package) and then rotate the X-Sense SX03-WX into place. You do need to pay attention to where you position the smoke alarm because if it’s too close to a oven or cooking top, you’re going to get lots of false alarms. Also, not all Smoke detectors fare well with high humidity form a bathroom – so far, only the Nest Protect has been a champion in this regard.
So, it’s best to position the X-Sense XS03-WX 20 inches from the nearest corner if you put it on the ceiling and no less than 4 inches if the smoke alarm is mounted on the wall. This would be enough for most smoke detectors, but the X-Sense XS03-WX is a smart device, so it can be connected to an app. The application is called X-Sense Home and it’s the same that you can use with the X-Sense security system.
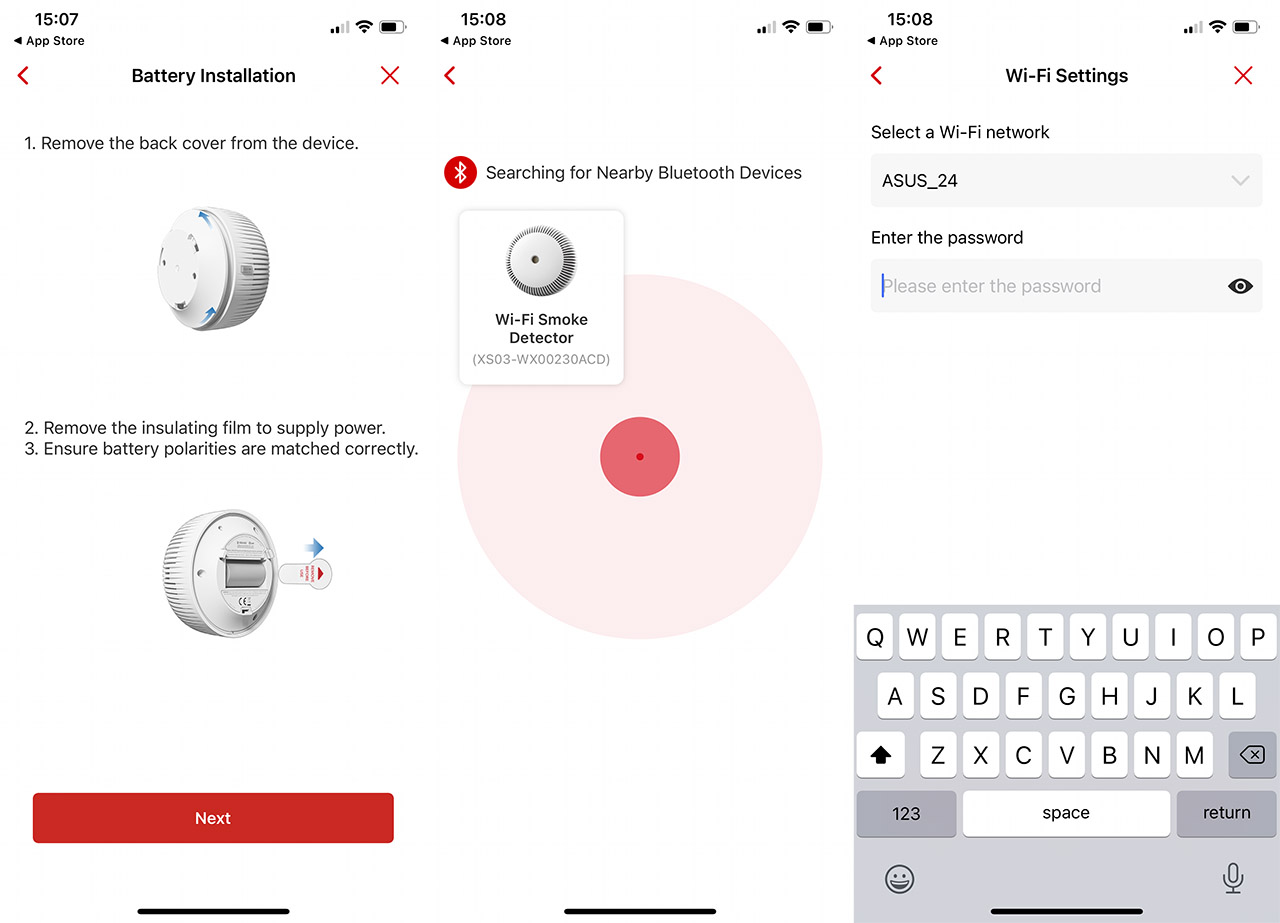
After logging into the app, I clicked on Add Device and put the batteries into the device. Then, the app detected the smoke detector and I was asked to select the location, and to put the X-Sense XS03-WX in pairing mode (clicked and held the Test button for a few seconds). A few seconds later, the WiFi smoke alarm was detected and I was asked to enter the WiFi credential to my network (has support only for 2.4GHz WiFi networks). And that’s about it, I could now roam the app.
The Mobile Application
The dashboard will show the signal strength and the amount of battery that’s left and, scrolling down a little, you can enable the Notifications. There are offline notifications, as well as when the alarm is triggered, silenced, when it’s running a test and more.
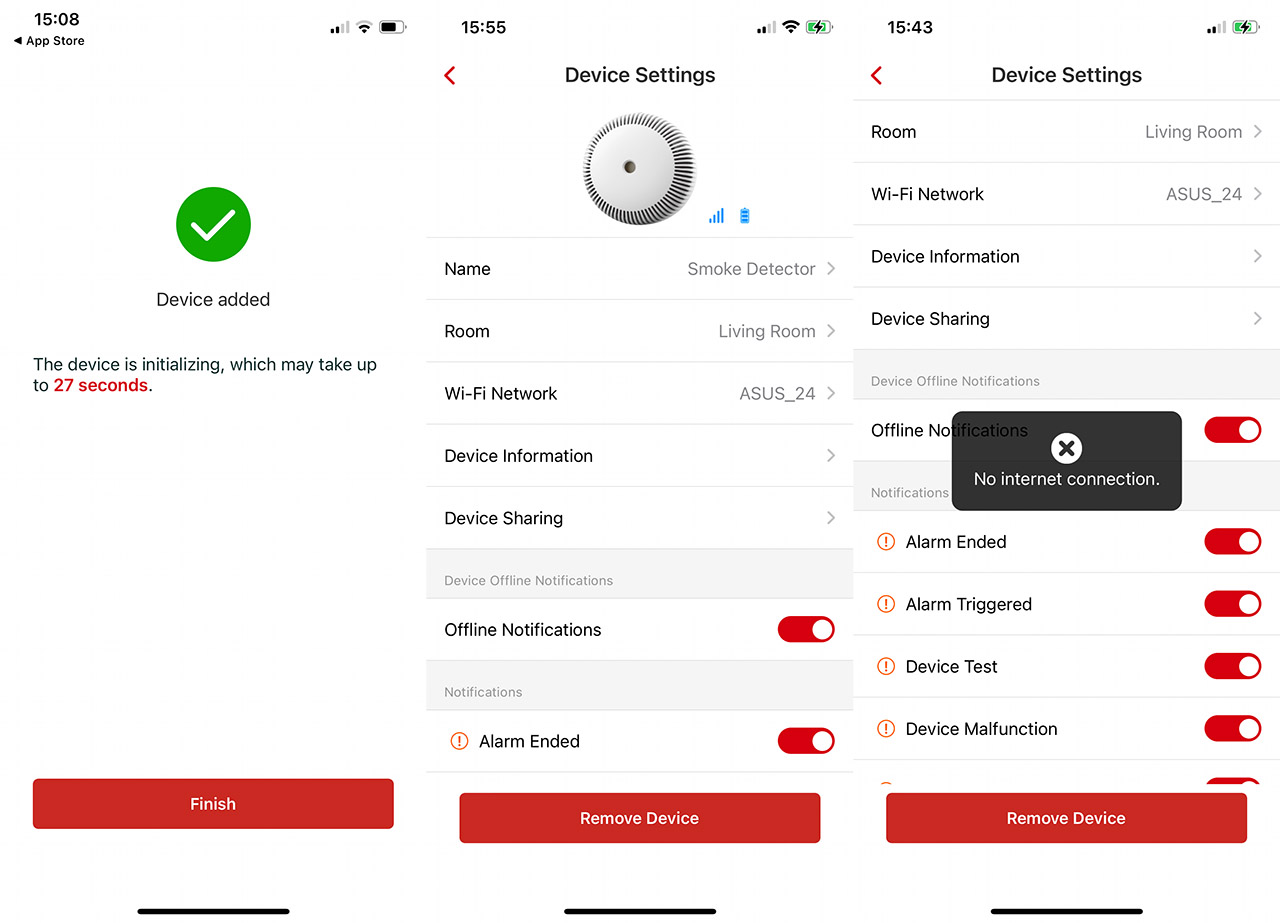
You can select whichever you like or leave them all on. Now let’s talk about the Internet connection. To receive notifications outside the local network, the app does need continuous Internet access, but after turning it off, you do get an obnoxious message that the connection is lost. It’s still less annoying than on other apps that essentially throw you out. But yes, this is an app that needs a constant Internet connection.
Features and Reaction Test
The X-Sense XS03-WX uses a photoelectric sensor to detect smoke and, as is characteristic for these type of sensors, the main type of particles that can be quickly detected are those from smoldering fires. For a long time, the manufacturer relied on ionization sensors for the fast flaming particles, but, due to the non-environmental-friendly nature of those sensors, there has been a shift towards using photoelectric sensor for both small and larger smoke particles.
These are known as dual-sensors, but, while I have seen it on other brands, it doesn’t seem that it’s implemented on the X-Sense XS03-WX. In any case, the way a photoelectric sensor works is that it relies on a light beam that points away from the sensor inside a sensing chamber. When smoke enter this chamber, the light beam gets reflected, pointing towards the sensor, thus triggering the alarm.
In order to test the X-Sense XS03-WX, I relied on fake smoke in a can, which is the least damaging to the device, with the exception of running the inner test.
This inner test can be run by pressing the Test/Silence button and its role is to check if the device is in working conditions. Some people don’t think that these tests are legit (in most cases, they are, though), so they resort to using real fire. Don’t do that since you not only risk burning your house down, it’s also very much possible to mess with the smoke detector. The heat and the smoke particles can cause more frequent false alarms. Ideally, you should use those expensive testing tools where they measure the amount of smoke that goes towards the device and its density.
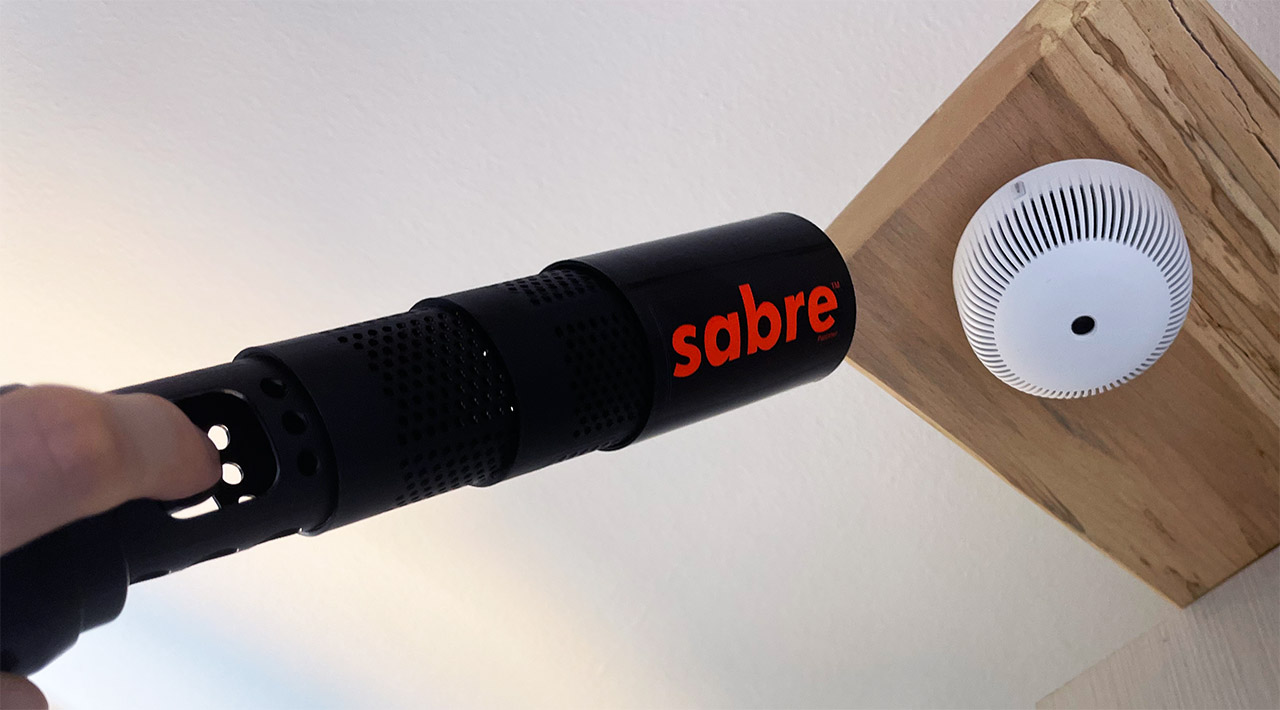
But, there is an alternative in the form of the fake smoke cans. I use the ones from Sabre since I like their elongated necks which allow for more uniform smoke and that’s what I also used for testing the X-Sense XS03-WX. The idea is to check how quickly the smoke alarm is triggered by pushing smoke for one or two seconds (or more, if necessary) from 1, 2 and 3 feet away. So, 1 foot away from the X-Sense XS03-WX, it only took one second of smoke to trigger the alarm after 7 seconds.
This is also when I experienced a false alarm. About 15 minutes after the alarm was triggered by the false smoke, it got triggered again out of the blue. I assume that it was probably the lack of ventilation because there was barely any wind (despite having the windows open) and the temperature was about 80 F with 70% humidity.
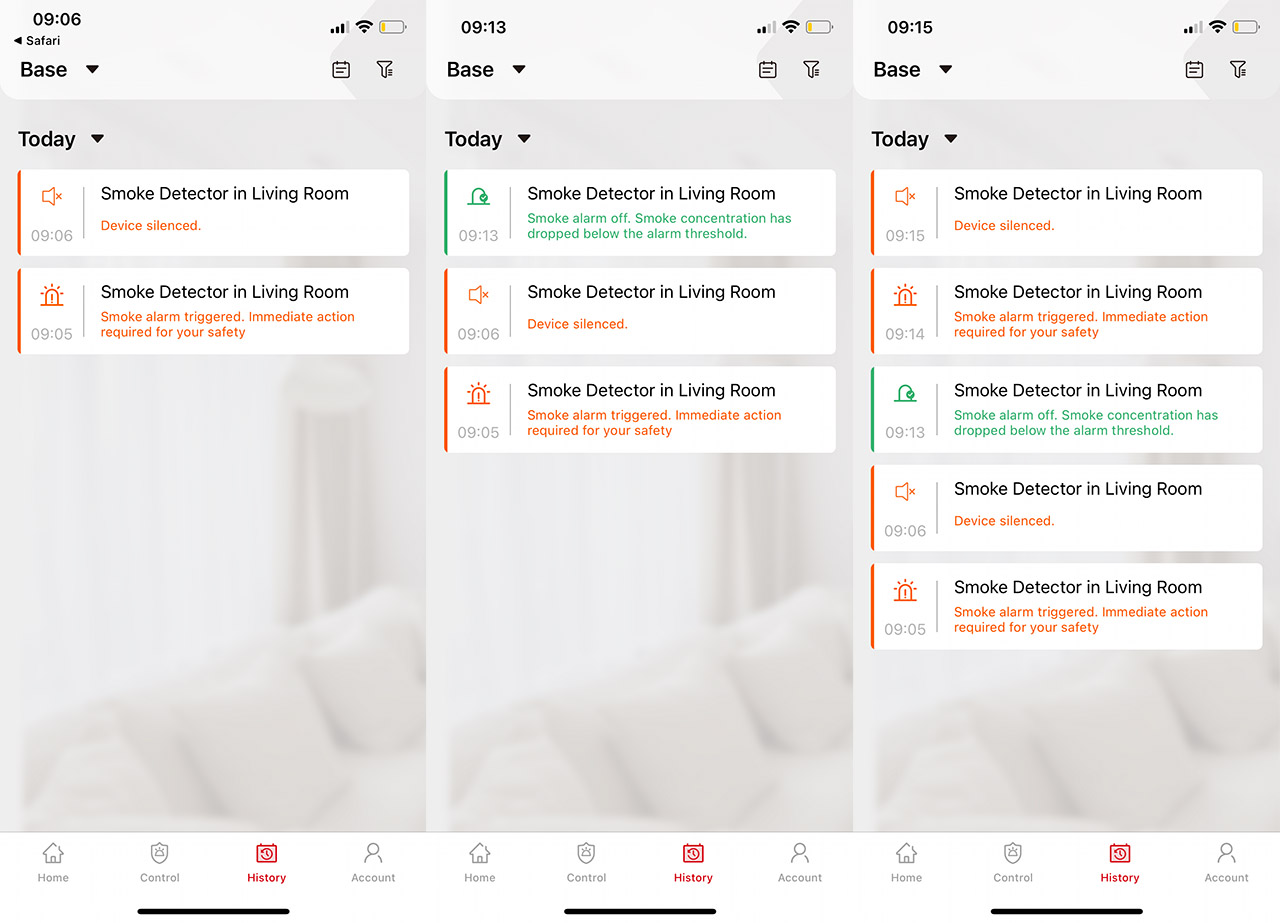
I put a fan to move the air a bit and I did not see any other false alarms, for now. Two feet underneath the device, I sprayed the fake smoke again and waited. Before giving up, the alarm sounded after 34 seconds. Moving lower to 3 feet, I had to spray for two seconds (didn’t even bother to try with a second after the slow reaction seen in the previous test) and the alarm was triggered after 10 seconds.
But how quick were the notifications? Probably a couple of seconds after the horn started to blast the alarm sound, I got the message on the phone that the device detected smoke. So it’s quite fast.
The Conclusion
I don’t feel like the X-Sense XS03-WX is that much different than the XS01-WT, both of these compact smoke alarms being able to connect to the mobile application, therefore pushing notifications towards your phone when it detects smoke. And it’s a useful thing to have, enough to persuade the people that may be skeptical about using a smart smoke alarm (then again, the non-smart XS03 version is also available).
The device is reactive enough and easy to install, but it’s also possible to experience false alarms, so do take that into account before positioning it near a kitchen or a bathroom. I would have liked to see a UL certification, but I suppose that this would have significantly increased the price of the device.

Mark is a graduate in Computer Science, having gathered valuable experience over the years working in IT as a programmer. Mark is also the main tech writer for MBReviews.com, covering not only his passion, the networking devices, but also other cool electronic gadgets that you may find useful for your every day life.

